Chocolate Chip Cookie Dough Dip Easy Sweet Treat
. This blog post showed you how to make Chocolate Chip Cookie Dough Dip. We covered the ingredients and step-by-step instructions. You learned some tips for the best texture and flavor variations to try. Storage advice ensures you keep the dip fresh. Enjoy your creamy dip with snacks like graham crackers or apple slices. Get creative with add-ins for extra flavor. Happy dipping!](https://dishtreats.com/wp-content/uploads/2025/07/9841c43c-25b7-4553-9f85-c4e222a26afc.webp)
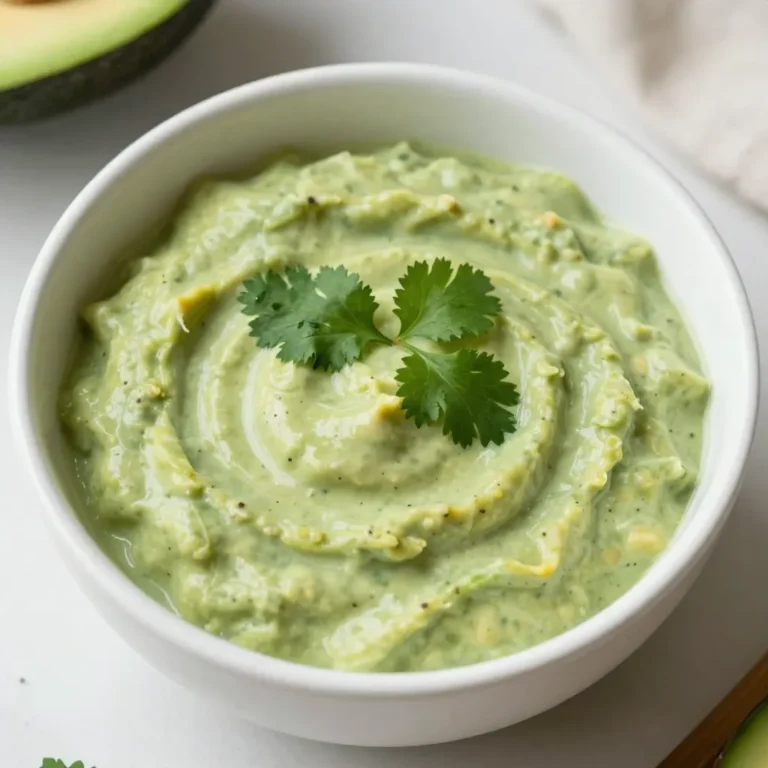
Craving a sweet treat that’s easy to make and hard to resist? You’re in the right place! My Chocolate Chip Cookie Dough Dip combines all your favorite cookie flavors into a creamy, dreamy dip. It’s perfect for sharing or enjoying solo. In this post, you’ll find simple steps to whip up this delightful treat, plus tips on serving and storing. Let’s dive into the deliciousness together!
Ingredients
Complete List of Ingredients
- 1 cup all-purpose flour
- ½ cup brown sugar, tightly packed
- ½ cup granulated sugar
- ½ cup unsalted butter, softened to room temperature
- 1 teaspoon pure vanilla extract
- 1 cup cream cheese, softened
- 1 cup mini chocolate chips
- A pinch of salt
- Optional: ½ cup chopped nuts (walnuts or pecans)
The ingredients for this dip are simple and easy to find. You start with flour, sugars, and butter. The cream cheese adds a rich creaminess. Vanilla gives it a warm flavor that blends well. Mini chocolate chips add a sweet crunch. If you like nuts, add them for extra texture.
Suggested Serving Options
- Graham crackers
- Pretzels
- Apple slices
You can serve this dip in many fun ways. Graham crackers provide a sweet base. Pretzels add a salty twist. Apple slices give a fresh crunch. All these options pair well with the creamy dip. Try them all to find your favorite!
Step-by-Step Instructions
Preparation Process
- Step 1: Combine butter and sugars
Start by placing the softened butter, brown sugar, and granulated sugar in a medium bowl. Use an electric mixer or a whisk to blend them well. You want this mix to be creamy and smooth. This will take about 2-3 minutes.
- Step 2: Add cream cheese and vanilla
Next, add your softened cream cheese and pure vanilla extract. Beat the mixture until it becomes fluffy and smooth, which should take another 2-3 minutes.
- Step 3: Sift in flour and salt
Carefully sift in the all-purpose flour along with a pinch of salt. Mix on low speed or gently fold using a spatula. Be cautious not to overmix. A few small streaks of flour are okay.
- Step 4: Fold in chocolate chips and nuts
Now, gently fold in the mini chocolate chips. If you like, add the optional chopped nuts too. Make sure everything is evenly mixed throughout the dip.
Chilling the Dip
Chilling the dip is key. It helps the flavors blend and makes the dip firmer. I recommend chilling for at least 30 minutes. This step transforms the dip from good to great. Enjoy the wait, as you think about how tasty it will be!
Tips & Tricks
Achieving the Best Texture
To get the best texture for your dip, avoid overmixing. Overmixing can make the dip too dense and tough. When you combine the flour, mix just until you no longer see flour streaks. A few small lumps are okay. This keeps your dip light and creamy.
Softened ingredients are key. Make sure your butter and cream cheese are at room temperature. This helps them blend smoothly, creating a creamy base. If they are too cold, you may end up with lumps in your dip.
Flavor Enhancements
You can enhance the flavor by adding fun ingredients. Try mixing in peanut butter for a nutty twist. It adds rich flavor and pairs well with the chocolate chips. Feel free to get creative with other flavors too!
Adjust the sweetness to your liking. If you prefer a less sweet dip, cut back on the sugar. This way, you can enjoy the chocolate flavor without it being too sugary. Taste as you go to find your perfect balance.

Variations
Alternative Flavors
You can change up the flavor of your dip. Try making a brownie batter dip. Just mix in cocoa powder and more chocolate chips. This adds a rich, chocolatey twist. Or go for a s’mores-inspired dip. Add crushed graham crackers and mini marshmallows for that campfire taste. Both of these options are fun ways to switch things up. They keep the dip fresh and exciting.
Dietary Adjustments
If you need gluten-free options, use gluten-free flour instead of all-purpose flour. This keeps the dip safe for those avoiding gluten. For vegan adaptations, swap cream cheese for a plant-based cream cheese. You can also use vegan butter. Make sure to pick a sugar that is vegan-friendly. These changes let more people enjoy this sweet treat. They ensure everyone can dive into this delicious dip!
Storage Info
How to Store Leftovers
To keep your dip fresh, use an airtight container. Glass or plastic containers work well. Store it in the fridge for up to five days. If you notice any change in smell or texture, throw it out.
Freezing Instructions
You can freeze this dip if you want to save some for later. First, place the dip in a freezer-safe container. Press plastic wrap directly onto the dip to avoid ice crystals. Seal the container tightly. You can freeze it for up to three months.
When you are ready to eat it, move the dip to the fridge for a day to thaw. Once thawed, stir it gently to revive the texture. Serve with your favorite dippers, like graham crackers or apple slices. Enjoy the creamy goodness again!
FAQs
Can I eat the dip without baking it?
Yes, you can eat the dip without baking it. This dip is safe to eat raw. The ingredients are all edible as they are. Many people prefer it this way. It’s creamy, sweet, and full of chocolate flavor. Just grab your favorite dippers and enjoy!
How long can I store Chocolate Chip Cookie Dough Dip?
You can store this dip in the fridge for about five days. Keep it in an airtight container to keep it fresh. After that, the taste and texture may change. If you want to keep it longer, consider freezing it.
Can I make this dip in advance?
Yes, making this dip in advance is a great idea! You can prepare it a day ahead of time. This gives the flavors a chance to blend. Just remember to chill it in the fridge before serving. It will be ready to enjoy when you are!
What can I use instead of cream cheese?
If you want a substitute for cream cheese, try Greek yogurt or mascarpone. Both options work well and add creaminess. You can also use silken tofu for a dairy-free option. Just make sure to adjust the sweetness if needed.
This blog post showed you how to make Chocolate Chip Cookie Dough Dip. We covered the ingredients and step-by-step instructions. You learned some tips for the best texture and flavor variations to try. Storage advice ensures you keep the dip fresh.
Enjoy your creamy dip with snacks like graham crackers or apple slices. Get creative with add-ins for extra flavor. Happy dipping!
. This blog post showed you how to make Chocolate Chip Cookie Dough Dip. We covered the ingredients and step-by-step instructions. You learned some tips for the best texture and flavor variations to try. Storage advice ensures you keep the dip fresh. Enjoy your creamy dip with snacks like graham crackers or apple slices. Get creative with add-ins for extra flavor. Happy dipping!](https://dishtreats.com/wp-content/uploads/2025/07/9841c43c-25b7-4553-9f85-c4e222a26afc-300x300.webp)
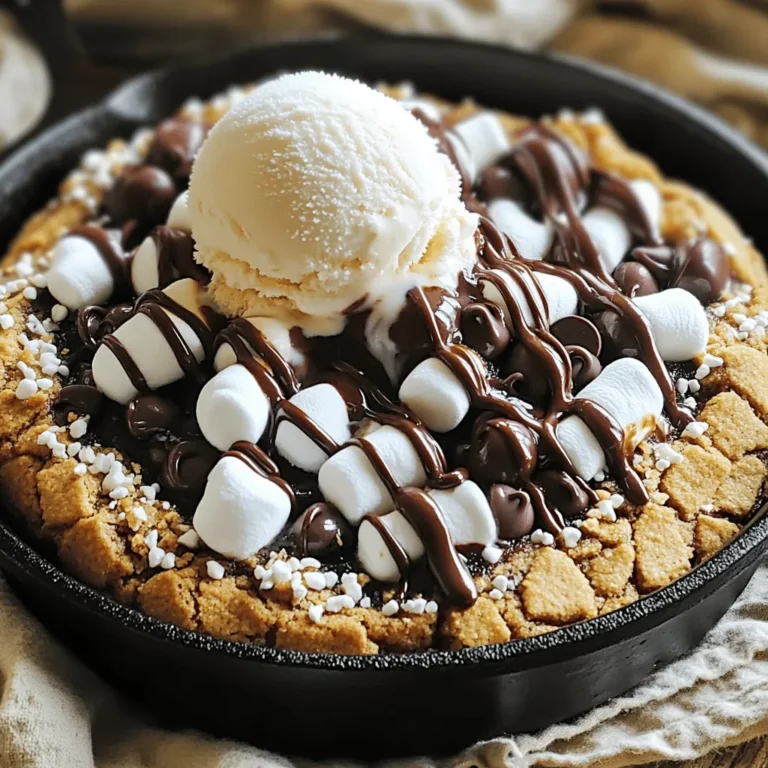
![To make these tasty peanut butter banana oat bars, you'll need a few simple items. Here’s your shopping list: - 2 ripe bananas, well mashed - 1 cup peanut butter (smooth or crunchy) - 1/2 cup honey or maple syrup - 2 cups rolled oats - 1/2 teaspoon ground cinnamon - 1/4 teaspoon salt - Optional ingredients for enhancement: - 1/2 cup dark chocolate chips - 1/4 cup chopped nuts These ingredients come together to create a sweet, hearty snack. The ripe bananas add natural sweetness and moisture. The peanut butter gives a rich, creamy texture. Oats provide a filling base that keeps you energized. You can choose honey or maple syrup for sweetness. The cinnamon adds warmth and flavor, while salt enhances all the tastes. If you want to make them extra special, add dark chocolate chips or nuts for crunch. You can find the full recipe at the end of this guide. Enjoy gathering your ingredients and preparing for a delicious treat! - Preheat your oven to 350°F (175°C). - Line an 8x8 inch baking pan with parchment paper. - Combine bananas and peanut butter in a large mixing bowl. - Incorporate honey or maple syrup into the mixture. - Mix in oats, cinnamon, and salt. - Add dark chocolate chips and nuts if desired. - Spread the mixture into the prepared pan. - Bake for 20-25 minutes until golden brown. - Allow the bars to cool in the pan before transferring to a wire rack. - Cut into squares or rectangles. These simple steps lead you to a tasty treat. Follow the [Full Recipe] for more details. Enjoy your healthy snack! To make the best peanut butter banana oat bars, use overripe bananas. They add natural sweetness and moisture. Mix your ingredients well to get an even consistency. If you don’t mix well, some bites may taste different. Make your bars look great! Dust them with a sprinkle of cinnamon. You can also drizzle some extra peanut butter on top. This small touch adds flavor and makes them look appealing. Serve them on a decorative plate for a nice touch. A beautiful plate can make your snack feel special. Don’t be afraid to get creative! You can try adding spices like nutmeg or vanilla extract. These spices can bring out new flavors in your bars. Just a pinch can change your whole snack experience. Have fun experimenting to find your favorite taste! For the full recipe, check out the section above. {{image_4}} If you want a nut-free option, you can swap the peanut butter. Use sunflower seed butter or almond butter. Both options give a great taste. Sunflower seed butter adds a nice, nutty flavor without nuts. Almond butter gives a creamy texture that works well too. This change makes the bars safe for kids with nut allergies. For a gluten-free version, choose certified gluten-free rolled oats. Regular oats can often have gluten. Using gluten-free oats ensures everyone can enjoy these bars. They still taste delicious and keep all the good flavors. You won’t lose any texture or taste with this swap. To change the flavor, add dried fruits like cranberries or raisins. These fruits bring a sweet and chewy contrast to the bars. You can also mix in some chopped nuts for extra crunch. Feel free to get creative and use your favorite dried fruits. This way, you can make each batch of bars unique and exciting. Try these variations to find your favorite way to enjoy these tasty Peanut Butter Banana Oat Bars. If you want the full recipe, check out the section above. Store your peanut butter banana oat bars in an airtight container. This keeps them fresh at room temperature. If you want to keep them longer, put them in the fridge. They will stay good for about a week. If you want to save some bars for later, wrap them tightly in plastic wrap. Then, cover them with foil to prevent freezer burn. You can freeze them for up to three months. Just thaw them in the fridge when you're ready to enjoy. When you're ready to eat a bar, warm it in the microwave. A few seconds will give it a soft texture. This small step makes a big difference in taste and enjoyment. Yes, you can make these bars vegan. Just swap honey for maple syrup. Also, check that your chocolate chips are dairy-free. Look for golden brown edges and a set center. This means they are ready to come out. If you need a substitute, applesauce works well. It adds moisture and sweetness to the bars. When stored properly, these bars last up to a week in the fridge. You can freeze them for longer storage, too. Peanut butter banana oat bars are easy and tasty. You start by mixing ripe bananas, peanut butter, and oats. Then, you bake them until golden brown. Remember to cool and slice before serving. You can store them at room temp or freeze for later. Try adding dried fruits or other nut butters for more fun. With these simple steps, you can enjoy healthy snacks for days! Enjoy experimenting with your own versions!](https://dishtreats.com/wp-content/uploads/2025/06/65bd505b-0ff3-4866-91fc-ab6a46460c2c-768x768.webp)