Crispy Parmesan Ranch Potato Skins Tasty Snack Delight
![To make Crispy Parmesan Ranch Potato Skins, gather these simple ingredients: - 4 large russet potatoes - 1 cup shredded sharp cheddar cheese - 1/2 cup grated Parmesan cheese - 1/4 cup sour cream - 2 tablespoons ranch seasoning mix - 1/4 cup green onions, chopped - 3 tablespoons olive oil - Salt and pepper to taste - Optional: hot sauce for serving These items will help you create a tasty snack that everyone loves. The russet potatoes give a sturdy base, while the cheese brings flavor and creaminess. The ranch seasoning mix adds a punch of taste that makes these skins special. I always keep a few extra green onions on hand for garnish. They add color and a mild onion flavor that enhances the dish. I recommend using fresh ingredients for the best results. Fresh potatoes will give you a crispier skin. The cheese should be high-quality for a richer flavor. If you like spice, have hot sauce ready for a kick! For the full recipe, visit the [Full Recipe] section. 1. Preheat your oven to 400°F (200°C) to get it ready for baking. 2. Scrub the russet potatoes under cold running water. Dry them completely with a clean towel. 3. Prick each potato with a fork six to eight times. This helps steam escape while they bake. 1. Rub each potato with olive oil. Make sure they are well-coated. 2. Sprinkle salt on the potatoes for extra flavor. 3. Place the potatoes on the middle rack of the oven. Bake for 45-60 minutes. Check their doneness by piercing with a fork. 1. Once baked, let the potatoes cool for about 10 minutes. This makes them easier to handle. 2. Slice each potato in half lengthwise. Now you have boat-like shapes! 3. Scoop out a bit of the flesh, leaving about 1/4 inch intact along the skin. 1. Brush the insides of each potato skin with olive oil. Season with salt and pepper for taste. 2. Add a generous amount of shredded cheddar cheese in each skin. Then sprinkle the remaining Parmesan cheese on top. 3. Put the filled skins back in the oven, cut-side up. Bake for an extra 10-15 minutes. The cheese should melt and the edges should crisp. 4. While baking, mix the remaining Parmesan cheese, ranch seasoning, and chopped green onions in a bowl. 5. When the potato skins are crispy, take them out. Top each skin with the ranch mix. 6. Return the potato skins to the oven for 5 more minutes. This lets the flavors meld beautifully. Enjoy your Crispy Parmesan Ranch Potato Skins hot, served with sour cream and optional hot sauce! For complete details, refer to the Full Recipe. To make your potato skins crispy, follow these simple steps: - Bake at a high temperature: Set your oven to 400°F (200°C). High heat gets the skins nice and crisp. - Use olive oil: Coat the skins well in olive oil. This helps them crisp up and adds flavor. - Season well: Don’t skip the salt and pepper. Seasoning is key for great taste. You can switch up the cheese for your potato skins. Here are some ideas: - Monterey Jack: This cheese melts well and adds a creamy texture. - Gouda: It gives a smoky flavor that pairs nicely with ranch. - Feta: For a tangy twist, sprinkle some crumbled feta on top. Balancing flavors is important. Use milder cheeses with stronger toppings. Adding more flavor is easy! Here are some tips: - Spices: Try adding paprika or garlic powder for extra kick. - Herbs: Fresh herbs like parsley or chives brighten up the dish. - Toppings: Consider adding crispy bacon bits or diced tomatoes for extra texture. These tips help you make the best crispy Parmesan ranch potato skins. For the complete recipe, check out the Full Recipe section. {{image_4}} For a twist, try different spice blends. You can use garlic powder, onion powder, or smoked paprika. Each adds a unique taste. You can also switch the ranch seasoning for taco seasoning. It gives a fun and zesty flavor. - Garlic powder - Onion powder - Smoked paprika - Taco seasoning Explore different flavor profiles. For a spicy kick, add cayenne pepper or chili powder. If you like fresh herbs, try dill or parsley. These choices keep your potato skins exciting and tasty. Get creative with toppings to suit your taste. You can add crispy bacon bits for a savory crunch. If you're vegan, top with dairy-free cheese or avocado. - Crispy bacon bits - Dairy-free cheese - Avocado slices For a fresh touch, add chopped tomatoes or jalapeños. You can also sprinkle some fresh cilantro or green onions. This way, everyone can enjoy their potato skins just how they like them. Pair your potato skins with a hearty soup or salad. A warm chili or creamy broccoli soup works well. These sides make a filling meal. - Hearty chili - Creamy broccoli soup - Fresh garden salad You can also serve them with grilled chicken or fish. This gives a nice balance to your meal. The crispy potato skins shine as a fun side dish. For more ideas, check out the full recipe. To keep your crispy potato skins fresh, store them in the fridge. Place them in an airtight container. They will stay good for about 3 days. Make sure they cool completely before sealing. This helps prevent excess moisture. When you want to enjoy your leftovers, use an oven for the best taste. Preheat it to 350°F (175°C). Place the potato skins on a baking sheet. Heat them for about 10-15 minutes. This keeps them crispy. Avoid using a microwave, as it can make them soggy. Yes, you can freeze potato skins! To freeze, let them cool completely. Place them in a single layer on a baking sheet. Freeze them for about 1-2 hours. After that, transfer them to a freezer bag. Remove as much air as possible. For thawing, place the skins in the fridge overnight before reheating. The best potatoes for potato skins are large russet potatoes. They have thick skin and a fluffy interior. This makes them perfect for holding toppings. Their size allows for a good amount of filling. Plus, they get crispy when baked, which is what we want. Yes, you can prepare them ahead of time. Bake the potatoes and scoop out the flesh. Store the skins in the fridge until you're ready to bake. Just add cheese and toppings before the final bake. This saves time and makes serving easier. To keep potato skins crispy, follow these tips: - Ensure you coat the skins with olive oil. - Bake them at a high temperature. - Avoid overcrowding the baking sheet. - Don't cover them while they cool. These steps help maintain crunchiness and flavor. Crispy Parmesan Ranch Potato Skins go well with several sauces. Here are some tasty pairings: - Sour cream - Ranch dressing - Hot sauce - Guacamole - Salsa These sauces add flavor and enhance your snack experience. Yes, you can freeze potato skins for later use. Bake the skins and let them cool completely. Then, store them in airtight containers. They can last a couple of months in the freezer. When ready to enjoy, bake them directly from frozen. This way, you get to savor that crispy goodness again! This blog post guides you on making Crispy Parmesan Ranch Potato Skins, covering every step. You learned about needed ingredients and how to prepare them. I shared tips for achieving crispy skins and creative topping ideas. You also discovered ways to store and reheat leftovers. Enjoy making this tasty treat! With your new skills, you can impress friends and family. These potato skins are simple and delicious.](https://dishtreats.com/wp-content/uploads/2025/07/2d854721-5686-49a1-8fc7-db971342c8a3.webp)
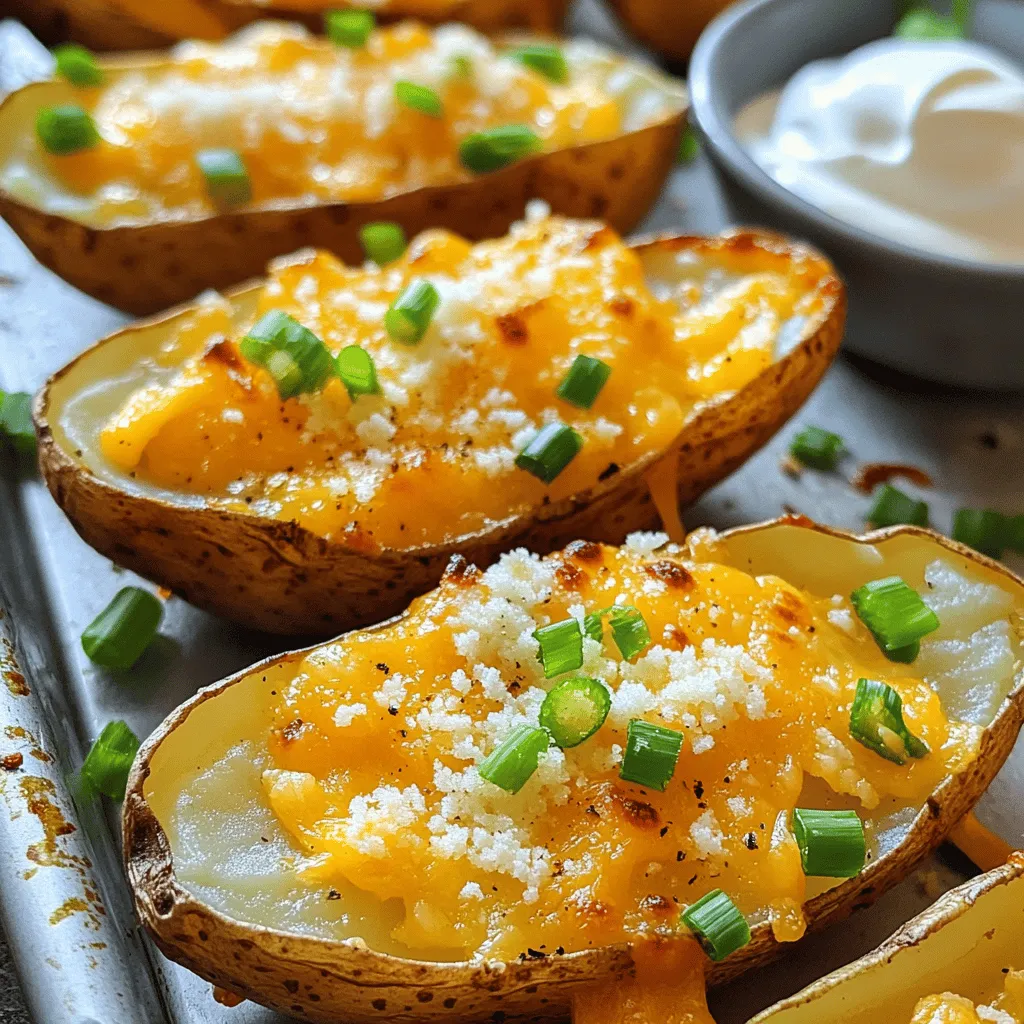
Are you ready to dive into a snack that will elevate your taste buds? Crispy Parmesan Ranch Potato Skins combine cheesy goodness with a hint of ranch flavor. These easy-to-make delights promise a satisfying crunch and are perfect for any gathering. In this blog, I’ll guide you through simple steps and tips to create the ultimate snack. Let’s turn those potatoes into something unforgettable!
Ingredients
To make Crispy Parmesan Ranch Potato Skins, gather these simple ingredients:
- 4 large russet potatoes
- 1 cup shredded sharp cheddar cheese
- 1/2 cup grated Parmesan cheese
- 1/4 cup sour cream
- 2 tablespoons ranch seasoning mix
- 1/4 cup green onions, chopped
- 3 tablespoons olive oil
- Salt and pepper to taste
- Optional: hot sauce for serving
These items will help you create a tasty snack that everyone loves. The russet potatoes give a sturdy base, while the cheese brings flavor and creaminess. The ranch seasoning mix adds a punch of taste that makes these skins special. I always keep a few extra green onions on hand for garnish. They add color and a mild onion flavor that enhances the dish.
I recommend using fresh ingredients for the best results. Fresh potatoes will give you a crispier skin. The cheese should be high-quality for a richer flavor. If you like spice, have hot sauce ready for a kick!
Step-by-Step Instructions
Preparation
1. Preheat your oven to 400°F (200°C) to get it ready for baking.
2. Scrub the russet potatoes under cold running water. Dry them completely with a clean towel.
3. Prick each potato with a fork six to eight times. This helps steam escape while they bake.
Baking the Potatoes
1. Rub each potato with olive oil. Make sure they are well-coated.
2. Sprinkle salt on the potatoes for extra flavor.
3. Place the potatoes on the middle rack of the oven. Bake for 45-60 minutes. Check their doneness by piercing with a fork.
Preparing the Potato Skins
1. Once baked, let the potatoes cool for about 10 minutes. This makes them easier to handle.
2. Slice each potato in half lengthwise. Now you have boat-like shapes!
3. Scoop out a bit of the flesh, leaving about 1/4 inch intact along the skin.
Filling and Final Baking
1. Brush the insides of each potato skin with olive oil. Season with salt and pepper for taste.
2. Add a generous amount of shredded cheddar cheese in each skin. Then sprinkle the remaining Parmesan cheese on top.
3. Put the filled skins back in the oven, cut-side up. Bake for an extra 10-15 minutes. The cheese should melt and the edges should crisp.
4. While baking, mix the remaining Parmesan cheese, ranch seasoning, and chopped green onions in a bowl.
5. When the potato skins are crispy, take them out. Top each skin with the ranch mix.
6. Return the potato skins to the oven for 5 more minutes. This lets the flavors meld beautifully.
Enjoy your Crispy Parmesan Ranch Potato Skins hot, served with sour cream and optional hot sauce!
Tips & Tricks
Achieving Perfectly Crispy Potato Skins
To make your potato skins crispy, follow these simple steps:
- Bake at a high temperature: Set your oven to 400°F (200°C). High heat gets the skins nice and crisp.
- Use olive oil: Coat the skins well in olive oil. This helps them crisp up and adds flavor.
- Season well: Don’t skip the salt and pepper. Seasoning is key for great taste.
Cheese Options
You can switch up the cheese for your potato skins. Here are some ideas:
- Monterey Jack: This cheese melts well and adds a creamy texture.
- Gouda: It gives a smoky flavor that pairs nicely with ranch.
- Feta: For a tangy twist, sprinkle some crumbled feta on top.
Balancing flavors is important. Use milder cheeses with stronger toppings.
Enhancing Flavor
Adding more flavor is easy! Here are some tips:
- Spices: Try adding paprika or garlic powder for extra kick.
- Herbs: Fresh herbs like parsley or chives brighten up the dish.
- Toppings: Consider adding crispy bacon bits or diced tomatoes for extra texture.
These tips help you make the best crispy Parmesan ranch potato skins.

Variations
Different Seasonings
For a twist, try different spice blends. You can use garlic powder, onion powder, or smoked paprika. Each adds a unique taste. You can also switch the ranch seasoning for taco seasoning. It gives a fun and zesty flavor.
- Garlic powder
- Onion powder
- Smoked paprika
- Taco seasoning
Explore different flavor profiles. For a spicy kick, add cayenne pepper or chili powder. If you like fresh herbs, try dill or parsley. These choices keep your potato skins exciting and tasty.
Additional Topping Suggestions
Get creative with toppings to suit your taste. You can add crispy bacon bits for a savory crunch. If you’re vegan, top with dairy-free cheese or avocado.
- Crispy bacon bits
- Dairy-free cheese
- Avocado slices
For a fresh touch, add chopped tomatoes or jalapeños. You can also sprinkle some fresh cilantro or green onions. This way, everyone can enjoy their potato skins just how they like them.
Transforming Into a Meal
Pair your potato skins with a hearty soup or salad. A warm chili or creamy broccoli soup works well. These sides make a filling meal.
- Hearty chili
- Creamy broccoli soup
- Fresh garden salad
You can also serve them with grilled chicken or fish. This gives a nice balance to your meal. The crispy potato skins shine as a fun side dish.
Storage Info
How to Store Leftovers
To keep your crispy potato skins fresh, store them in the fridge. Place them in an airtight container. They will stay good for about 3 days. Make sure they cool completely before sealing. This helps prevent excess moisture.
Reheating Instructions
When you want to enjoy your leftovers, use an oven for the best taste. Preheat it to 350°F (175°C). Place the potato skins on a baking sheet. Heat them for about 10-15 minutes. This keeps them crispy. Avoid using a microwave, as it can make them soggy.
Freezing Options
Yes, you can freeze potato skins! To freeze, let them cool completely. Place them in a single layer on a baking sheet. Freeze them for about 1-2 hours. After that, transfer them to a freezer bag. Remove as much air as possible. For thawing, place the skins in the fridge overnight before reheating.
FAQs
What is the best type of potatoes for potato skins?
The best potatoes for potato skins are large russet potatoes. They have thick skin and a fluffy interior. This makes them perfect for holding toppings. Their size allows for a good amount of filling. Plus, they get crispy when baked, which is what we want.
Can I make Crispy Parmesan Ranch Potato Skins in advance?
Yes, you can prepare them ahead of time. Bake the potatoes and scoop out the flesh. Store the skins in the fridge until you’re ready to bake. Just add cheese and toppings before the final bake. This saves time and makes serving easier.
How do I prevent potato skins from getting soggy?
To keep potato skins crispy, follow these tips:
- Ensure you coat the skins with olive oil.
- Bake them at a high temperature.
- Avoid overcrowding the baking sheet.
- Don’t cover them while they cool.
These steps help maintain crunchiness and flavor.
What dipping sauces pair well with potato skins?
Crispy Parmesan Ranch Potato Skins go well with several sauces. Here are some tasty pairings:
- Sour cream
- Ranch dressing
- Hot sauce
- Guacamole
- Salsa
These sauces add flavor and enhance your snack experience.
Are these potato skins suitable for freezing?
Yes, you can freeze potato skins for later use. Bake the skins and let them cool completely. Then, store them in airtight containers. They can last a couple of months in the freezer. When ready to enjoy, bake them directly from frozen. This way, you get to savor that crispy goodness again!
This blog post guides you on making Crispy Parmesan Ranch Potato Skins, covering every step. You learned about needed ingredients and how to prepare them. I shared tips for achieving crispy skins and creative topping ideas. You also discovered ways to store and reheat leftovers.
Enjoy making this tasty treat! With your new skills, you can impress friends and family. These potato skins are simple and delicious.
![To make Crispy Parmesan Ranch Potato Skins, gather these simple ingredients: - 4 large russet potatoes - 1 cup shredded sharp cheddar cheese - 1/2 cup grated Parmesan cheese - 1/4 cup sour cream - 2 tablespoons ranch seasoning mix - 1/4 cup green onions, chopped - 3 tablespoons olive oil - Salt and pepper to taste - Optional: hot sauce for serving These items will help you create a tasty snack that everyone loves. The russet potatoes give a sturdy base, while the cheese brings flavor and creaminess. The ranch seasoning mix adds a punch of taste that makes these skins special. I always keep a few extra green onions on hand for garnish. They add color and a mild onion flavor that enhances the dish. I recommend using fresh ingredients for the best results. Fresh potatoes will give you a crispier skin. The cheese should be high-quality for a richer flavor. If you like spice, have hot sauce ready for a kick! For the full recipe, visit the [Full Recipe] section. 1. Preheat your oven to 400°F (200°C) to get it ready for baking. 2. Scrub the russet potatoes under cold running water. Dry them completely with a clean towel. 3. Prick each potato with a fork six to eight times. This helps steam escape while they bake. 1. Rub each potato with olive oil. Make sure they are well-coated. 2. Sprinkle salt on the potatoes for extra flavor. 3. Place the potatoes on the middle rack of the oven. Bake for 45-60 minutes. Check their doneness by piercing with a fork. 1. Once baked, let the potatoes cool for about 10 minutes. This makes them easier to handle. 2. Slice each potato in half lengthwise. Now you have boat-like shapes! 3. Scoop out a bit of the flesh, leaving about 1/4 inch intact along the skin. 1. Brush the insides of each potato skin with olive oil. Season with salt and pepper for taste. 2. Add a generous amount of shredded cheddar cheese in each skin. Then sprinkle the remaining Parmesan cheese on top. 3. Put the filled skins back in the oven, cut-side up. Bake for an extra 10-15 minutes. The cheese should melt and the edges should crisp. 4. While baking, mix the remaining Parmesan cheese, ranch seasoning, and chopped green onions in a bowl. 5. When the potato skins are crispy, take them out. Top each skin with the ranch mix. 6. Return the potato skins to the oven for 5 more minutes. This lets the flavors meld beautifully. Enjoy your Crispy Parmesan Ranch Potato Skins hot, served with sour cream and optional hot sauce! For complete details, refer to the Full Recipe. To make your potato skins crispy, follow these simple steps: - Bake at a high temperature: Set your oven to 400°F (200°C). High heat gets the skins nice and crisp. - Use olive oil: Coat the skins well in olive oil. This helps them crisp up and adds flavor. - Season well: Don’t skip the salt and pepper. Seasoning is key for great taste. You can switch up the cheese for your potato skins. Here are some ideas: - Monterey Jack: This cheese melts well and adds a creamy texture. - Gouda: It gives a smoky flavor that pairs nicely with ranch. - Feta: For a tangy twist, sprinkle some crumbled feta on top. Balancing flavors is important. Use milder cheeses with stronger toppings. Adding more flavor is easy! Here are some tips: - Spices: Try adding paprika or garlic powder for extra kick. - Herbs: Fresh herbs like parsley or chives brighten up the dish. - Toppings: Consider adding crispy bacon bits or diced tomatoes for extra texture. These tips help you make the best crispy Parmesan ranch potato skins. For the complete recipe, check out the Full Recipe section. {{image_4}} For a twist, try different spice blends. You can use garlic powder, onion powder, or smoked paprika. Each adds a unique taste. You can also switch the ranch seasoning for taco seasoning. It gives a fun and zesty flavor. - Garlic powder - Onion powder - Smoked paprika - Taco seasoning Explore different flavor profiles. For a spicy kick, add cayenne pepper or chili powder. If you like fresh herbs, try dill or parsley. These choices keep your potato skins exciting and tasty. Get creative with toppings to suit your taste. You can add crispy bacon bits for a savory crunch. If you're vegan, top with dairy-free cheese or avocado. - Crispy bacon bits - Dairy-free cheese - Avocado slices For a fresh touch, add chopped tomatoes or jalapeños. You can also sprinkle some fresh cilantro or green onions. This way, everyone can enjoy their potato skins just how they like them. Pair your potato skins with a hearty soup or salad. A warm chili or creamy broccoli soup works well. These sides make a filling meal. - Hearty chili - Creamy broccoli soup - Fresh garden salad You can also serve them with grilled chicken or fish. This gives a nice balance to your meal. The crispy potato skins shine as a fun side dish. For more ideas, check out the full recipe. To keep your crispy potato skins fresh, store them in the fridge. Place them in an airtight container. They will stay good for about 3 days. Make sure they cool completely before sealing. This helps prevent excess moisture. When you want to enjoy your leftovers, use an oven for the best taste. Preheat it to 350°F (175°C). Place the potato skins on a baking sheet. Heat them for about 10-15 minutes. This keeps them crispy. Avoid using a microwave, as it can make them soggy. Yes, you can freeze potato skins! To freeze, let them cool completely. Place them in a single layer on a baking sheet. Freeze them for about 1-2 hours. After that, transfer them to a freezer bag. Remove as much air as possible. For thawing, place the skins in the fridge overnight before reheating. The best potatoes for potato skins are large russet potatoes. They have thick skin and a fluffy interior. This makes them perfect for holding toppings. Their size allows for a good amount of filling. Plus, they get crispy when baked, which is what we want. Yes, you can prepare them ahead of time. Bake the potatoes and scoop out the flesh. Store the skins in the fridge until you're ready to bake. Just add cheese and toppings before the final bake. This saves time and makes serving easier. To keep potato skins crispy, follow these tips: - Ensure you coat the skins with olive oil. - Bake them at a high temperature. - Avoid overcrowding the baking sheet. - Don't cover them while they cool. These steps help maintain crunchiness and flavor. Crispy Parmesan Ranch Potato Skins go well with several sauces. Here are some tasty pairings: - Sour cream - Ranch dressing - Hot sauce - Guacamole - Salsa These sauces add flavor and enhance your snack experience. Yes, you can freeze potato skins for later use. Bake the skins and let them cool completely. Then, store them in airtight containers. They can last a couple of months in the freezer. When ready to enjoy, bake them directly from frozen. This way, you get to savor that crispy goodness again! This blog post guides you on making Crispy Parmesan Ranch Potato Skins, covering every step. You learned about needed ingredients and how to prepare them. I shared tips for achieving crispy skins and creative topping ideas. You also discovered ways to store and reheat leftovers. Enjoy making this tasty treat! With your new skills, you can impress friends and family. These potato skins are simple and delicious.](https://dishtreats.com/wp-content/uploads/2025/07/2d854721-5686-49a1-8fc7-db971342c8a3-300x300.webp)

![- 3 medium zucchinis (spiralized) - 1 cup cherry tomatoes (halved) - 1/2 cup bell peppers (diced) - 1/4 cup red onion (thinly sliced) - 1 cup fresh basil leaves - 1/4 cup pine nuts (lightly toasted) - 1/2 cup grated parmesan cheese (or nutritional yeast for a vegan option) - 1/2 cup extra virgin olive oil - 2 cloves garlic (minced) - Sea salt and freshly ground black pepper (to taste) - Juice of 1 lemon I love choosing fresh ingredients for my Pesto Zoodle Salad. The zucchinis become long, curly noodles when you spiralize them. They are light and perfect for summer. Cherry tomatoes add a sweet bite. Use any color bell peppers for a pop of color. I enjoy the crunch of red onions. Fresh basil gives that classic pesto flavor. Pine nuts add a rich, nutty taste. You can swap grated parmesan cheese for nutritional yeast if you prefer a vegan option. Extra virgin olive oil makes the pesto creamy and smooth. The garlic gives a punch of flavor, while lemon juice brightens the dish. Don’t forget the sea salt and black pepper for seasoning. - Spiralizer - Food processor - Mixing bowl You will need a spiralizer to create the zoodles. A food processor helps blend the pesto quickly. A mixing bowl is essential for combining all the delicious ingredients. The caloric content per serving varies based on the ingredients used. On average, this salad packs around 200 calories per serving. The macronutrient breakdown is roughly 15g of fat, 8g of carbs, and 5g of protein. This makes it a light and healthy dish. You can find the full recipe for the Pesto Zoodle Salad above. Enjoy making this fresh and healthy meal! To make the pesto, you'll need: - 1 cup fresh basil leaves - 1/4 cup pine nuts (lightly toasted) - 1/2 cup grated parmesan cheese (or nutritional yeast) - 2 cloves garlic (minced) - 1/2 cup extra virgin olive oil - Sea salt and freshly ground black pepper - Juice of 1 lemon Start by placing the basil, pine nuts, parmesan, and garlic in a food processor. Blend them until smooth. While blending, slowly add the olive oil until the mixture is creamy. If you find it too thick, add more olive oil. Taste it, then adjust the seasoning with salt, pepper, and lemon juice. For spiralizing zucchini, use a spiralizer to create long, thin noodles called zoodles. Simply place the zucchini in the spiralizer and twist to form strands. If you don't have a spiralizer, you can use a julienne peeler or a sharp knife. Just slice the zucchini into thin strips to mimic zoodles. In a large mixing bowl, combine the zoodles, halved cherry tomatoes, diced bell peppers, and thinly sliced red onion. Pour the vibrant pesto over this mix. Carefully toss all the ingredients with tongs until the zoodles are well coated. Letting the salad rest for about 10 minutes is key. This marinating time allows all the flavors to blend nicely. It makes each bite more tasty and refreshing. Enjoy your vibrant Pesto Zoodle Salad! For the complete recipe, check the [Full Recipe]. To boost the taste of your pesto zoodle salad, add fresh herbs like parsley or mint. These herbs brighten your dish. You can also adjust the garlic and lemon. If you love garlic, add more. For a zesty kick, squeeze in more lemon juice. Soggy zoodles can ruin your salad. To avoid this, salt the zoodles first. Let them sit for a few minutes, then pat them dry. This step helps remove excess moisture. For the pesto, if it's too thick, add more olive oil. This keeps it light and creamy. For a stunning presentation, serve your salad in a large bowl. This lets the colors shine. You can garnish it with extra basil leaves and lemon zest. If you want to add protein, grilled chicken or shrimp works well. These pair nicely with the fresh flavors of the salad. Don't forget to check the [Full Recipe] for more details and tips! {{image_4}} You can switch zoodles for other veggies. Carrots and cucumbers make great alternatives. They add crunch and color, too. If you want a vegan option, skip the cheese. Use nutritional yeast instead. It gives a cheesy flavor without dairy. While pesto shines here, other dressings work well. Try a lemon vinaigrette for a bright taste. You can also use tahini or a simple olive oil and vinegar mix. Add spices like paprika or cumin to change the flavor. These can add warmth and depth. Seasonal veggies can enhance your salad. Think fresh corn, snap peas, or bell peppers. They add a burst of color and nutrition. You can also toss in fruits like diced peaches or berries. They bring sweetness to the mix, making every bite exciting. For more ideas, check the Full Recipe for inspiration! Store your Pesto Zoodle Salad in an airtight container. This keeps it fresh longer. Make sure you let it cool to room temperature before sealing. I recommend using glass containers. They do not hold odors and are easy to clean. The salad lasts in the fridge for about 3 days. After that, it may lose flavor and crispness. Signs of spoilage include a slimy texture or off smell. If you see these signs, it's best to toss it. You can enjoy this salad cold or at room temperature. If you want to warm it up, use a microwave. Heat it gently for about 30 seconds. Avoid reheating if you have added fresh veggies, as they can become mushy. A zucchini noodle salad, or zoodle salad, uses spiralized zucchinis as noodles. Zoodles are light and low in carbs. They are a great alternative to pasta. Zoodles help add more veggies to your meals while keeping the dish fresh and crunchy. Yes, you can make the pesto ahead of time. Store it in an airtight container in the fridge. It lasts about one week. You can also freeze it for up to three months. Just remember to leave some space in the container. The pesto will expand when frozen. Absolutely! This salad works well for meal prep. You can prepare the zoodles and pesto in advance. Keep them separate until you are ready to eat. This way, the zoodles stay fresh and do not get soggy. You can pack the salad in lunch boxes for easy grab-and-go meals. To make this recipe gluten-free, check all your ingredients. Ensure the pesto does not contain any gluten. Use gluten-free pasta or zoodles as a base. The other ingredients, like veggies and cheese, are naturally gluten-free. This way, you can enjoy the salad worry-free. Freezing the Pesto Zoodle Salad is not ideal. The zoodles can become mushy after freezing. However, you can freeze the pesto alone. When ready to enjoy, just thaw the pesto and mix it with fresh zoodles and veggies. This keeps your salad fresh and tasty. For the full recipe, check the main section. Pesto Zoodle Salad is a fresh, tasty dish made from zoodles, tomatoes, peppers, and pesto. You learned how to prepare the pesto and combine all the ingredients for a delightful meal. Remember to store any leftovers properly for the best taste. Try out the flavor tips and variations to make the dish your own. This recipe is not only nutritious but also easy to adapt for different diets. Enjoy exploring your cooking skills with this vibrant salad!](https://dishtreats.com/wp-content/uploads/2025/07/8637ce27-f1ae-4e5b-b0b9-802b4b26ee84-768x768.webp)

![- 8 oz rotini or fusilli pasta - 1 cup cherry tomatoes, halved - 1 cucumber, diced - 1 cup Kalamata olives, pitted and halved - 1/2 red onion, finely chopped - 1 bell pepper, diced - 1 cup feta cheese, crumbled - 1/4 cup fresh parsley, chopped - 1/4 cup extra virgin olive oil - 3 tablespoons red wine vinegar - 1 teaspoon dried oregano - Salt and pepper, to taste - Substitute red wine vinegar with apple cider vinegar - Add other vegetables like bell peppers or spinach This salad bursts with color and flavor. The main ingredients bring freshness. Each bite is full of crunch and zest. The pasta holds the dressing well, creating a tasty mix. The dressing is simple but packs a punch. Extra virgin olive oil adds richness. Red wine vinegar gives a tangy taste. Dried oregano adds a hint of earthiness. Salt and pepper enhance all the flavors. Want to mix it up? Try adding apple cider vinegar instead of red wine vinegar. You can also throw in extra veggies like spinach. This salad is flexible and lets your creativity shine. For the full recipe, check out the Zesty Greek Pasta Salad with Feta & Olives. To start, bring salted water to a rolling boil. Add 8 ounces of rotini or fusilli pasta. Cook for 8-10 minutes until al dente. Once cooked, drain the pasta in a colander. Rinse it under cold water to stop the cooking. Set the drained pasta aside for later. While your pasta cooks, wash and chop your vegetables. Use 1 cup of cherry tomatoes, 1 cucumber, 1/2 red onion, and 1 bell pepper. Dice these into bite-sized pieces. Also, chop 1/4 cup of fresh parsley. Once chopped, place all the vegetables into a large mixing bowl. This creates a colorful and fresh base for your salad. Now it’s time to mix things! Add the cooled pasta and 1 cup of Kalamata olives to the bowl of vegetables. This combination adds a nice salty flavor. In a separate bowl, prepare the dressing. Mix together 1/4 cup of olive oil, 3 tablespoons of red wine vinegar, and 1 teaspoon of dried oregano. Add salt and pepper to taste. Whisk until well combined. Drizzle the dressing over the pasta and vegetable mixture. Gently fold in 1 cup of crumbled feta cheese. Make sure all the ingredients are evenly coated with the dressing. This step is key for great flavor in every bite. Cover the salad with plastic wrap or a lid. Place it in the refrigerator for 30 minutes. This chilling time helps the flavors meld together. You can serve your pasta salad cold or at room temperature. For the full recipe, check out the details above. Serve your Greek pasta salad in a vibrant bowl for visual appeal. A colorful dish draws people in. You can also use individual plates for a fresh look. Garnish each serving with extra feta and parsley. This adds a pop of color and flavor. Let your salad chill longer in the fridge. This helps the flavors blend and deepen. If you love herbs, try adding basil or dill. Fresh herbs boost the taste and aroma. Prep your ingredients in advance. Chop vegetables and cook the pasta ahead of time. This makes assembly quick and easy. When storing leftovers, use an airtight container. It keeps the salad fresh and tasty for days. For the best flavor, consume within three to five days. {{image_4}} There are many fun ways to switch up your Easy Greek Pasta Salad. Try a Mediterranean twist for a new taste. Here are some ideas: - Add sun-dried tomatoes for a sweet, tangy flavor. - Toss in artichoke hearts for extra texture. - For protein, add grilled chicken or chickpeas. Both options make it filling. If you need to change the recipe for your diet, here are some tips: - Use gluten-free pasta to make it gluten-free. - For a vegan option, skip the feta cheese or try a vegan substitute. Enjoy seasonal ingredients by mixing in fresh veggies: - In summer, add zucchini for a crunchy touch. - Use roasted vegetables for deeper flavors. Roasting brings out their natural sweetness. These variations keep your Easy Greek Pasta Salad fresh and exciting! Check out the [Full Recipe] for the base you can customize. To keep your Easy Greek Pasta Salad fresh, place it in an airtight container. You can store it in the refrigerator for about 3-5 days. This salad tastes best when you enjoy it fresh. I do not recommend freezing this salad. Freezing can change its texture, making it less enjoyable. If you prepare a large batch, store the dressing separately. This keeps the flavors bright and fresh. This pasta salad is best served cold. However, you can also enjoy it at room temperature. Before serving, gently toss the salad. This helps mix the flavors evenly throughout. For the full recipe, check back to the beginning. Yes, it can be prepared a day in advance for flavor enhancement. This allows all the tastes to blend and become more rich. Just keep it in the fridge until you are ready to serve. You can use vegan feta or other cheese alternatives. This makes the dish suitable for various diets. You might want to try a creamy cheese for a nice texture. Yes, it’s perfect for picnics and potlucks if kept properly chilled. The fresh ingredients hold up well. Just pack it in a cooler or insulated bag to keep it fresh. Consider adding grilled chicken, shrimp, or canned chickpeas. These options make the salad more filling. They also add great taste and texture to the mix. This salad combines fresh pasta with vibrant vegetables, feta, and a simple dressing. Using easy steps, you can create a delightful dish that's perfect for any gathering. Remember, you can adjust flavors and ingredients to fit your taste. Meal prep helps save time, and eating fresh is best. Enjoy your colorful pasta salad, whether at a picnic or a family dinner!](https://dishtreats.com/wp-content/uploads/2025/06/42921458-26d8-4100-967d-b17bfbbdb796-768x768.webp)
![- 4 cups fresh spinach - 1 cup mixed berries - 1/2 cup feta cheese - 1/4 cup sliced almonds or walnuts - 1/4 red onion - 1 tablespoon honey - 2 tablespoons balsamic vinegar - 2 tablespoons extra virgin olive oil - Salt and pepper to taste The heart of a great Summer Berry Spinach Salad lies in its fresh ingredients. Start with 4 cups of fresh spinach. Choose vibrant, crisp leaves for the best flavor. Next, add 1 cup of mixed berries. I love using strawberries, blueberries, and raspberries together. They add sweetness and color. For creaminess, include 1/2 cup of feta cheese. Crumble it into small pieces for easy mixing. You can also try goat cheese if you prefer. Then, toss in 1/4 cup of sliced almonds or walnuts for crunch. Toasting them adds extra flavor. Finally, slice 1/4 of a red onion. Its sharpness balances the sweetness of the berries. Now, let’s move to the dressing. Combine 1 tablespoon of honey with 2 tablespoons of balsamic vinegar. This mix gives a sweet and tangy kick. Add 2 tablespoons of extra virgin olive oil for richness. Season with salt and pepper to taste. This dressing brings all the flavors together. For the full recipe, check the details above. Each ingredient plays a role in making this salad a fresh and tasty delight! - First, wash and dry the spinach. Make sure it's clean and free of dirt. - Next, add the spinach to a large mixing bowl. This is your fresh salad base. - Rinse the mixed berries under cool water. This helps keep them fresh and tasty. - Slice the strawberries if needed. Halve or quarter them to match other berries. - Gently add the berries to the bowl with the spinach. - Finely slice the red onion. Sprinkle it over the salad for a nice crunch. - In a small bowl, combine honey, balsamic vinegar, olive oil, salt, and pepper. - Whisk until the mixture is smooth. This dressing will bring the salad to life. - Carefully drizzle the dressing over the salad. Make sure every part gets a light coat. - Top with crumbled feta cheese and toasted sliced almonds or walnuts. This adds creaminess and crunch. - Gently toss the salad. Be careful not to mush the berries; you want them whole. For the full recipe, check out the vibrant Summer Berry Spinach Salad. Enjoy every bite! For this salad, I love using strawberries, blueberries, and raspberries. They add sweet flavors and vibrant colors. Choose berries that are firm and bright. Avoid any that feel squishy or have dark spots. In summer, you’ll find these berries at their best. They are fresh and full of flavor. If you can, buy them locally for the best taste. To make your salad stand out, serve it in a wide, shallow bowl. This lets the colors shine. Arrange the spinach first, then place the berries artistically on top. A sprinkle of feta cheese adds a touch of white. You can even drizzle a bit of extra dressing on top for a glossy finish. This makes the dish look fancy and appetizing. When mixing the salad, be gentle. You don’t want to squish the berries. Use your hands or two large spoons. Lift the spinach from the bottom and turn it over. This way, all the ingredients blend well. Toss just enough to coat everything with the dressing. It should look fresh and colorful, not mushy. Enjoy the beautiful mix of flavors! {{image_4}} You can change the nuts or cheese in this salad to suit your taste. If you want a creamier texture, try goat cheese instead of feta. For nuts, walnuts add a rich flavor, while pecans give a sweet crunch. You can also skip the nuts if you have a nut allergy. If you prefer different greens, kale or arugula work well. Kale adds a hearty bite, while arugula brings a peppery flavor. Both options will keep your salad fresh and exciting. While the balsamic dressing is tasty, many other dressings pair well. A lemon vinaigrette adds brightness. A poppy seed dressing can bring a sweet touch. You can also try a yogurt-based dressing for creaminess without the extra calories. You can make your dressing at home or buy it from the store. Homemade dressings let you control the flavor. Store-bought options save time and still taste great. Always check the labels for added sugars or preservatives. You can adapt this salad for fall or winter by changing the ingredients. In the fall, swap out berries for roasted apples or pears. Add some crumbled blue cheese for a bold taste. For winter, add sliced citrus fruits like oranges or grapefruits. They add a lovely color and refreshing taste during cold months. For a heartier salad, consider adding roasted butternut squash or cooked quinoa. This gives you a filling meal while keeping it seasonal and delicious. For the full recipe, click [Full Recipe]. To store leftovers, place the salad in an airtight container. This keeps it fresh and crisp. Avoid mixing the dressing in if you plan to eat it later. The dressing can make the salad soggy. Instead, store the dressing in a separate small jar. Use glass or BPA-free plastic containers. They help keep flavors intact and prevent leaks. If you have extra berries or nuts, store them in separate bags. This way, they stay fresh for longer. Serve the salad within two hours after making it. This keeps the greens bright and the berries juicy. If you need to hold it longer, store it in the fridge. Just remember to add the dressing right before serving. To keep ingredients fresh, cover the salad tightly. Use plastic wrap or a lid. You can also place a damp paper towel on top. This helps maintain moisture without making everything soggy. You cannot freeze the entire salad. Freezing will ruin the texture of the spinach and berries. However, you can freeze some components. For example, freeze extra berries for smoothies later. To freeze components separately, wash and dry the berries first. Spread them out on a baking sheet and freeze until solid. After that, transfer them to a freezer bag. This way, you can enjoy them later without losing flavor. You can easily add protein to your salad. Here are some great ideas: - Grilled chicken, sliced thin - Shrimp, cooked and peeled - Quinoa, cooked and cooled - Chickpeas, drained and rinsed - Hard-boiled eggs, sliced or quartered These additions make the salad heartier. They also give you extra nutrients. Adding protein turns a light dish into a full meal. Yes, you can prepare this salad ahead of time. Here are some tips for meal planning: - Wash and dry the spinach one day before serving. - Store it in a sealed bag with a paper towel to absorb moisture. - Prepare the berries and onion. Keep them separate in the fridge. - Make the dressing a day ahead and store it in a jar. Just mix everything together when you're ready to eat. This keeps the salad fresh and crunchy. This salad is packed with nutrition. Here are some key benefits: - Spinach is rich in vitamins A, C, and K. - Berries are full of antioxidants, which help fight free radicals. - Feta cheese adds calcium and protein. - Nuts provide healthy fats and fiber. Eating this salad supports good health. It boosts your energy and keeps you feeling full. Get creative with your toppings! Here are some fun ideas: - Croutons for added crunch - Avocado slices for creaminess - Sunflower seeds for a nutty flavor - Fresh herbs like basil or mint for a fresh twist - Dried fruits like cranberries or apricots for sweetness Feel free to mix and match. You can make each salad unique! This salad is best when fresh. Here’s how to store it: - Keep it in the fridge for up to two days. - Store the dressing separately to prevent sogginess. - Use an airtight container for the salad. If you want to keep it longer, avoid adding wet ingredients. This helps maintain freshness. This blog post covers how to make a delicious Summer Berry Spinach Salad. We explored the fresh ingredients, simple steps, and helpful tips for making it special. You learned how to pick the best berries, create an easy dressing, and suggest variations. Remember, this salad is not just tasty; it's also packed with nutrients. Whether you serve it fresh or store leftovers, it's a dish you can enjoy many ways. Try it out and make it your own!](https://dishtreats.com/wp-content/uploads/2025/07/5f6f3c08-a552-4e10-ab55-3c96ca32b52c-768x768.webp)
![- 2 cups diced apples - 1 cup celery, thinly sliced - 1 cup red grapes, halved - 1/2 cup walnuts, chopped - 1/2 cup raisins or dried cranberries - 1 cup plain Greek yogurt - 1 tablespoon honey - 1/2 teaspoon fresh lemon juice - Salt and pepper to taste - Lettuce leaves for serving Fresh produce makes this salad shine. I love using crisp apples, like Granny Smith, for their tartness. They add a nice crunch. The celery brings a refreshing snap, while juicy red grapes add sweetness. Nuts and dried fruits give texture and flavor. Chopped walnuts are my go-to. Toast them for even more flavor. Raisins or dried cranberries add a touch of sweetness, balancing the dish well. For the dressing, I use plain Greek yogurt. It’s creamy and healthy. Honey adds sweetness, and a bit of lemon juice brightens the flavors. Season with salt and pepper to enhance everything. Finally, serve on fresh lettuce leaves. They make a great base and add color. This combination of ingredients creates a delightful Waldorf salad. You can find the full recipe at [Full Recipe]. - Start by adding 2 cups of diced apples to a large bowl. - Drizzle the apples with 1/2 teaspoon of fresh lemon juice. This keeps them fresh and bright. - Next, slice 1 cup of celery into thin pieces. Add this to the bowl. - Halve 1 cup of red grapes and toss them in too. - In the same bowl, mix the fruit with 1/2 cup of chopped walnuts. - Add 1/2 cup of raisins or dried cranberries for sweetness. Gently toss the mixture. - In a separate bowl, combine 1 cup of plain Greek yogurt with 1 tablespoon of honey. Stir until smooth. - Carefully fold the yogurt dressing into the fruit mixture. Make sure everything is coated. - Season with salt and pepper to taste, folding gently to mix. - Cover the bowl and chill it in the fridge for at least 30 minutes. This helps the flavors blend. - When ready, serve on fresh lettuce leaves for a beautiful presentation. Enjoy your Waldorf salad! - For the complete recipe, check out the Full Recipe. You can swap out fruits and nuts to suit your taste. Try pears or oranges for a fresh twist. For nuts, almonds or pecans work well, too. If you want a creamier texture, use Greek yogurt instead of mayonnaise. The yogurt adds protein and keeps the salad light. Toasting walnuts really boosts their flavor. Just place them in a dry pan over medium heat. Stir them until they smell nutty and are lightly browned. You can also adjust sweetness or tartness. If the salad is too sweet, add a dash of lemon juice. For more sweetness, drizzle in extra honey. Serve your Waldorf salad on crisp lettuce leaves for a vibrant look. Arrange the salad in a large bowl or individual cups. Garnish with mint leaves for a fresh pop of color. You can also sprinkle extra toasted walnuts on top for added crunch. These simple touches make your dish stand out. For the full recipe, refer to the Waldorf Wonderland Salad 🥗. {{image_4}} The classic Waldorf salad uses simple, fresh ingredients. It combines apples, celery, grapes, and walnuts in a creamy dressing. Modern twists can add new flavors. You might see variations like adding chicken or swapping yogurt for mayonnaise. These changes keep the dish fresh and fun. You can experiment with spices, too. A hint of cinnamon or nutmeg can add warmth. If you want a vegan Waldorf salad, swap Greek yogurt for a plant-based option. Silken tofu blended with lemon juice makes a great dressing. For a gluten-free version, check your nuts and dried fruits. Most are safe, but some brands add gluten. You can also cut calories by using low-fat yogurt. This keeps the creaminess while reducing fat. Seasonal fruits can enhance the Waldorf salad. In fall, add sliced pears for sweetness. In winter, pomegranate seeds add color and crunch. Fresh berries in summer create a bright, juicy contrast. Each season brings a new twist to this classic salad. Try different fruits to match the season and your taste. The full recipe allows you to mix and match as you please. To store leftover Waldorf salad, place it in an airtight container. This keeps the salad fresh. Use a lid or plastic wrap to seal it well. The salad can last up to 3 days in the fridge. After that, the texture and flavor may change. If you see any browning apples, it’s best to toss them out. You can prepare some ingredients in advance. Chop your apples, celery, and grapes a day before. Keep them in separate containers in the fridge. This saves time when you want to make the salad. If you want to freeze Waldorf salad, I suggest not freezing it whole. The fruits will lose their crunch. Instead, freeze just the nuts or dried fruits. This keeps them fresh longer. When you are ready, mix them in fresh, chilled salad. You can enjoy that fresh taste even after storage! For the full recipe, check out the Waldorf Wonderland Salad. Waldorf Salad dates back to the late 1800s. A chef at the Waldorf Astoria Hotel in New York created it. The original recipe had only apples, celery, and mayonnaise. Over time, people added more ingredients, like walnuts and grapes. This salad became popular at formal dinners and events. It has a classic, timeless appeal that many enjoy today. Yes, you can prepare Waldorf Salad ahead of time. Make it a few hours before serving for best results. Just follow the steps of mixing everything and keep it in the fridge. This helps the flavors blend well. If you plan to serve it the next day, be careful with the apples. They can brown, so use lemon juice to keep them fresh. Waldorf Salad is quite healthy! It features fresh fruits and nuts, which offer great nutrients. Apples provide fiber and vitamins, while walnuts add healthy fats. The Greek yogurt dressing gives protein and a creamy texture. This salad is a great choice for a light meal or side dish. Eating it can help you feel full and satisfied. You can find the full recipe for this delightful salad [here](#). Waldorf salad combines fresh produce, nuts, and a creamy dressing. You learned how to prepare it step-by-step. I shared tips to enhance flavor and presentation. Feel free to adjust ingredients based on your taste. You can also explore various dietary options and seasonal fruits. This salad is not only tasty but also healthy. With proper storage methods, you’ll enjoy it for days. Now, it's time to create your own delicious version!](https://dishtreats.com/wp-content/uploads/2025/06/24fb7af7-5454-4649-a19f-39fd463a867f-768x768.webp)
