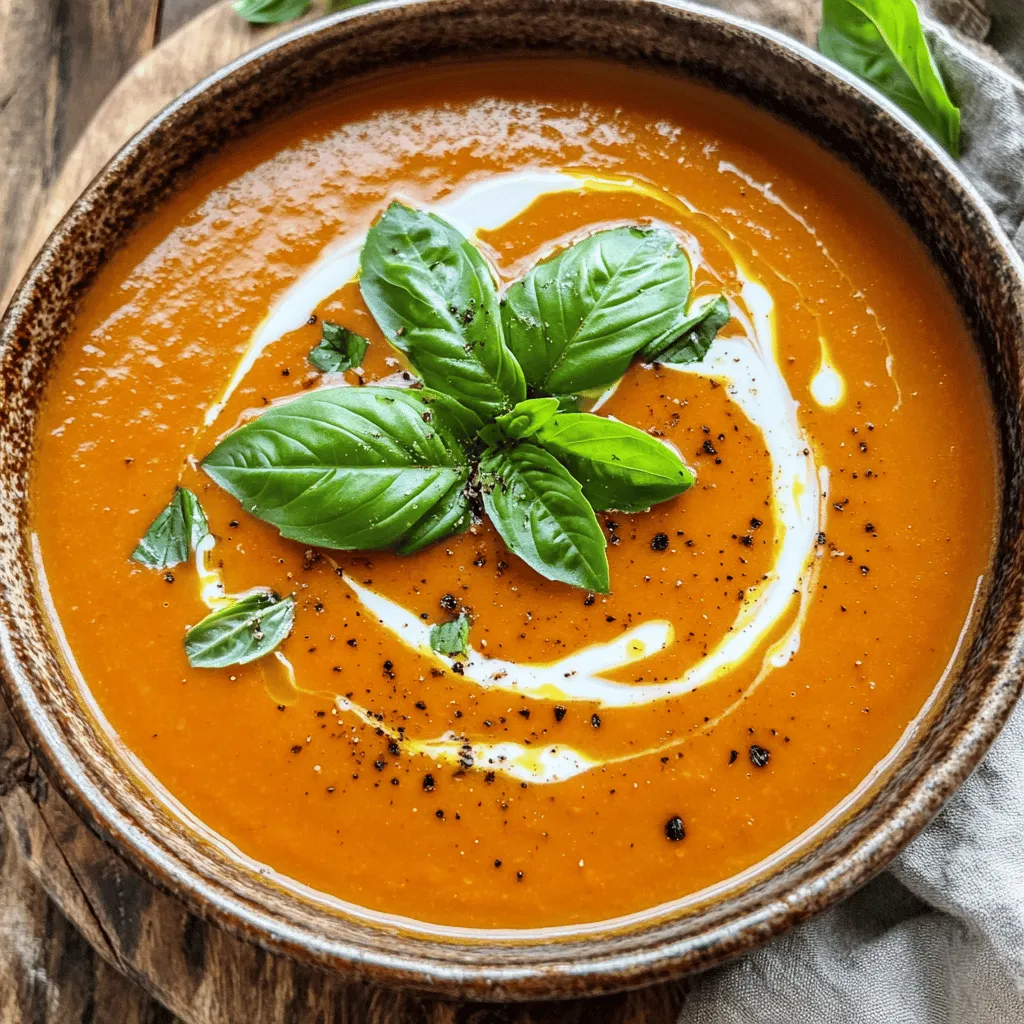
Creamy Roasted Red Pepper Soup Nourishing and Simple

Are you ready to warm your soul with a bowl of Creamy Roasted Red Pepper Soup? This simple yet nourishing recipe brings together sweet red bell peppers, aromatic garlic, and creamy coconut milk for a delightful flavor explosion. Whether you’re seeking comfort on a chilly day or a tasty meal prep option, this soup is sure to impress. Let’s dive into the ingredients and make something special!
Ingredients
Complete List of Ingredients
- 4 large red bell peppers
- 1 medium onion, finely chopped
- 3 cloves garlic, minced
- 2 cups vegetable broth
- 1 cup coconut milk (or heavy cream for a richer flavor)
- 1 teaspoon smoked paprika
- 1 teaspoon dried basil
- Salt and pepper to taste
- 2 tablespoons olive oil
- Fresh basil leaves for garnish
The main stars of this soup are the red bell peppers. They bring a sweet and smoky flavor. I love using fresh, ripe peppers for the best taste. The onion and garlic add depth and aroma to the base. Vegetable broth makes the soup warm and hearty.
Ingredient Substitutions
You can swap coconut milk for almond milk or cashew cream if needed. For a richer flavor, heavy cream works well too. Fresh basil can replace dried basil if you want a brighter taste. Always use what you have on hand.
For broth, you can use chicken broth if you’re not vegan. Just check the label to make sure it fits your diet.
Nutritional Benefits
Red bell peppers are rich in vitamins A and C. They help boost your immune system and improve skin health. Coconut milk has healthy fats that aid in digestion. It’s also a great source of energy.
In each serving, you get a good amount of fiber, which keeps you full. This soup is not only tasty but also good for you.
Step-by-Step Instructions
Preparation Steps
- Roasting the red bell peppers
First, preheat your oven to 400°F (200°C). Cut the red bell peppers in half. Remove the seeds and stems. Place the halves cut-side down on a baking sheet lined with parchment. Drizzle with olive oil and roast for 25-30 minutes. The skin should blister and the flesh should feel soft.
- Sautéing the onion and garlic
While the peppers roast, heat 1 tablespoon of olive oil in a large pot over medium heat. Add the chopped onion and cook for about 5 minutes. The onion should become soft and clear. Next, add the minced garlic and sauté for 1 minute. Enjoy the wonderful smell filling your kitchen!
Cooking Directions
- Combining ingredients in the pot
Once the peppers are roasted and cool, peel off the skins. Chop the flesh into small pieces. Add these pieces to the pot with the sautéed onion and garlic. Pour in the vegetable broth, smoked paprika, and dried basil. Stir well and bring the mixture to a boil. Reduce the heat and let it simmer for 10 minutes. This helps the flavors blend.
- Blending the soup for a creamy texture
Use an immersion blender to purée the soup until it is smooth and creamy. If you do not have an immersion blender, carefully transfer the soup to a countertop blender. Blend in batches if needed. This step gives the soup its lovely velvety texture.
Finishing Touches
- Adding coconut milk or heavy cream
After blending, stir in the coconut milk or heavy cream. This adds richness to your soup. Allow it to heat through for 2-3 minutes.
- Seasoning and garnishing the soup
Season the soup with salt and pepper to taste. For a pretty finish, serve hot with fresh basil leaves on top. These leaves add a lovely aroma and color. Enjoy your creamy roasted red pepper soup, made simple and nourishing!
Tips & Tricks
Perfecting the Flavor
To make this soup your own, adjust the spices. Add more smoked paprika for a deeper flavor. If you like heat, a pinch of cayenne can spice things up. You can also use fresh herbs for a brighter taste. Fresh basil adds a nice twist right at the end.
For the best texture, blend the soup well. Use an immersion blender for ease. If you want extra creaminess, blend in more coconut milk or heavy cream. This will give you a velvety feel that is hard to resist.
Serving Suggestions
This soup is great on its own, but you can add more. A slice of crusty bread works perfectly. You can also serve it with a simple salad for a complete meal. Try pairing it with a tangy vinaigrette to balance the creaminess.
For a fun twist, top the soup with croutons or a dollop of sour cream. These add crunch and a nice contrast to the smooth soup.
Making Ahead and Freezing
If you want to make the soup ahead, it stores well. Cool it down and pour it into an airtight container. It can stay in the fridge for up to three days. When you’re ready to eat, just reheat it on the stove. Stir often to keep it smooth.
To freeze, let it cool completely before transferring to freezer-safe bags. Lay the bags flat to save space. When you’re ready to eat, thaw it overnight in the fridge. Heat it gently on the stove, and stir well before serving.
Variations
Vegan and Dairy-Free Options
You can easily make this soup vegan. Replace the heavy cream with coconut milk. This keeps the soup creamy and rich. You can also use cashew cream for a nut-free option. For toppings, add fresh herbs like cilantro or parsley. These plant-based toppings enhance the soup’s flavor and freshness.
Spicy Roasted Red Pepper Soup
Want a kick? Add chili flakes or diced jalapeños. This brings heat that pairs well with roasted peppers. Use just a pinch for mild spice or more for a fiery kick. To balance the heat, add a touch of honey or maple syrup. This sweetness makes every spoonful enjoyable.
Creamy Roasted Red Pepper Soup with Protein
Boost the soup’s nutrition by adding protein. You can stir in cooked chicken or beans. Both options make the soup heartier and more filling. For a vegetarian twist, try chickpeas or lentils. They blend well and add a satisfying texture.
Storage Info
Best Practices for Storing Leftovers
Store your creamy roasted red pepper soup in an airtight container. Keep it in the fridge. This soup lasts about 4 to 5 days in the fridge. Make sure to let it cool before sealing it. Label the container with the date to track freshness.
Freezing Instructions
You can freeze this soup for longer storage. Pour the cooled soup into freezer-safe bags or containers. Remove as much air as you can. It keeps well for up to 3 months in the freezer. When you want to eat it, thaw it overnight in the fridge. To reheat, warm it on the stove over low heat or use the microwave. Stir well to ensure even heating.
Reusing Ingredients
Don’t waste any leftovers! Use extra soup as a sauce for pasta or drizzle it over roasted veggies. You can also blend it with grains for a creamy risotto. If you have leftover red peppers, toss them in salads or sandwiches. They add great flavor and nutrition to many dishes. Feel free to explore other recipes that use similar ingredients, like stuffed peppers or pasta sauces.
FAQs
Common Questions About Creamy Roasted Red Pepper Soup
What can I substitute for coconut milk?
You can use heavy cream instead of coconut milk. If you want a lighter option, try almond milk or soy milk. Each choice will give the soup a different taste.
Can I use fresh bell peppers instead of roasted?
Yes, you can use fresh bell peppers, but roasting them brings out their natural sweetness. Roasting adds depth and flavor that fresh peppers lack.
Cooking Time and Preparation
How long does it take to make creamy roasted red pepper soup?
Making this soup takes about 55 minutes in total. This includes 15 minutes for prep and 40 minutes for cooking and blending.
What is the best way to roast red peppers?
To roast red peppers, preheat your oven to 400°F (200°C). Cut the peppers in half, remove seeds, and coat them with olive oil. Place them cut-side down on a baking sheet. Roast for 25-30 minutes until the skin blisters.
Dietary Considerations
Is this soup gluten-free?
Yes, creamy roasted red pepper soup is gluten-free. All the ingredients used are free from gluten.
Can I make it nut-free?
Absolutely! If you use coconut milk, choose a brand that is nut-free. You can also opt for heavy cream, which is nut-free by nature.
You learned how to make a creamy roasted red pepper soup. I covered the ingredients, cooking steps, and storage tips. This soup is tasty and easy to make. You can adjust spices and add your favorite proteins. It’s also great for meal prep. With these tips, you’ll create a soup that impresses everyone. Enjoy the rich flavors while knowing it’s good for you, too. This dish is perfect for any occasion and will become a favorite in your home.


. Enjoy making your air fryer sweet potato chips! You now know how to make tasty sweet potato chips with an air fryer. We covered the needed ingredients, proper preparation, and seasoning. I shared tips for perfect crispiness and suggested flavor boosts. I also explored storage and reheating methods to keep your chips fresh. Try different seasonings and root veggies for variety. Enjoy the fun of making your own snacks!](https://dishtreats.com/wp-content/uploads/2025/06/63cc0e6b-da42-45de-be59-e2118d293653-768x768.webp)


![To make creamy avocado toast, you need these fresh ingredients: - 4 ripe avocados - 8 slices of whole grain bread - 1 tablespoon fresh lemon juice - ½ teaspoon garlic powder - ½ teaspoon smoked paprika - Salt and black pepper, to taste - 1 cup cherry tomatoes, halved - Fresh basil leaves for garnish These ingredients come together to create a bright and tasty dish. The avocados provide creaminess, while the lemon juice adds a zing. Garlic powder and smoked paprika give the avocado spread a delicious depth. You can customize your toast with these optional toppings: - Crumbled feta cheese - Red chili flakes - A drizzle of balsamic glaze These extras let you explore different flavors. Feta adds a salty kick, while red chili flakes bring heat. Balsamic glaze offers a sweet contrast. Feel free to mix and match to suit your taste! Avocados are not just tasty; they also pack a punch in nutrition. They are rich in healthy fats, which can help lower bad cholesterol. They also contain fiber, which aids digestion. Plus, avocados are high in vitamins C, E, and K, supporting your immune system and skin health. Eating avocados promotes heart health and keeps you feeling full longer. This creamy avocado toast is not only a simple delight but a smart choice for your meals. For the full recipe, check out the detailed instructions! To make creamy avocado toast, start by toasting your bread. Use a toaster or a skillet. Aim for a golden brown color. This creates a firm base for your toppings. While the bread toasts, cut the ripe avocados in half. Remove the pits carefully. Use a spoon to scoop the soft flesh into a bowl. Next, add fresh lemon juice, garlic powder, smoked paprika, salt, and black pepper. Mix these into the avocado. Use a fork to mash it until creamy. It should still have some small chunks for texture. Taste it and adjust the seasoning if needed. Once the bread is ready, spread the avocado mix generously over each slice. Make sure to cover the bread completely. For the best toast, choose whole grain bread. It adds flavor and nutrition. Toasting in a skillet gives a nice crispness. Preheat the skillet over medium heat. Add a bit of olive oil for extra flavor. If using a toaster, toast twice for extra crunch. Keep an eye on the bread to avoid burning. Perfect toast should be firm and golden. To achieve the best creaminess, use ripe avocados. They should yield slightly when pressed. Start mashing with a fork in a bowl. Press down firmly to break it up. Mix in your other ingredients as you mash. This helps blend the flavors well. You want a creamy texture, but some chunks are great for bite. Don’t over-mash; keep it fun and textured. For the full recipe, you can check out the [Full Recipe]. When choosing avocados, look for ones that feel slightly soft when you gently squeeze them. A ripe avocado should give a little but not feel mushy. Check the skin color too; darker skin often means it's ripe. If you find hard avocados, leave them at room temperature for a few days to ripen. You can speed this up by placing them in a paper bag with a banana. If you have leftover avocado mixture, store it in an airtight container. To keep it fresh, add a layer of plastic wrap on top, pressing it directly against the surface. This prevents air from causing browning. You can also add a little extra lemon juice for added protection. Serve your creamy avocado toast with fresh toppings for added flavor and fun. Consider adding sliced radishes for crunch, or a poached egg for protein. You can also try smoked salmon or a sprinkle of nuts for extra texture. Customize each slice to create a unique bite every time. For the full recipe, check out the detailed steps and enjoy this simple dish! {{image_4}} Let’s get creative with your creamy avocado toast! You can mix and match toppings to make each bite special. Here are some ideas: - Crumbled feta cheese: This adds a salty kick. - Red chili flakes: For a spicy touch, sprinkle these on top. - Balsamic glaze: Drizzle it for a sweet and tangy flavor. - Radish slices: These add crunch and a peppery note. - Sliced boiled eggs: They provide extra protein and creaminess. You can change the whole vibe of your toast with different flavors. Here are some tasty combos: - Spicy: Mash in jalapeños or add hot sauce for heat. - Mediterranean: Mix in olives, sun-dried tomatoes, and a bit of oregano. - Mexican: Top with black beans, corn, and a squeeze of lime. - Asian: Add sesame seeds, soy sauce, and sliced green onions. Avocado toast is great for everyone! Here are some easy swaps: - Vegan bread: Choose gluten-free bread to keep it vegan and gluten-free. - Nutritional yeast: Use this instead of cheese for a cheesy flavor. - Chickpeas: Mash these into the avocado for added protein and flavor. - Hummus: Spread a layer of hummus under the avocado for extra creaminess. Feel free to explore these variations and make this dish your own. For the full recipe, check the recipe section above. If you have leftover toast, store it in an airtight container. This keeps it from getting soggy. You can also wrap it in foil or plastic wrap. Toast is best eaten fresh, but you can enjoy it later. Just reheat it in a toaster or oven to bring back its crunch. To keep avocados fresh, sprinkle lemon juice on the cut side. The acid slows browning. Cover the avocado tightly with plastic wrap. You can also store it in an airtight container. Place the pit back in the unused half to help it stay fresh longer. If you prepare avocado toast but can't eat it right away, store it carefully. Place the toast in a container with a lid. Avoid stacking to prevent sogginess. When ready to eat, reheat it for a few minutes in an oven. This brings back the crispy texture. For the best taste, enjoy it fresh if you can. Check out the Full Recipe for more tips! To make creamy avocado toast, you need ripe avocados, whole grain bread, and a few spices. Start by toasting the slices of bread until golden brown. Next, cut the avocados in half, remove the pits, and scoop the flesh into a bowl. Add lemon juice, garlic powder, smoked paprika, salt, and pepper. Mash the mixture until creamy but slightly chunky. Spread it on the toast, top with cherry tomatoes, and finish with fresh basil. For full details, check out the Full Recipe. Avocados are packed with good fats. They are rich in fiber, which helps digestion. They also contain vitamins like C, E, K, and B6. These nutrients support heart health and skin. Eating avocados can also boost your mood and give you energy. Plus, they can help lower cholesterol! You can prepare the avocado mixture ahead of time. Store it in an airtight container with lemon juice to prevent browning. However, I advise against toasting the bread too early. Toasted bread tastes best fresh and crunchy. Assemble your avocado toast right before serving for the best flavor and texture. Whole grain bread is my go-to choice. It adds a nice nutty flavor and fiber. Sourdough is also excellent for a tangy twist. Gluten-free bread works well too. Choose a bread that you enjoy, as it will make your toast even better! Creamy avocado toast is simple and delicious. You learned the key ingredients, from ripe avocados to tasty toppings. Following the steps ensures the perfect texture and creaminess. Remember to choose ripe avocados and store them right. You can explore unique flavor combos for a fun twist. This dish offers great health benefits and endless variations. Enjoy making this tasty treat!](https://dishtreats.com/wp-content/uploads/2025/06/dc41bef5-23d5-41ad-b579-59fa0f16c9c9-768x768.webp)