Zucchini Corn Pizza Flavorful and Simple Delight
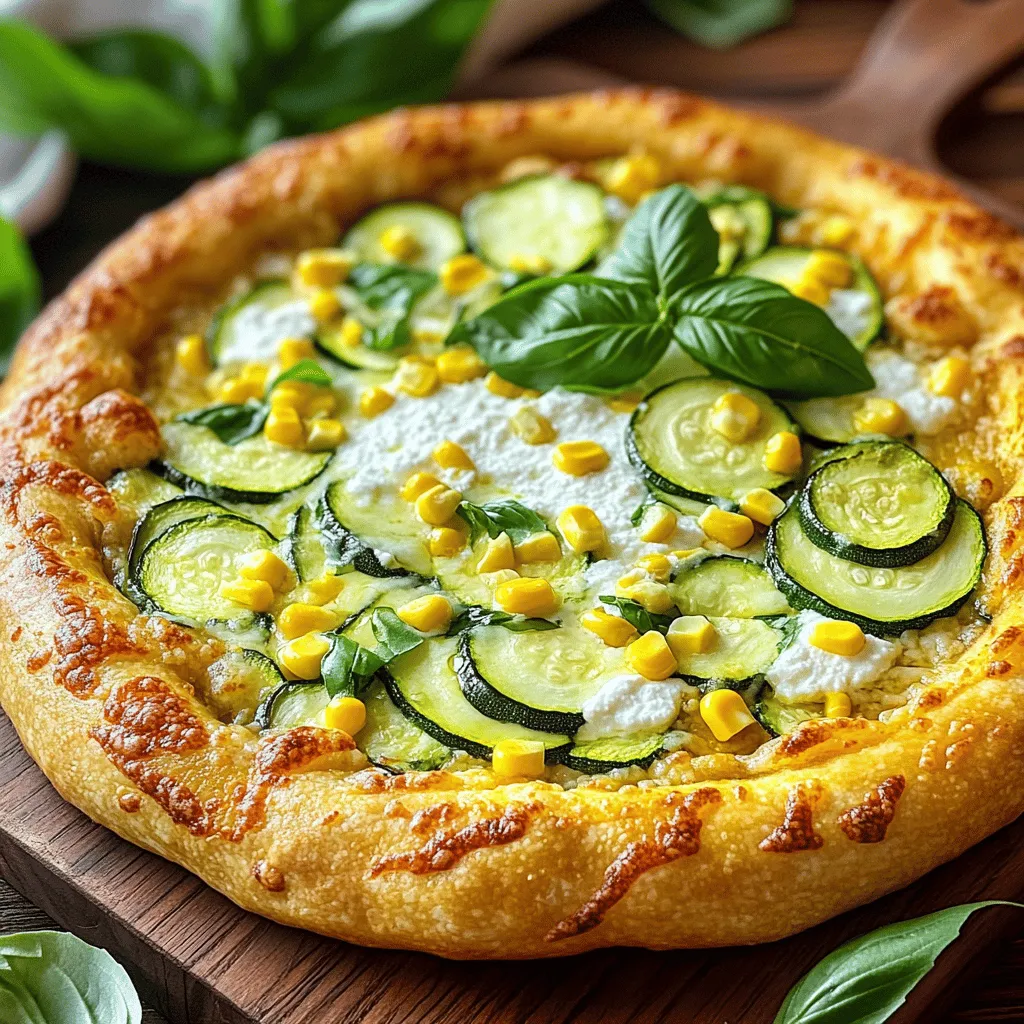
If you crave a tasty and simple dish, this Zucchini Corn Pizza is for you! Using fresh ingredients like zucchini and sweet corn, it’s packed with flavor and easy to make. Whether you opt for a store-bought crust or whip up your own, this recipe delivers deliciousness in every bite. Let’s dive into the step-by-step process to create a pizza that’s sure to please everyone at the table!
Ingredients
To make a delicious Zucchini Corn Pizza, gather the following ingredients:
- Pre-made or homemade pizza crust
- Medium zucchini
- Sweet corn kernels
- Shredded mozzarella cheese
- Ricotta cheese
- Garlic powder
- Italian seasoning
- Olive oil
- Salt and pepper
- Fresh basil leaves for garnish
These ingredients bring together fresh flavors and simple steps. The zucchini adds a nice crunch, while the corn gives a sweet burst. Mozzarella and ricotta create a creamy, cheesy base that holds everything together. Garlic powder and Italian seasoning add warmth and depth.
You can choose a pre-made crust to save time or make your own for extra fun. I love using fresh corn when it’s in season, but frozen works just as well. Using fresh basil as a garnish elevates the dish and adds a pop of color.Each bite of this pizza is a tasty treat that everyone will enjoy.
Step-by-Step Instructions
Preparation Steps
1. Preheat your oven. Set it to 475°F (245°C). This heat helps the crust crisp up nicely.
2. Sauté zucchini. Heat 1 tablespoon of olive oil in a skillet on medium heat. Add sliced zucchini. Cook for 3-4 minutes until tender. Season with garlic powder, salt, and pepper. Remove from heat.
3. Prepare the pizza crust. If using a pre-made crust, roll it out on a baking sheet. For homemade crust, follow your recipe.
Topping the Pizza
1. Spread ricotta cheese. Evenly layer the ricotta on the crust. Leave a small edge for the crust.
2. Layer zucchini and corn. Place the sautéed zucchini and 1 cup of sweet corn kernels on the ricotta. This adds a sweet crunch.
3. Add mozzarella and season. Sprinkle 1 cup of shredded mozzarella cheese on top. Finish with a dash of Italian seasoning for extra flavor.
Baking the Pizza
1. Bake time and temperature. Place the pizza in the oven. Bake for 12-15 minutes or until the crust is golden and the cheese bubbles.
2. Cooling and garnishing. Once baked, let the pizza cool for a minute. Top it with fresh basil leaves for a pop of color and flavor.Enjoy your delicious zucchini corn pizza!
Tips & Tricks
Selecting Ingredients
When making zucchini corn pizza, pick fresh zucchini. Look for firm ones without soft spots. I love using medium zucchini for its balance of flavor and texture. For corn, fresh is best. It adds sweetness. But if you can’t find it, frozen corn works too. Just make sure it’s thawed and drained.
Cooking Techniques
Sautéing the zucchini properly is key. Use medium heat and cook it for about three minutes. This softens the zucchini without losing its crunch. Don’t crowd the pan; keep the veggies moving. For the crust, preheat your oven to 475°F. This ensures a crispy base. If you use a pre-made crust, roll it out gently.
Presentation Tips
Slice your pizza into even wedges. This makes it easy to serve. For a touch of color, add fresh basil leaves on top. You can even drizzle a bit of olive oil for shine. A garnish like this not only looks good, but it also adds flavor.

Variations
Additional Toppings
You can change up this pizza with fun toppings.
- Protein options: Add grilled chicken or crispy bacon for protein. Both work great.
- Other vegetables: Spinach and bell peppers add freshness. They also bring color and flavor.
Dietary Modifications
Making this pizza fit your diet is easy.
- Gluten-free crust options: Use a gluten-free crust or cauliflower crust. Both options taste great.
- Vegan cheese alternatives: Try dairy-free cheese. It melts well and keeps the taste rich.
Flavor Enhancements
Spice things up with these ideas.
- Spices and herbs to experiment with: Add red pepper flakes for heat or fresh oregano for a twist.
- Sauces to drizzle on top: A balsamic glaze or pesto adds a nice touch. They enhance the flavor and look.
Storage Info
Refrigeration Tips
To store leftovers, place the pizza in an airtight container. This keeps it fresh for up to three days. If you want to reheat, use an oven or toaster oven. Preheat it to 350°F (175°C). Heat the pizza for about 10 minutes. This way, it stays crispy.
Freezing Instructions
You can also freeze the assembled pizza. Wrap it tightly in plastic wrap and then foil. This prevents freezer burn. It can last for up to two months in the freezer. When you are ready to cook it, thaw it in the fridge overnight. Then, bake it at 475°F (245°C) for about 15-20 minutes. Enjoy that fresh taste again!
FAQs
Common Questions
Can I use different types of cheese?
Yes, you can use other cheeses. Try feta for tang or gouda for a smoky taste. Mixing cheeses adds fun flavors and keeps things interesting.
What is the best crust for zucchini corn pizza?
A thin, crispy crust works best. You can use a pre-made crust for ease. If you want to try making your own, a homemade whole wheat crust adds a nice touch.
How can I make the pizza healthier?
Choose a whole grain crust for more fiber. Use less cheese or add more veggies for nutrition. You can even try a cauliflower crust for a low-carb option.
Preparation Queries
Can I prepare the ingredients in advance?
Yes, you can prep in advance. Slice the zucchini and store it in the fridge. You can also measure out the corn and cheeses for quick assembly.
What can I substitute if I’m out of zucchini?
If you lack zucchini, use yellow squash or bell peppers. Both add great flavor and texture. You can use any veggies you have on hand for a fun twist.
Cooking Clarifications
How do I know when the pizza is done?
You’ll know the pizza is done when the crust is golden brown. The cheese should be melted and bubbling. A quick peek should show a nice, crispy bottom.
What if my crust burns before the cheese melts?
If the crust burns, try lowering the oven temperature. You can also bake the pizza on a lower rack. Covering the edges with foil helps prevent burning while the cheese melts.
This pizza offers fresh flavors and easy steps. You can create a delicious crust topped with sautéed zucchini, sweet corn, and gooey cheese. Don’t forget the tips for choosing fresh ingredients and enhancing flavors. Feel free to explore different toppings or dietary options to suit your taste. With proper storage, your leftovers will taste great, too. Enjoy this fun dish shared with friends or family. Making it can be simple and tasty every time. Dive into your cooking adventure with this recipe and let your creativity shine!

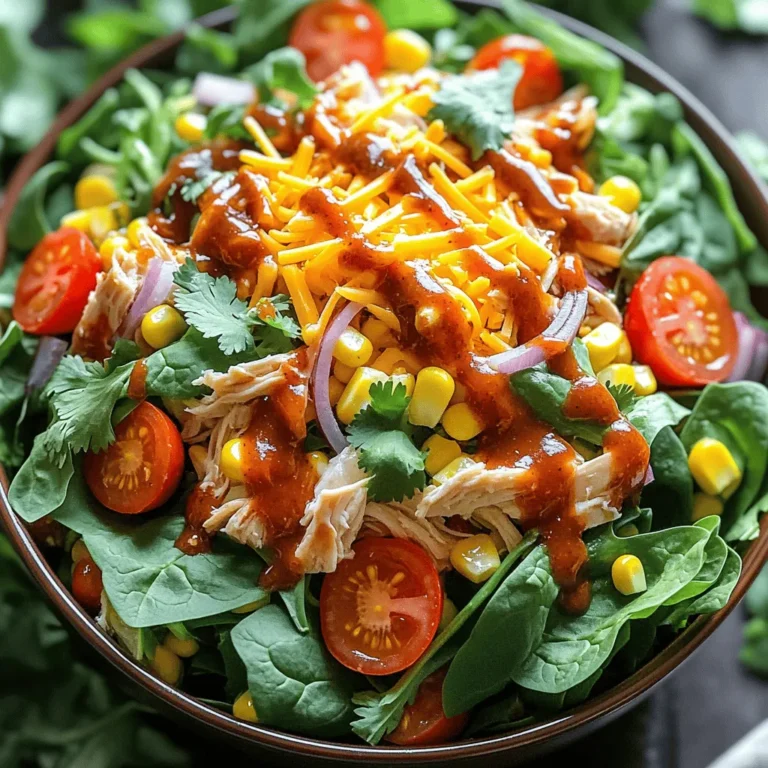
![- 1 can (15 oz) black beans, thoroughly rinsed and drained - 1 cup sweet corn (use fresh, frozen, or canned) - 1 large red bell pepper, diced into bite-sized pieces - 1 ripe avocado, diced - 1/2 medium red onion, finely chopped for a milder flavor - 1 cup cherry tomatoes, halved for bursts of sweetness - 1/4 cup fresh cilantro, finely chopped for an aromatic touch The foundation of my zesty black bean salad lies in the fresh ingredients. Black beans serve as the protein-packed base. They add a creamy texture and earthy flavor. Sweet corn brings a pop of sweetness, balancing the dish. A red bell pepper adds crunch and color. Diced avocado gives a rich, buttery taste. Finely chopped red onion adds a mild bite, while halved cherry tomatoes provide juicy bursts. Finally, fresh cilantro adds a bright finish, tying all the flavors together. - 2 tablespoons freshly squeezed lime juice - 1 tablespoon high-quality olive oil - 1 teaspoon ground cumin for warmth - 1 teaspoon garlic powder for depth - Salt and freshly cracked black pepper to taste The dressing is key to making the salad come alive. Fresh lime juice adds a zesty kick. Olive oil brings richness and ties the salad together. Ground cumin adds a warm, earthy note. Garlic powder deepens the flavor profile. Finally, salt and black pepper enhance all the tastes, making each bite delightful. - Portion size and garnishes - Optional accompaniments For serving, I like to present the salad in a large, colorful bowl. This makes it inviting and fun. You can also portion it into individual cups for a neat look. Garnish with extra cilantro leaves and lime wedges for a fresh touch. This salad pairs well with grilled chicken or fish. It also makes a great filling for wraps or tacos. Enjoy the zesty flavors and vibrant colors! For the full recipe, check out the details above. To start, grab a big mixing bowl. Add the rinsed black beans, sweet corn, diced red bell pepper, diced avocado, finely chopped red onion, halved cherry tomatoes, and chopped cilantro. Mix them all together well. Make sure each ingredient spreads out. This ensures every bite is full of flavor. Next, take a small bowl. In it, whisk together the freshly squeezed lime juice, olive oil, ground cumin, garlic powder, and a good pinch of salt and black pepper. Keep whisking until the dressing is smooth and well mixed. This mixture will bring out the best in the salad. Now, drizzle the dressing over your salad mixture. Using a large spoon or spatula, gently toss everything together. You want each piece coated with that zesty dressing. After tossing, taste the salad. You can add more lime juice or salt if needed. Let the salad sit for 10-15 minutes at room temperature. This resting time helps all the flavors blend nicely before you serve it. Check out the Full Recipe to see all the details! To make your Zesty Black Bean Salad shine, adjust the seasoning to suit your taste. Start with a little salt and pepper, then taste. If it needs more, add gradually until it’s perfect. You can also squeeze in a splash of extra lime juice. This adds brightness and makes the flavors pop. Using canned ingredients can save you time. Canned black beans and corn are quick and easy. Just rinse and drain them well. If you prefer fresh, that’s great too! Prepping ingredients in advance can also help. Chop your veggies the day before. Store them in the fridge until you’re ready to mix. Serving style can make your salad more appealing. Use a large, colorful bowl to showcase the bright ingredients. You can also serve it in cups for individual portions. Garnish with extra cilantro leaves and lime wedges. This adds a fresh look and invites guests to enjoy your creation. For the full recipe, check the details above! {{image_4}} You can easily swap beans in this salad. Try pinto beans or kidney beans for a different taste. Each bean brings its own flavor and texture. Adding or substituting vegetables can change the salad’s vibe. Consider diced cucumber for crunch or chopped jalapeño for heat. Roasted red peppers can add a smoky note. Use what you like! This salad is vegan and gluten-free. It fits well into many diets. If you want more protein, add grilled chicken or shrimp. Both options pair great with the zesty flavors. You can also use tofu or tempeh for a plant-based protein boost. Both options add texture while keeping it healthy. Want to mix up the dressing? Try a simple vinaigrette with balsamic vinegar instead of lime juice. It adds a sweet tang. You could also use a creamy dressing, like ranch or avocado dressing. This change can make the salad richer and more filling. For a spicy kick, add some hot sauce to your dressing. Experiment to find your favorite combination! For the full recipe and more ideas, check the [Full Recipe]. Store Zesty Black Bean Salad in an airtight container. Glass containers work best, but plastic ones are fine too. Make sure everything is sealed tight. This keeps the flavors fresh. Keep the salad in the fridge for the best taste. To batch prepare, mix all ingredients except avocado. Add avocado just before serving. This keeps it from browning. You can store the salad for up to three days. After that, it may lose its crunch and flavor. You can freeze black bean salad, but I don’t recommend it. Freezing changes the texture of the ingredients. If you decide to freeze it, do so without avocado. To thaw, place the salad in the fridge overnight. This helps it retain some freshness. Yes, you can make this salad ahead of time. It tastes even better after resting. To prep, mix all the salad ingredients in a bowl. Keep the dressing separate until you're ready to serve. This keeps the salad fresh and crunchy. Store the salad in a sealed container in the fridge. It can last up to two days. Just remember to add the dressing just before serving. This salad pairs well with many dishes. Try serving it with grilled chicken or fish for a complete meal. You can also enjoy it with tacos or burritos for a fun twist. It works great as a side dish for barbecues. If you want a lighter meal, serve it with whole-grain pita bread. The flavors blend well with many cuisines. Yes, this salad is very healthy! Black beans are rich in protein and fiber, which help you feel full. They also support heart health and digestion. The fresh veggies add vitamins and minerals. Avocado provides healthy fats that are good for your skin. The lime juice boosts your vitamin C intake. Overall, this salad is a great choice for a nutritious meal. For the full recipe, check out the vibrant Zesty Black Bean Salad! This blog post covered the essentials for making a delicious black bean salad. We explored fresh ingredients, dressings, serving ideas, and tips for great flavor. You can customize it to fit your taste and dietary needs, too. Remember to store your salad properly for freshness. A well-made salad can be a healthy, tasty dish that fits into your meal plans. Enjoy your cooking and delight in each bite of your Zesty Black Bean Salad!](https://dishtreats.com/wp-content/uploads/2025/07/dc2c0f53-4615-45f1-afed-f531318cc377-768x768.webp)