
One Bowl Zucchini Bread Easy Recipe to Delight
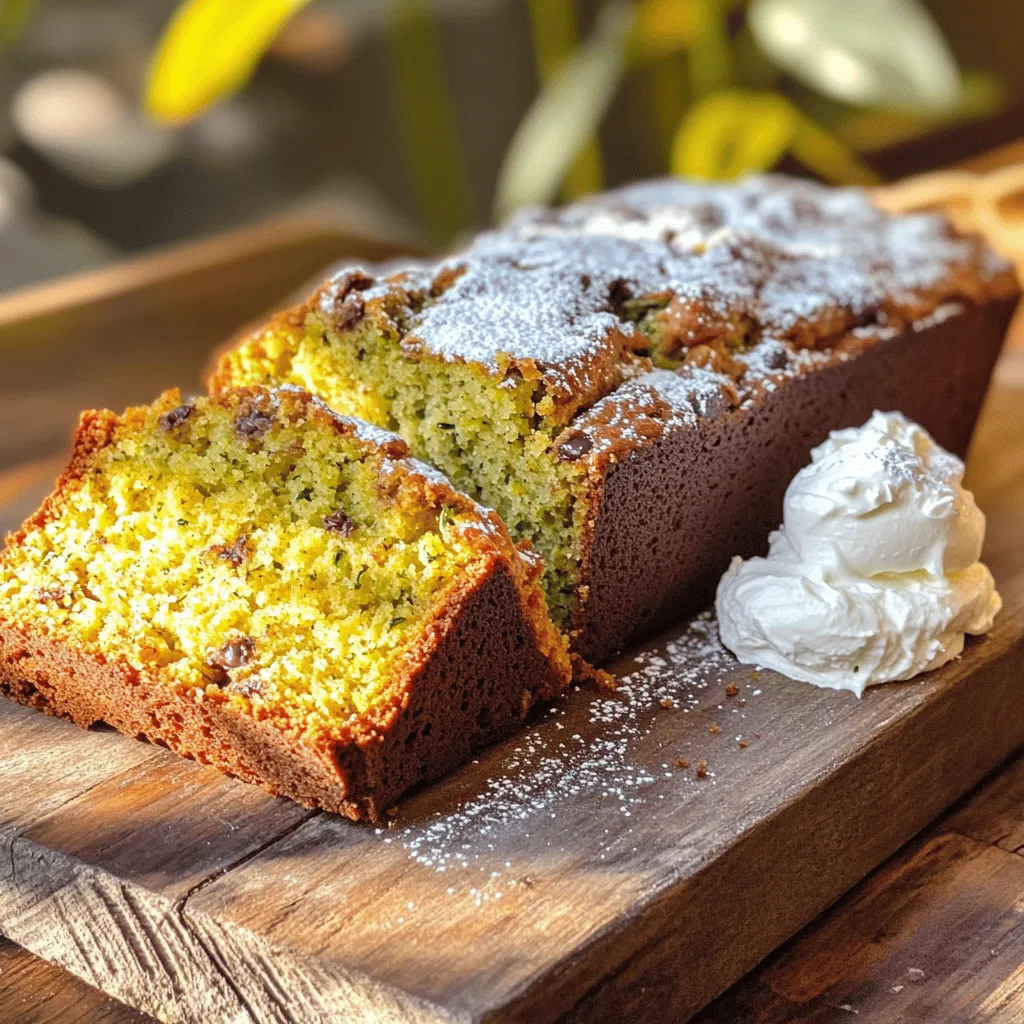
Are you ready to bake the easiest and most delicious One Bowl Zucchini Bread? I’ll show you how to create this moist, flavorful treat with just one bowl. No need for fancy tools or complicated steps—just fresh ingredients and simple instructions. This quick and rewarding recipe is perfect for any skill level. Let’s dive into making a zucchini bread that will delight your taste buds!
Ingredients
Essential Ingredients for One Bowl Zucchini Bread
To make your one bowl zucchini bread, gather these key items:
- 1 medium zucchini, grated and thoroughly drained
- 1 cup granulated sugar
- 1/2 cup packed brown sugar
- 1/2 cup vegetable oil
- 2 large eggs
- 1 teaspoon pure vanilla extract
- 1 ½ cups all-purpose flour
- 1 teaspoon baking soda
- 1/2 teaspoon baking powder
- 1 teaspoon ground cinnamon
- 1/4 teaspoon ground nutmeg
- 1/2 teaspoon salt
These ingredients create a moist and flavorful bread. The key is to use fresh zucchini. It adds moisture and a subtle taste.
Optional Ingredients to Enhance Flavor
You can elevate your zucchini bread with these extra ingredients:
- 1/2 cup walnuts or pecans, chopped
- 1/2 cup semi-sweet chocolate chips
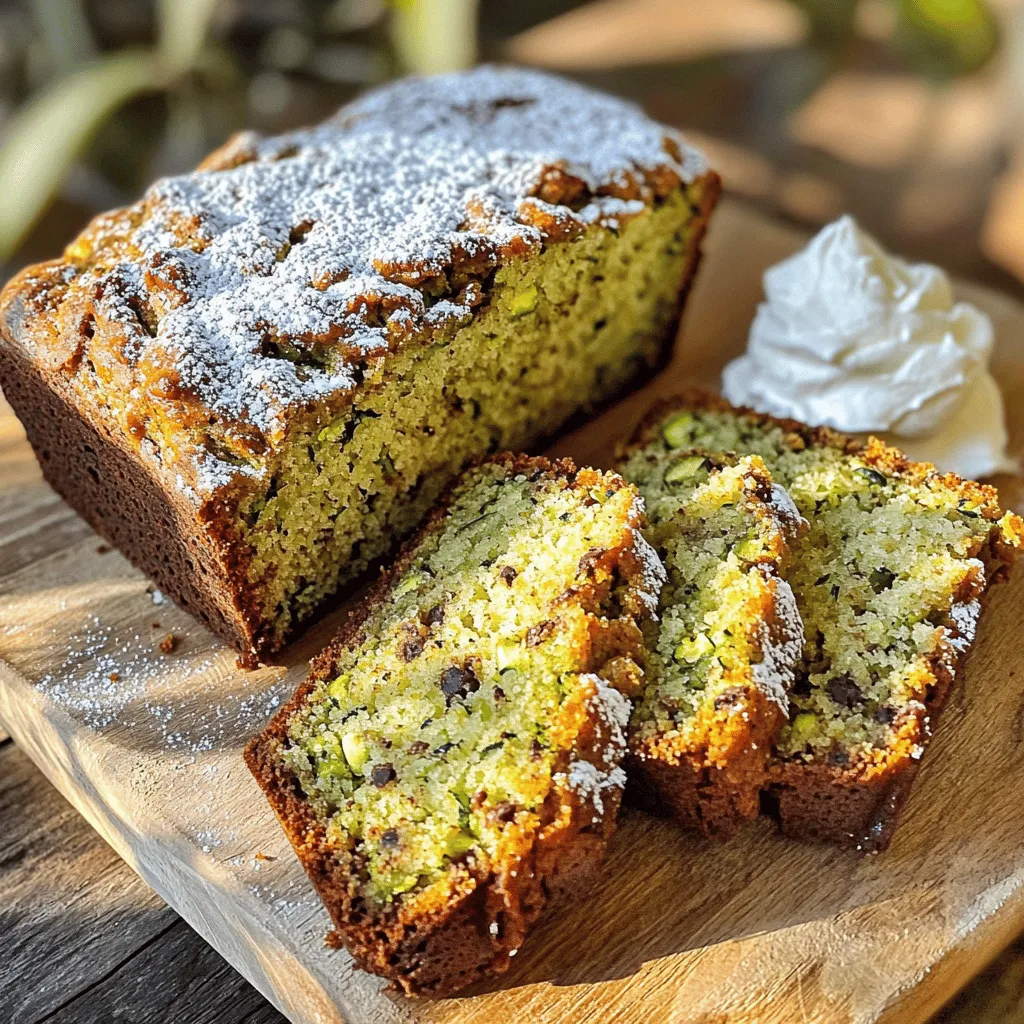
Adding nuts gives a nice crunch. Chocolate chips add sweetness and richness. Feel free to mix and match based on your taste.
Measurement and Substitutions
Accurate measurements are vital for success. Use a kitchen scale for precision if you have one. For substitutions:
- Replace granulated sugar with coconut sugar for a healthier option.
- Use applesauce instead of oil for a lower-fat version.
- Swap all-purpose flour with a gluten-free blend if needed.
These changes can help you tailor the recipe to your needs. Always consider how these swaps may affect flavor and texture.
Step-by-Step Instructions
Preparing Your Ingredients and Tools
First, gather all your ingredients and tools. You will need:
- 1 medium zucchini, grated and thoroughly drained
- 1 cup granulated sugar
- 1/2 cup packed brown sugar
- 1/2 cup vegetable oil
- 2 large eggs
- 1 teaspoon pure vanilla extract
- 1 ½ cups all-purpose flour
- 1 teaspoon baking soda
- 1/2 teaspoon baking powder
- 1 teaspoon ground cinnamon
- 1/4 teaspoon ground nutmeg
- 1/2 teaspoon salt
- 1/2 cup walnuts or pecans, chopped (optional)
- 1/2 cup semi-sweet chocolate chips (optional)
You will also need a mixing bowl, a whisk, and a loaf pan. Preheat your oven to 350°F (175°C). Grease a 9×5 inch loaf pan with non-stick spray or butter.
Mixing the Wet Ingredients
In a large mixing bowl, add the grated zucchini, granulated sugar, brown sugar, and vegetable oil. Mix well until the sugars dissolve. Next, crack the eggs into the bowl and add the vanilla extract. Whisk until everything is smooth and combined. This step is key for a moist zucchini bread.
Combining Dry Ingredients and Baking the Bread
In a separate bowl, sift together the all-purpose flour, baking soda, baking powder, ground cinnamon, ground nutmeg, and salt. Sifting helps to aerate the flour. This gives your bread a light texture. Gradually add the dry mixture to the wet ingredients. Stir gently after each addition. Avoid over-mixing, as this can make your bread dense.
If you want to enhance your bread, fold in the chopped nuts or chocolate chips now. This adds a delightful crunch and flavor. Carefully pour the batter into the prepared loaf pan. Use a spatula to smooth out the top for even baking.
Bake in the preheated oven for 50-60 minutes. Use a toothpick to check if it is done. Insert it into the center. If it comes out clean, your bread is ready. Let it cool in the pan for about 10 minutes. Then, move the bread to a wire rack to cool completely.
Tips for Properly Measuring Flour
To measure flour correctly, use the spoon-and-level method. First, fluff the flour in its container. Then, spoon it into your measuring cup without packing it down. Level it off with a knife for accuracy. This helps to prevent your bread from becoming too dry or dense.
Tips & Tricks
How to Ensure Moisture in Zucchini Bread
To make sure your zucchini bread stays moist, start with the right zucchini. Use a medium zucchini and grate it finely. After grating, squeeze out excess water. This step helps prevent a soggy loaf. Mixing in oil keeps the bread tender. Use half a cup of vegetable oil. You can also add yogurt or applesauce for extra moisture. These ingredients make the bread soft without adding too much fat.
Common Mistakes to Avoid
One mistake is not draining the zucchini properly. If you skip this, your bread may turn out wet and dense. Another common error is overmixing the batter. Mix until just combined to keep the bread light. Don’t skip the use of both baking soda and baking powder. This combo helps your bread rise well. Lastly, remember to check the oven temperature. An oven that’s too hot can burn the outside while leaving the inside raw.
Best Ways to Test for Doneness
To check if your zucchini bread is done, use a toothpick. Insert it into the center of the loaf. It should come out clean or with a few crumbs. If you see wet batter, it needs more time. Start checking at 50 minutes. Ovens can vary, so keep an eye on it. If the top gets too brown, cover it lightly with foil. This trick helps it bake evenly without burning. For the best result, let the bread cool in the pan for about 10 minutes before transferring it to a wire rack.
Variations
Gluten-Free One Bowl Zucchini Bread
You can easily make this zucchini bread gluten-free. Just replace the all-purpose flour with a gluten-free blend. Look for a brand that can substitute 1:1. This way, you keep the same texture and taste. Ensure that your baking soda and baking powder are also gluten-free. This simple swap lets everyone enjoy a slice.
Adding Different Nuts and Fruits
Mixing in nuts or fruits can add new flavors. Walnuts are classic, but pecans work great too. You can also add dried fruits like raisins or cranberries. For a twist, try chocolate chips! They melt and add richness. Experiment with the amount based on your taste. Each option makes your bread unique and fun.
Chocolate Chip vs. Nut-Free Options
If you love chocolate, adding chips is a no-brainer. They melt and blend well with the zucchini. However, some may want a nut-free option. Simply skip the nuts and add more chocolate or fruits. You can even replace the nuts with seeds like sunflower seeds. This way, everyone has a tasty option to enjoy.
Storage Info
How to Store Leftover Zucchini Bread
To keep your zucchini bread fresh, wrap it in plastic wrap. You can also place it in an airtight container. Store it at room temperature for up to three days. If you live in a warm area, the fridge is a better choice. Make sure it cools completely before storing. This helps prevent moisture buildup.
Freezing Instructions for Long-Term Storage
Freezing is a great way to save leftover zucchini bread. First, slice the bread before freezing. Wrap each slice in plastic wrap. Then, place the wrapped slices in a freezer bag. Remove as much air as possible before sealing. It can last for up to three months in the freezer. When you want a slice, just thaw it in the fridge overnight.
Reheating Tips to Maintain Freshness
To reheat, preheat your oven to 350°F (175°C). Place the slices on a baking sheet lined with parchment paper. Heat for about 10 minutes until warm. You can also use a microwave. Heat each slice for about 15-20 seconds. Enjoy your moist zucchini bread just like the first day!
FAQs
Can I use yellow squash instead of zucchini?
Yes, you can use yellow squash. It has a similar texture. However, the flavor will change slightly. Yellow squash may taste a bit sweeter and milder. This can add a unique twist to your zucchini bread.
How can I make this recipe vegan?
To make this zucchini bread vegan, swap the eggs for flax eggs. Mix one tablespoon of ground flaxseed with three tablespoons of water. Let it sit for five minutes to thicken. You can also use unsweetened applesauce instead of eggs. Use 1/4 cup for each egg. Both options work well in this recipe.
What is the best way to drain grated zucchini?
To drain grated zucchini, use a clean kitchen towel or cheesecloth. Place the grated zucchini in the middle of the towel. Gather the sides and twist to squeeze out excess moisture. You can also press it in a fine mesh strainer. Draining well helps avoid soggy bread.
- How to avoid a soggy zucchini bread:
- Use properly drained zucchini.
- Don’t overmix the batter; this keeps it light.
- Ensure your oven is at the right temperature before baking.
- Bake until a toothpick comes out clean.
Following these tips will lead you to a perfect, moist loaf that everyone will enjoy.
This blog post covers all you need for perfect one bowl zucchini bread. We explored essential and optional ingredients, along with measurements. I shared step-by-step instructions for mixing and baking. The tips ensure your bread stays moist and free from common mistakes.
Variations, like gluten-free options and adding fruits or nuts, add fun twists. Finally, I outlined storage, freezing, and reheating tips for enjoying your bread later. Now, you have everything to bake a delightful treat! Enjoy your baking journey with zucchini bread.

![To make a delicious Vegan Lentil Shepherd's Pie, you will need: - 1 cup green or brown lentils, thoroughly rinsed - 3 cups vegetable broth - 1 medium onion, finely diced - 2 cloves garlic, minced - 2 medium carrots, diced into small cubes - 2 celery stalks, finely diced - 1 cup peas (fresh or frozen) - 2 tablespoons tomato paste - 1 tablespoon soy sauce or tamari - 1 teaspoon dried thyme - 1 teaspoon dried rosemary - Salt and freshly cracked pepper to taste - 4 large potatoes, peeled and chopped into chunks - 1/4 cup unsweetened plant-based milk (such as almond or soy) - 2 tablespoons vegan butter or olive oil You can enhance your shepherd's pie with these optional ingredients: - 1 teaspoon smoked paprika for a hint of smokiness - 1 tablespoon nutritional yeast for a cheesy flavor - 1 cup mushrooms, diced, for a hearty texture - A splash of red wine for depth of flavor This recipe serves 4-6 and is a healthy choice. Each serving has: - Approximately 300 calories - 14 grams of protein - 10 grams of fiber - Low in saturated fat - Rich in vitamins A and C from the veggies When you make this Vegan Lentil Shepherd’s Pie, you enjoy a meal that is tasty, filling, and good for you. For the complete cooking details, check out the Full Recipe. To cook the lentils, start by rinsing 1 cup of green or brown lentils. Next, place them in a medium pot with 3 cups of vegetable broth. Bring this mix to a boil, then reduce the heat. Let it simmer for 20-25 minutes. You want the lentils to be tender but not mushy. Drain any leftover liquid and put the lentils aside. In a large skillet, heat a drizzle of olive oil over medium heat. Add 1 diced onion and sauté for about 5 minutes until soft. Then, include 2 minced garlic cloves, 2 diced carrots, and 2 diced celery stalks. Cook this mix for another 5-7 minutes until all the veggies are tender. Now, stir in the cooked lentils, 1 cup of peas, 2 tablespoons of tomato paste, and 1 tablespoon of soy sauce. Add 1 teaspoon of dried thyme, 1 teaspoon of dried rosemary, and some salt and pepper. Let this simmer for about 5 minutes. While the lentil mix simmers, you can prepare the potatoes. Bring a large pot of salted water to a boil. Add 4 large, peeled, and chopped potatoes. Cook them until fork-tender, about 15-20 minutes. Drain the potatoes and return them to the pot. Mash them using a potato masher. Mix in 1/4 cup of plant-based milk and 2 tablespoons of vegan butter. Keep mashing until smooth and creamy. Adjust the seasoning with salt and pepper. Preheat your oven to 375°F (190°C). Grease a baking dish and spoon the lentil mixture into the bottom. Spread the creamy mashed potatoes over the top. Use a fork to create peaks for texture. Bake the pie for 25-30 minutes until the top is golden and crispy. This dish is now ready to enjoy! For the full recipe, check out the detailed instructions above. To make creamy mashed potatoes, start with hot potatoes. Use a potato masher or ricer for the best texture. Gradually add unsweetened plant-based milk and vegan butter for creaminess. Mix until smooth, but avoid over-mixing. A pinch of salt enhances the flavor. Use fresh ingredients for depth. Start by sautéing onions until soft. Add garlic, carrots, and celery for sweetness. Cook them until tender. Incorporate the lentils with herbs like thyme and rosemary. This step brings out the flavors. Don't forget to season with salt and pepper. Let it simmer briefly to blend all the tastes. Serve your Vegan Lentil Shepherd’s Pie hot. Pair it with a crisp green salad for balance. You can also add crusty bread for a hearty touch. For extra flair, sprinkle fresh parsley on top before serving. This adds color and freshness to your meal. Explore different side dishes like roasted vegetables or quinoa for variety. Enjoy your delightful and wholesome dinner! For the full recipe, check the [Full Recipe]. {{image_4}} You can make this lentil shepherd's pie gluten-free. Simply replace soy sauce with coconut aminos. This swap keeps the flavor but avoids gluten. Always check labels to ensure all ingredients are gluten-free. If you're avoiding lentils, try chickpeas or black beans as protein sources. For a nut-free version, skip the plant-based milk and use vegetable broth for mashing. You can also use cauliflower instead of potatoes for a low-carb twist. Incorporate seasonal vegetables to boost flavor and nutrition. Fresh spinach or zucchini works great in the filling. Mushrooms add a nice umami taste, too. Don't be afraid to mix it up based on what's in season. This keeps your dish fresh and exciting. For the full recipe, refer to the beginning of this article. To store your Vegan Lentil Shepherd's Pie, let it cool first. Once cooled, cover it tightly with plastic wrap or foil. You can also use an airtight container. Store it in the fridge for up to four days. This keeps the flavors intact and helps maintain the pie's texture. If you want to save some pie for later, freezing is a great option. Cut the pie into individual portions. Wrap each piece in plastic wrap and then in foil. This prevents freezer burn. Place the wrapped pieces in a freezer bag. You can freeze them for up to three months. When you are ready to enjoy, just thaw it in the fridge overnight. To reheat your shepherd's pie, use the oven for the best results. Preheat your oven to 350°F (175°C). Remove the pie from the fridge or freezer and unwrap it. Place it in a baking dish. Cover the dish with foil to keep it moist. Heat it for about 25-30 minutes if cold. If it’s frozen, it might take up to 45 minutes. Remove the foil for the last 5-10 minutes to crisp the top. Enjoy your delicious meal just like it was fresh! Yes, you can use canned lentils. Just drain and rinse them first. They cook faster. This saves time. For this recipe, use about 1.5 cups of canned lentils. You can serve it with a fresh salad or steamed vegetables. A side of crusty bread also works well. The pie is hearty, so keep sides light. It lasts for 3 to 5 days in the fridge. Store it in an airtight container. Reheat it in the oven or microwave. Yes, you can prepare it a day in advance. Assemble the pie, then cover it and chill. Bake it just before serving for the best taste. Check out the Full Recipe for more details! This blog post covered how to make a tasty vegan lentil shepherd's pie. We explored essential and optional ingredients, plus nutritional info. I provided clear, step-by-step cooking methods. You learned tips for creamy mashed potatoes and flavorful lentils. We noted variations for different diets and the best ways to store leftovers. In closing, I hope you enjoy making this dish! It’s a great meal for everyone.](https://dishtreats.com/wp-content/uploads/2025/06/9ba9e126-74d7-4f69-86a8-52952e7f4e77-768x768.webp)


![- 8 oz spaghetti or fettuccine pasta - 2 boneless, skinless chicken breasts - 1 cup basil pesto (homemade or store-bought) - 1/2 cup heavy cream - 1/4 cup cherry tomatoes, halved - 1/4 cup freshly grated Parmesan cheese - Fresh basil leaves for garnish - Salt and freshly ground black pepper, to taste - 2 tablespoons extra virgin olive oil Gather these ingredients before you start cooking. The pasta and chicken form the base of your dish. The creamy pesto sauce adds rich flavor. The cherry tomatoes bring a burst of freshness. The Parmesan cheese tops it off with a salty kick. Fresh basil leaves make it look gorgeous. Using fresh ingredients makes a big difference. If you have the time, try making your own pesto. It’s simple and tastes amazing. You can adjust the flavors to your liking. You can also swap the pasta type if you want. Just keep in mind that different shapes may change how the sauce clings to the pasta. For the chicken, you want it juicy and tender. The seasoning is key here. Use good quality olive oil, salt, and pepper. This will help keep the flavor bright and fresh. Once you have everything, you’ll be ready to make a delicious meal. If you want the full recipe, check out the complete guide for step-by-step instructions. Start by boiling a large pot of water. Add a good amount of salt to the water. This will help flavor the pasta. Once the water is boiling, add your spaghetti or fettuccine. Cook it until it is al dente, which means it should be firm to the bite. This usually takes around 8-10 minutes. When done, drain the pasta. Make sure to save about 1/2 cup of the pasta water for later. While the pasta cooks, get ready to season the chicken. Sprinkle salt and pepper on both sides of the chicken breasts. Heat 2 tablespoons of olive oil in a large skillet over medium heat. When the oil is hot, add the chicken. Cook each side for about 6-7 minutes. You want the chicken to turn a nice golden brown. Check that the juices run clear when you cut into it. Once cooked, take the chicken out of the skillet and let it rest for a few minutes. Then, slice it into thin strips. In the same skillet, lower the heat to medium-low. Add your basil pesto to the pan and stir it. You want to warm it through but not burn it. After about a minute, slowly pour in 1/2 cup of heavy cream. Stir it all together until it is well mixed and heated, which should take about 2-3 minutes. Now, add the cooked pasta to the skillet with your creamy pesto sauce. Toss the pasta gently to make sure it gets coated evenly. If the sauce looks too thick, add a little of the reserved pasta water. This will help you reach your desired creamy consistency. To finish, fold in the halved cherry tomatoes and the sliced chicken. Stir everything together for another 2 minutes. This will warm the chicken and tomatoes through. Finally, sprinkle freshly grated Parmesan cheese on top. Toss it lightly to mix. For a bright touch, garnish with fresh basil leaves before serving. For a full recipe, check out the details above! You can use homemade or store-bought pesto for this dish. Homemade pesto gives you full control over flavors, but store-bought saves time. If you want a stronger basil taste, simply add more fresh basil leaves to your mix. For a milder flavor, blend in more nuts or cheese. This helps balance the taste to your liking. To keep your chicken juicy, avoid overcooking it. Cook chicken breasts in a hot skillet for 6-7 minutes on each side. The internal temperature should reach 165°F. Rest the chicken for a few minutes before slicing. This helps the juices stay inside. You can make your sauce thicker or lighter based on your taste. For a richer sauce, use more heavy cream. If you want a lighter option, try half-and-half or low-fat milk. Adding a splash of pasta water helps adjust the sauce's thickness too. This way, you can achieve the perfect creamy texture for your chicken pesto pasta. For the Full Recipe, check out the detailed instructions to create this delightful dish! {{image_4}} Adding vegetables to your Chicken Pesto Pasta makes it even better. It boosts flavor and nutrition. Seasonal veggies like spinach or bell peppers work great. Spinach adds a nice green color. Bell peppers give a sweet crunch. You can toss them in during the last few minutes of cooking. This way, they stay bright and fresh. If you need gluten-free pasta, you have choices! You can use rice pasta or chickpea pasta. These options taste great and cook well. Just follow the package instructions. Cooking times may differ, so keep an eye on them. You want your pasta to be tender but not mushy. Not in the mood for chicken? Try shrimp or tofu instead! Shrimp cooks fast and adds a nice twist. Just sauté them until they turn pink. Tofu is a fantastic plant-based option. Make sure to press it first to remove extra water. Adjust cooking times based on what you choose. This keeps your dish delicious and exciting. For the full recipe, check out the [Full Recipe]. Store any leftovers in the fridge. Use a tight-sealing container to keep your chicken pesto pasta fresh. Glass containers work well, as do plastic ones. Make sure to let it cool down before putting it away. It stays good in the fridge for up to three days. To freeze your chicken pesto pasta, pack it in an airtight container or freezer bag. Remove as much air as possible. This helps prevent freezer burn. You can freeze it for up to three months. Just label the bag with the date so you remember when you froze it. When reheating, use the microwave or stovetop. If using the microwave, heat in short bursts. Stir between each burst to ensure even warming. On the stovetop, add a splash of water or cream to keep it moist. This helps keep the creaminess intact. Enjoy your meal again as if it were fresh! To make chicken pesto pasta from scratch, follow these basic steps: 1. Cook the pasta. Boil water in a large pot, add salt, and cook your choice of spaghetti or fettuccine until al dente. 2. Prepare the chicken. Season boneless chicken breasts with salt and pepper. Sear them in olive oil until golden brown. 3. Make the sauce. In the same skillet, mix basil pesto with heavy cream until warm and creamy. 4. Combine. Toss the cooked pasta with the sauce and sliced chicken. Adjust the sauce with reserved pasta water if needed. 5. Serve. Garnish with cherry tomatoes, Parmesan cheese, and fresh basil. You can find the full recipe above for a detailed guide. Yes, you can make chicken pesto pasta ahead of time. Here are some tips: - Cooked pasta and sauce. Prepare the chicken and sauce, then store them separately from the pasta. This keeps them fresh. - Refrigerate. Store in airtight containers in the fridge for up to three days. - Freeze. For longer storage, freeze the chicken and sauce. Use within two months for best flavor. - Reheat. When ready, reheat the chicken and sauce. Cook the pasta fresh to keep it al dente. Chicken pesto pasta pairs well with various side dishes. Consider these suggestions: - Garlic bread. A warm, crispy slice complements the creamy pasta. - Salad. A light green salad with a tangy vinaigrette balances the richness of the dish. - Roasted vegetables. Seasonal veggies add color and nutrients to the meal. Chicken pesto pasta can be a healthy option. Here’s why: - Protein. Chicken provides lean protein, which is vital for muscle health. - Basil and olive oil. These ingredients are rich in antioxidants and healthy fats. - Pasta. Whole-grain pasta offers fiber, which aids digestion. - Portion control. Adjust the serving size to fit your dietary needs. Absolutely! You can use various pasta types. Here are some alternatives: - Whole wheat pasta. Adds extra fiber and nutrients. - Gluten-free pasta. Great for those with gluten sensitivities. - Zoodles. Spiralized zucchini for a low-carb option. - Penne or rigatoni. These shapes hold the sauce well, providing a satisfying bite. In this post, I covered how to make a delicious chicken pesto pasta. We discussed the main ingredients and their roles, along with simple steps for cooking. I also shared tips for perfecting your dish and exciting variations to try. In closing, this recipe is easy and flexible, letting you customize flavors. Whether you choose to add veggies or change proteins, your meal will impress. Enjoy this tasty dish and make it your own!](https://dishtreats.com/wp-content/uploads/2025/06/ae0d281d-adb6-406a-8a42-58bd8911a0b3-768x768.webp)
![To make Classic Sloppy Joes, you need some simple, fresh ingredients. Here’s what you will need: - 1 lb ground beef (or turkey) - 1 small onion, finely chopped - 1/2 green bell pepper, finely chopped - 2 cloves garlic, minced - 1 cup tomato sauce - 2 tablespoons ketchup - 1 tablespoon brown sugar - 1 tablespoon Worcestershire sauce - 1 teaspoon mustard - Salt and pepper to taste - 4 hamburger buns - 1 cup shredded cheddar cheese (optional) - Fresh parsley for garnish These ingredients come together to create a rich and tasty filling. The ground beef or turkey serves as a hearty base. The onion and bell pepper add a nice crunch and sweetness. Garlic gives it a punch of flavor. You can also adjust the recipe. If you want a lighter dish, use turkey. For a cheesy twist, add cheddar on top. Fresh parsley adds color and a hint of freshness. This Classic Sloppy Joes recipe is quick and easy. You can find the full recipe [Full Recipe]. Enjoy cooking! First, heat a large skillet over medium heat. This step is key to getting a nice sear. Once the skillet is hot, add 1 lb ground beef or turkey. Use a wooden spoon to break the meat apart as it cooks. This helps it brown evenly. Cook until the meat is browned throughout. Be sure to drain any excess fat from the pan. This keeps your Sloppy Joes from being greasy. Next, add 1 small finely chopped onion, 1/2 green bell pepper, and 2 cloves minced garlic to the skillet. Stir the mixture well. Cook for about 5 minutes or until the veggies soften and smell great. They add a nice flavor to your dish. Now it’s time to make the sauce. Stir in 1 cup tomato sauce, 2 tablespoons ketchup, 1 tablespoon brown sugar, 1 tablespoon Worcestershire sauce, and 1 teaspoon mustard. Mix everything well until the sauce blends with the meat and veggies. Bring the mixture to a gentle simmer. This step helps all the flavors meld together. Lower the heat to maintain a gentle simmer. Let the mixture cook for about 10 minutes, stirring occasionally. If it gets too thick, add a splash of water. This keeps it from becoming dry. Stirring helps prevent sticking and keeps the mixture smooth. Taste the mixture and season it with salt and pepper to your liking. This is your chance to adjust the flavors. While the sloppy joe filling simmers, toast 4 hamburger buns. You can use a hot skillet or toaster. Toast them until they are golden brown and slightly crisp. This adds a nice crunch to your meal. To serve, take a toasted bun and spoon the savory filling onto it. For a cheesy twist, add 1 cup shredded cheddar cheese on top. Finish with a sprinkle of chopped parsley for a pop of color and flavor. This makes your Sloppy Joes look and taste amazing. Enjoy this delightful dish with your family! For the full recipe, check the recipe section above. To enhance flavor, try adjusting the ketchup or brown sugar. If you like it sweeter, add more brown sugar. For a tangy kick, a splash of vinegar works wonders. The sauce should be rich but not too thick. If it gets too thick, add a little water or extra tomato sauce. This keeps it juicy and fun to eat. You can cook Sloppy Joes on the stovetop or in a slow cooker. The stovetop is quick and easy. Sauté the meat and veggies, then let it simmer. In a slow cooker, mix everything and let it cook for hours. This method deepens the flavor. You can also swap the meat. Ground turkey or chicken are great lighter options. For a twist, try lentils for a vegetarian dish. Sloppy Joes pair well with crispy fries or a fresh coleslaw. The crunch of the coleslaw balances the softness of the sandwich. For drinks, a cold soda or iced tea is perfect. You can also enjoy them with a light beer if you prefer. These pairings make your meal fun and complete. {{image_4}} You can spice up your Sloppy Joes with fun twists. For a veggie option, try lentils or black beans instead of meat. They give a hearty texture and soak up the sauce well. Another twist is BBQ Sloppy Joes. Just add your favorite BBQ sauce to the meat mixture for a sweet and tangy flavor. Toppings can make your Sloppy Joes even more amazing. You might want to add different types of cheese. Try provolone or pepper jack for a kick. You can also mix in various sauces. A drizzle of ranch or hot sauce adds a nice touch. Different places have their own takes on Sloppy Joes. In Mexico, they use spices and jalapeños for a spicy version. In the Philippines, they might add sweet sauce and serve it with rice. Exploring these options shows how versatile this dish can be. To keep your Sloppy Joes fresh, store them in an airtight container. Place the cooled mixture in the fridge. Make sure to separate any extra buns to avoid sogginess. You can keep the leftovers for up to three days. If you want to keep them longer, freezing is a great option. When you reheat Sloppy Joes, the stovetop is best. Place the mixture in a skillet over low heat. Stir often to keep it juicy. If using the microwave, cover it with a damp paper towel to keep moisture in. For buns, you can toast them lightly on a skillet or wrap them in foil and warm them in the oven. This way, they stay soft and tasty. To freeze the Sloppy Joe mixture, let it cool first. Then, transfer it to a freezer-safe bag. Remove as much air as possible before sealing. This helps prevent freezer burn. You can freeze it for up to three months. When ready to eat, thaw it in the fridge overnight. Reheat on the stove until hot. Enjoy your Sloppy Joes just like the first time! Making Classic Sloppy Joes is quick and easy. You need about 10 minutes for prep. Cooking takes another 15 minutes. In total, you can have dinner ready in just 25 minutes. Yes, you can use ground turkey as a lighter choice. Turkey has fewer calories and less fat than beef. The flavor will be milder, so you might want to adjust your spices. It’s a great way to make a healthier Sloppy Joe. Sloppy Joes pair well with many sides. Here are some tasty options: - French fries - Coleslaw - Potato chips - Corn on the cob - Salad These sides add nice crunch and freshness to your meal. You can definitely make Sloppy Joes ahead of time. Just cook the meat and sauce, then store it in the fridge. It will last for three days. When you’re ready to eat, heat it up and serve on toasted buns. This makes meal prep easy and saves time. For longer storage, you can freeze the mixture. Just thaw and reheat when ready. You’ll still enjoy great flavor! In this blog post, we covered how to make Classic Sloppy Joes. We explored the ingredients, cooking steps, and tips for flavoring. I also shared variations and storage methods. Sloppy Joes are simple to make, versatile, and fun to eat. Don't hesitate to explore your options by trying new ingredients or toppings. Enjoy your meal and share it with friends for a delicious time!](https://dishtreats.com/wp-content/uploads/2025/06/3a095a95-3efb-4397-8f70-4189d4d50cab-768x768.webp)