No-Bake Cheesecake Jars Creamy Dessert Delight
Looking for a dessert that’s easy, fun, and oh-so-delicious? You’ll love these No-Bake Cheesecake Jars! They are creamy, customizable, and perfect for any occasion. In this guide, I’ll show you how to make these delightful jars step-by-step, share tips and tricks for the best texture, and suggest tasty variations. Let’s dive in and create a dessert that everyone will adore!
Ingredients
Complete Ingredients List
To make no-bake cheesecake jars, gather the following ingredients:
- 1 cup graham cracker crumbs
- 1/2 cup unsalted butter, melted
- 2 cups cream cheese, softened
- 1 cup powdered sugar, sifted
- 1 teaspoon pure vanilla extract
- 1 cup heavy whipping cream
- Fresh berries for topping (strawberries, blueberries, or raspberries)
- Mint leaves for garnish (optional)
If you’re looking for dairy-free options, consider using dairy-free cream cheese and coconut cream instead of heavy cream. These swaps work well and keep the taste delicious.
Recommended Brands
When choosing ingredients, quality matters. Here are my top picks:
- Cream Cheese: Philadelphia and Kite Hill (dairy-free option).
- Heavy Cream: Land O’Lakes and Horizon Organic.
- Graham Crackers: Honey Maid and Annie’s are tasty choices.
These brands provide the best flavor and texture for your cheesecake jars. Using quality ingredients makes a big difference in your final dessert.
Step-by-Step Instructions
Preparation of Crust
To start, grab a medium mixing bowl. Combine 1 cup of graham cracker crumbs with 1/2 cup of melted butter. Stir until the crumbs feel like wet sand. This mix gives your crust a great flavor.
When you divide the crust mix into jars, aim for about 4 to 6 jars. Press down firmly with your fingers or a spoon. Make sure the crust is even and compact. This helps it hold together well.
Making the Cheesecake Filling
Next, take a new mixing bowl. Beat 2 cups of softened cream cheese with an electric mixer. Mix on medium speed for about 2-3 minutes until it’s smooth.
Now, slowly add 1 cup of sifted powdered sugar and 1 teaspoon of vanilla extract. Keep mixing on low until everything blends smoothly.
In another clean bowl, whip 1 cup of heavy cream. Use a handheld mixer or whisk until soft peaks form. This gives the filling a light, fluffy texture.
Gently fold the whipped cream into the cream cheese mix with a spatula. Be careful not to stir too hard. You want to keep that fluffiness. Mix until there are no streaks left.
Assembling the Jars
Now comes the fun part! Layer the cream cheese mixture over the crust in each jar. Fill them about three-quarters full. This leaves room for toppings.
After you fill the jars, cover them with lids or plastic wrap. Refrigerate for at least 4 hours, but overnight is best. The cheesecake sets and flavors blend well during this time.
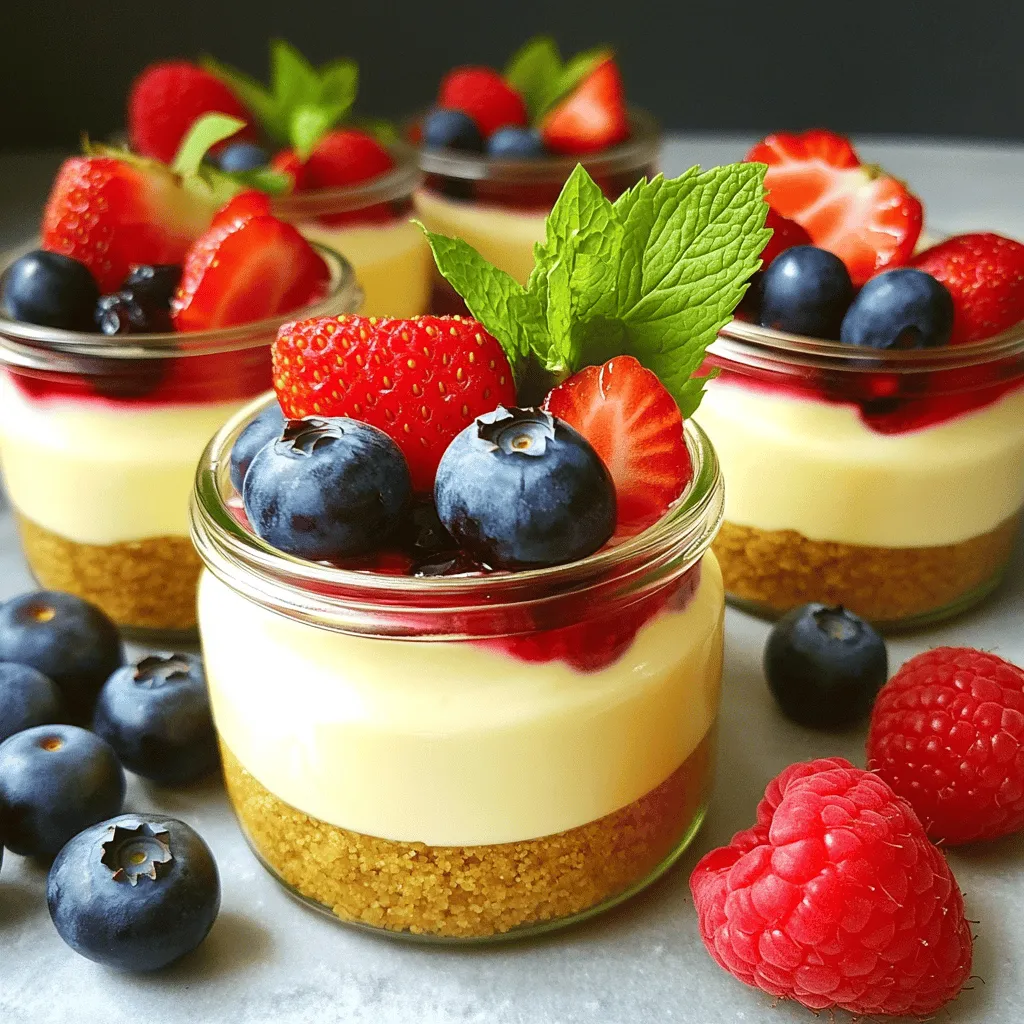
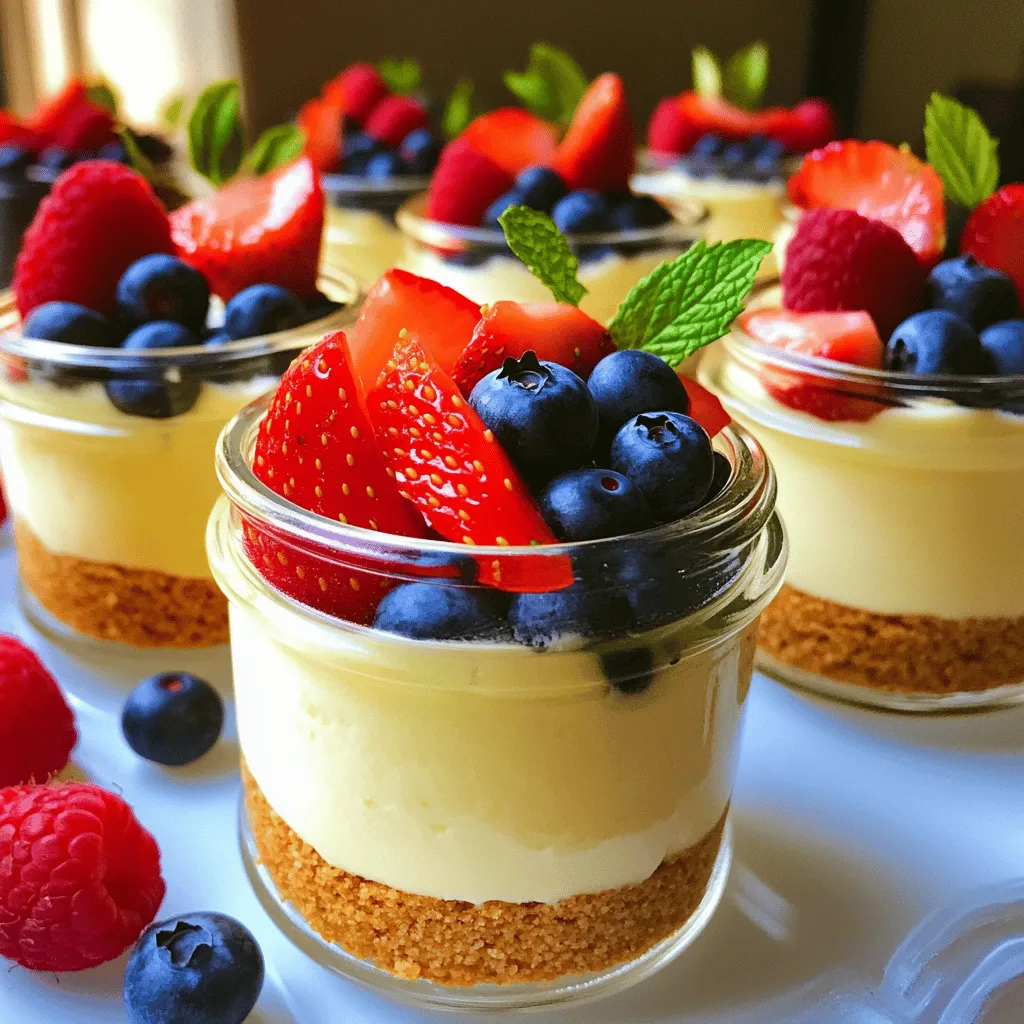
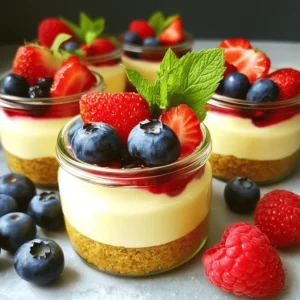
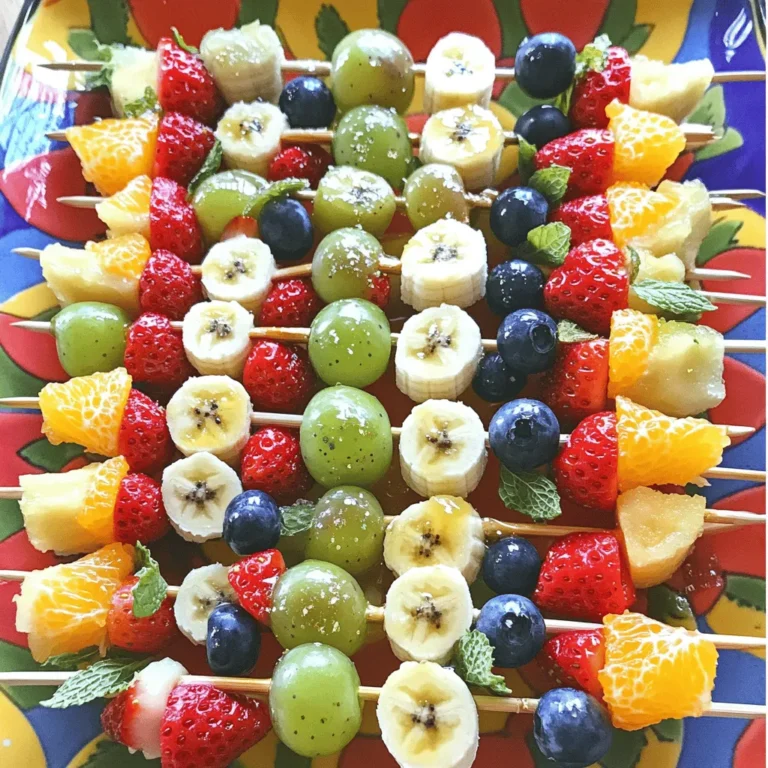
Before serving, add fresh berries on top. You can use strawberries, blueberries, or raspberries. A mint leaf on top adds a nice touch. Enjoy your no-bake cheesecake jars!
Tips & Tricks
Achieving the Best Texture
To get the best texture for your no-bake cheesecake jars, start with softening the cream cheese. Leave the cream cheese out at room temperature for about 30 minutes. This helps it blend smoothly. You can also cut it into smaller pieces to speed up the softening.
Whipping the cream properly is key. Use a clean bowl and beaters. Start at low speed and then increase to medium. Whip until you see soft peaks. This adds air and makes the cheesecake light and fluffy. Be gentle when folding the whipped cream into the cheese mixture. You want to keep that fluffy texture.
Serving Suggestions
Garnishing your cheesecake jars can make them pop. Fresh berries are a great choice. Strawberries, blueberries, and raspberries add color and flavor. You can also sprinkle crushed graham crackers on top for extra crunch.
Pair your cheesecake jars with drinks like coffee, tea, or sparkling water. A light herbal tea can balance the sweetness. If you want something richer, try serving with a dessert wine. These combinations enhance the tasting experience and make your dessert even more delightful.
Variations
Flavor Variations
You can make no-bake cheesecake jars in many flavors. Some popular choices are chocolate and lemon. For a chocolate version, add melted chocolate to the cream cheese mixture. Use about 4 ounces of melted chocolate for a rich taste. For a lemon flavor, mix in freshly squeezed lemon juice and zest. Use about 1/4 cup of juice and 1 tablespoon of zest. Adjust the sugar to balance the tartness.
Here are more flavor ideas:
- Strawberry: Blend fresh strawberries into the cream cheese mixture.
- Coffee: Add instant coffee granules to the cream for a coffee kick.
- Peanut Butter: Stir in creamy peanut butter for a nutty twist.
Dietary Modifications
If you need gluten-free options, use gluten-free graham crackers for the crust. You can also make a nut crust using almond flour or crushed nuts mixed with coconut oil.
For vegan options, replace cream cheese with a dairy-free cream cheese. You can find many brands at stores now. For the whipping cream, use coconut cream. Chill a can of coconut milk overnight, then scoop out the thick part to whip. This makes a creamy vegan dessert that everyone can enjoy.
Storage Info
Proper Storage Techniques
To store your no-bake cheesecake jars, simply cover them tightly. You can use lids or plastic wrap. These jars keep well in the fridge for up to five days. This way, you can enjoy them fresh throughout the week. Make sure to keep them in the coldest part of your fridge. This helps maintain their creamy texture and flavor.
Freezing Cheesecake Jars
You can freeze your cheesecake jars for later. First, make sure they are tightly sealed. Use freezer-safe lids or wrap them in plastic wrap. They can last up to three months in the freezer. When you’re ready to enjoy them, take them out and place them in the fridge. Let them thaw overnight. This keeps them creamy and delicious, just like when you first made them.
FAQs
How long do no-bake cheesecake jars last in the fridge?
No-bake cheesecake jars last up to five days in the fridge. To keep them fresh, cover each jar tightly with a lid or plastic wrap. It helps to keep air out and maintain flavor. If you notice any changes in smell or texture, it’s best to discard them.
Can I use different toppings?
Yes, you can use many toppings! Here are some fun ideas:
- Crushed cookies for a crunchy texture.
- Sliced bananas for a fruity twist.
- Chocolate sauce for a rich flavor.
- Caramel drizzle for sweetness.
- Toasted nuts for added crunch.
Feel free to mix and match your favorites!
What should I do if my cheesecake filling is too runny?
If your filling is too runny, it might need more cream cheese or whipped cream. Try these tips:
- Blend in a bit more softened cream cheese. This will thicken the mix.
- Ensure you whip the cream until soft peaks form. If it’s not whipped enough, it won’t add structure.
- Chill the jars longer. Sometimes, extra time in the fridge helps the filling firm up.Check out the No-Bake Cheesecake Jars Delight for detailed steps and tips!
You now have all the tools to make delicious no-bake cheesecake jars. We covered the complete ingredient list and helpful substitutions. You learned step-by-step instructions for the crust, filling, and assembly. Plus, we explored tips for texture and variations to fit dietary needs. Remember to store them properly so you can enjoy them later. With this knowledge, you can impress your friends and family. Enjoy your tasty creations and keep experimenting with flavors!

![- 1 package (15.35 oz) Oreo cookies - 8 oz cream cheese, softened to room temperature - 1 cup semisweet chocolate chips - 1 tablespoon coconut oil (optional, for smoother melting) - Sprinkles or crushed Oreos for decoration I love using classic Oreo cookies for this recipe. They add rich flavor and crunch. The cream cheese makes the truffles creamy and smooth. When mixed with crushed Oreos, it creates a perfect dough. Next, I melt semisweet chocolate chips for coating. This chocolate is rich and adds sweetness. If you want a smoother coat, add coconut oil. It helps the chocolate melt better. Finally, I enjoy decorating the truffles. You can use colorful sprinkles or crushed Oreos. This adds a fun look and extra flavor. You can find the complete recipe [Full Recipe]. - Using flavored cream cheese (e.g., vanilla or chocolate) - Alternative chocolate types (dark chocolate, white chocolate) - Various toppings (nuts, colorful candy sprinkles) Feel free to get creative with your ingredients. Flavored cream cheese can add a twist. Imagine using chocolate cream cheese for an even richer taste. You can also play with chocolate types. Dark chocolate gives a bold flavor. White chocolate adds sweetness and a nice contrast. For toppings, you can use nuts or different sprinkles. This makes your truffles unique and fun! To start, you need to crush the Oreos. You can use a food processor for this task. Just place the cookies in and pulse until they are fine crumbs. If you want a more hands-on method, put the Oreos in a zip-lock bag. Then, use a rolling pin to crush them until they are finely broken. Either way works great! Next, mix the crushed Oreos with cream cheese. In a large bowl, add the Oreo crumbs to softened cream cheese. Use a spatula or your hands to mix it well. You want it to be uniform and dough-like. This will be the base of your truffles. Now, let’s shape the truffles. Take a tablespoon-sized portion of the Oreo mixture. Roll it into a smooth ball with your hands. Place each ball on a baking sheet lined with parchment paper. This makes it easy to lift them later. After shaping, it's time to chill them. Put the baking sheet with the truffles in the refrigerator for about 30 minutes. This step helps the truffles firm up, making them easier to dip in chocolate later. Next, let's melt the chocolate. In a microwave-safe bowl, combine semisweet chocolate chips with coconut oil if you want a smoother mix. Heat the mixture in the microwave in 30-second intervals. Stir between each interval until the chocolate is fully melted and smooth. After the chocolate is ready, it's time to dip the truffles. Take each chilled truffle and use a fork to dip it into the melted chocolate. Make sure it is fully coated. Then, gently tap the fork against the bowl to remove any extra chocolate. While the chocolate coating is still wet, you can decorate the truffles. Add some crushed Oreos or colorful sprinkles on top. This makes your truffles look festive and fun. Get creative! You can also use different toppings for special occasions. For more detailed steps, check out the Full Recipe. To make your chocolate smooth, add a tablespoon of coconut oil when melting. This small addition keeps the chocolate creamy and easy to dip. Mixing the crushed Oreos with cream cheese is key. Make sure to blend them well, so you get a nice, even dough. You want every bite to be rich and flavorful. Yes, you can prepare these truffles in advance. This makes them a great treat for parties. Once you form the truffles, chill them for about 30 minutes. After that, store them in the fridge or freezer. If you freeze them, let them sit out for a few minutes before serving. This helps bring back that perfect texture. When serving your truffles, presentation counts. Arrange them on a stylish platter or in a decorative box. You can also use colorful cupcake liners for a fun touch. Pair these treats with beverages like coffee or a glass of cold milk. The flavors blend nicely and make each bite even more enjoyable. For more ideas, check out the Full Recipe. {{image_4}} You can easily change the flavor of your truffles. Adding flavor extracts gives a nice twist. A drop of mint, vanilla, or almond extract can boost the taste. You can also try different Oreo flavors. Peanut butter or red velvet Oreos add a fun spin. Each flavor brings a new experience to your truffles. If you need gluten-free treats, use gluten-free Oreos. They work just like regular Oreos. For vegan options, switch to dairy-free cream cheese and chocolate. This way, everyone can enjoy these tasty treats without worry. Decorating can make your truffles stand out. Use white chocolate or colored melts for a fun look. You can also create themed truffles for holidays. Think about red and green for Christmas or pastel colors for Easter. The right decorations can make your truffles fit any occasion. To keep your chocolate covered Oreo truffles fresh, store them in the fridge. Place them in an airtight container. This helps to prevent them from drying out. If you plan to eat them soon, this method is best. For longer storage, you can freeze the truffles. First, place them in a single layer on a baking sheet. Freeze them for about one hour until they are firm. Then, transfer them to a freezer-safe bag or container. This will help them last longer without losing flavor. In the fridge, these truffles can last about one week. They taste best within the first few days. In the freezer, they can last up to three months. The flavor and texture stay good if stored properly. Always label your containers with the date to track how long they have been stored. To keep your truffles fresh, use airtight containers. This stops moisture from getting in. Moisture can make the chocolate lose its nice shine and texture. If you freeze your truffles, let them thaw in the fridge. This helps them regain their creamy texture. Avoid thawing them at room temperature, which can make them too soft. Once they are thawed, enjoy them cold or let them sit out for a few minutes for a softer bite. For the full recipe, check the previous section. Yes, you can use low-fat cream cheese. However, it may change the flavor and texture. Low-fat cream cheese can make truffles less rich and creamy. The truffles might be a bit drier too. For the best taste, I recommend using regular cream cheese. These truffles take about 30 minutes to set in the fridge. This chilling time helps the truffles hold their shape. After you dip them in chocolate, place them back on the baking sheet. Leave them in the fridge until the chocolate hardens. You can use store-bought truffles, but homemade ones are better. Homemade truffles taste fresher and let you pick flavors. You can customize them to your liking. Plus, making them yourself is a fun activity! You can use many cookies for truffles. Some great options include: - Chocolate chip cookies - Peanut butter cookies - Vanilla wafers - Graham crackers Feel free to mix and match flavors! This allows for fun and unique treats. For the full recipe, check out the details above. You can make delicious chocolate-covered Oreo truffles at home. This blog showed you the key ingredients and easy steps needed to prepare, shape, dip, and decorate them. Remember, the fun lies in customizing flavors and toppings to your taste. Use the tips provided for great texture and storage. These bites are perfect for parties or a sweet treat at home. Enjoy making these truffles, and delight in sharing them with friends and family!](https://dishtreats.com/wp-content/uploads/2025/07/b12a751c-54f3-4358-8f8e-2195b80955c3-768x768.webp)
![- 1 can (15 oz) of chickpeas - 2 tablespoons extra virgin olive oil - Spice seasoning options: smoked paprika, garlic powder, ground cumin Crispy air fryer chickpeas need just a few simple ingredients. First, grab a can of chickpeas. They provide protein and fiber. Next, use extra virgin olive oil for richness. This oil helps the spices stick and adds flavor. For seasoning, I love smoked paprika, garlic powder, and ground cumin. These spices add depth and warmth to the dish. - Chopped fresh parsley or cilantro for garnishing - Alternative spices for flavor enhancement You can add fresh herbs like parsley or cilantro to make it pop. They add a burst of color and freshness. Feel free to play with spices. Try cayenne for heat or even cinnamon for a sweet twist. The options are endless! If you want to see the full recipe, check it out [Full Recipe]. - Preheat air fryer to 400°F (200°C). - Rinse and dry chickpeas thoroughly. Start by preheating your air fryer. Set it to 400°F (200°C) and let it heat for about five minutes. While it warms up, rinse the chickpeas well. It’s key to remove all the canning liquid. After rinsing, spread the chickpeas on a kitchen towel. Pat them dry gently. This step helps them get that perfect crisp. - Mix chickpeas with olive oil and spices. - Transfer to air fryer basket. In a large bowl, add the dried chickpeas. Pour in two tablespoons of olive oil. Sprinkle in smoked paprika, garlic powder, ground cumin, sea salt, and black pepper. Mix well so every chickpea gets coated. Next, transfer the seasoned chickpeas to the air fryer basket. Make sure they are in a single layer. Crowding the basket can lead to uneven cooking. - Set cooking time for 15–20 minutes. - Shake basket every 7 minutes for even cooking. Set the timer for 15 to 20 minutes. It’s important to shake the basket every seven minutes. This ensures all sides get crispy. Look for a nice golden-brown color and a satisfying crunch. When they’re done, let them cool for a few minutes. They will crisp up even more as they cool. If you like, garnish with chopped parsley or cilantro for a fresh touch before serving. To get the best crunch, drying chickpeas is key. Start by rinsing them well. Then, spread them on a clean kitchen towel and gently pat them dry. This step removes excess moisture, which helps them crisp up nicely in the air fryer. Next, set your air fryer to 400°F (200°C). Preheat it for about 5 minutes. This heat is crucial for achieving that perfect texture. When you place the chickpeas in the basket, make sure they are in a single layer. Overcrowding can lead to soggy chickpeas. Crispy chickpeas pair well with many dips. Hummus and tzatziki are two of my favorites. They add creaminess that balances the crunch. You can also toss them into salads for an extra crunch or use them to top soups. If you want to get creative, try using crispy chickpeas as a snack on their own. They make a great addition to trail mixes or can be sprinkled on popcorn for a fun twist. Chickpeas are not just tasty; they're nutritious too. They are high in protein and fiber. This makes them a filling snack that can help you feel satisfied. Air frying reduces the amount of oil needed, so you get a low-calorie snack option without sacrificing flavor. These crispy chickpeas are a great way to enjoy a healthy snack without the guilt. You can feel good about munching on them anytime! For the full recipe, check the section above. {{image_4}} You can change the flavor of your crispy air fryer chickpeas. One fun option is to add spice. Try cayenne or chili powder for a spicy kick. Just mix in a little with your other spices before cooking. If you prefer sweet snacks, go for cinnamon and sugar. This will give your chickpeas a unique twist that's fun and tasty. These chickpeas are healthy and fit many diets. They are naturally gluten-free and vegan-friendly. This means everyone can enjoy them! For those watching their salt intake, you can lower the sodium. Simply reduce or skip the sea salt in the recipe for a low-sodium version. If you're hosting a party, you might want more chickpeas. To increase the batch size, just double or triple the ingredients. The cooking time may stay the same, but keep an eye on them. You can also swap chickpeas for other legumes like black beans or lentils. They will work well in the air fryer and offer different flavors. Each option can give you a fun new snack! Check out the [Full Recipe](#) for detailed steps on making these crispy delights! To store your crispy chickpeas, use an airtight container. This will help them stay crunchy. A glass jar or a plastic container with a tight lid works well. Make sure to let them cool completely before sealing. This step prevents moisture buildup. You can easily reheat chickpeas in an air fryer. Set it to 350°F (175°C) and heat for about 5 minutes. This method keeps them crispy. If you prefer the oven, place them on a baking sheet at the same temperature. Check often to avoid sogginess. Crispy chickpeas last for about 3 days at room temperature. If you store them in the fridge, they may last a bit longer, but they can lose some crispiness. For best results, enjoy them fresh! To make air fryer chickpeas crispy, first dry them well. After rinsing, spread them on a clean towel and pat them dry. Removing moisture is key for that perfect crunch. Next, toss the chickpeas with olive oil and spices. The oil helps them crisp up in the air fryer. Set your air fryer to 400°F (200°C). Cook them for 15 to 20 minutes, shaking the basket every 7 minutes. This ensures even cooking and a nice, golden-brown color. Keep an ear out for a satisfying crunch as they cook. Let them cool for a few minutes after frying. They will get even crunchier as they cool. Yes, you can use dried chickpeas, but they require more prep. Start by soaking the dried chickpeas overnight. This softens them and reduces cooking time. After soaking, rinse and boil them until tender, about 1 to 2 hours. Once cooked, follow the same steps to dry and season them. Air frying time may be longer, as dried chickpeas need to lose more moisture. Pay close attention to their texture for that perfect crunch. Crispy chickpeas pair well with many dips. Try hummus for a classic touch. Tzatziki offers a cool contrast. You can also serve them with guacamole for a creamy twist. For a spicy kick, mix them with a sriracha mayo. These dips enhance the flavors of the chickpeas. They make for a fun and tasty snack or appetizer. Enjoy exploring different combinations to find your favorite! For the full recipe, check out the [Full Recipe]. Crispy air fryer chickpeas are easy and fun to make. We covered the main ingredients, like chickpeas and olive oil, and talked about spices for extra flavor. You learned preparation steps, tips for crispiness, and fun ways to enjoy this snack. Try different spices or dips to keep it exciting. Crispy chickpeas are a tasty, healthy option for any event. Enjoy your cooking and happy snacking!](https://dishtreats.com/wp-content/uploads/2025/07/61bc6060-fad3-40a7-be2f-ccc6788a1d37-768x768.webp)