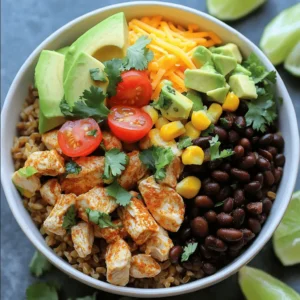
Easy Chicken Burrito Bowls Quick and Tasty Meal
Looking for a quick and tasty meal? These Easy Chicken Burrito Bowls have you covered! With tender chicken, hearty rice, and fresh toppings, you’ll whip up a satisfying dish in no time. Perfect for busy weeknights or meal prep, these bowls are as simple as they are delicious. Get ready to impress your family with a meal that’s both fun to make and eat.
Ingredients
Main Ingredients
To make my easy chicken burrito bowls, gather these key ingredients:
- Chicken and Rice:
- 1 lb boneless, skinless chicken breasts, diced into bite-sized pieces
- 2 cups cooked brown rice
- Seasoning:
- 1 tablespoon extra virgin olive oil
- 1 teaspoon ground cumin
- 1 teaspoon chili powder
- 1 teaspoon garlic powder
- Sea salt and freshly cracked black pepper to taste
- Toppings:
- 1 cup black beans, drained and thoroughly rinsed
- 1 cup corn (freshly shucked or frozen)
- 1 medium ripe tomato, diced
- 1 ripe avocado, sliced into thin wedges
- 1/2 cup shredded cheese (cheddar or a tasty taco blend)
- 1/4 cup fresh cilantro, finely chopped
- 1 lime, cut into wedges for garnish
These ingredients come together to create a flavorful meal. Each bite bursts with taste and texture. You will appreciate how simple it is to prepare this dish.Enjoy cooking!
Step-by-Step Instructions
Preparing the Chicken
To start, heat 1 tablespoon of olive oil in a large skillet over medium heat. Once the oil shimmers, add 1 pound of diced chicken breasts. Sprinkle in 1 teaspoon each of ground cumin, chili powder, and garlic powder. Season with sea salt and cracked black pepper to taste. Sauté the chicken for about 6 to 8 minutes. Stir occasionally to ensure even cooking. Look for the chicken to be golden brown and cooked through.
Cooking the Rice
If you have not cooked your rice yet, follow the package directions for 2 cups of brown rice. Bring water to a boil, add the rice, and reduce the heat to low. Cover and let it simmer until tender. Once the rice is done, fluff it with a fork for a light, airy texture.
Combining Ingredients
When your chicken is fully cooked, lower the heat. Carefully stir in 1 cup of drained black beans and 1 cup of corn. Mix well and heat everything through for 2 to 3 more minutes. This step adds great flavor and texture to your chicken mix.
Assembling the Burrito Bowls
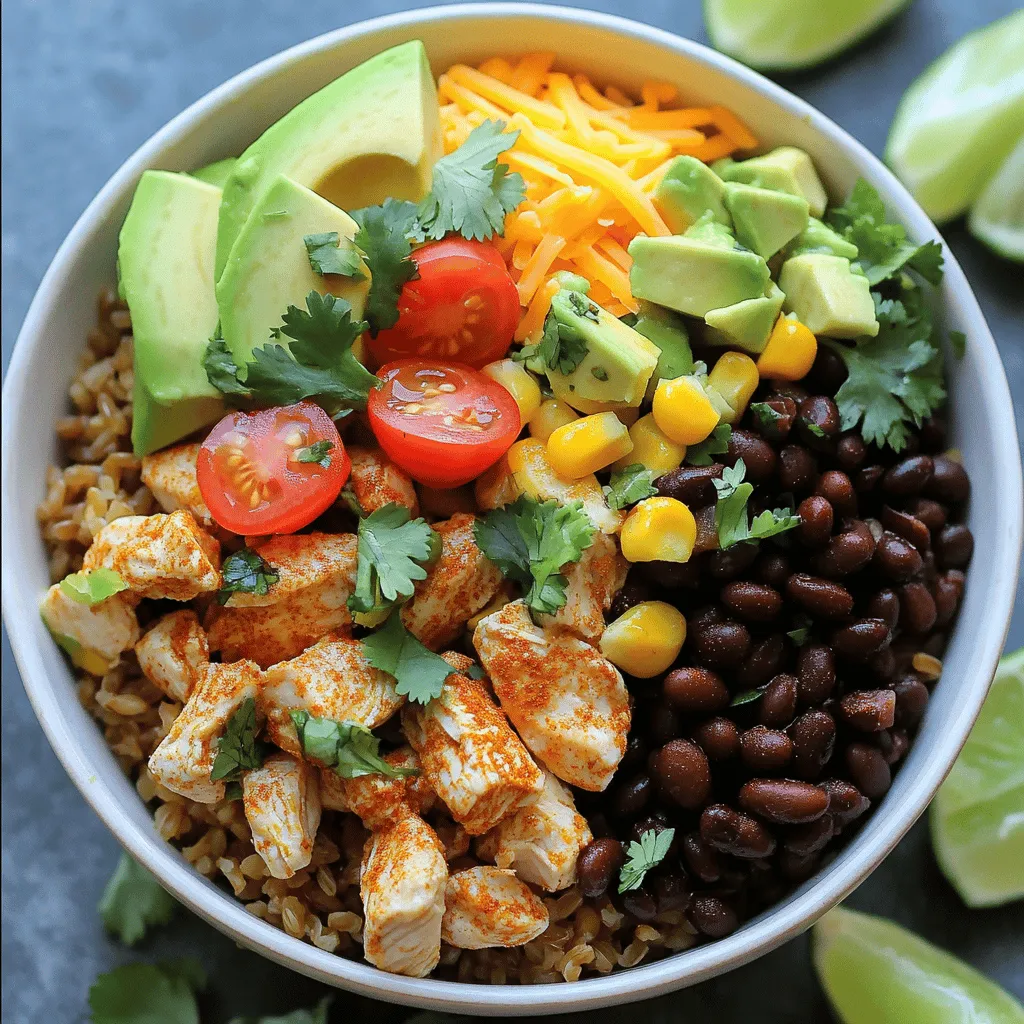
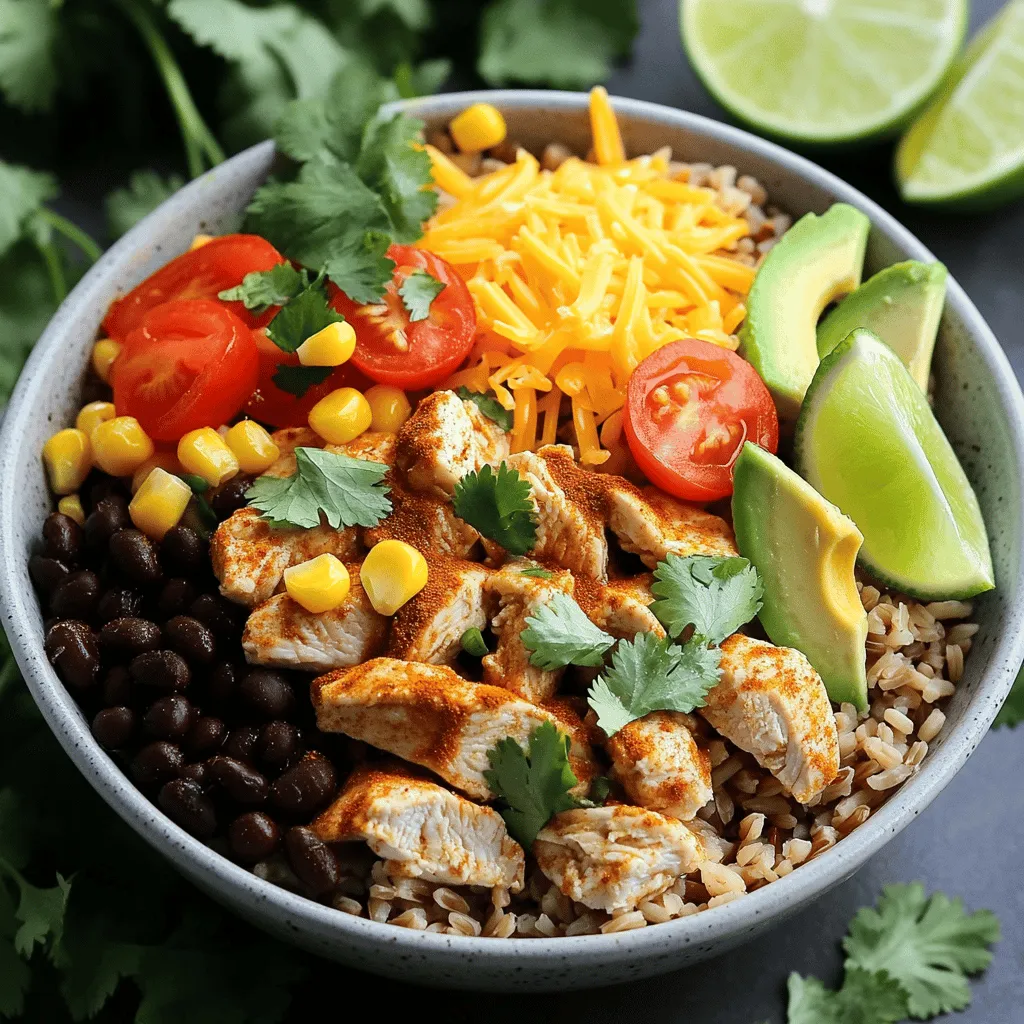
Now comes the fun part! Start by placing a generous amount of brown rice at the bottom of each bowl. Next, spoon the chicken mixture over the rice. Top it off with 1 medium diced tomato and slices from 1 ripe avocado. Finish your burrito bowls with a sprinkle of 1/2 cup of shredded cheese and 1/4 cup of finely chopped cilantro. Don’t forget to serve lime wedges on the side; they add a refreshing zing when squeezed over the top. Enjoy your Easy Chicken Burrito Bowls!
Tips & Tricks
Cooking Tips
- Perfectly Cooked Chicken: To make sure your chicken is tasty and juicy, start with fresh, high-quality chicken breasts. Cut them into small pieces for even cooking. Season them well with spices like cumin, chili powder, and garlic powder. Use medium heat when you sauté them. This way, they cook through but do not dry out. Stir them often to cook evenly. When they turn golden brown, they are ready.
- Rice Tips: For fluffy rice, cook it according to the package instructions. After it’s done, fluff it with a fork to separate the grains. Keep the rice warm by covering it with a lid or a clean towel. This keeps it moist until you’re ready to serve.
Presentation Tips
- Serving Suggestions: When you arrange the bowls, start with a layer of warm rice. Then, add the chicken mixture on top. For a fun look, sprinkle the toppings evenly. Use clear bowls to show off all the colorful layers. This makes the meal more inviting.
- Garnishing Ideas: Fresh garnishes make a big difference. Add lime wedges on the side for a zesty kick. Chop fresh cilantro and sprinkle it over the top for a pop of green. These small touches make your burrito bowls not just tasty, but also beautiful.
Variations
Ingredient Swaps
You can easily switch up the protein in your chicken burrito bowls. If you want a different taste, try using:
- Beef
- Shrimp
- Tofu
These swaps add variety and keep things exciting. Each option brings its own unique flavor.
For the rice, you can also make some changes. Instead of brown rice, consider these options:
- Quinoa
- Cauliflower rice
- White rice
Each type of rice offers a new texture and flavor. Quinoa adds protein, while cauliflower rice is low-carb.
Flavor Enhancements
Want to spice things up? Add some heat to your bowls! Here are a few ideas:
- Jalapeños
- Hot sauce
These ingredients can bring a kick to your meal. Just add them to your chicken or mix them in with the rice.
You can also get creative with toppings. Here are some fun ideas:
- Sour cream
- Grilled vegetables
These extras can add creamy texture or a smoky flavor. Feel free to mix and match to find your perfect combination.Enjoy your cooking adventure!
Storage Info
Storage Instructions
- Refrigeration: Place leftover burrito bowls in airtight containers. Store them in the fridge for up to three days. To keep the flavors fresh, separate the toppings. This helps prevent sogginess.
- Freezing Tips: To freeze, store the chicken mixture and rice in separate containers. You can freeze them for up to three months. When ready to eat, thaw them in the fridge overnight. This keeps the meal fresh and tasty.
Reheating Guidelines
- Best Methods: To reheat in the microwave, place the bowl in for 1-2 minutes. Stir halfway through to heat evenly. For stovetop reheating, use a skillet over medium heat. Add a splash of water to keep it moist. Heat until warmed through. Enjoy your easy chicken burrito bowls hot!
FAQs
How to make chicken burrito bowls quick and easy?
To make chicken burrito bowls fast, I suggest a few tips. First, cook the brown rice ahead of time. You can make it in a rice cooker or on the stovetop. It saves you time when you’re ready to assemble.
Use pre-diced chicken or rotisserie chicken for quick prep. This way, you skip the chopping and cooking time. Also, grab canned black beans and corn. They are quick to rinse and mix in.
Chop your veggies while the rice cooks. This lets you multitask and speeds up the process.
Can I make burrito bowls in advance?
Yes, you can prep burrito bowls in advance! I often do this for busy days. Start by cooking the rice, chicken, and beans. Let them cool before storing.
Chop your fresh toppings the day before. Keep them in airtight containers in the fridge. This keeps them fresh and ready to use. Just assemble your bowls when you’re ready to eat.
What to serve with chicken burrito bowls?
Burrito bowls pair well with many sides. I love serving them with crispy tortilla chips for crunch. You could also add fresh salsa for a kick of flavor.
A simple side salad with lime dressing complements the bowls nicely. It adds freshness and balance. You can even serve guacamole on the side.
This blog post provided a simple guide for making chicken burrito bowls. We covered ingredients, cooking steps, tips, and variations. Cooking flavorful chicken and rice is easy if you follow the steps. Don’t forget to mix in tasty toppings and consider different protein or rice options. Store leftovers properly for quick meals later. With these tips, you can enjoy tasty burrito bowls any day. Embrace your creativity and have fun with your meals!