Chocolate Peanut Butter Mug Cake Quick and Easy Snack

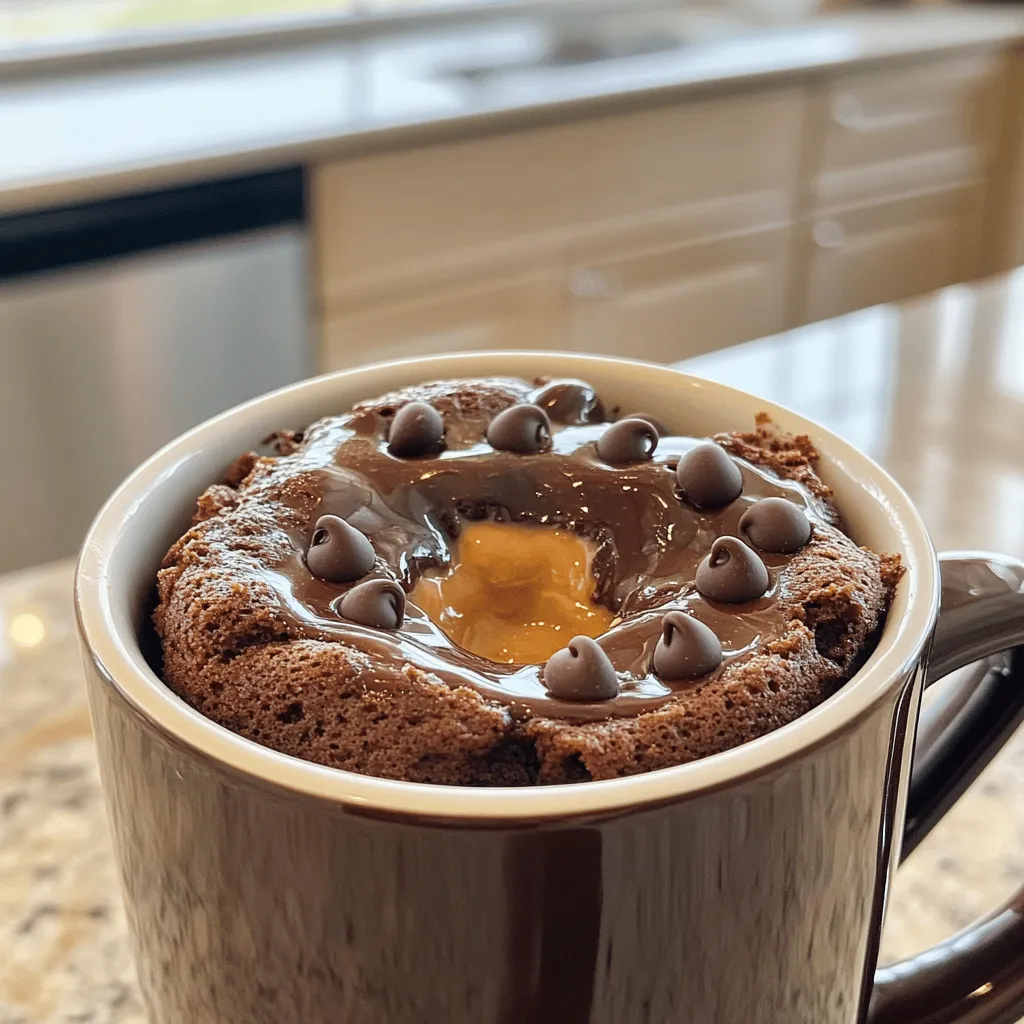
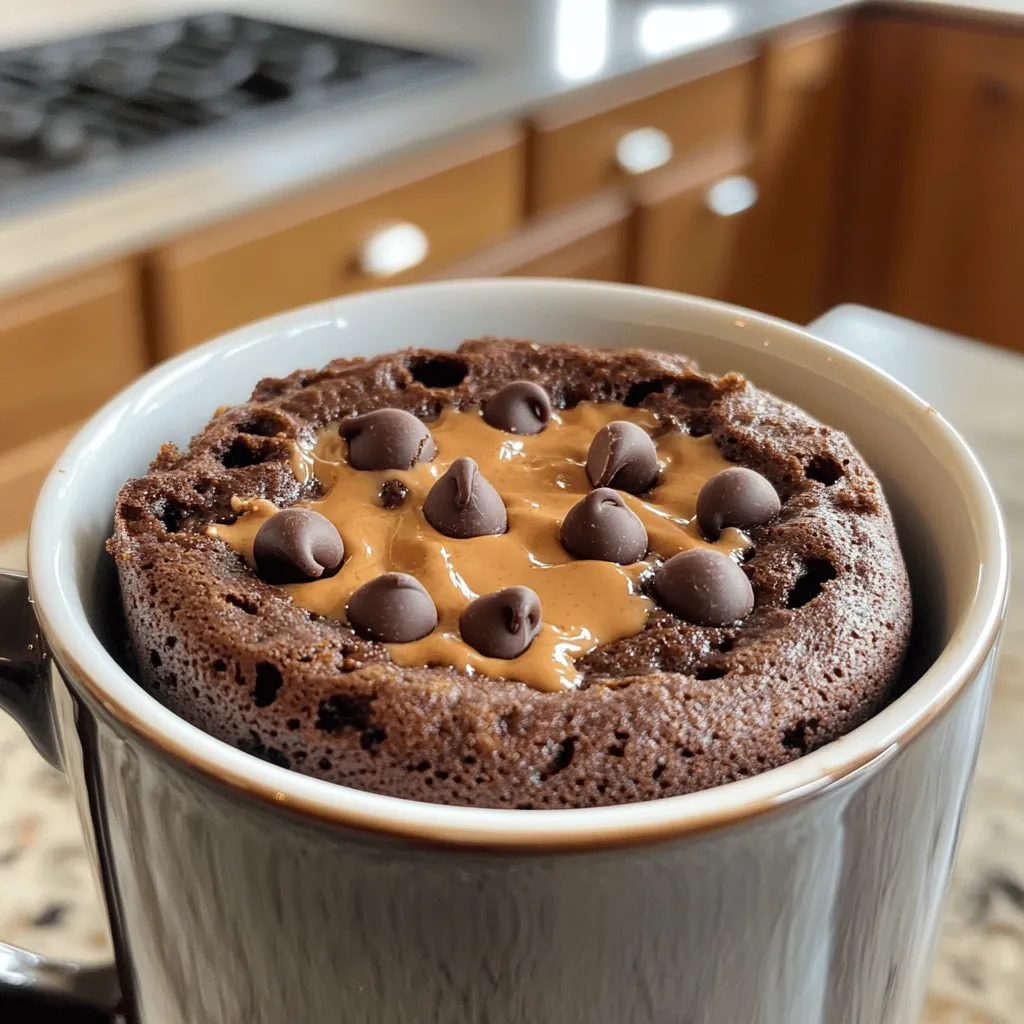
Want an easy and delicious snack? This Chocolate Peanut Butter Mug Cake is your answer! In just minutes, you can whip up a soft, warm treat bursting with rich flavors. Perfect for late-night cravings or a quick dessert, it’s made with simple ingredients you likely have on hand. Ready to indulge in this quick delight? Let me guide you through the easy steps to make your very own cake in a mug!
Ingredients
Detailed Ingredient List
- 4 tablespoons all-purpose flour
- 2 tablespoons unsweetened cocoa powder
- 3 tablespoons granulated sugar
- 1/8 teaspoon baking powder
- Pinch of salt
- 3 tablespoons milk (or non-dairy alternative)
- 2 tablespoons vegetable oil (or melted coconut oil)
- 1 tablespoon creamy peanut butter
- 1 tablespoon chocolate chips (optional)
When I whip up this Chocolate Peanut Butter Mug Cake, I love how simple the ingredients are. All you need is a few pantry staples. The flour gives it structure, while cocoa powder adds rich flavor. Sugar sweetens the mix perfectly. Baking powder helps it rise in the microwave. A pinch of salt balances everything out.
Milk is key to making the batter creamy. You can use regular milk or any non-dairy milk you prefer. I often choose almond or oat milk. For fat, I use vegetable oil, but melted coconut oil can take it to the next level. It adds a slight coconut flavor that pairs so well with chocolate.
Peanut butter is the star! It creates that gooey center we all crave. I also like to add chocolate chips for an extra treat. They melt and make every bite taste even better.
Ingredient Substitutions
- Flour alternatives for gluten-free options: You can use almond flour or gluten-free flour mixes. These work well and keep the cake moist.
- Sugar substitutes for a healthier version: Try coconut sugar or a sugar substitute like stevia. These options can help cut down on calories while keeping it sweet.
- Dairy-free ingredient options: Use a non-dairy milk like soy or cashew milk. These options will also keep your cake delicious and creamy.
With these ingredients and substitutions, you can customize this mug cake to fit your needs. Enjoy experimenting!
Step-by-Step Instructions
Preparing the Mug
Select a microwave-safe mug. Make sure it can hold a cup of batter. Next, add these dry ingredients to your mug:
- 4 tablespoons all-purpose flour
- 2 tablespoons unsweetened cocoa powder
- 3 tablespoons granulated sugar
- 1/8 teaspoon baking powder
- Pinch of salt
Use a small whisk or fork to mix these dry ingredients well. This step helps avoid clumps. A well-mixed base makes your cake fluffy.
Mixing the Batter
Now, pour in the wet ingredients:
- 3 tablespoons milk (or a non-dairy alternative)
- 2 tablespoons vegetable oil (or melted coconut oil)
Stir this mixture until smooth. You want no lumps left! This chocolatey batter is where the magic begins.
Next, add 1 tablespoon of creamy peanut butter. Place it gently in the center of the batter. Press it down a bit, but don’t mix it in. This keeps it gooey in the middle.
For extra sweetness, sprinkle 1 tablespoon of chocolate chips on top. They will melt and add a rich flavor.
Cooking the Mug Cake
Carefully put the mug in the microwave. Cook on high for 30 to 40 seconds. After 30 seconds, check your cake. It should look slightly puffed and spring back when touched.
Microwave times can vary, so keep an eye on it. Overcooking can make it dry.
When done, take the mug out (it will be hot!). Let it cool for 1-2 minutes. Cooling helps the flavors mix and makes it safe to eat. Enjoy your mug cake right from the mug or on a plate for a treat!
Tips & Tricks
Perfecting Your Mug Cake
To make your mug cake just right, avoid common mistakes. First, use the right mug. Choose a microwave-safe mug that holds at least 12 ounces. A smaller mug can overflow. Next, mix your dry ingredients well. This helps avoid clumps and ensures a smooth batter.
When adding your peanut butter, press it down gently. This creates a gooey center. Also, microwave in short bursts. Start with 30 seconds, then check. If it’s not done, add 10 seconds.
Feel free to experiment with flavors. Swap out cocoa powder for matcha for a green twist. You can also add a pinch of cinnamon for warmth. Want a fruity touch? Add mashed banana or blueberries for a fun twist.
Serving Suggestions
Pair your mug cake with delicious toppings. A scoop of vanilla ice cream is a classic choice. It melts into the warm cake and adds creaminess. Fresh berries are a great option too. They add a burst of freshness and color.
Get creative with garnishing ideas. Drizzle chocolate syrup or melted peanut butter over the top. A sprinkle of crushed nuts adds crunch and flavor. Want a special touch? Top it with whipped cream and a cherry for a dessert that shines.
Remember, this mug cake is as fun to make as it is to eat!

Variations
Flavor Variations
You can easily change your Chocolate Peanut Butter Mug Cake to fit your taste. Here are some ideas:
- Adding nuts or other mix-ins: Chopped walnuts or almonds can add a nice crunch. You could also try adding dried fruit like cherries or cranberries for a sweet twist.
- Adjusting sweetness or richness: If you like it sweeter, add more sugar or some honey. For a richer taste, try using dark chocolate cocoa powder or extra chocolate chips.
Dietary Variations
Want to fit this cake into your diet? Here are some options:
- Vegan adaptations: Use almond milk or oat milk instead of regular milk. Swap out the vegetable oil for melted coconut oil, and choose a vegan chocolate brand for your chips. This way, you can enjoy a delicious vegan treat.
- Low-carb alternatives: For a low-carb version, use almond flour instead of all-purpose flour. You can replace sugar with a low-carb sweetener like erythritol or stevia. This makes a great option for those watching their carbs.
Storage Info
Storing Leftovers
To keep any leftover mug cake fresh, cover it with plastic wrap or place it in an airtight container. This helps to keep moisture in and prevent it from drying out. Store the mug cake in the fridge for up to three days. When you want to enjoy it again, simply reheat it in the microwave for about 10 to 15 seconds. Check to see if it is warm throughout before eating. If it feels dry, you can add a small splash of milk to make it moist again.
Freezing Options
Yes, you can freeze this mug cake! To freeze, let it cool completely. Then, wrap it tightly in plastic wrap and place it in a freezer bag. Be sure to squeeze out any air to prevent freezer burn. It can last in the freezer for up to two months. When you are ready to eat it, take it out and let it thaw in the fridge overnight. If you’re in a hurry, you can microwave it for about 30 seconds to thaw. Just make sure to check it often to avoid overcooking. Enjoy your Chocolate Peanut Butter Mug Cake anytime!
FAQs
How long does it take to make a Chocolate Peanut Butter Mug Cake?
Making this mug cake is quick and easy. It takes about 5 minutes to prep and 1 to 2 minutes to cook. So, you can enjoy a warm treat in under 10 minutes!
Can I make this recipe in advance?
You can prepare the dry ingredients ahead of time. Just mix the flour, cocoa powder, sugar, baking powder, and salt. Store this mix in a sealed container. When you’re ready, add the wet ingredients and cook. This saves time when you want a quick snack!
What if I don’t have a microwave?
If you don’t have a microwave, don’t worry! You can use an oven. Preheat your oven to 350°F (175°C). Pour the batter into a small oven-safe dish. Bake for about 10 to 12 minutes. Check it often to avoid overcooking. Enjoy your mug cake just the same!
This blog post covered how to make a delightful Chocolate Peanut Butter Mug Cake. You learned about key ingredients, substitutions, and step-by-step instructions for preparation. I shared tips to avoid mistakes and offered variations to customize your cake. Lastly, I included storage tips to keep any leftovers fresh.
Now, you have all the tools needed to enjoy this easy treat anytime. Get ready to impress yourself or friends with a quick and tasty dessert!


![To make a true classic key lime pie, you need these key items: - 1 ½ cups graham cracker crumbs - ½ cup unsweetened coconut flakes - ⅓ cup granulated sugar - ½ cup unsalted butter, melted - 4 large egg yolks - 1 (14 oz) can sweetened condensed milk - ½ cup freshly squeezed key lime juice (approx. 12 key limes) - Zest of 2 key limes - 1 cup heavy whipping cream - 2 tablespoons powdered sugar - Lime slices and extra zest for garnish These ingredients work together to create a sweet, tangy pie that sings of sunshine. You can add some optional ingredients to enhance your pie: - Toasted coconut flakes for extra crunch - A pinch of salt to balance sweetness - Lime zest for a stronger lime flavor These add-ons can make your pie even more delightful. If you're missing an ingredient, here are some easy swaps: - Use regular lime juice instead of key lime juice. It will taste different but still good. - Swap graham cracker crumbs with crushed vanilla wafers for a unique flavor. - Replace heavy cream with whipped topping for a lighter version. These substitutions can help you prepare the pie with what you have. For the exact steps, check out the Full Recipe. First, preheat your oven to 350°F (175°C). This step is key for a great crust. In a medium bowl, mix the graham cracker crumbs, coconut flakes, and granulated sugar. Pour in the melted butter and stir until it feels like moist sand. Next, grab a 9-inch pie pan. Press the crumb mixture into the bottom and up the sides of the pan. Make sure it’s firm and even. Bake this crust for 8-10 minutes until the edges are golden. After baking, let it cool completely. Now, let’s make the filling. In a large bowl, whisk the egg yolks until they are pale yellow. Then, add the sweetened condensed milk, key lime juice, and lime zest. Whisk until everything is smooth. You want to have no lumps here! Carefully pour this lime mixture into your cooled crust. Spread it out evenly. Bake the pie for 15 minutes. The filling should be set but still a bit jiggly in the center. After baking, take it out and let it cool at room temperature. Once it’s cool, put the pie in the fridge for at least 2 hours. This chilling time makes it even tastier! For the full recipe, check out the details above! To get the best texture and flavor in your Key Lime Pie, follow a few simple tips: - Use Fresh Key Limes: Fresh key limes give a bright taste. They also add a nice zing. - Whisk Egg Yolks Well: Whisk the yolks until they are pale. This helps create a smooth filling. - Don’t Overbake: Bake the filling until it is just set. It should still jiggle a bit in the middle. - Chill Properly: Let the pie cool at room temp before refrigerating. This step enhances the flavor. Some mistakes can ruin your pie. Here are a few to watch out for: - Skipping the Zest: The zest adds flavor and aroma. Don’t skip it! - Using Cold Ingredients: Let your ingredients reach room temperature. This helps them mix better. - Overmixing the Filling: Whisk just until combined. Overmixing can create bubbles in the filling. - Not Cooling the Crust: Always cool the crust completely before adding the filling. A warm crust can make the filling runny. Having the right tools makes cooking easier and more fun: - 9-inch Pie Pan: This is the perfect size for your Key Lime Pie. - Mixing Bowls: Use medium and large bowls for mixing your crust and filling. - Electric Mixer: This helps you whip the cream to stiff peaks easily. - Zester or Grater: A good zester is key for getting the lime zest just right. These tips and tools will help you create a perfect Key Lime Pie every time. For the full recipe, check out the [Full Recipe]. {{image_4}} You can change up the crust for your Key Lime Pie. Here are some fun ideas: - Graham Cracker Crust: This is the classic choice. It’s sweet and crunchy. - Oreo Crust: Use crushed Oreos instead of graham crackers for a chocolate twist. - Nut Crust: Ground almonds or pecans add a nice nutty flavor. Mix them with butter and a bit of sugar. - Coconut Crust: Use shredded coconut for a tropical feel. It pairs well with the lime. Want to try something different? Here are some tasty twists: - Mango Key Lime Pie: Add pureed mango to the filling for a fruity kick. - Berry Key Lime Pie: Mix in fresh berries like strawberries or blueberries for color and flavor. - Coconut Key Lime Pie: Stir in coconut milk for a creamier texture and tropical taste. - Chocolate Key Lime Pie: Add melted chocolate to the filling for a rich, sweet layer. Making your pie look great can be fun. Here are some ideas: - Whipped Cream Topping: Spread whipped cream on top. Use a spatula to make swirls. - Garnish with Lime: Add lime slices or zest for a pop of color. - Serve in Mason Jars: For a fun twist, serve individual portions in jars. - Add Fresh Berries: Place berries around the pie for extra flair. For the full recipe, check out the Zesty Classic Key Lime Pie . To keep your key lime pie fresh, cover it tightly with plastic wrap or aluminum foil. This prevents the pie from absorbing fridge odors. Store it in the fridge for up to three days. Make sure to slice the pie before storing to make it easier to serve later. You can freeze key lime pie if you want to save some for later. First, let the pie cool completely after baking. Wrap the pie tightly in plastic wrap and then in aluminum foil. This double wrapping helps prevent freezer burn. You can freeze it for up to three months. Just remember to label it with the date. To enjoy your frozen key lime pie, move it from the freezer to the fridge. Let it thaw overnight. If you're in a hurry, you can leave it at room temperature for about two hours. Do not microwave it, as this can change the texture. Once thawed, you can add fresh whipped cream or lime zest for extra flavor before serving. Yes, you can use regular limes. Key limes are smaller and more fragrant. They have a tart flavor that makes the pie special. If you use regular limes, the pie will taste a bit different but still good. You might want to adjust the sugar to balance the flavor. You can keep key lime pie in the fridge for up to three days. Cover it well to prevent it from drying out. If the pie has whipped cream on top, eat it within two days. The cream can lose its texture after that. You can use coconut cream or a dairy-free option. If you need a lighter option, try using yogurt. For a richer flavor, you can also use mascarpone cheese. Each choice will change the taste and texture a bit, but they all work well in this recipe. Check the [Full Recipe] for more details. In this post, we explored the key ingredients for classic Key Lime Pie, from crust to filling. I shared step-by-step instructions for baking. We discussed tips to avoid common mistakes and explored variations for flavor and presentation. Additionally, we covered how to store and reheat leftovers effectively. Key Lime Pie is simple to make and delightful to share. Enjoy creating your version and savor each bite. When you follow these tips, your pie will shine!](https://dishtreats.com/wp-content/uploads/2025/07/bf504450-0d09-4d53-b035-55d87c168019-768x768.webp)


![To make your chocolate chip banana bread, you need these key ingredients: - 2 ripe bananas, thoroughly mashed - 1/3 cup coconut oil, melted - 1 teaspoon pure vanilla extract - 1/2 cup packed brown sugar - 1/4 cup granulated sugar - 2 large eggs at room temperature - 1 teaspoon baking soda - 1/4 teaspoon fine salt - 1 1/2 cups all-purpose flour - 1/2 cup semi-sweet or dark chocolate chips - 1/4 cup walnuts or pecans, chopped (optional) Each ingredient plays a vital role in crafting a moist and tasty loaf. Ripe bananas add sweetness and moisture. Coconut oil gives a rich flavor and a soft texture. The sugars create that perfect crust while the eggs help bind everything together. You can personalize your chocolate chip banana bread with fun add-ins. Here are some ideas: - Chopped nuts for crunch - Dried fruits like cranberries or raisins - A sprinkle of cinnamon for warmth - Peanut butter or nutella swirls for extra richness Feel free to mix and match! These add-ins can bring new flavors and textures to your bread. Using high-quality ingredients makes a big difference. Choose ripe bananas; they should be spotty and soft. Fresh eggs bring richness and flavor. Use pure vanilla extract for the best taste. For the oils, opt for organic coconut oil if possible. Quality flour helps create the right texture. Remember, great ingredients lead to great results! For the full recipe, check out the [Full Recipe]. Start by preheating your oven to 350°F (175°C). This step is crucial for even baking. Next, grab a 9x5 inch loaf pan. Lightly grease it with cooking spray or butter. You can also use parchment paper to line the pan. This makes removing the banana bread easier. In a large mixing bowl, take 2 ripe bananas and mash them well. You want them smooth with no lumps. Then, add 1/3 cup of melted coconut oil. Mix them together until they blend into a creamy base. This combination gives your bread moisture and flavor. Add 1 teaspoon of pure vanilla extract, 1/2 cup of packed brown sugar, and 1/4 cup of granulated sugar to the banana mix. Stir until it’s smooth. Now, crack in 2 large eggs. Mix well after each egg. Then, sprinkle 1 teaspoon of baking soda and 1/4 teaspoon of fine salt over the mix. Stir gently. Next, sift in 1 1/2 cups of all-purpose flour. Fold it in carefully. Don’t overmix; this keeps your loaf tender. Finally, gently fold in 1/2 cup of semi-sweet or dark chocolate chips. If you like, add 1/4 cup of chopped nuts too. Pour the batter into your prepared loaf pan. Smooth the top with a spatula. Place it in the oven and bake for 55-65 minutes. It’s done when a toothpick comes out clean or with a few crumbs. Let the bread cool in the pan for 10 minutes. Then, carefully move it to a wire rack to cool completely. This cooling step helps set the flavors. For the full recipe, refer to the section above. To get the best texture, use ripe bananas. The riper, the better! They must be soft and spotty. This way, you get a sweet and moist bread. Mash them well to avoid lumps. Mix ingredients gently after adding the flour. Over-mixing can make your bread tough. Aim for a light, fluffy loaf. Keep your banana bread fresh by wrapping it tightly. You can use plastic wrap or foil. Store it at room temperature for up to four days. If you want it to last longer, place it in the fridge for about a week. To keep it even longer, freeze it. Slice it before freezing for easy serving. Just make sure to wrap each slice well. Serve your chocolate chip banana bread warm. It tastes best right out of the oven! Add some butter on top for richness. You can also sprinkle powdered sugar for a sweet touch. For extra fun, top with fresh banana slices or more chocolate chips. This makes it look pretty and taste even better! For the complete recipe, check out the Full Recipe section in this article. {{image_4}} You can enjoy chocolate chip banana bread without gluten. Use a gluten-free flour blend. This blend works well as a one-to-one substitute. Make sure it has xanthan gum. This helps bind the ingredients. The flavor stays rich and delicious. Just follow the same steps as in the Full Recipe. You will love the texture and taste. For a vegan version, swap eggs for flax eggs. To make a flax egg, mix one tablespoon of flaxseed meal with three tablespoons of water. Let it sit for a few minutes to thicken. Use non-dairy milk and coconut oil as well. This keeps the bread moist and soft. You can still add chocolate chips, just choose dairy-free ones. You can add your favorite spices for extra flavor. Cinnamon and nutmeg pair well with bananas. A pinch of each can make a big difference. You can also try almond or coconut extract. These extracts add depth. Experiment to find your favorite combo. Each twist makes the bread unique and fun. To keep your chocolate chip banana bread fresh, store it at room temperature. Wrap it tightly in plastic wrap or foil. This helps keep moisture in. Place it in a cool, dry spot, away from direct sunlight. If you prefer, you can also use an airtight container. This will help maintain its soft texture and rich flavor. Freezing is a great option if you want to save some for later. First, let the banana bread cool completely. Then, wrap it tightly in plastic wrap, followed by aluminum foil. This extra layer prevents freezer burn. You can freeze it for up to three months. When you're ready to enjoy it, simply thaw it in the fridge overnight. Reheating banana bread can bring back its lovely warmth. You can use a toaster oven or a conventional oven. Preheat your oven to 350°F (175°C). Slice the bread and place it on a baking sheet. Heat for about 5-10 minutes. If you want a softer texture, cover it with foil. You can also pop a slice in the microwave for about 10-15 seconds. Enjoy it warm for a cozy treat! Your chocolate chip banana bread is done when a toothpick comes out clean. Insert it in the center. If it has a few crumbs, that is fine too. The bread usually bakes for 55-65 minutes. The top should look golden brown. Yes, you can substitute some ingredients. For example, use olive oil instead of coconut oil. You can also swap brown sugar for maple syrup. Make sure to adjust the amounts as needed for the best results. Chocolate chip banana bread lasts about 3-4 days at room temperature. Store it in an airtight container. For longer storage, keep it in the fridge for a week. You can also freeze it for up to 3 months. You can use applesauce or mashed bananas as egg substitutes. Use 1/4 cup of applesauce or 1/2 banana for each egg. Both options keep the bread moist and flavorful. This chocolate chip banana bread stands out because of its rich flavors. The combination of ripe bananas and chocolate chips creates a sweet treat. Using coconut oil adds a subtle depth to the taste. The option to add nuts gives extra texture. You can find the complete recipe in the Full Recipe section. This blog post covered how to make delicious chocolate chip banana bread. We discussed key ingredients, optional add-ins, and the importance of ingredient quality. I shared step-by-step instructions to guide you through the baking process. We explored tips for the perfect texture, storage methods, and fun variations like gluten-free and vegan options. With these insights, you can easily bake this treat and impress everyone. Enjoy your baking journey!](https://dishtreats.com/wp-content/uploads/2025/06/ff2d306f-7b8f-4bb2-a8a5-5e2882fba681-768x768.webp)