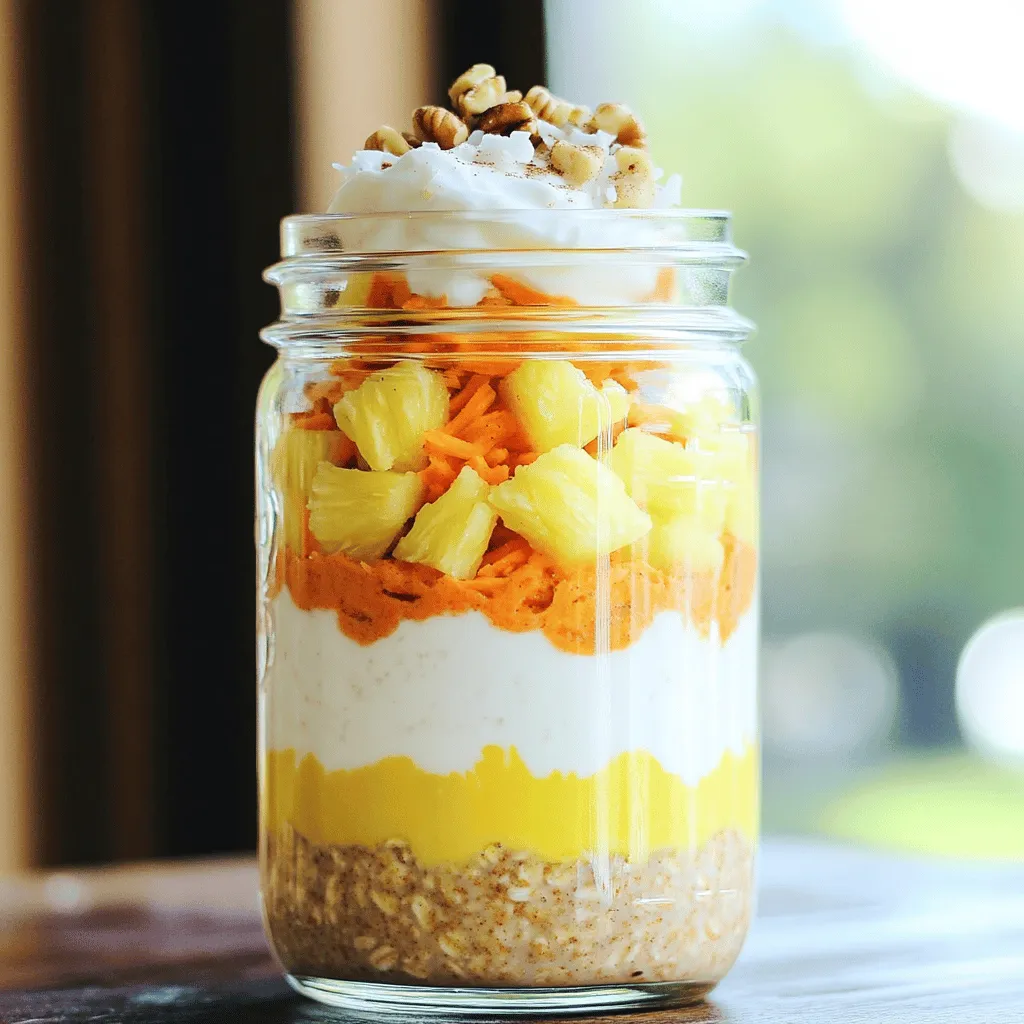
Carrot Cake Overnight Oats Flavorful and Filling Meal

Are you ready to transform your breakfast game? Carrot Cake Overnight Oats combine sweet flavors with hearty ingredients, offering a filling meal that’s simple to prepare. You’ll love the blend of oats, carrots, and spices creating a treat that tastes as good as cake. Whether you’re a busy professional or a home cook, this healthy recipe is just what you need to kickstart your mornings. Let’s dive into the delightful details!
Ingredients
To make carrot cake overnight oats, you need fresh and simple ingredients. Each one adds flavor and texture. Here’s a detailed list of what you will need:
- 1 cup rolled oats
- 1 ½ cups almond milk (or any milk of your choice)
- 1 medium carrot, finely grated
- 1 tablespoon chia seeds
- 1 tablespoon maple syrup (or honey for sweetness)
- ½ teaspoon ground cinnamon
- ¼ teaspoon ground nutmeg
- ¼ cup crushed pineapple, thoroughly drained
- 2 tablespoons raisins
- 2 tablespoons chopped walnuts (optional, for added crunch)
- Pinch of salt
- Greek yogurt for a creamy topping (optional)
- Shredded coconut for a decorative garnish (optional)
Each ingredient plays a key role. The rolled oats form the base. Almond milk gives a creamy texture. Finely grated carrot gives that classic flavor. Chia seeds thicken the mix. Maple syrup or honey adds sweetness. Ground cinnamon and nutmeg bring warmth and spice. Crushed pineapple gives a juicy twist. Raisins add chewiness, while walnuts offer crunch. A pinch of salt enhances all the flavors. Greek yogurt makes it creamy, and shredded coconut adds a fun touch on top.
Step-by-Step Instructions
Preparation Steps
- In a large bowl, mix the rolled oats and almond milk.
- Add the finely grated carrot, chia seeds, and maple syrup.
- Sprinkle in the ground cinnamon, nutmeg, and pinch of salt.
- Stir until the mixture is well blended and smooth.
- Fold in the drained crushed pineapple, raisins, and walnuts.
- Carefully divide the mixture into two jars or containers.
- Seal the containers tightly to keep them fresh.
- Place them in the fridge overnight, or for at least six hours.
Serving Suggestions
- When ready to eat, top with Greek yogurt for creaminess.
- Sprinkle shredded coconut on top for a fun touch.
- If you want more flavor, add walnuts or raisins.
Final Touches
- If the oats are too thick, add a splash of almond milk.
- Stir well to achieve your preferred consistency.
- Enjoy these tasty carrot cake oats chilled as breakfast or a snack!
Tips & Tricks
Achieving the Best Texture
Soaking the oats overnight is key. This allows them to absorb the liquid and soften. The longer they soak, the creamier they get. You can adjust the liquid to get your favorite thickness. If you like it thicker, use less milk. For a runnier mix, add more milk before serving.
Flavor Enhancements
Get creative with spices! You can add more cinnamon or try ginger for a twist. Vanilla extract also works well. Honey and maple syrup add sweetness. If you want less sugar, use less syrup. Balance is important for the best flavor.
Presentation Ideas
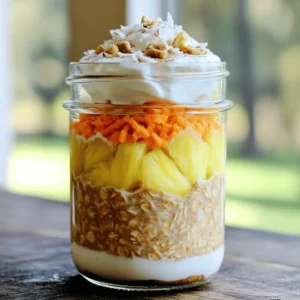
Layering adds fun! Start with oats, then add yogurt, and top with fruit. Use jars for a pretty look. Colorful toppings, like berries or nuts, make it pop. You can even sprinkle coconut for a tropical feel. A visually appealing dish makes breakfast even better!
Variations
Nut-Free Version
If you want to skip the nuts, there are great options. Instead of walnuts, try seeds. Sunflower seeds or pumpkin seeds add a nice crunch. You can also use toasted coconut for a fun texture. For a nut-free topping, use extra raisins or even some granola. These swaps keep your carrot cake overnight oats tasty without any nuts.
Vegan or Dairy-Free Options
To make this recipe vegan, choose plant-based milk. Almond milk is a great choice, but you can use oat milk or coconut milk too. For toppings, skip the Greek yogurt or use a dairy-free yogurt. You can also add more fruit, like banana slices or berries, for extra creaminess and flavor. This way, you keep it vegan while still enjoying a delicious meal.
Seasonal Variations
You can easily change the flavors based on the season. In fall, add chopped apples or pears. Cinnamon pairs well with these fruits for a cozy taste. In winter, consider using spices like ginger or cardamom. These spices warm up the flavor and make it special for cold months. Experimenting with different fruits and spices can keep your carrot cake overnight oats fresh and exciting all year round!
Storage Info
Refrigeration Guidelines
To keep your carrot cake overnight oats fresh, store them in airtight containers. This will prevent any unwanted odors from your fridge. The oats will last up to five days in the fridge. However, the longer they sit, the softer they become. You may want to enjoy these tasty oats within the first three days for the best texture.
Freezing Instructions
Yes, you can freeze carrot cake overnight oats! Just make sure to use freezer-safe containers. They can last up to three months in the freezer. When you are ready to eat, take them out and thaw them overnight in the fridge. If you need them fast, you can thaw them in the microwave on low power. Stir well before serving to get the right consistency.
Best Containers for Storage
I recommend using glass jars for storage. They are better for the environment and keep your food fresh. Glass does not absorb odors or stains like plastic. If you prefer plastic, choose BPA-free options. Make sure the containers are airtight to keep your oats safe and tasty.
FAQs
Can I use quick oats instead of rolled oats?
You can use quick oats, but the texture changes. Quick oats cook faster and get mushy. Rolled oats stay chewy and absorb flavors better. For carrot cake overnight oats, I prefer rolled oats for that satisfying bite.
How long do I need to soak the oats?
Soak the oats for at least six hours. This time lets the oats absorb the liquid. You can soak them overnight for the best flavor. The longer they soak, the creamier they become.
Can I make this recipe in advance for meal prep?
Yes! You can prepare these oats in advance. Just mix everything and store in jars. They last for up to five days in the fridge. This makes busy mornings easier and tastier. Enjoy a gourmet meal without the rush.
This blog post covered a fun and tasty recipe for carrot cake overnight oats. You learned about every ingredient and how they come together to create a healthy dish. I shared tips to achieve the best texture and flavor, along with ideas for variety and storage.
These oats are great for breakfast or a snack. With the right tweaks, you can make them fit your taste. Enjoy your oats and get creative with toppings!


![To make crispy cauliflower tacos, gather these key ingredients: - 1 head of cauliflower, separated into bite-sized florets - 1 cup panko breadcrumbs - 1 teaspoon smoked paprika - 1 teaspoon garlic powder - 1 teaspoon onion powder - 1/2 teaspoon cayenne pepper (adjust to your spice level) - Salt and pepper to taste - 1 cup all-purpose flour - 1 cup plant-based milk (or regular milk) - Corn tortillas (for assembling the tacos) - 1 ripe avocado, sliced - 1 cup shredded red cabbage - Fresh cilantro, for garnishing - Lime wedges, for serving You can swap some ingredients based on your needs. Here are some ideas: - Use gluten-free flour instead of all-purpose flour. - Replace panko with crushed cornflakes for a different crunch. - Try almond milk or oat milk instead of plant-based milk. - Use different spices, like chili powder or cumin, for a unique flavor. To make your tacos even more delicious, consider these toppings: - Fresh salsa for a burst of flavor. - Pickled onions for a tangy kick. - Crumbled feta or queso for creaminess. - Radish slices for added crunch. - A drizzle of hot sauce for some heat. For the full recipe, refer back to the earlier section. Enjoy creating your crispy cauliflower tacos! Start by preheating your oven to 425°F (220°C). This ensures even cooking and crispiness. Next, take your head of cauliflower and separate it into bite-sized florets. Make sure the pieces are not too big. Smaller florets cook faster and get crispier. Now, let’s set up your breading station. Get three bowls in a row. In the first bowl, add one cup of all-purpose flour. In the second bowl, pour one cup of plant-based milk (or regular milk). In the third bowl, mix one cup of panko breadcrumbs with one teaspoon of smoked paprika, one teaspoon of garlic powder, one teaspoon of onion powder, and half a teaspoon of cayenne pepper. Add salt and pepper to taste. Stir the breadcrumbs well to spread the spices evenly. Once your cauliflower is ready and your breading station is set, it’s time to coat the florets. Dip each floret into the flour first. Make sure it’s fully coated, then shake off the excess. Next, dip the floret into the plant-based milk, letting any extra drip off. Finally, roll it in the breadcrumb mixture, pressing gently. Place the breaded florets on a lined baking sheet, leaving space between them. Now, slide the baking sheet into your preheated oven. Bake for 25-30 minutes. Flip the florets halfway through to ensure they brown evenly. When they turn golden and crispy, they’re ready! Enjoy your crispy cauliflower tacos with all the tasty toppings from the Full Recipe. To get that crunch, the key is the panko breadcrumbs. They create a light and crispy coating. Make sure to coat each cauliflower floret well. When you bake them, place them evenly on the sheet. This allows hot air to circulate, making them crispier. Spice up your tacos with smoked paprika and cayenne pepper. They add a nice kick. You can also mix in herbs like cumin or oregano for extra depth. Don't forget to season with salt and pepper. Taste the breadcrumbs before coating the cauliflower to ensure they are flavorful. For the best serving experience, warm your corn tortillas before filling them. This makes them pliable and tasty. Layer your tacos with fresh avocado and shredded cabbage. Top with chopped cilantro and a squeeze of lime for brightness. For an extra treat, serve with a side of salsa or hot sauce. If you want the full recipe, check out the Crispy Cauliflower Tacos section. {{image_4}} You can easily make these tacos vegan. Use plant-based milk instead of regular milk. For the breading, stick to vegan-friendly panko breadcrumbs. This keeps the flavor and crunch you want. To make these tacos gluten-free, swap regular flour with a gluten-free all-purpose blend. Gluten-free panko will also work well for the breading. This way, everyone can enjoy these tasty tacos. You can change the flavor of your tacos. For a spicy kick, add more cayenne pepper or some chili powder. If you prefer sweet, try adding a drizzle of agave syrup or honey. For a savory twist, consider using smoked paprika or a dash of soy sauce in the batter. Each variation brings a new taste adventure to your table. To store leftover tacos, place them in an airtight container. Separate the crispy cauliflower and tortillas if you can. This keeps the tortillas from getting soggy. Store in the fridge for up to three days. When you are ready to eat, you can reheat them for the best taste. To reheat, place the cauliflower on a baking sheet. Preheat your oven to 350°F (175°C). Bake for about 10-15 minutes until crispy again. For the tortillas, heat them in a dry pan for a minute on each side. This helps to keep them warm and flexible. If you want to freeze the tacos, wrap each taco tightly in plastic wrap. Place them in a freezer-safe bag to avoid freezer burn. They can last up to a month in the freezer. When ready to eat, thaw them overnight in the fridge and reheat as mentioned above. Enjoy the great taste even after storage! For the full recipe, refer back to the beginning of the article. To make your cauliflower tacos crispier, follow these tips: - Use Panko Breadcrumbs: They are lighter and create a better crunch than regular breadcrumbs. - Double Coat: For extra crunch, dip the florets in flour, then milk, and roll in breadcrumbs twice. - Bake at High Heat: Ensure your oven is at 425°F (220°C) for that golden finish. - Don’t Crowd the Pan: Space the florets on the baking sheet. This helps them crisp all over. - Flip Regularly: Halfway through baking, flip the florets to cook evenly. By using these steps, you'll achieve a wonderfully crispy texture every time. Yes, you can use different tortillas! Here are some options: - Flour Tortillas: These are soft and great for holding fillings. - Whole Wheat Tortillas: A healthier choice with more fiber. - Lettuce Wraps: For a low-carb option, try using large lettuce leaves. - Taco Shells: Crunchy taco shells add a fun twist. Choose the tortilla that fits your taste and dietary needs. Pair your crispy cauliflower tacos with these delicious side dishes: - Mexican Rice: Fluffy rice with spices complements the tacos well. - Black Beans: A protein-rich side that adds flavor and nutrition. - Guacamole: Creamy and fresh, it’s always a hit. - Corn Salad: A sweet and tangy salad brightens the meal. - Grilled Vegetables: Charred veggies bring a smoky flavor that pairs nicely. These sides will enhance your taco experience and create a full, flavorful feast. For the complete recipe, check out the [Full Recipe]. This blog covered ingredients, steps, tips, variations, and storage for cauliflower tacos. You learned how to prep, bread, and bake for that perfect crunch. I shared useful flavor boosts and serving ideas. You can explore vegan and gluten-free options to suit your needs. Finally, I provided storage tips to keep leftovers fresh. Cauliflower tacos are fun and flexible. Enjoy making them your own!](https://dishtreats.com/wp-content/uploads/2025/07/b9e73b78-f0ec-4a59-80bf-257d8f9aee98-768x768.webp)