
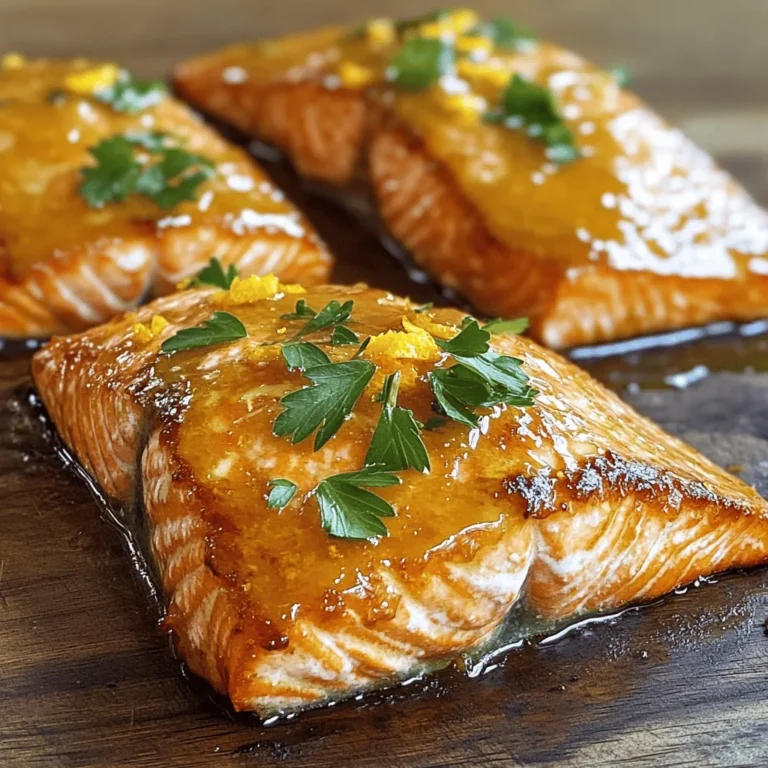
Lemon Dill Salmon Cakes Flavorful and Simple Recipe

Are you ready to enjoy a fresh and tasty dish that’s both simple and fun to make? My Lemon Dill Salmon Cakes are the perfect option for a quick weeknight meal or a special gathering. Packed with bright flavors and easy to prepare, these cakes will impress anyone at your table. Let’s dive into the ingredients and get cooking!
Ingredients
To make delicious Lemon Dill Salmon Cakes, you need the right ingredients. Here’s what you will need:
- 2 cups cooked salmon, flaked
- 1/2 cup panko breadcrumbs
- 1/4 cup fresh dill, finely chopped
- 1/4 cup green onions, finely chopped
- 1/4 cup creamy mayonnaise
- 1 tablespoon Dijon mustard
- 1 tablespoon fresh lemon juice
- 1 teaspoon lemon zest
- 1 large egg, lightly beaten
- 1/2 teaspoon garlic powder
- Salt and pepper, to taste
- Olive oil, for frying
Using fresh ingredients makes a big difference in taste. Fresh dill adds a bright flavor, while lemon juice and zest bring out the salmon’s richness. The panko breadcrumbs create a crisp outer layer, making each bite a delight.
Step-by-Step Instructions
Preparation of Salmon Mixture
In a large bowl, combine your ingredients for the salmon mixture. Start with 2 cups of cooked salmon, flaked into small pieces. Add in 1/2 cup of panko breadcrumbs for a crunchy texture. Next, mix in 1/4 cup of fresh dill and 1/4 cup of finely chopped green onions. These herbs will give your cakes a bright flavor. Then, add 1/4 cup of creamy mayonnaise, 1 tablespoon of Dijon mustard, 1 tablespoon of fresh lemon juice, and 1 teaspoon of lemon zest. The lemon will add a fresh zing. Finally, sprinkle in 1/2 teaspoon of garlic powder, along with salt and pepper to taste. Mix gently to keep the salmon pieces intact.
Forming the Patties
Now that your salmon mixture is ready, it’s time to shape the patties. Grab a handful of the mixture and form it into a patty. Aim for about 2-3 inches in diameter and 1/2 inch thick. This size ensures even cooking. You should be able to make around 8 to 10 patties. Keep your hands wet to prevent sticking. Lay the patties on a plate as you prepare to cook them.
Cooking Process
To cook the patties, heat a non-stick skillet over medium heat. Add enough olive oil to coat the bottom of the pan. Wait until the oil shimmers but does not smoke, then carefully place the patties in the skillet. Cook them in batches to avoid crowding. Fry each side for about 4 to 5 minutes. Look for a golden brown color to know they are done. Once cooked, use a slotted spatula to transfer the cakes to a plate lined with paper towels. This step helps drain off any extra oil. Serve the salmon cakes warm, with fresh dill and lemon wedges for extra flavor.
Tips & Tricks
Ensuring Perfect Texture
To get soft patties, don’t overmix the salmon mixture. When you combine the ingredients, do it gently. This keeps the salmon flaky and tender. If you mix too much, your patties can become tough and dry.
Cooking Tips
How do you know when the oil is ready for frying? Look for a shimmering surface in the oil. This means it’s hot enough. You can also test it by dropping a small piece of the mixture in the oil. If it sizzles right away, you’re good to go. This helps the salmon cakes cook evenly and get that nice golden color.
Serving Suggestions
What are the best sides to serve with Lemon Dill Salmon Cakes? I love pairing them with a light salad, like arugula or mixed greens. A creamy tartar sauce also goes well. You can add lemon wedges for a fresh touch. These sides balance the flavors and make the meal feel complete. For a heartier option, consider roasted vegetables or quinoa.

Variations
Adding Flavor Enhancements
You can add capers or feta to boost flavor. Capers bring a salty bite, while feta adds creaminess. Both options mix well with the lemon and dill. They create a Mediterranean twist that excites your palate. Try adding them next time for a fun change.
Substitute Ingredients
If you’re gluten-free, use gluten-free breadcrumbs. Many brands offer tasty options that work well in this recipe. You can also use crushed rice crackers or almond flour. These substitutes keep the texture light and crispy, so you won’t feel left out.
Different Cooking Methods
You can bake or fry these salmon cakes. Baking is a healthier choice. Preheat your oven to 400°F (200°C) and place the patties on a lined baking sheet. Bake for about 15-20 minutes until golden. Frying gives a crispy crust and rich flavor. Choose the method that fits your diet and mood. Either way, you’ll enjoy a delicious meal.
Storage Info
How to Store Leftover Salmon Cakes
To keep your salmon cakes fresh, store them in the fridge. Place them in an airtight container. This helps to prevent them from drying out. They stay good for about 2 to 3 days. Always let them cool down before sealing them in the container. This keeps moisture inside, which can lead to sogginess.
Freezing Tips
If you want to save salmon cakes for later, freezing is a great option. Start by letting them cool completely. Next, arrange them in a single layer on a baking sheet. Freeze them for about an hour. Once frozen, transfer the cakes to a freezer-safe bag. Make sure to squeeze out as much air as possible. They can last up to 2 months this way. When you’re ready to eat, just pull them out and thaw in the fridge overnight.
Reheating Instructions
To reheat your salmon cakes, use a skillet for the best results. Heat a little olive oil over medium heat. Place the cakes in the skillet and cook for about 3 to 4 minutes per side. This keeps them crispy and warm. You can also use an oven at 350°F. Bake them for about 10-15 minutes. Both methods will keep the texture nice. Enjoy them warm for the best flavor!
FAQs
Can I use canned salmon instead of cooked salmon?
Yes, you can use canned salmon. Canned salmon saves time and is easy to find. It is also affordable and has a long shelf life. However, it often has a different texture than fresh salmon. You may also want to drain it well to reduce moisture. This can help you keep your salmon cakes from being too wet. Overall, canned salmon is a good option if you are in a hurry.
How long do these salmon cakes last in the fridge?
Lemon Dill Salmon Cakes can last up to three days in the fridge. To store them, place the cakes in an airtight container. This helps keep them fresh and safe to eat. Make sure they cool down before sealing the container. If you want to keep them longer, you can freeze them for up to three months.
What can I serve with Lemon Dill Salmon Cakes?
You can serve these salmon cakes with many delicious sides. Here are some popular pairings:
- A light green salad with a lemon vinaigrette
- Creamy tartar sauce for dipping
- Roasted vegetables for a healthy option
- Rice or quinoa for a filling meal
- A side of coleslaw for extra crunch
These options will make your meal even more enjoyable.
In this post, I covered how to make Lemon Dill Salmon Cakes from scratch. We discussed the key ingredients and included step-by-step instructions for easy preparation. I shared tips to ensure a great texture and storage info for leftovers. You can also explore variations like capers or baking the cakes.
In conclusion, these salmon cakes are simple and fun to make. Enjoy them with your favorite sides for a tasty meal!


![To make Indian-spiced chickpea stew, you need fresh and flavorful ingredients. This stew brings warmth and comfort to your table. Here’s what you’ll need: - Canned chickpeas: 2 cups, thoroughly drained and rinsed - Vegetables and aromatics: - 1 medium onion, finely chopped - 2 cloves garlic, minced - 1 tablespoon fresh ginger, grated - Spices and liquids: - 1 can (14 oz) diced tomatoes with juice - 1 can (14 oz) coconut milk - 2 cups vegetable broth - 1 tablespoon curry powder - 1 teaspoon ground cumin - 1 teaspoon turmeric powder - 1/2 teaspoon red chili powder (adjust according to your heat preference) - 1 tablespoon olive oil - Salt and freshly ground black pepper, to taste - Fresh cilantro, chopped (for garnishing) These ingredients create a rich base for your stew. The chickpeas provide protein and texture. The diced tomatoes add acidity and sweetness. Coconut milk gives a creamy touch. Each spice brings its own unique flavor. You can find the full recipe [here]. Enjoy cooking! 1. Sautéing the aromatics Start by heating olive oil in a large pot over medium heat. Add the chopped onion and cook until it turns soft and golden. This should take around five minutes. Then, mix in minced garlic and grated ginger. Cook for one more minute, stirring often. You want to smell the lovely aroma from the garlic and ginger. 2. Adding spices and liquids Next, sprinkle in the curry powder, ground cumin, turmeric powder, and red chili powder. Stir until the onion is coated with these spices. Let them cook for two minutes. This step makes the flavors pop! Now, pour in the diced tomatoes with their juice, followed by the creamy coconut milk and vegetable broth. Mix everything well to combine. 3. Simmering the stew Gently fold in the rinsed chickpeas. Add salt and black pepper to taste. Bring the stew to a gentle simmer. Once simmering, lower the heat, cover the pot, and let it cook for 20 to 25 minutes. Stir occasionally to keep it from sticking. After cooking, taste and tweak the seasoning. If you want it thicker, mash a few chickpeas against the pot. Garnish with fresh cilantro before serving. Enjoy your delicious Indian-spiced chickpea stew! For the full recipe, refer back to the ingredients section. - Ensuring the perfect texture: To get that creamy and thick stew, you should mash some chickpeas. This adds a nice body. Stir gently while mashing to keep some whole. - Adjusting spice levels: If you want more heat, add more red chili powder. Start with a little, then taste and add more if needed. For less spice, cut the chili powder in half. - Enhancing flavor with garnishes: Fresh cilantro adds color and brightness to the stew. Just chop it up and sprinkle it on top before serving. You can also add a squeeze of lime for extra zing. These tips will help you craft a comforting dish. For the complete cooking process, check the Full Recipe. {{image_4}} You can easily change this stew to fit your taste. - Using different legumes or vegetables: If you don’t have chickpeas, try black beans or lentils. You can also add sweet potatoes, carrots, or spinach for more nutrients. - Dairy-free options: The coconut milk gives a rich taste, but you can swap it with almond or soy milk. This keeps the stew creamy without dairy. - Additional spices to suit taste: If you want more heat, add cayenne pepper or fresh chili. For a different flavor, try garam masala or coriander. Play around with spices to find your perfect blend. Feel free to explore these options! Every change can make your stew unique and delicious. Want to try the original? Check out the Full Recipe for the classic dish. To keep your Indian-spiced chickpea stew fresh, let it cool first. This step is key. Place the pot on a cool surface. Give it about 30 minutes to reach room temperature. Use airtight containers for storage. Glass containers work well. They keep the flavors locked in. You can also use plastic containers, but make sure they are BPA-free. When ready to reheat, take the stew from the fridge. Pour it into a pot. Heat it on medium-low. Stir often to stop it from sticking. If it seems thick, add a splash of vegetable broth or water. Heat until it's warm, about 5 to 10 minutes. For safe eating, ensure it reaches at least 165°F. This way, you'll enjoy the stew's warmth and flavor again! For the full recipe, check out the Spicy Indian Chickpea Stew 🥘. Yes, you can freeze this stew. Let it cool first. Then, put it in a safe container. Leave some space at the top for expansion. It stays good for about three months. To thicken your stew, mash some chickpeas. Use the back of a spoon against the pot. You can also simmer it longer. This helps reduce the liquid and makes it thicker. You can serve this stew with rice or naan. Both soak up the flavors well. A side salad or yogurt adds a nice touch too. Enjoy experimenting with different pairings! For the complete recipe, check out the [Full Recipe]. This blog post covered how to make a tasty Indian-spiced chickpea stew. We explored key ingredients like canned chickpeas, various vegetables, and spices. I shared step-by-step instructions for cooking, along with helpful tips for texture and flavor. You learned about fun ingredient variations and how to store leftovers properly. In conclusion, this stew is simple to make and packed with flavor. Feel free to get creative with your ingredients. Enjoy your cooking!](https://dishtreats.com/wp-content/uploads/2025/06/561fcdd4-13bb-4dd2-b7b4-b44f6a9d9028-768x768.webp)