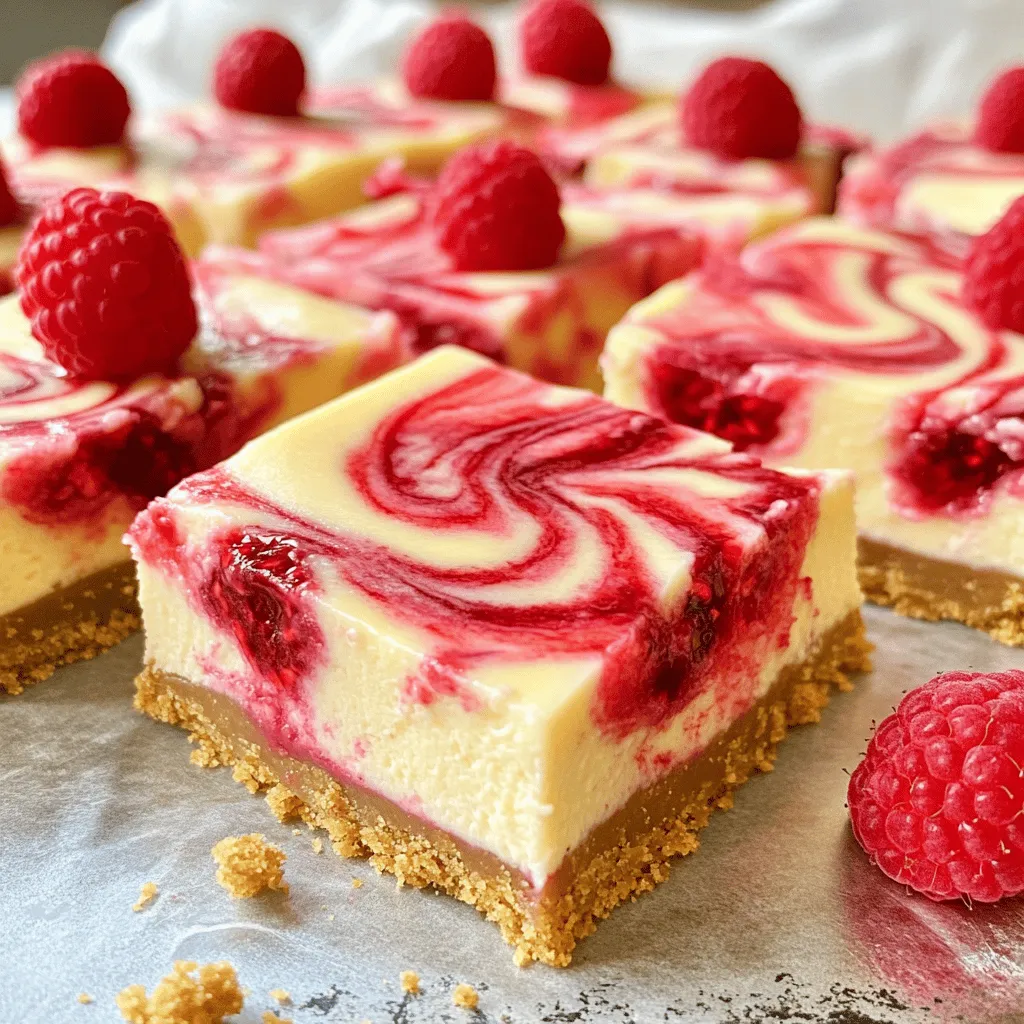
Raspberry Swirl Cheesecake Bars Simple and Delicious

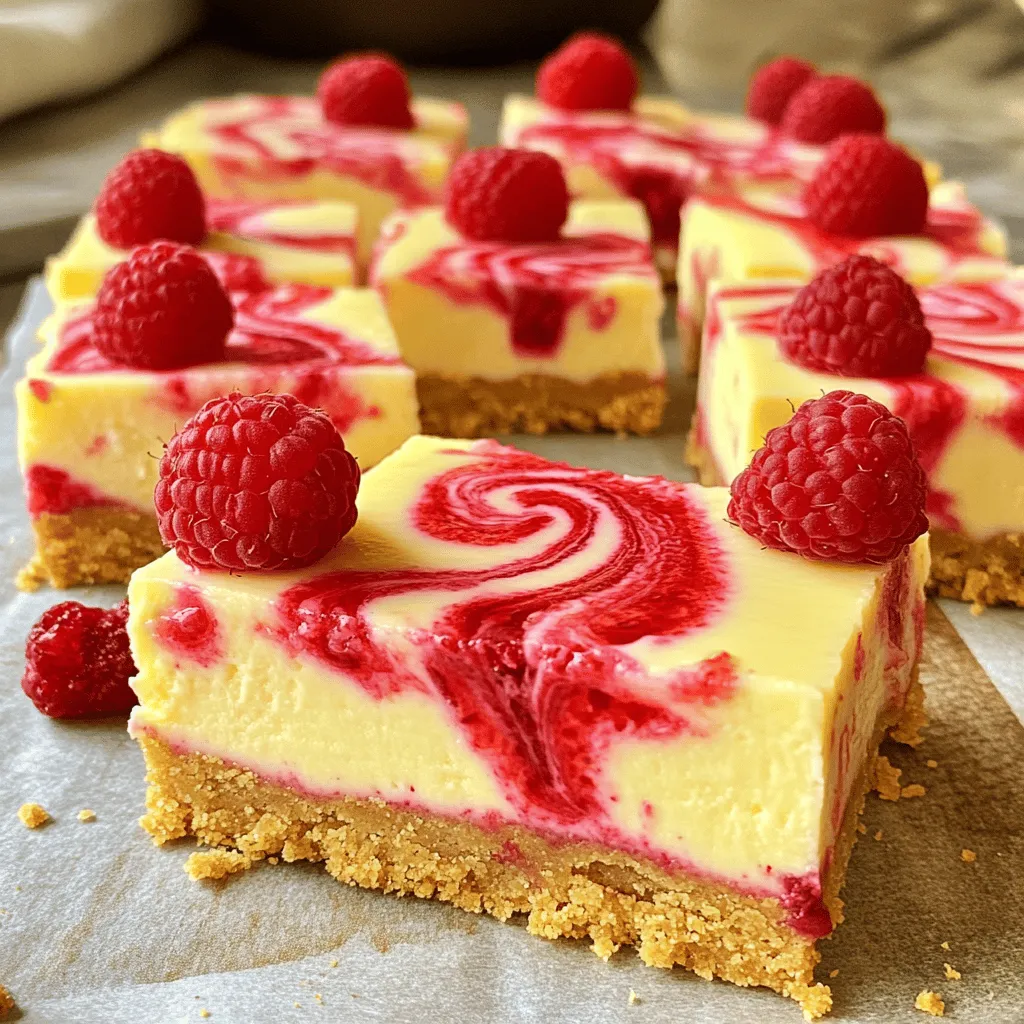
Are you ready to make a dessert that wows? Raspberry Swirl Cheesecake Bars are an easy treat you’ll love. They combine creamy cheesecake and fresh raspberries in each bite. Plus, they’re perfect for any occasion, whether it’s a picnic or a party. Follow me as I guide you through the simple steps to create this delightful dessert, and enjoy all the tips to make it just right. Let’s get started!
Ingredients
Complete List of Ingredients
- 1 ½ cups graham cracker crumbs
- ½ cup unsalted butter, melted
- 2 tablespoons granulated sugar
- 16 oz cream cheese, softened
- 1 cup granulated sugar
- 1 teaspoon vanilla extract
- 3 large eggs
- 1 cup fresh raspberries
- 1 tablespoon cornstarch
- 2 tablespoons freshly squeezed lemon juice
- A pinch of salt
When making Raspberry Swirl Cheesecake Bars, each ingredient plays a key role. The graham cracker crumbs form a sweet and crunchy crust. I use unsalted butter for richness. The two tablespoons of sugar enhance the crust’s flavor.
For the filling, cream cheese is the star. It gives the bars their rich, creamy texture. I add one cup of sugar for sweetness and a teaspoon of vanilla for flavor depth. The eggs work as a binder, adding structure.
Fresh raspberries add a burst of flavor and color. I mix them with cornstarch and lemon juice. This creates a lovely swirl that brightens the cheesecake. A pinch of salt balances the sweet and tart notes perfectly.
Ingredient Substitutions
- You can use alternative sweeteners like honey or maple syrup if you prefer.
- For a dairy-free option, try using a plant-based cream cheese.
- If you need a gluten-free crust, crushed gluten-free cookies work well.
These substitutions allow you to adjust the recipe to suit your needs. Each option still delivers delicious results.
Step-by-Step Instructions
Preheat and Prepare
- Preheat oven to 325°F (160°C).
- Line an 8×8-inch pan with parchment paper.
Crust Preparation
- In a medium bowl, mix 1 ½ cups graham cracker crumbs, ½ cup melted butter, and 2 tablespoons sugar.
- Press this mixture into the pan to form a solid crust.
- Bake for 10 minutes and let it cool.
Cheesecake Filling Process
- In a large bowl, beat 16 oz softened cream cheese until smooth.
- Gradually add 1 cup sugar and mix until fluffy.
- Add 1 teaspoon vanilla extract and a pinch of salt.
- Mix in 3 large eggs, one at a time, on low speed.
Raspberry Swirl Creation
- In a small bowl, mash 1 cup fresh raspberries with a fork.
- Add 1 tablespoon cornstarch and 2 tablespoons lemon juice, mixing well.
- The mixture should be chunky for swirling.
Assemble the Cheesecake Bars
- Pour cream cheese mixture over the cooled crust.
- Drop raspberry mixture in dollops on top.
- Use a knife to swirl raspberry sauce into the cream cheese.
Baking Instructions
- Place the pan in the oven.
- Bake for 35-40 minutes until the center is set but jiggly.
Cooling and Serving Recommendations
- Let the bars cool at room temperature in the pan.
- Chill in the fridge for at least 4 hours.
- Lift the bars out using the parchment.
- Cut into squares and serve chilled.
- For a pretty touch, add fresh raspberries and powdered sugar on top.
Tips & Tricks
Expert Tips for Perfect Cheesecake Bars
How to avoid cracks in the cheesecake:
To avoid cracks, mix the batter gently. Overmixing adds air, which causes cracks. Bake the bars at a low temperature for even cooking. This method helps the cheesecake set evenly.
Importance of room temperature ingredients:
Always use room temperature cream cheese. Cold cream cheese does not mix well. It can turn lumpy and ruin the texture. Let your eggs sit out too. This ensures a smooth batter that rises nicely.
Equipment Recommendations
Recommended mixers and baking pans:
A hand mixer or stand mixer works best for mixing. They blend the ingredients evenly. Use an 8×8-inch metal or glass pan. This size helps the bars cook evenly.
Use of thermometer for precise baking:
A kitchen thermometer is a must-have. It helps check if the cheesecake is done. The center should be slightly jiggly but set. Remove it from the oven at this point.
Serving Suggestions
Recommended garnishes and accompaniments:
Garnish your bars with fresh raspberries. A dusting of powdered sugar adds sweetness. You can also drizzle some raspberry sauce on top. This adds color and flavor to your dish.
Pairing beverages for serving:
Serve these bars with a nice cup of tea or coffee. A light sparkling water also pairs well. The drink enhances the dessert’s flavor without overpowering it.

Variations
Flavor Alternatives
You can make your cheesecake bars unique by using different fruit purees. Try strawberries, blueberries, or peaches for a new twist. Each fruit brings its own taste and color. You can also create a chocolate raspberry cheesecake. Just add melted chocolate to the cream cheese mix. This will give your bars a rich flavor that pairs well with the tart raspberries.
Dietary Modifications
Want a vegan version? Use plant-based cream cheese and a flaxseed egg. For a no-bake cheesecake bar, skip the oven. Chill the bars in the fridge after mixing the filling. It will still set well and taste great.
Seasonal Twists
Change up the fruit to match the seasons. In summer, use fresh cherries or peaches. In fall, add pumpkin or apple puree for a cozy flavor. For holidays, present the bars with festive toppings like crushed candy canes or a sprinkle of cinnamon. This will make your cheesecake bars not just tasty but also visually appealing.
Storage Info
Proper Storage Methods
To keep your raspberry swirl cheesecake bars fresh, use an airtight container. This method prevents them from drying out or absorbing other smells in the fridge. You can store them in the refrigerator for up to five days. Always place parchment paper between the bars. This makes it easy to remove them without breaking.
Freezing Instructions
If you want to store your cheesecake bars for longer, you can freeze them. Wrap each bar in plastic wrap and place them in a freezer-safe bag. They can stay frozen for up to three months without losing flavor. When you’re ready to enjoy them, move the bars to the fridge overnight to thaw. This keeps their taste and texture intact. For the best experience, serve them chilled after thawing.
FAQs
Common Questions about Raspberry Swirl Cheesecake Bars
Can I use frozen raspberries instead?
Yes, frozen raspberries work well too. Just thaw them first. Drain any extra juice to avoid a soggy mix.
How long do these cheesecake bars last?
These bars last up to five days in the fridge. Keep them in an airtight container for best results.
What if I don’t have graham crackers?
If you lack graham crackers, use crushed cookies or oats. These alternatives add a different flavor but still taste great.
Serving and Enjoyment Questions
Can I make these bars in advance?
Absolutely! These bars taste even better after chilling overnight. Prepare them a day ahead for a stress-free dessert.
How do I make the cheesecake less sweet?
To reduce sweetness, cut back on sugar. You can also add a pinch of salt to balance the flavors.
Baking and Preparation Questions
Can I double the recipe for a larger batch?
Yes, you can double the recipe. Use a larger pan and adjust the baking time as needed. Keep an eye on the center.
What to do if my cheesecake bars are too soft?
If they turn out soft, chill them longer in the fridge. If they’re still too soft, they may need longer baking next time.
This recipe for raspberry swirl cheesecake bars offers delicious flavors and easy steps. You learned about the ingredients, substitutions, and cooking tips to make it perfect. I shared ideas for variations, storage, and common questions to help you succeed. Enjoy experimenting with flavors and serving these bars. They are sure to impress your family and friends. Now, grab your ingredients and start baking!


![To make delicious zucchini chocolate chip muffins, gather these simple ingredients: - 1 medium zucchini, grated (approximately 1 cup) - 1 cup all-purpose flour - 1/2 cup whole wheat flour - 1/2 teaspoon baking soda - 1 teaspoon baking powder - 1/2 teaspoon salt - 1/2 teaspoon ground cinnamon - 2 large eggs - 1/2 cup granulated sugar - 1/4 cup packed brown sugar - 1/3 cup vegetable oil - 1 teaspoon vanilla extract - 1/2 cup semi-sweet chocolate chips - 1/4 cup walnuts or pecans, chopped (optional for extra crunch) These ingredients blend well and create a moist muffin. The grated zucchini adds moisture while keeping the muffins healthy. The mix of flours gives a great texture. The sugars balance the chocolatey goodness. You can add nuts for crunch, or leave them out if you want a smoother bite. If you want the full details on how to put this all together, check out the Full Recipe. Start by preheating your oven to 350°F (175°C). This step is key for even baking. Prepare a muffin tin by lining it with paper liners or lightly greasing each cup. In a medium mixing bowl, whisk together the following dry ingredients: - 1 cup all-purpose flour - 1/2 cup whole wheat flour - 1/2 teaspoon baking soda - 1 teaspoon baking powder - 1/2 teaspoon salt - 1/2 teaspoon ground cinnamon Mix well to ensure they are evenly combined. This helps the muffins rise properly. In a larger bowl, crack two large eggs and beat them lightly. Add: - 1/2 cup granulated sugar - 1/4 cup packed brown sugar Mix these until smooth and slightly frothy. This gives the muffins a nice texture. Slowly add in: - 1/3 cup vegetable oil - 1 teaspoon vanilla extract Stir until fully combined. Next, gently fold in 1 cup of grated zucchini. Make sure it’s evenly distributed for great flavor. Gradually add the dry mixture to the wet ingredients. Use a spatula to fold them together gently. It’s okay if there are a few lumps. Next, divide the batter evenly among the prepared muffin cups, filling each about two-thirds full. Place the muffin tin in the preheated oven and bake for 18 to 20 minutes. To check if they are done, insert a toothpick into the center. It should come out clean or with a few moist crumbs. Once done, let the muffins cool in the pan for about 5 minutes before transferring them to a wire rack. This makes them easier to remove without breaking. For the full recipe, refer to the earlier sections. To make great muffins, follow these tips closely: - Use Fresh Ingredients: Fresh baking powder and soda give the best rise. - Room Temperature Eggs: Bring your eggs to room temperature for better mixing. - Preheat the Oven: Always preheat your oven to 350°F (175°C) before baking. - Fill Muffin Cups Evenly: Fill each cup about two-thirds full for a nice dome shape. Overmixing can lead to tough muffins, which we want to avoid. Here’s how: - Mix Dry and Wet Separately: Always mix dry and wet ingredients in separate bowls first. - Fold Gently: When combining, use a spatula to fold the mixture. Stop mixing when you see a few lumps. - Don’t Worry About Lumps: A few lumps are okay; they will bake out in the oven. Presentation is important for making your muffins look as good as they taste. Try these ideas: - Serve Warm: Serve your muffins warm from the oven for a cozy feel. - Use a Basket: Place muffins in a basket lined with a cloth napkin for a rustic touch. - Garnish: Lightly dust with powdered sugar or drizzle melted chocolate on top for flair. For the full recipe of Zucchini Chocolate Chip Muffins, check the earlier section. {{image_4}} You can make these muffins gluten-free easily. Just swap the all-purpose flour with gluten-free flour blend. Make sure it has xanthan gum to help with texture. This change keeps the muffins soft and tasty. You can also mix in other fun ingredients. Dried fruits like raisins or cranberries add sweetness. Chopped nuts like walnuts or pecans give a nice crunch. You can even add seeds for more texture. Just be sure to adjust the amount of chocolate chips if you add more. If you want a lower sugar treat, you have options. Use less granulated sugar or brown sugar. You can try sugar substitutes like stevia or monk fruit sweetener. These options can help keep the muffins sweet without the extra calories. Just remember to check the package for measurements. Check out the [Full Recipe] for more details! To keep your zucchini chocolate chip muffins fresh, store them in an airtight container. You can place them on the counter. They will stay tasty for about three days. If you want to keep them longer, consider freezing. Freezing muffins is easy and smart. First, let the muffins cool completely. Then, wrap each muffin in plastic wrap or aluminum foil. Place them in a freezer-safe bag or container. These muffins can last up to three months in the freezer. When you want one, just take it out and reheat. Reheating is quick and simple. You can use a microwave or an oven. For the microwave, heat one muffin for 15 to 20 seconds. For the oven, preheat to 350°F (175°C). Place the muffin on a baking sheet and warm it for about 5 to 10 minutes. Enjoy your warm muffin with a cup of coffee or tea! To make zucchini chocolate chip muffins from scratch, follow this simple recipe. Start by preheating your oven to 350°F (175°C). Prepare your muffin tin with liners or grease it. In one bowl, mix all-purpose flour, whole wheat flour, baking soda, baking powder, salt, and cinnamon. In another bowl, beat two eggs, then add granulated and brown sugar. Mix in vegetable oil and vanilla extract. Fold in grated zucchini, then combine the wet and dry ingredients. Lastly, add chocolate chips and any nuts if you want. Fill the muffin cups and bake them for 18 to 20 minutes. For the full recipe, check the instructions above. Yes, you can use frozen zucchini in this recipe. Just make sure to thaw it first. Drain any excess water to avoid soggy muffins. Frozen zucchini works well because it retains most of its flavor. It also provides moisture, just like fresh zucchini does. This option is great if you have leftover zucchini from last season. Zucchini offers several health benefits. It is low in calories and high in fiber. This can help keep you feeling full longer. Zucchini is also packed with vitamins like A and C. These vitamins support your immune system and skin health. Plus, adding veggies to your muffins makes them more nutritious. It’s a great way to sneak in some extra greens. Zucchini muffins can last up to a week when stored properly. Keep them in an airtight container at room temperature. If you want them to last longer, you can freeze them. Just make sure they are completely cooled before freezing. They can stay fresh in the freezer for about three months. Yes, you can substitute other types of flour in this recipe. Almond flour, oat flour, or coconut flour are all good options. Each type of flour can change the texture slightly, so keep that in mind. If you use a gluten-free flour blend, make sure it has a binding agent, like xanthan gum, for the best results. You now have a clear guide for making delicious zucchini chocolate chip muffins. We covered the ingredients and step-by-step instructions needed to bake them perfectly. Plus, I shared tips on avoiding common baking mistakes and ways to store your muffins. You can also explore tasty variations to suit your taste. Remember, these muffins are not just yummy; they bring the added health benefits of zucchini. Happy baking, and enjoy these treats!](https://dishtreats.com/wp-content/uploads/2025/06/0cde25ea-110a-42a8-bcb8-b8faa9becc28-768x768.webp)

![To make these delightful cookies, you need a few key ingredients: - 1 cup ricotta cheese - 1/2 cup unsalted butter, softened - 1 cup granulated sugar - 1 large egg - 2 teaspoons fresh lemon zest - 2 tablespoons fresh lemon juice - 2 cups all-purpose flour - 1 teaspoon baking powder - 1/2 teaspoon baking soda - 1/4 teaspoon fine sea salt - Powdered sugar for dusting These ingredients create a soft and tasty cookie that bursts with lemon flavor. For this recipe, you will need: - A large mixing bowl - An electric mixer - A medium mixing bowl - Whisk - Baking sheet - Parchment paper - Cookie scoop or spoon - Wire rack Having the right tools makes baking easy and fun. You can easily swap some ingredients if needed: - Use low-fat ricotta for a lighter option. - Replace unsalted butter with coconut oil for a dairy-free cookie. - Substitute lemon with orange for a different flavor. - Use gluten-free flour to make these cookies gluten-free. These alternatives let you customize the recipe to fit your needs. For the full recipe, check the details provided above. First, heat your oven to 350°F (175°C). This step is key for baking. Next, line a baking sheet with parchment paper. This prevents the cookies from sticking. In a large bowl, mix the ricotta cheese and softened butter. Use an electric mixer on medium speed. Beat them for about 2-3 minutes. You want a smooth and creamy mix. This will be the base of your cookies. Now, it’s time to add the sugar. Gradually sprinkle in the granulated sugar, mixing as you go. Keep beating until it’s light and fluffy. Next, crack in the egg. Add the lemon zest and lemon juice. Mix until everything is well combined. In a separate bowl, whisk together the flour, baking powder, baking soda, and sea salt. Once mixed, add the dry ingredients to the ricotta mix. Stir gently until just combined. Be careful not to overmix. This helps keep the cookies soft. Use a spoon or cookie scoop to drop rounded tablespoons of dough onto the baking sheet. Leave about 2 inches of space between each cookie. This allows them to spread while baking. Place the sheet in the oven and bake for 12-15 minutes. Look for lightly golden edges and soft centers. After baking, let the cookies cool on the sheet for about 5 minutes. Then carefully transfer them to a wire rack. Let them cool completely. Once cooled, dust lightly with powdered sugar for a sweet touch. Enjoy these delightful lemon ricotta cookies! For the complete recipe, check out the [Full Recipe]. To make your lemon ricotta cookies soft, use fresh ricotta cheese. It adds moisture and flavor. Avoid overmixing the dough. Mix just until combined. This keeps the cookies light. Let the dough chill for about 30 minutes. Chilling helps the cookies hold their shape while baking. Accurate measurements are key to great cookies. Use dry measuring cups for flour and sugar. Spoon the flour into the cup, then level it off with a knife. Do not pack it down. For liquids, use a clear liquid measuring cup. Fill it to the desired line while checking at eye level. One common mistake is not preheating the oven. Always preheat to ensure even baking. Another mistake is baking on an ungreased or unlined pan. Use parchment paper to prevent sticking. Finally, don’t skip cooling the cookies on a wire rack. This helps them set and stay soft. For the full recipe, check out the step-by-step guide. {{image_4}} You can add chocolate chips for a sweet twist. Use semi-sweet or milk chocolate chips. Just fold in one cup of chips into the dough after mixing in the dry ingredients. This change creates a fun contrast with the lemon flavor. The rich chocolate and bright lemon make each bite exciting! To make these cookies gluten-free, swap the all-purpose flour with a gluten-free blend. Look for a blend that includes xanthan gum. This ingredient helps the cookies hold their shape. Follow the same recipe steps, and you will have delicious gluten-free cookies that everyone can enjoy. You can enhance the flavor by adding herbs or spices. Try mixing in a teaspoon of fresh thyme or rosemary for a unique taste. You could also use vanilla extract for warmth. These small changes can take your lemon ricotta cookies to a whole new level. Experiment with flavors and find what you like best! To keep your lemon ricotta cookies fresh, place them in an airtight container. This will help maintain their soft texture. I recommend layering the cookies with parchment paper. This way, they won’t stick together. Store the container at room temperature for up to five days. If you live in a humid area, consider refrigerating them. Just remember to bring them to room temperature before enjoying. If you want to save some cookies for later, freezing is a great option. First, let the cookies cool completely. Then, place them in a single layer on a baking sheet. Freeze for about an hour until firm. After that, transfer the cookies to a freezer-safe bag or container. Make sure to remove as much air as possible. You can freeze them for up to three months. When you’re ready to enjoy, thaw them in the fridge overnight. Lemon ricotta cookies are best enjoyed fresh, but they can last. If stored correctly, they stay soft for about five days at room temperature. Over time, they may become a bit dry. To refresh them, you can microwave a cookie for about 10 seconds. This will bring back some of the softness. Always check for any signs of spoilage before eating. If they smell off or look strange, it’s best to toss them. Enjoy your cookies! For the full recipe, refer to the main article. Yes, you can use pre-made ricotta cheese. Just make sure it is fresh and creamy. Store-bought ricotta saves time and still brings great taste. If it's a bit watery, drain it before use. This will keep your cookies from getting too soggy. To make these cookies dairy-free, replace ricotta cheese with tofu. Use firm tofu, blend it, and add a bit of lemon juice for flavor. For butter, try coconut oil or a dairy-free spread. These swaps keep the cookies soft and delicious without dairy. The best way to glaze these cookies is with a simple lemon glaze. Mix powdered sugar with fresh lemon juice until smooth. Drizzle the glaze over cooled cookies for a sweet finish. You can also add lemon zest on top for extra flavor. You will know the cookies are done when the edges turn golden. The centers should still look soft and puffy. A toothpick inserted in the center should come out clean or with a few crumbs. Avoid over-baking for the softest texture. Yes, you can make these cookies healthier. Use whole wheat flour instead of all-purpose flour. Replace granulated sugar with coconut sugar or a sugar substitute. You can also cut down on butter by using applesauce or Greek yogurt. These changes keep cookies tasty and lower in calories. For the full recipe, check the [Full Recipe]. In this post, we covered how to make lemon ricotta cookies step by step. We explored key ingredients, baking equipment, and helpful tips. I shared ways to customize the cookies with flavors and special diets. Finally, we discussed storage methods to keep them fresh. With these insights, you can bake delicious cookies that are soft and bright in flavor. Enjoy your baking experience and share these treats with friends!](https://dishtreats.com/wp-content/uploads/2025/07/5405bae2-00aa-4997-8585-ece8a42539ac-768x768.webp)
