Mediterranean Chickpea Salad Fresh and Flavorful Dish
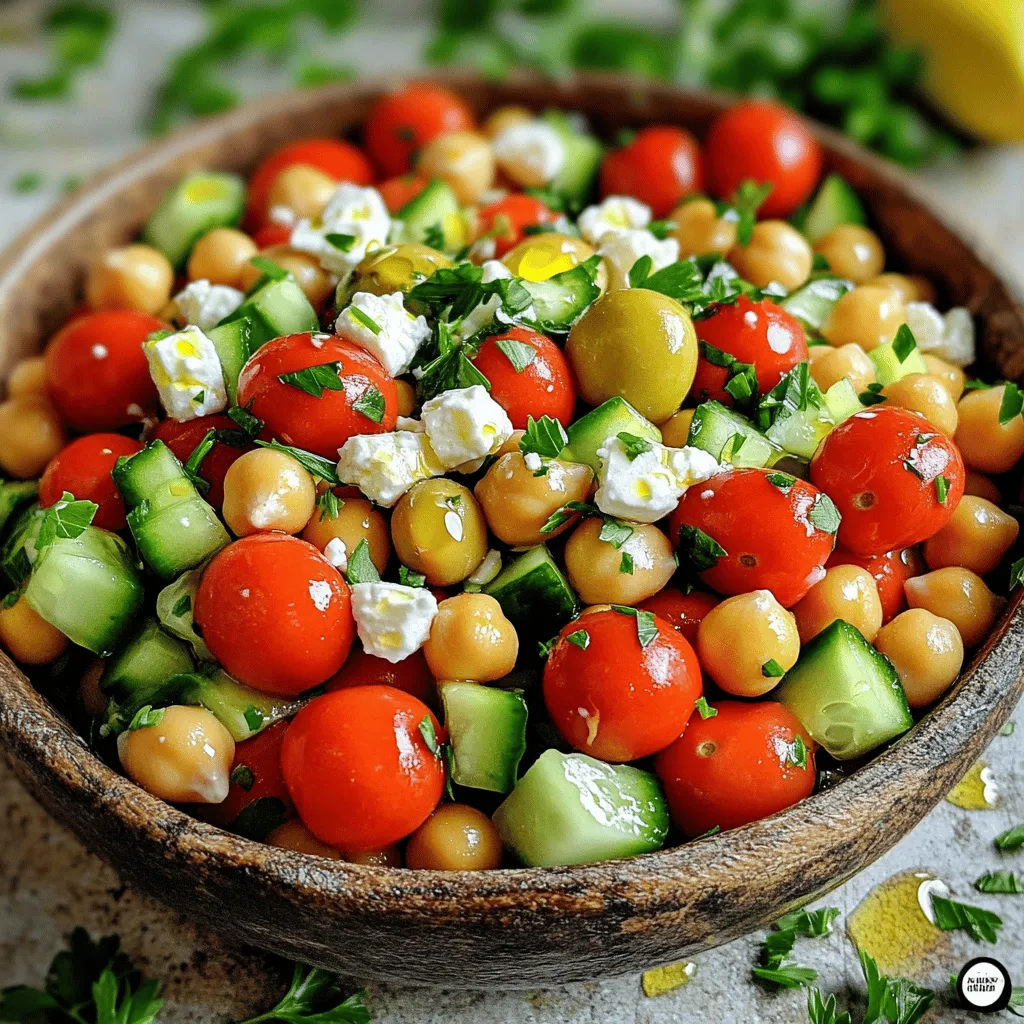
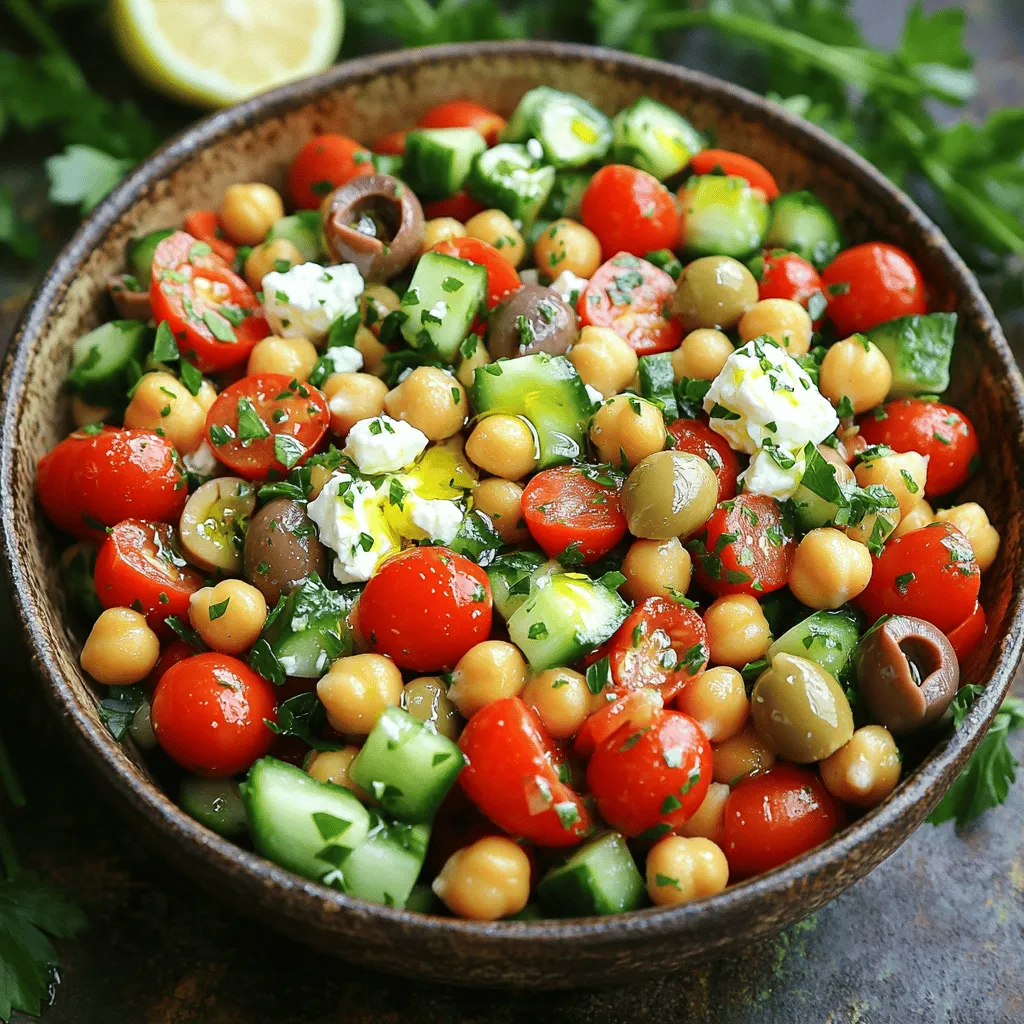
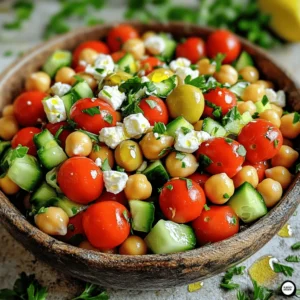
Looking to brighten up your meal with a fresh and vibrant dish? This Mediterranean Chickpea Salad is packed with flavor and nutrition! You’ll enjoy the mix of crunchy veggies, tangy lemon, and savory olives. Plus, it’s simple to make in just a few steps. Dive into this recipe that can be customized to your taste. Let’s make a healthy salad that everyone will love!
Ingredients
To make a delicious Mediterranean chickpea salad, you need fresh and simple ingredients. Here’s what you need:
- Canned chickpeas
- Cherry tomatoes
- Cucumber
- Red onion
- Kalamata olives
- Fresh parsley
- Feta cheese (optional)
- Olive oil
- Fresh lemon juice
- Dried oregano
- Salt and pepper
These ingredients bring bright flavors and textures to your dish. Canned chickpeas offer protein and fiber. Cherry tomatoes add sweetness and color. Cucumber gives a nice crunch. Red onion adds a sharp bite, while Kalamata olives bring a briny taste. Fresh parsley brightens it all up. Feta cheese adds creaminess but is optional. Olive oil and lemon juice make a tangy dressing, while oregano, salt, and pepper enhance the flavors.Enjoy creating this fresh and flavorful dish!
Step-by-Step Instructions
Preparation of Ingredients
To start, gather your ingredients. You will need canned chickpeas, cherry tomatoes, cucumber, red onion, Kalamata olives, and fresh parsley. If you want, you can add feta cheese. Rinse the chickpeas well under cold water. This step helps remove any excess salt. Next, drain them carefully. Cut the cherry tomatoes in half to release their sweet juices. Dice the cucumber into small, bite-sized pieces. Chop the red onion finely for a mild flavor. Slice the Kalamata olives and chop the parsley. If using feta, crumble it into small pieces.
Mixing and Tossing the Salad
In a large mixing bowl, combine the chickpeas, tomatoes, cucumber, onion, olives, and parsley. This mix creates a colorful base for your salad. Use a large spoon to gently mix the ingredients together. Be careful not to mash the chickpeas. You want to keep that lovely, firm texture. This step makes sure all the flavors blend well.
Dressing the Salad
Now, let’s make the dressing. In a small bowl, whisk together the olive oil, fresh lemon juice, oregano, salt, and pepper. This mixture adds a bright, tangy taste. Drizzle the dressing over the salad mix. Then, use your large spoon or spatula to toss everything gently. Make sure all the ingredients get coated in the dressing. If you’re adding feta, sprinkle it on top and toss lightly again. Taste the salad and adjust the seasoning as needed. Cover the bowl with plastic wrap and chill in the fridge for at least 15 minutes. This resting time helps the flavors meld together.
Tips & Tricks
Flavor Enhancements
To make this salad pop with flavor, try adding a few ingredients. Fresh herbs like basil or mint bring a bright taste. You can also toss in a pinch of red pepper flakes for some heat. If you love garlic, add a minced clove to the dressing. It gives a nice kick and elevates your salad.
Serving Suggestions
Serve your Mediterranean chickpea salad as a main dish or a side. It pairs well with grilled chicken or fish. You can also enjoy it with warm pita bread, making it a complete meal. For a fun twist, serve it stuffed in a wrap or a pita pocket for lunch.
Presentation Tips
Make your salad shine when serving. Use a colorful bowl to highlight the vibrant ingredients. Add a sprinkle of parsley and feta on top to make it look fresh. If you want, you can even add lemon wedges around the bowl. This adds a touch of elegance and freshness.
Variations
Substitutions for Ingredients
You can easily change some ingredients in this salad. If you don’t have chickpeas, try black beans or kidney beans. For a different flavor, use grape tomatoes instead of cherry tomatoes. You can also swap cucumber for bell pepper for a crunchier bite. Instead of red onion, use green onions for a milder taste. If you want a creamier salad, consider adding avocado instead of feta cheese.
Seasonal Additions
You can make this salad fresh with seasonal ingredients. In summer, add sweet corn or diced bell peppers. In fall, try adding diced roasted butternut squash. Winter calls for hearty greens like kale or spinach mixed in. Each season brings new flavors to explore!
Vegan or Gluten-Free Adaptations
This salad is naturally vegan and gluten-free, which makes it easy to adapt. Simply skip the feta cheese if you’re vegan. If you want a protein boost, toss in some quinoa or lentils. For a gluten-free option, ensure your olives and any packaged ingredients are certified gluten-free. Enjoy this versatile dish while keeping your diet in mind.
Storage Info
Refrigeration Guidelines
You can store your Mediterranean chickpea salad in the fridge. Use an airtight container for best results. It will stay fresh for about 3 to 5 days. Keep it covered to minimize air exposure. This helps to retain flavors and textures.
Freezing Instructions
Freezing this salad is not ideal. The fresh veggies can lose their crunch. However, if you want to freeze it, do so without the dressing. Freeze in a sealed bag or container. When you’re ready to eat, thaw in the fridge overnight and add the dressing fresh.
How to Maintain Freshness
To maintain freshness, keep the salad covered. If you notice the veggies getting soggy, drain any excess liquid. You can also add fresh herbs or extra lemon juice before serving. This will revive the flavors and brightness. Always taste before serving to adjust seasoning.
FAQs
How long can Mediterranean Chickpea Salad be stored?
You can store Mediterranean Chickpea Salad in the fridge. It lasts about 3 to 5 days. Keep it in a sealed container. The flavors will blend well over time. However, the veggies might lose some crunch.
Can I make this salad in advance?
Yes, you can make this salad ahead of time. It tastes even better after sitting for a while. Just cover it and chill it in the fridge. I suggest making it a few hours before serving. This lets the flavors mix nicely.
What are the health benefits of chickpeas?
Chickpeas are packed with nutrients. They are high in protein and fiber. This helps keep you full longer. Chickpeas also support heart health. They can help lower cholesterol levels. Plus, they provide vitamins and minerals. This makes them a great addition to any meal.You learned about each ingredient, how to prepare, and flavorful tips to enhance your dish. We explored variations to keep things exciting for every season and diet. Proper storage helps maintain freshness for longer.
Enjoy experimenting with this salad. It’s tasty and fits many meals. You can make it your own with fun twists. Happy cooking!
![- 1 large head of cauliflower, trimmed and cut into bite-sized florets - 1 cup shredded sharp cheddar cheese, divided - 1 cup cream cheese, softened to room temperature - 1 cup milk, preferably whole - 1/2 cup grated Parmesan cheese - 1 cup breadcrumbs (whole wheat or panko for extra crunch) - 2 garlic cloves, finely minced - 1 teaspoon onion powder - Salt and freshly cracked black pepper to taste - 2 tablespoons extra virgin olive oil - Fresh parsley, finely chopped (for garnish) - For cheese lovers, try gouda or mozzarella for a different taste. - If you want a dairy-free version, use cashew cream and dairy-free cheese. - Whole grain breadcrumbs work well. For gluten-free, use crushed nuts or gluten-free crumbs. This cheesy cauliflower casserole is perfect for a cozy meal. The rich flavors come from simple ingredients, making it easy to enjoy. You can find the full recipe above to guide you through the cooking process. First, set your oven to 375°F (190°C). Preheating is key. It ensures even cooking and helps achieve a golden crust. If you skip this step, your casserole may not cook right. Next, you will blanch the cauliflower. Fill a large pot with water and add a pinch of salt. Once it boils, gently add the cauliflower florets. Blanch them for about 5 minutes. They should be tender but still crunchy. Drain and let them cool. Keeping that crunch is important for the final dish. Now, let’s make the cheese mixture. In a big bowl, mix softened cream cheese with milk until smooth. Then add minced garlic and onion powder. Finally, fold in half of the shredded cheddar cheese. You want it creamy and well-blended. This mixture adds great flavor. Next, fold the blanched cauliflower into the cheese mixture. Make sure each floret gets coated well. This is where you can add salt and freshly cracked black pepper. Taste it to ensure it’s seasoned just right. Take a 9x13 inch casserole dish and grease it with olive oil or cooking spray. Pour the creamy cauliflower mixture into the dish. Spread it out evenly. This helps every bite to be delicious. Finally, bake your casserole. Place it in the oven for 25-30 minutes. Look for a golden brown top and bubbly cheese. When it’s done, let it cool for about 5 minutes before serving. This helps the flavors settle and makes it easier to serve. For the full recipe, check out the details above. To get creamy cauliflower, use softened cream cheese and whole milk. This mix gives a rich feel. Blanch the cauliflower just right, so it stays firm. If you want a crispy topping, use panko breadcrumbs. They add extra crunch and texture. Mixing the breadcrumbs with a bit of olive oil helps them brown. Try adding fresh herbs like thyme or rosemary for extra flavor. A pinch of smoked paprika can bring a nice twist too. If you like heat, consider some chili flakes. Always taste your mix before baking. Adjust salt and pepper to your liking. This will make sure every bite is just right. For a fun touch, serve the casserole in individual ramekins. This makes each serving special. You can also top each ramekin with fresh parsley for color. Using a sprinkle of extra Parmesan adds a nice look and taste. Remember, we eat with our eyes first. A pretty dish makes it more inviting! {{image_4}} To make a low-carb version, use cauliflower rice instead of whole florets. This change will keep the dish light and reduce carbs. You can also add other veggies like broccoli or spinach. These will boost the flavor and nutrition. For a vegan option, swap dairy cheese with dairy-free cheese alternatives. Look for brands made from nuts or soy that melt well. You can also use plant-based cream options like coconut cream or cashew cream. This keeps the creamy texture without dairy. If you like heat, add chili flakes or jalapeños. These will give your casserole a nice kick. You may also explore global twists. Try Mediterranean flavors with olives and feta cheese, or go for Mexican flavors by adding black beans and corn. Each twist makes this dish exciting! For the full recipe, check out the [Full Recipe]. To store leftovers, use an airtight container. Make sure to cool the casserole first. Place it in the fridge. It will stay fresh for about 3 to 5 days. Always check for signs of spoilage before eating. For reheating, the oven is best for keeping the texture. Preheat your oven to 350°F (175°C). Place the casserole in a baking dish. Cover it with foil to avoid drying out. Heat for about 20 minutes or until warm. Limit reheating to just once to keep it tasty. To freeze, let the casserole cool completely. Cut it into portions for easy use. Wrap each piece well in plastic wrap. Then place them in a freezer-safe bag. It can last up to 3 months. For thawing, place it in the fridge overnight for best results. This helps keep the quality. To make this cheesy cauliflower casserole, follow these easy steps: 1. Preheat the oven: Set it to 375°F (190°C). 2. Blanch the cauliflower: Boil water with salt, then add cauliflower florets for about 5 minutes. Drain and let cool. 3. Prepare the cheese mixture: In a bowl, mix cream cheese and milk until smooth. Add minced garlic, onion powder, and half the cheddar cheese. 4. Combine with cauliflower: Fold the blanched cauliflower into the cheese mixture. Season with salt and pepper. 5. Fill the casserole dish: Grease a 9x13 inch dish and pour the mixture in. 6. Prepare the topping: Combine breadcrumbs, Parmesan, remaining cheddar, and olive oil. Sprinkle on top. 7. Bake: Cook in the oven for 25-30 minutes until golden brown. 8. Cool and garnish: Let it cool for a few minutes and add parsley on top. You can find the full recipe above for more details. Yes, you can make this casserole ahead of time. Prepare it up to the baking step. Cover it and place it in the fridge for up to 24 hours. When ready to serve, bake it at 375°F (190°C) for about 30-35 minutes. You may need to add a few extra minutes if it’s cold from the fridge. This casserole pairs well with many dishes. Here are some great options: - Grilled chicken or fish for protein. - A fresh green salad for crunch. - Roasted vegetables for added nutrition. - Garlic bread for a comforting touch. These sides will balance the rich flavors of the casserole. Yes, it is perfect for meal prep. Store leftovers in airtight containers in the fridge for up to 4 days. Reheat in the microwave or oven. For best results, use the oven to keep the topping crispy. Cauliflower is a powerhouse of nutrients. Here are some key benefits: - Low in calories: This makes it great for weight management. - High in fiber: Promotes good digestion and keeps you full. - Rich in vitamins: Especially vitamin C and K, which support health. - Antioxidants: Help protect your body from damage. Including cauliflower in your diet can boost overall health while enjoying delicious meals. This cheesy cauliflower casserole is a blend of flavor and ease. We covered the key ingredients, preparation steps, and variations to make it your own. From storing leftovers to serving suggestions, this dish fits many needs. Whether you prefer it low-carb, vegan, or with a spicy kick, there's a version for everyone. Enjoy creating your own twist on this delightful dish. Cooking should be fun and tasty!](https://dishtreats.com/wp-content/uploads/2025/07/466b6563-f7cf-4c28-8259-a68bc212ec4f-768x768.webp)


![- 1 pre-made pizza dough - 1/2 cup fresh basil pesto - 1 cup shredded mozzarella cheese - 1 medium lemon (zested and juiced) - 1 cup cherry tomatoes, halved - 1/4 cup finely grated Parmesan cheese - 1 tablespoon extra-virgin olive oil - Salt and freshly ground black pepper to taste - Fresh basil leaves for garnish - Additional toppings (e.g., olives, peppers) - Alternative cheese options (feta, goat cheese) To make a great Lemon Basil Pesto Pizza, you need these ingredients. They work together to create a fresh, bright flavor. First, the pre-made pizza dough saves time and makes this recipe easy. You can find it in stores. Fresh basil pesto adds a rich, herby taste. It’s the star of this dish. Shredded mozzarella cheese melts beautifully. It gives that familiar cheesy texture we love. The lemon zest and juice bring a tangy punch. Cherry tomatoes add sweetness and color. Grated Parmesan cheese gives a nutty, salty flavor. The olive oil helps everything blend well. Salt and pepper round out the taste. For those who want to mix things up, you can add more toppings. Olives and peppers are great choices. You might also try different cheeses like feta or goat cheese for a twist. With these simple and tasty ingredients, you’re on your way to making a delightful pizza. For the full recipe and step-by-step guide, check out the [Full Recipe]. 1. Preheat your oven to 475°F (245°C). If you have a pizza stone, place it in the oven. This helps the crust cook evenly. If not, use a baking sheet. 2. Lightly flour a clean surface. Roll out the pizza dough to your desired thickness. Make sure it fits your baking surface. 3. Once rolled out, move the dough onto parchment paper. This will help you transfer the pizza later. 1. Spread the fresh basil pesto over the dough. Leave a half-inch border for the crust. 2. Sprinkle the shredded mozzarella cheese over the pesto. Make sure it covers the whole pizza. 3. Add the halved cherry tomatoes on top of the cheese. This adds color and flavor. 4. Drizzle the extra-virgin olive oil over everything. Season with salt and freshly ground black pepper to taste. 5. Zest the lemon and sprinkle it evenly on the pizza. This adds a fresh citrus aroma. 1. Slide the parchment paper with the pizza onto the preheated pizza stone or baking sheet. 2. Bake for about 12-15 minutes. Look for a golden brown crust and bubbling cheese. 3. Carefully take the pizza out of the oven. Drizzle fresh lemon juice over the top. 4. Sprinkle grated Parmesan cheese over the warm pizza. Add fresh basil leaves for garnish. 5. Use a sharp knife or pizza cutter to slice the pizza into wedges. Serve hot for the best taste. You can find the Full Recipe for this delicious Lemon Basil Pesto Pizza above. To get the best crust, I recommend using a pizza stone. It heats up and gives your pizza a crispy base. If you don’t have one, a baking sheet works too. Just make sure you preheat it well. Roll your pizza dough to the right thickness. Aim for about a quarter-inch thick. This allows for a nice rise and crunch without being too thin. For flavor, balance the saltiness with fresh lemon juice. A squeeze of lemon brightens up the taste. It makes the pizza feel fresh and lively. Use only fresh ingredients. Fresh basil, ripe tomatoes, and good cheese make a big difference. They add depth and vibrancy to your dish. When serving, place the pizza on a rustic wooden board. It adds a nice touch. You can also use a colorful platter for a fun look. Garnish with whole basil leaves and a lemon wedge. This makes it visually appealing and invites your guests to dig in. Serve it hot for the best taste! For the full recipe, check out the complete details above. {{image_4}} You can switch up the sauce for your pizza. Tomato sauce works well if you want a classic taste. You can also try a creamy white sauce. This adds a rich flavor that pairs nicely with lemon. Seasonal pesto is another fun option. You can make it with fresh herbs like parsley or cilantro. This gives a new twist to your dish. If you need a gluten-free pizza, several dough options are available. Many stores sell gluten-free pizza crusts. You can also make your own using almond flour or cauliflower. For those who follow a vegan diet, you can skip the cheese. There are many tasty vegan cheese substitutes. Look for brands made from nuts or soy for a creamy texture. Toppings can make your pizza unique. Popular choices include pepperoni, mushrooms, and bell peppers. Try mixing and matching your favorites. Seasonal vegetables add color and flavor. In summer, fresh zucchini or bell peppers work well. In winter, roasted butternut squash or kale can be a great choice. Don't be afraid to get creative with your toppings! To keep your Lemon Basil Pesto Pizza fresh, let it cool to room temperature. This step is key to avoid moisture buildup. Wrap each slice in plastic wrap or aluminum foil. You can also place them in an airtight container. This helps retain flavor and texture. Store the pizza in the fridge for up to three days. For best results, enjoy it within this time frame. When it's time to eat leftovers, you can use either an oven or a microwave. The oven is best for maintaining crispiness. Preheat your oven to 375°F (190°C). Place the pizza on a baking sheet and heat for about 10 minutes. This warms it up well without making it soggy. If you choose the microwave, place a slice on a microwave-safe plate. Add a cup of water next to it. This helps keep the crust from getting too chewy. Heat in 30-second intervals until warm. But remember, the microwave won't keep it crispy. For the best taste, the oven is your friend! Use these tips to enjoy your pizza even after the first delightful slice. For the full recipe, check out the complete article. To make your own basil pesto, you need a few simple ingredients. Combine fresh basil, garlic, pine nuts, Parmesan cheese, and olive oil in a food processor. Blend until smooth. Adjust the taste with salt and pepper. This mix adds great flavor to your pizza. Yes, you can freeze lemon basil pesto pizza. First, let the pizza cool completely. Then, wrap it in plastic wrap and place it in a freezer bag. It can last for up to three months. When you are ready to eat, bake it straight from the freezer. This makes a quick meal! Several side dishes pair well with lemon basil pesto pizza. Here are some of my favorites: - A light green salad with vinaigrette - Garlic bread for a crunchy side - Roasted vegetables for added flavor These sides balance the pizza's taste and make for a complete meal. To cut your pizza into even slices, use a sharp pizza cutter or knife. Start by cutting it in half, then cut each half into smaller sections. Aim for 8 slices for a standard pizza. This way, everyone gets a fair share! You can find high-quality pre-made pizza dough at many grocery stores. Look in the refrigerated section or the freezer aisle. Some local pizzerias also sell their dough. If you want a special option, check out artisan bakeries. They often have fresh dough made with quality ingredients. In this pizza guide, we covered essential ingredients, step-by-step instructions, and useful tips. You learned how to customize your pizza and store leftovers. Remember, fresh ingredients make a big difference in taste. If you try different toppings or variations, have fun with it! I believe cooking should be enjoyable and creative. Follow these steps, and you’ll create delicious pizza every time. Enjoy your cooking adventure!](https://dishtreats.com/wp-content/uploads/2025/06/c2cede7a-626b-4fd1-91be-1b09c425b287-768x768.webp)