Garlic Lemon Asparagus Quick and Tasty Side Dish
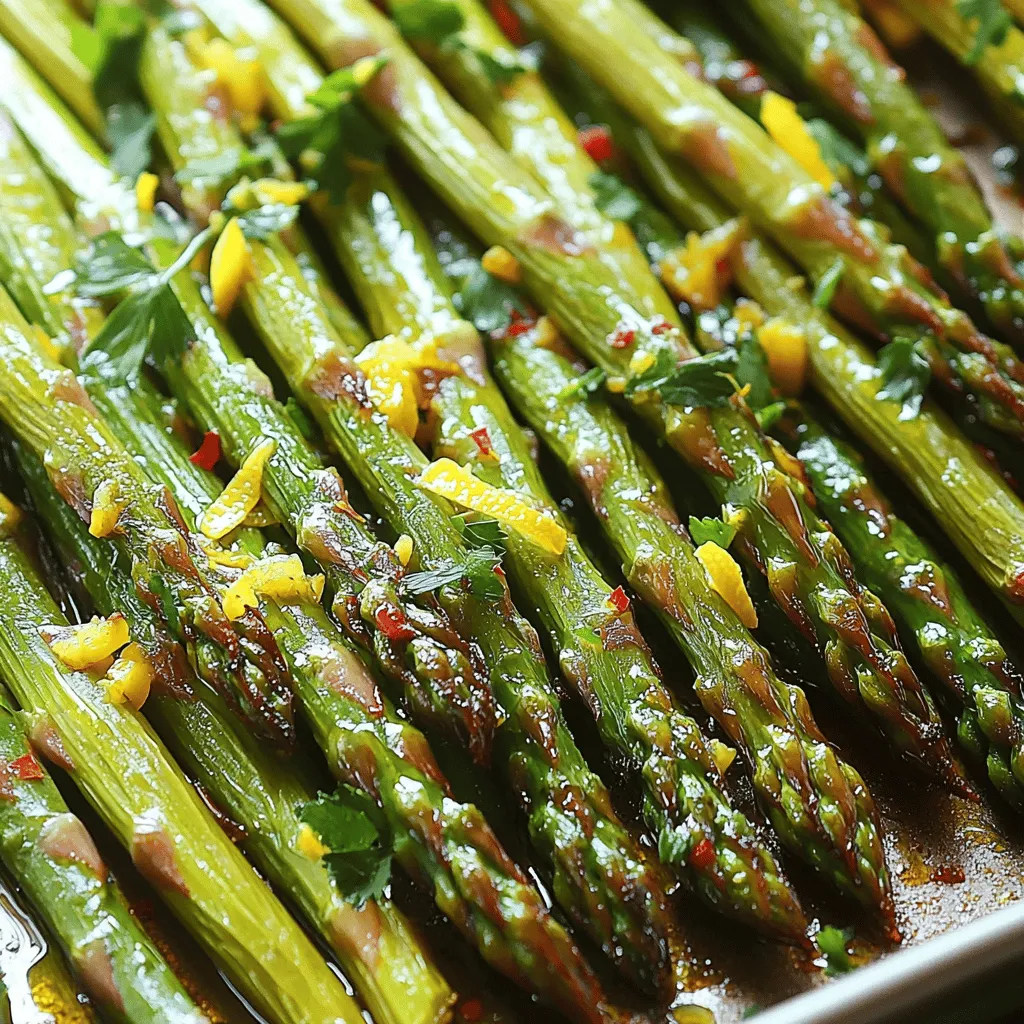
Looking for a quick, tasty side dish that brightens any meal? Garlic Lemon Asparagus is your answer! This dish marries fresh asparagus with zesty garlic and lemon for a flavor explosion. It’s not just easy to make, but also packed with nutrients. In this article, I’ll guide you step-by-step, share helpful tips, and suggest fun variations. Let’s make your meals shine with this delightful side!
Ingredients
Fresh Asparagus
- 1 pound fresh asparagus, trimmed
Asparagus is key to this dish. Choose bright green, firm stalks. Look for ones that snap easily when bent. This freshness ensures a crisp texture and vibrant flavor.
Garlic and Lemon
- 4 cloves garlic, minced
- Zest of 1 lemon
- Juice of 1 large lemon
Garlic adds depth. Use fresh, not pre-minced. Mince it well to release its oils. Lemon brings brightness. The zest adds a punch of flavor, while the juice balances the garlic’s intensity.
Seasoning and Garnish
- 2 tablespoons extra virgin olive oil
- 1 teaspoon red pepper flakes (optional for heat)
- Salt and freshly ground black pepper to taste
- Fresh parsley, finely chopped (for garnish)
Olive oil helps the asparagus roast evenly. Red pepper flakes give it a kick, but it’s optional. Season with salt and pepper to enhance all the flavors. Parsley adds a fresh touch. It makes the dish look great and adds a hint of herbal flavor.
Step-by-Step Instructions
Prepping the Asparagus
First, gather your ingredients. You need fresh asparagus, garlic, olive oil, lemon, and seasonings. Trim the tough ends off the asparagus. You want only the tender parts for this dish. Rinse the asparagus under cold water to remove any dirt. Pat them dry with a clean towel before cooking. This helps the oil and flavors stick well.
Mixing Ingredients
In a large bowl, add the trimmed asparagus. Next, add the minced garlic and the olive oil. The oil helps the asparagus roast nicely. Now, sprinkle in the lemon zest for a bright flavor. If you like heat, toss in red pepper flakes. Then, squeeze the lemon juice over the mixture. Add salt and black pepper to taste. Mix everything well with your hands or a spatula. Ensure each piece is coated in that zesty goodness.
Roasting Process
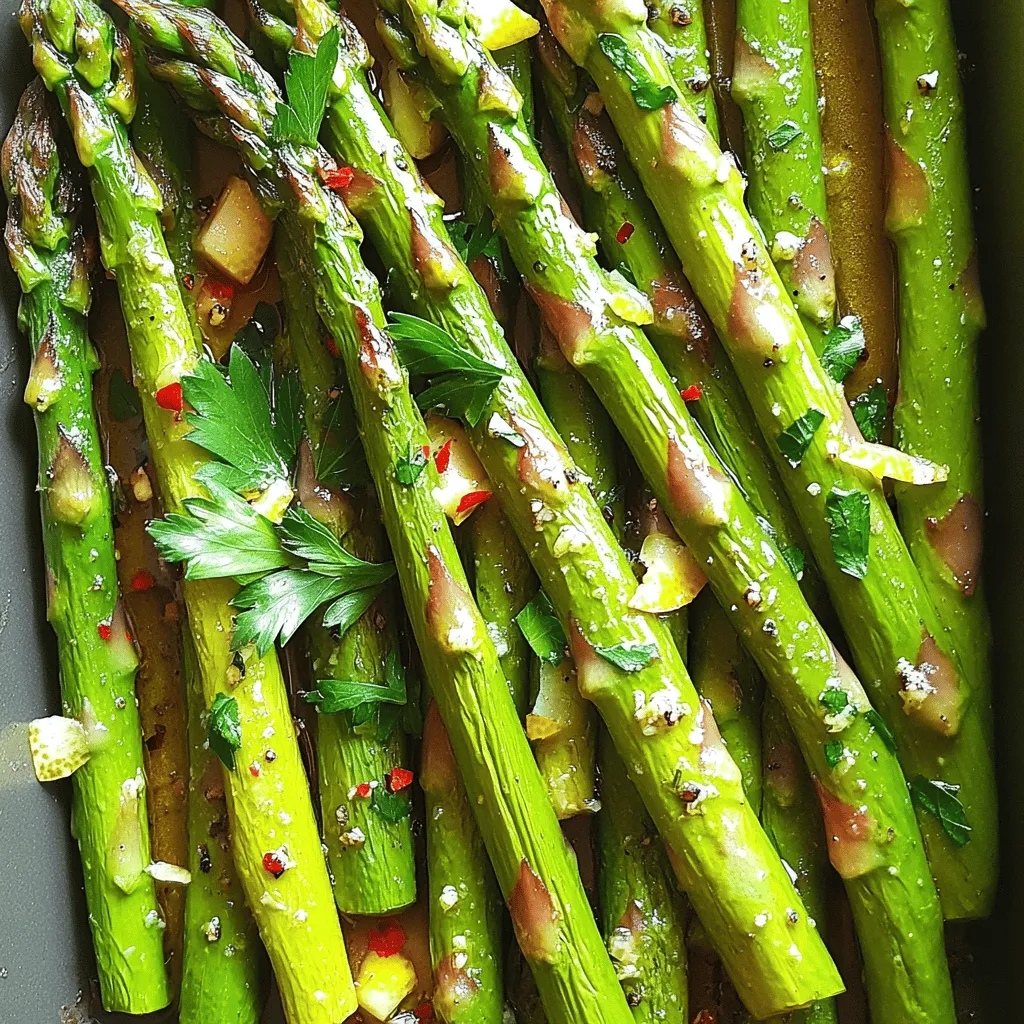
Preheat your oven to 400°F (200°C). Spread the asparagus on a large baking sheet in one even layer. This helps them roast evenly. Bake for 15-20 minutes. Halfway through, give them a good toss. This makes sure they crisp up on all sides. When they are bright green and tender, they are ready. Remove them from the oven and transfer them to a serving platter. Garnish with fresh parsley for a lovely touch.
Tips & Tricks
Achieving the Perfect Roasting Temperature
To get the best texture, preheat your oven to 400°F (200°C). This high heat helps the asparagus cook fast while keeping it tender. Roasting at this temperature gives the asparagus a nice crisp. You can also use a convection setting if you have one. This helps the heat circulate better, making the asparagus even crispier.
Enhancing Flavors with Optional Ingredients
While garlic and lemon shine in this dish, you can add more flavors too. Consider a pinch of red pepper flakes for heat. You can also add a sprinkle of grated Parmesan cheese for a cheesy twist. If you love herbs, try adding thyme or basil. Fresh herbs add a bright touch that works well with the garlic and lemon.
Serving Suggestions for Garlic Lemon Asparagus
Garlic lemon asparagus makes a great side dish. It pairs well with grilled chicken or fish. Serve it alongside a fresh salad for a light meal. You can also toss it into pasta for added flavor and crunch. For a fun twist, serve it on a bed of quinoa or rice. The bright colors make any plate look fancy, perfect for guests or family.
Variations
Adding Protein for a Complete Meal
You can easily add protein to make this dish a full meal. Grilled chicken or shrimp pairs well with garlic lemon asparagus. Simply cook the protein in the same oven as the asparagus. This method saves time and boosts flavor. Try marinating the chicken or shrimp in lemon juice for extra zest. You can also add sliced steak for a heartier option.
Vegetarian and Vegan Adaptations
For a vegetarian or vegan twist, add chickpeas or tofu. These ingredients add protein and make the meal filling. Toss them in olive oil, garlic, and lemon juice before roasting. This way, they soak in the flavors. You can also serve the asparagus on a bed of quinoa or rice for a healthy grain base.
Incorporating Other Vegetables
Feel free to mix in other vegetables for variety. Bell peppers, cherry tomatoes, or zucchini add color and flavor. Chop them into similar sizes as the asparagus for even cooking. Toss all the veggies together with the garlic and lemon mix. This boosts nutrition and makes the dish more colorful.
Storage Info
How to Store Leftovers
After you enjoy your garlic lemon asparagus, let it cool down. Place leftovers in an airtight container. Store it in the fridge for up to three days. This keeps the asparagus fresh and tasty.
Reheating Instructions
To reheat, you can use the oven or a skillet. For the oven, preheat it to 350°F (175°C). Spread the asparagus on a baking sheet and heat for about 10 minutes. If you prefer a skillet, add a little olive oil and heat over medium. Cook for 3-5 minutes until warm.
Best Practices for Freezing
If you want to save some for later, freezing works well. First, blanch the asparagus in boiling water for two minutes. Then, plunge it into ice water to stop cooking. Drain and dry the asparagus. Place it in a freezer-safe bag, removing as much air as you can. It will keep for up to six months. You can use this method to enjoy your garlic lemon asparagus anytime!
FAQs
Can I use frozen asparagus?
Yes, you can use frozen asparagus. Just remember that frozen asparagus may have a softer texture once cooked. To cook it, add a few extra minutes to the roasting time. This helps to ensure it cooks through and gets hot.
What other seasonings pair well with garlic lemon asparagus?
Many seasonings complement garlic lemon asparagus. Here are some great choices:
- Fresh thyme
- Oregano
- Rosemary
- Parmesan cheese
These add unique flavors. You can mix and match to find your favorite.
How do I know when the asparagus is cooked?
You can tell asparagus is cooked by its color and texture. It should be bright green and slightly tender. To test it, use a fork to pierce a stalk. If it goes through easily but still has a bit of crunch, it’s perfect.
You now have a clear guide to making garlic lemon asparagus. We covered the best fresh ingredients, step-by-step prep, and roasting tips. You learned how to enhance flavors and serve this dish. We even explored fun variations and proper storage.
Incorporating these tips ensures a tasty meal every time. Try making this dish your own! Enjoy experimenting and sharing it with others. Happy cooking!

![To make these Air Fryer Parmesan Zucchini Fries, you need just a few simple items. Gather these ingredients: - 2 medium zucchinis, sliced into thin fries - 1 cup breadcrumbs (recommended: panko) - 1/2 cup grated Parmesan cheese - 1 teaspoon garlic powder - 1 teaspoon Italian seasoning - 1/2 teaspoon salt - 1/4 teaspoon black pepper - 2 large eggs, beaten - Olive oil spray Each ingredient plays a key role. The zucchinis provide a fresh base. Panko breadcrumbs add great crunch. Parmesan cheese gives a rich, cheesy flavor. Garlic powder and Italian seasoning make your fries tasty. Salt and pepper enhance all the flavors. Eggs act as glue for the coating. The olive oil spray keeps everything crisp. When selecting zucchinis, choose firm ones with smooth skin. They should feel heavy for their size. This tells you they are fresh. The breadcrumbs should be light and airy, perfect for frying. If you're feeling adventurous, try different herbs or cheeses! For the full recipe, check out this [Full Recipe]. 1. Preheat your air fryer to 400°F (200°C). This step is key for a crispy finish. 2. Wash and dry the zucchinis. Clean veggies are a must for great taste. 3. Cut the zucchinis into 1/4 inch thick fries. Make sure they are even for uniform cooking. 1. In a medium bowl, combine breadcrumbs, Parmesan cheese, garlic powder, Italian seasoning, salt, and black pepper. This mix gives the fries a tasty crust. 2. In a separate bowl, beat the eggs until smooth. This egg wash will help the coating stick well. 1. Dip each zucchini fry in the beaten eggs. Let any extra egg drip back into the bowl. 2. Roll the zucchini in the breadcrumb mixture. Press gently to coat all sides evenly. This ensures every bite is full of flavor. 1. Lightly spray the air fryer basket with olive oil. This helps prevent sticking. 2. Arrange the coated zucchini fries in a single layer in the basket. Avoid crowding to keep them crispy. 3. Mist the tops of the fries with olive oil spray. This adds a lovely golden color. 4. Cook for 10-12 minutes, flipping halfway. This makes sure each side cooks evenly. Once you follow these steps, you will have crispy and tasty Air Fryer Parmesan Zucchini Fries. For the complete recipe, refer to the section above. Enjoy! To keep your zucchini fries crispy, avoid overcrowding the air fryer basket. When fries sit too close, they steam instead of crisp. It’s best to cook in batches if needed. Also, mist the tops of fries lightly with olive oil. This simple step helps them brown nicely. Want to spice things up? Consider adding cayenne pepper for heat. A little goes a long way! You can also play around with different herbs or seasonings. Try adding smoked paprika or fresh thyme for a unique twist. Each option can add depth to the flavor. Pair your zucchini fries with great dipping sauces. I love zesty marinara or creamy ranch. They add a fun taste contrast. For serving, arrange the fries in a single layer on a platter. Garnish with fresh herbs or a sprinkle of more Parmesan cheese for a lovely touch. Add a small bowl of sauce in the center for a delightful display. For the complete recipe, check out the Full Recipe section. {{image_4}} You can switch up the coating for your zucchini fries. Using gluten-free breadcrumbs works great if you need a gluten-free option. They still get nice and crispy. You can also try different cheeses like mozzarella or cheddar. Each cheese brings a unique flavor that can enhance your fries. Don't stop at zucchini! You can add other veggies like eggplant or carrots. Cut them into fries, just like the zucchini. This makes your dish colorful and fun. You might also mix in spices like paprika or cumin. These spices bring extra warmth and flavor to your fries. You can cook zucchini fries in different ways. The air fryer gives you crispy results in less time. Baking in the oven is another option. It takes longer but still tastes great. Stovetop frying is also a choice. You’ll need more oil, but the flavor is rich and satisfying. Each method has its perks, so feel free to experiment! To store Air Fryer Parmesan Zucchini Fries in the fridge, let them cool first. Place the fries in an airtight container. This keeps them fresh for up to three days. I recommend using glass containers, as they seal well and prevent moisture. If you want to save your fries for longer, freeze them. Lay the cooked fries on a baking sheet in a single layer. Freeze for about an hour. Once frozen, transfer them to a freezer bag. This method stops them from sticking together. They can last in the freezer for about two months. To reheat, place the frozen fries in the air fryer. Set it to 400°F (200°C) and cook for about 8-10 minutes. This will help keep them crispy. You can also reheat them in an oven for a similar effect. Air Fryer Parmesan Zucchini Fries stay fresh in the fridge for about 3 to 4 days. To store, place them in an airtight container. For longer storage, freeze them. They can last up to 2 months in the freezer. To freeze, lay them flat on a baking sheet first, then transfer them to a freezer bag. This helps keep them from sticking together. Yes, you can prepare these fries ahead of time. Slice the zucchinis and coat them in the breadcrumb mixture. Keep them in the fridge for up to 24 hours. When you're ready, air fry them directly from the fridge. If you freeze them, let them thaw in the fridge overnight before cooking. This helps them cook evenly and stay crispy. These zucchini fries taste great with many dishes. Serve them with a tangy marinara sauce or creamy ranch dressing for dipping. They also pair well with grilled chicken or fish. For a fun twist, try serving them alongside a fresh salad or as a side to tacos. Their crunch adds a nice texture contrast to softer dishes. Absolutely! You can use yellow squash instead of green zucchini. They have a similar taste and texture. If you have gifted zucchinis from friends or family, feel free to use those too. Just make sure they are firm and fresh for the best results. This recipe is very flexible and lets you enjoy various types of squash. In this post, I shared a simple recipe for Air Fryer Parmesan Zucchini Fries. You learned the ingredients, step-by-step instructions, and useful tips for crispiness. Experiment with flavors or make different versions to keep it fresh. Remember to store leftovers properly for later enjoyment. This dish is easy to make and pairs well with various dips. Enjoy your healthy snack, and have fun trying out new ideas!](https://dishtreats.com/wp-content/uploads/2025/06/3cf59b94-4108-4e4b-8eff-d7b1557676e8-768x768.webp)
![- 2 cups canned chickpeas - Fresh herbs: parsley and cilantro - Key spices: cumin and coriander To make crispy baked falafel, start with the main ingredients. The base is 2 cups of canned chickpeas. They give falafel a wonderful texture. Fresh herbs like parsley and cilantro add bright flavors. Using both gives a fresh taste. Spices are key too. Ground cumin and coriander bring warmth and depth. They create a balance that makes falafel special. - Aromatics: onion and garlic - Binding ingredients: tahini and breadcrumbs - Optional: olive oil for drizzling Next, we have additional ingredients. Aromatics like onion and garlic make the falafel smell great. They add a savory note that enhances the dish. Binding ingredients are also important. Tahini helps hold everything together. Breadcrumbs add crunch and structure. If you want a golden and crispy finish, drizzle olive oil on top. It helps the falafel bake evenly and get that perfect crunch. For the full recipe, check out the detailed instructions provided. 1. Preheat your oven to 400°F (200°C). 2. Line a baking sheet with parchment paper. This helps prevent sticking and ensures even cooking. 3. In a food processor, add the drained chickpeas, chopped onion, minced garlic, parsley, cilantro, cumin, coriander, baking powder, salt, black pepper, lemon juice, and tahini. 4. Pulse the mixture. You want it well combined but still chunky, like a paste. 1. Transfer the mixture to a mixing bowl. 2. Fold in the breadcrumbs. If it feels wet, add more breadcrumbs until it holds together. 3. Use your hands to shape the mixture into small balls or patties, about the size of golf balls. 4. Place them evenly on the prepared baking sheet. 1. Drizzle a good amount of olive oil over the falafel balls. This helps them get crispy. 2. Bake in the oven for about 20 minutes. Flip them halfway through for even browning. 3. Look for a golden brown color and a crispy outside. 4. Let the falafel cool for a few minutes before serving. This enhances their flavor and texture. For the full recipe, check the detailed instructions provided earlier. To make your falafel crispy, olive oil plays a key role. It adds flavor and helps create a golden crust. I suggest drizzling olive oil on top of your falafel before baking. This not only enhances the taste but also promotes even cooking. Baking techniques matter too. Preheat your oven to 400°F (200°C) for the best results. Use parchment paper on your baking sheet to prevent sticking. This will help the falafel stay intact and crisp up nicely. Adjusting the breadcrumbs is also important. If your mixture feels too wet, add more breadcrumbs until it holds together. If you want extra crunch, consider using panko breadcrumbs. They give a delightful texture that enhances the overall experience. For a beautiful presentation, arrange your crispy baked falafel on a colorful platter. Pair it with a creamy tahini sauce and a fresh cucumber-tomato salad. This adds both flavor and visual appeal. You might also want to serve it with warm pita bread. Add a side of hummus or tzatziki for a fun dip. These flavors complement the falafel well and make for a tasty meal. One common mistake is not achieving the right consistency. If your falafel falls apart during baking, it may be too wet. Always ensure your mixture holds together well. Adjust breadcrumbs as needed to fix this. Another mistake is overcrowding the baking sheet. Give each falafel space to bake evenly. This helps them crisp up nicely. Flip them halfway through baking for even browning. Finally, don’t skip the cooling step. Let the falafel cool for a few minutes after baking. This enhances their flavor and texture, making your dish even more delightful. For the full recipe, you can refer to the detailed guide above. {{image_4}} You can make falafel even more exciting by adding spices. Try mixing in smoked paprika for a warm, smoky flavor. If you want a brighter taste, add some zest from a lemon. You might also enjoy using fresh herbs like mint or dill for a fresh twist. Each region has its own spin, so feel free to experiment! For those who need gluten-free options, you can swap breadcrumbs with ground oats or almond flour. Both work well and keep the falafel together. If you want to make it vegan, just skip the tahini or use sunflower seed butter instead. This way, everyone can enjoy these tasty bites! While baking gives falafel a nice crunch, you can try air frying them for a quicker option. Air-frying uses less oil and cooks them evenly. You can also pan-fry them in a little oil for golden-brown goodness. Just make sure to keep an eye on them so they don’t burn. For the full recipe, check out the detailed steps above to make your crispy baked falafel! To store leftover falafel, place them in an airtight container. This helps keep them fresh. If you have sauce, store it separately. Leftover falafel stays tasty for about three to four days in the fridge. For freezing, let the falafel cool completely first. Then, space them on a baking sheet and freeze until solid. Once frozen, transfer them to a freezer bag. This way, they won’t stick together. To reheat, bake them directly from the freezer. Heat at 375°F (190°C) for about 15-20 minutes until warm and crispy. In the fridge, your leftover falafel will last about three to four days. If frozen, they can last up to three months. Just remember to seal them well to avoid freezer burn. Enjoy your crispy baked falafel whenever you want with these easy storage tips. For the full recipe, check back to create these delicious bites! Crispy baked falafel pairs well with many sides. You can serve it with: - Hummus for a creamy dip - Tahini sauce for added flavor - Tzatziki sauce for a cool touch - Fresh salads like cucumber-tomato salad - Pita bread for a classic wrap These options enhance the meal and add fresh tastes. To achieve extra crispy falafel, follow these tips: - Use panko breadcrumbs instead of regular ones. They add more crunch. - Drizzle olive oil generously over the falafel before baking. This helps with browning. - Bake at 400°F (200°C) for the best crispiness. Flip them halfway for even cooking. These small changes can make a big difference in texture. Yes, you can use dried chickpeas! Here’s how: - Soak 1 cup of dried chickpeas overnight in water. This softens them. - Drain and rinse the chickpeas before using them in the recipe. - Cook them in boiling water for about 1 hour until tender. Using dried chickpeas gives a fresher taste but takes more time. For the complete details on making crispy baked falafel, check out the [Full Recipe]. Baked falafel is easy and fun to make. By using canned chickpeas, fresh herbs, and key spices like cumin, you create a tasty dish. Follow the steps for perfect shapes, timing, and crunch. Remember to use olive oil and adjust breadcrumbs for crispiness. Play with flavors and storage tips to maximize your enjoyment. With this guide, you can make falafel that delights and satisfies. Now, you're ready to impress friends and family with your delicious creation!](https://dishtreats.com/wp-content/uploads/2025/06/049364cc-9d10-4f08-b8d2-88a9c6614eda-768x768.webp)
