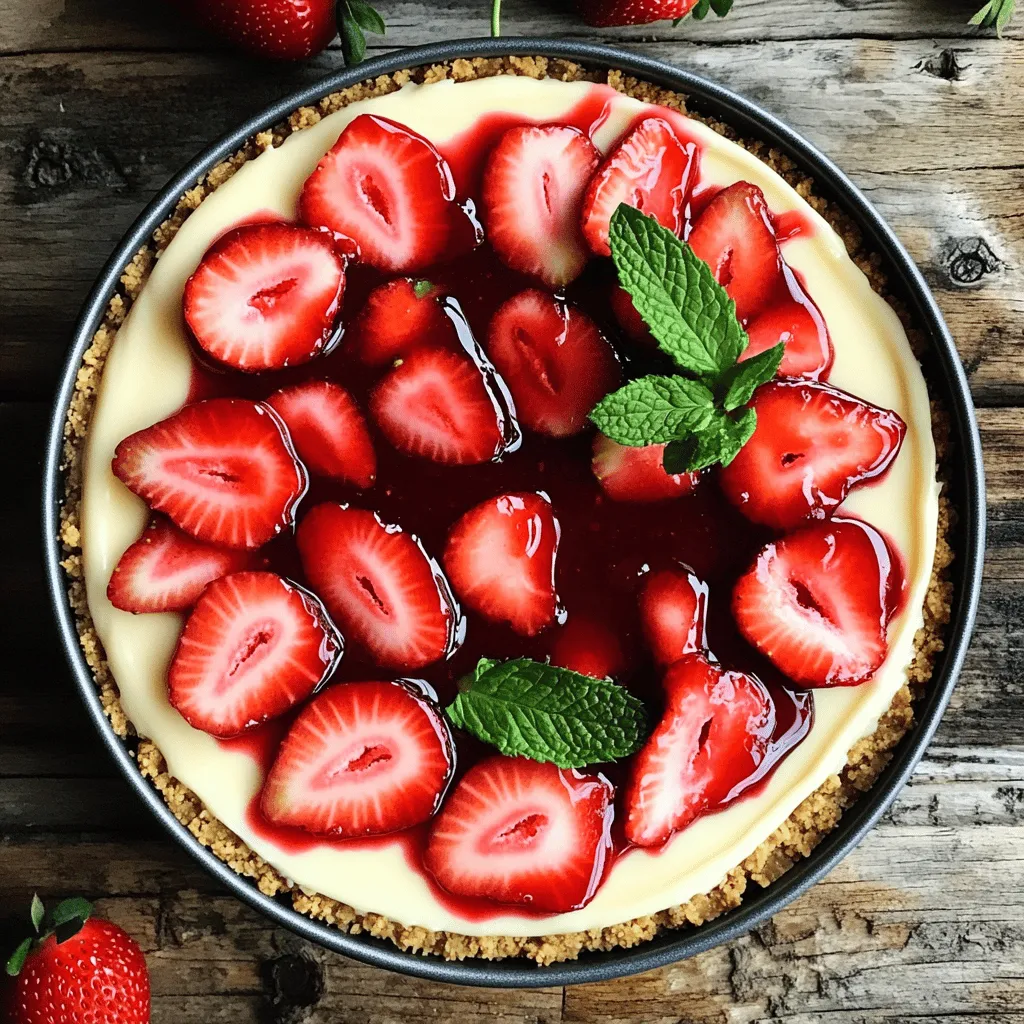
No-Bake Strawberry Cheesecake Simple and Tasty Delight

Welcome to the world of sweet indulgence with my No-Bake Strawberry Cheesecake! This simple dessert is perfect for everyone, from busy parents to budding chefs. You don’t need fancy skills or hours in the kitchen. With just a handful of ingredients, you’ll create a creamy delight that’s as fun to make as it is to eat. Stick around, and I’ll guide you through every step of this mouthwatering treat!
Ingredients
Essential Ingredients for No-Bake Strawberry Cheesecake
To make a no-bake strawberry cheesecake, you need a few key ingredients. Each ingredient plays a vital role in the flavor and texture of the cake. Here’s what you’ll need:
- 200g digestive biscuits, finely crushed
- 100g unsalted butter, melted
- 400g cream cheese, softened to room temperature
- 100g powdered sugar
- 1 teaspoon pure vanilla extract
- 250ml heavy whipping cream
- 300g fresh strawberries, hulled and sliced
- 100g strawberry jam
- Fresh mint leaves for garnish (optional)
Ingredient Measurements and Substitutions
If you’re missing an ingredient, don’t worry! You can make easy swaps. Instead of digestive biscuits, you can use graham crackers. For butter, margarine works too. If you want a lighter version, try using low-fat cream cheese. You can also substitute heavy cream with whipped topping for a similar effect.
Tips for Selecting Fresh Strawberries
When choosing strawberries, look for bright red color and a shiny surface. Check for firmness and avoid any with soft spots. Fresh strawberries should smell sweet and fragrant. If you can, buy them from a local market to ensure they are in season. This will make your cheesecake taste even better!
Step-by-Step Instructions
Preparation of the Biscuit Base
To start, gather your ingredients. You need 200g of digestive biscuits and 100g of unsalted butter. First, crush the biscuits into fine crumbs. A food processor works best for this. If you don’t have one, you can place the biscuits in a zip-top bag and crush them with a rolling pin.
Next, melt the butter in a small saucepan or microwave. Mix the crushed biscuits and melted butter in a large bowl. Stir until the mixture looks like damp sand.
Now, take a 9-inch springform pan. Firmly press the biscuit mix into the bottom of the pan. Make it even and flat. This is your base. Place the pan in the fridge for about 10 minutes to let it set.
Making the Cheesecake Filling
For the filling, you’ll need 400g of cream cheese, 100g of powdered sugar, and 1 teaspoon of pure vanilla extract. In a new bowl, use an electric mixer to beat the cream cheese. Add the powdered sugar and vanilla extract. Blend until the mix is smooth and creamy. Be sure there are no lumps.
Now, in another bowl, whip 250ml of heavy cream until stiff peaks form. This means it should hold its shape. Gently fold the whipped cream into the cream cheese mix. Use a spatula for this. Be careful not to lose the air in the whipped cream.
Assembling and Chilling the Cheesecake
Once your filling is ready, pour it over the chilled biscuit base. Use a spatula to spread it out evenly. Next, take 300g of fresh strawberries. Slice them and arrange them on top of the cheesecake filling. Make a nice pattern for a pretty look.
In a small saucepan, heat 100g of strawberry jam until it melts. Remove it from heat and let it cool slightly. Drizzle the melted jam over the strawberries. Cover the cheesecake with plastic wrap and place it in the fridge. Let it chill for at least 4 hours, but overnight is best.
When it’s ready, run a warm knife around the edge of the pan to loosen it. Then, carefully release the sides of the springform pan. Now, your no-bake strawberry cheesecake is ready to enjoy!
Tips & Tricks
Achieving the Perfect Cheesecake Texture
To get the best texture, you need to mix well. First, ensure your cream cheese is soft. This helps it blend smoothly. When you whip the cream, aim for stiff peaks. This keeps your cheesecake light and fluffy. Always fold the whipped cream gently into the cheese mixture. This step is key to keeping air in your cheesecake.
Common Mistakes to Avoid
One big mistake is not chilling the base long enough. If the base isn’t set, it will crumble when you cut it. Another mistake is over-mixing the cream cheese. This can lead to a dense texture. Make sure to use fresh strawberries; old ones can affect the taste. Finally, don’t skip the strawberry jam drizzle. It adds flavor and makes your cheesecake look great.
How to Easily Cut and Serve the Cheesecake
To cut the cheesecake cleanly, use a warm knife. Dip the knife in hot water and wipe it dry. This helps you get neat slices. Serve each slice on a dessert plate. You can garnish with mint leaves and extra strawberries. This adds a pop of color and freshness.
Variations
Alternative Fruit Toppings
You can switch out strawberries for other fruits. Try blueberries, raspberries, or peaches. Each will give a unique taste. Fresh fruit adds color and flavor. You can also use canned fruit if fresh isn’t available. Just make sure to drain any juice before adding.
Chocolate or Caramel Drizzle Options
Chocolate or caramel can elevate your cheesecake. Melt chocolate and drizzle it on top for a rich taste. A caramel drizzle gives a sweet contrast to the tartness of the strawberries. You can use store-bought sauces or make your own. Just pour it on right before serving to keep it fresh.
Gluten-Free Biscuit Base Options
If you need a gluten-free option, use gluten-free biscuits. Brands like gluten-free graham crackers work well. Crush them just like regular biscuits. Blend with melted butter and press into your pan. This way, everyone can enjoy the cheesecake without worry.
Storage Info
How to Store No-Bake Strawberry Cheesecake
To keep your no-bake strawberry cheesecake fresh, store it in the fridge. Use an airtight container or cover it tightly with plastic wrap. This prevents odors from other foods from mixing in. Keep the cheesecake chilled until you are ready to serve it.
Freezing and Thawing Tips
You can freeze this cheesecake if you want to save leftovers. Slice the cheesecake into portions before freezing. Wrap each slice in plastic wrap, then place them in a freezer bag. This helps maintain its taste and texture. To thaw, take it out of the freezer and place it in the fridge for several hours. Avoid microwaving, as it can ruin the texture.
Shelf Life in the Refrigerator
In the fridge, your no-bake strawberry cheesecake will last for about three to four days. After that, it may start to lose its freshness. For the best taste, enjoy it within the first few days. Always check for any signs of spoilage before serving.
FAQs
How long does the cheesecake need to set?
The cheesecake needs at least four hours to set. I recommend letting it chill overnight for the best results. This allows the flavors to meld and the texture to firm up nicely.
Can I use frozen strawberries?
Yes, you can use frozen strawberries. Just thaw them first and drain any excess liquid. Frozen strawberries can work well, but fresh ones give a better taste and texture.
What can I substitute for cream cheese?
You can use Greek yogurt or mascarpone cheese as substitutes. Both options offer a creamy texture, but the taste will differ slightly. Choose what you like best for your cheesecake.
How to tell when the cheesecake is ready to serve?
The cheesecake should be firm to the touch and not jiggle in the center. Run a warm knife around the edge before removing the springform pan. This method helps prevent cracks and ensures a clean slice.
You learned how to make a no-bake strawberry cheesecake. We covered key ingredients, measurements, and tips for choosing ripe strawberries. I shared step-by-step instructions for the biscuit base, filling, and chilling process. Remember to avoid common mistakes for the best texture and serving. You can explore fruit variations and storage tips to keep it fresh. Enjoy your delicious dessert, and don’t hesitate to experiment with new flavors!


![To make Chicken Pesto Pasta Salad, you need fresh and tasty ingredients. Here’s what you will use: - 2 cups penne pasta - 1 cup cooked chicken breast, shredded - 1/2 cup cherry tomatoes, halved - 1/2 cup mozzarella balls, drained - 1/4 cup fresh basil leaves, chopped - 1/4 cup pesto sauce - 2 tablespoons extra virgin olive oil - Juice of 1 fresh lemon - Salt and black pepper to taste - Optional: 1/4 cup pine nuts, toasted Each ingredient brings its own flavor. The penne pasta serves as a great base. The chicken adds protein. Tomatoes give freshness, while mozzarella adds creaminess. You can change things up with add-ins. Here are some great options: - Spinach or arugula for extra greens - Bell peppers for crunch - Grated Parmesan cheese for a salty kick - Cooked bacon for a smoky flavor - Quinoa instead of pasta for a healthier twist Feel free to mix and match. Your salad can be unique each time you make it. When it comes to pesto, you have choices. You can use fresh homemade pesto or store-bought pesto. Fresh pesto tastes bright and bold. You can make it with basil, garlic, pine nuts, cheese, and olive oil. Store-bought pesto saves time but may have preservatives. Both options work well in your salad. I recommend trying fresh pesto if you have the time. It elevates the dish and adds a personal touch. For the full recipe, check out the [Full Recipe]. 1. Cook the Pasta: Start by boiling water in a large pot. Add salt for flavor. When it boils, add 2 cups of penne pasta. Cook until al dente, about 8-10 minutes. Drain the pasta and rinse it with cold water to cool it down. 2. Mix the Ingredients: In a big mixing bowl, add 1 cup of shredded cooked chicken, 1/2 cup of halved cherry tomatoes, and 1/2 cup of drained mozzarella balls. Use a spatula to mix them well. 3. Combine with Pasta: Add the cooled penne pasta to the bowl. Gently mix to combine everything. Be careful not to break the mozzarella balls. 4. Make the Dressing: In a small bowl, whisk together 1/4 cup of pesto sauce, 2 tablespoons of extra virgin olive oil, and the juice from 1 fresh lemon. Add a pinch of salt and black pepper. 5. Dress the Salad: Pour the dressing over the pasta salad. Use a spoon or tongs to toss everything gently. Make sure all the ingredients are coated. 6. Fold in Fresh Herbs: Add 1/4 cup of chopped fresh basil and optional 1/4 cup of toasted pine nuts. Gently fold them into the salad without bruising the basil. 7. Taste and Adjust: Taste your salad. If it needs more flavor, add more salt, pepper, or lemon juice. 8. Chill Before Serving: Cover the salad with plastic wrap. Let it chill in the fridge for at least 30 minutes. This helps the flavors mix well. - Use a large pot to give the pasta room to move. - Salt the water before adding pasta. This makes it taste better. - Stir the pasta often while it cooks to prevent sticking. - Always taste the pasta a minute before the time is up. It should be firm but not hard. Making the dressing is quick and easy. In just a few steps, you can create a burst of flavor. Start with fresh pesto sauce. If you like a creamier dressing, mix in some yogurt or sour cream. Always taste your dressing before adding it to the salad. Adjust the flavors based on your taste. This simple dressing brings the whole dish together and makes it shine. For the full recipe, check out the details above. Mixing ingredients well is key to flavor. Start with the pasta. Make sure it is cold before adding other items. This keeps everything fresh. Next, add the chicken, tomatoes, and mozzarella. Use a spatula to fold gently. This ensures the mozzarella stays whole. It adds nice pops of flavor to each bite. Taste your dish as you cook. Start with a pinch of salt and pepper. The lemon juice adds brightness, so taste it first. If it needs more zing, add another squeeze. Always remember that you can add more, but you can't take it out. This rule helps you control the flavors. For a great look, serve the salad in a big bowl. Layer the salad for a beautiful view. Add extra basil leaves on top. A sprinkle of toasted pine nuts adds crunch. This makes your dish eye-catching and fun. Enjoy serving this colorful salad at any gathering! You can find the full recipe in the main article. {{image_4}} You can boost your Chicken Pesto Pasta Salad with more veggies and proteins. Adding fresh spinach or arugula gives a nice crunch. Bell peppers add color and sweetness. Toss in some peas or zucchini for a nutritious kick. You can also swap chicken for shrimp, tofu, or chickpeas. This way, you can cater to different tastes and dietary needs. When it comes to ingredients, you have choices. Using homemade pesto elevates your dish. It tastes fresh and bright. You can easily make pesto with basil, nuts, olive oil, and garlic. If you’re short on time, store-bought pesto works too. Just pick a brand with simple, quality ingredients. This saves time without losing flavor. You can adjust this recipe for various diets. For a gluten-free option, use gluten-free pasta. Many brands offer great alternatives. If you want a vegan version, replace the chicken with chickpeas or roasted vegetables. Use a vegan pesto made from nuts and nutritional yeast instead of cheese. These swaps keep the dish tasty and satisfying for everyone. To store leftover chicken pesto pasta salad, place it in an airtight container. Make sure the lid seals tightly to keep the salad fresh. You can keep it in the fridge for up to three days. If you notice the salad looking dry, add a splash of olive oil or lemon juice before serving. This will help restore some moisture. Freezing pasta salad is not the best choice since the texture can change. If you do want to freeze it, separate the chicken and pasta from the veggies and dressing. Store each part in a freezer-safe bag or container. You can freeze it for up to one month. When ready, thaw it in the fridge overnight before serving. Reheating chicken pesto pasta salad is simple. If you have stored it in the fridge, serve it cold or at room temperature. If you prefer it warm, place it in a microwave-safe dish. Heat it for about 30 seconds at a time until it reaches your desired warmth. Be careful not to overheat, as it can make the pasta mushy. Always check the seasoning again after reheating and adjust as needed. You can use tofu, shrimp, or chickpeas as great chicken alternatives. Tofu gives a nice texture. Shrimp adds a seafood twist. Chickpeas provide protein and a hearty feel. You can also try cooked turkey or beef for a different taste. The key is to use a protein you enjoy. This salad stays fresh in the fridge for three to five days. Make sure to store it in an airtight container. The flavors will blend nicely as it sits. However, the longer it sits, the softer the pasta becomes. Yes, you can prepare this salad a day in advance. It tastes even better after the flavors meld overnight. Just keep it covered in the fridge. If you use fresh basil, add it right before serving to keep it vibrant. Check out the Full Recipe for complete details! This article covered how to make a tasty Chicken Pesto Pasta Salad. You learned about key ingredients, and how to cook pasta just right. I shared some helpful tips for mixing and serving. Remember, you can add veggies or change spices to fit your taste. Store leftovers well for future meals. This salad is great for lunch or a gathering. Enjoy your cooking and happy eating!](https://dishtreats.com/wp-content/uploads/2025/06/0440c548-7b14-481e-8658-8224512ec7fd-768x768.webp)