Healthy No Bake Granola Bars Simple and Tasty Snack
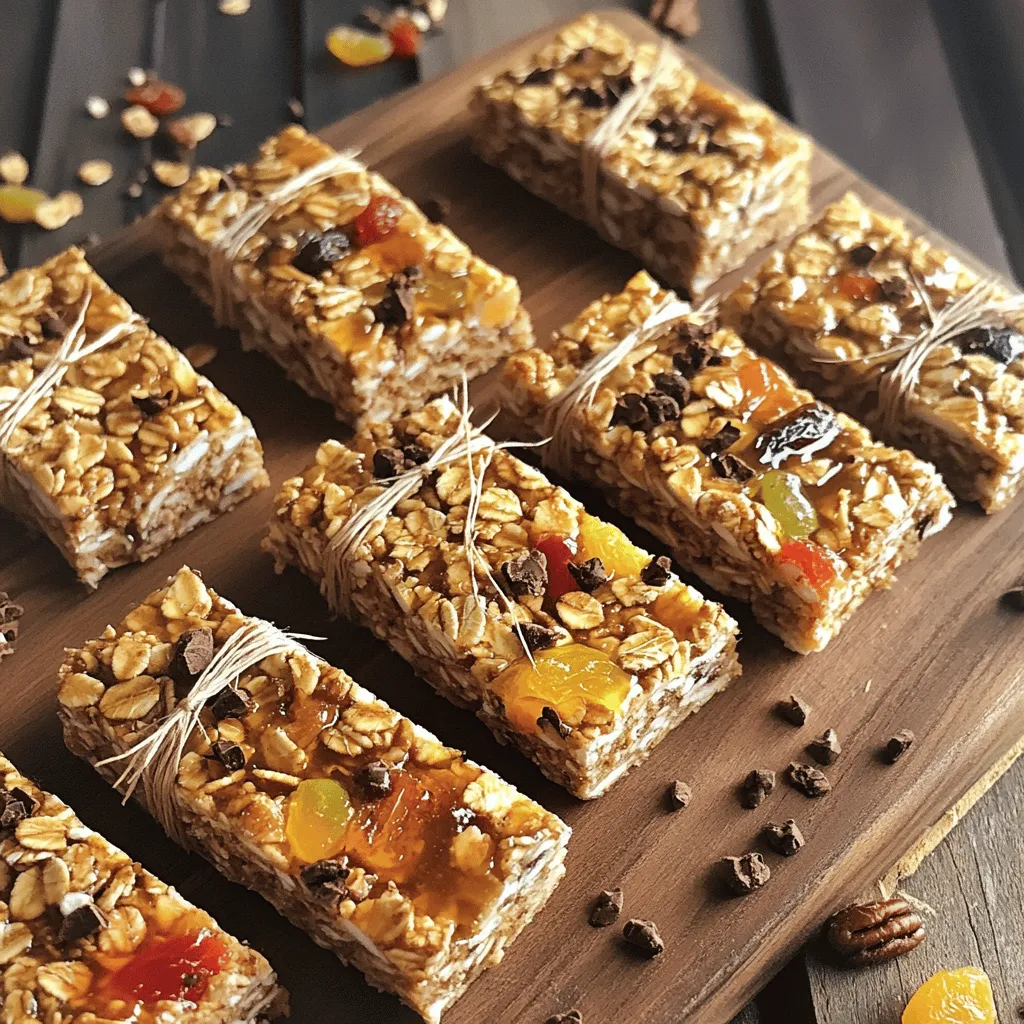
Looking for a quick, tasty snack? Healthy no bake granola bars check all the boxes! They’re easy to make, full of nutrients, and perfect for any time of day. In this guide, I’ll share simple steps and ingredients you can trust. Whether you’re on the go or at home, these bars are your answer. Let’s dive into how to whip up these delicious treats and keep your energy up!
Ingredients
List of Ingredients
- 2 cups rolled oats
- 1/2 cup almond butter (or your favorite nut butter)
- 1/2 cup honey or maple syrup
- 1/2 cup chopped nuts (such as almonds, walnuts, or pecans)
- 1/4 cup mini dark chocolate chips (optional)
- 1/4 cup dried fruit (choose from raisins, cranberries, or apricots)
- 1 teaspoon vanilla extract
- 1/2 teaspoon ground cinnamon
- A pinch of salt
Nutritional Benefits of Each Ingredient
Rolled oats provide fiber, which helps keep you full. They also lower cholesterol. Almond butter gives you healthy fats and protein. Honey or maple syrup adds sweetness but also some trace vitamins. Chopped nuts are great for healthy fats, protein, and minerals. Mini dark chocolate chips can boost mood with antioxidants. Dried fruit adds natural sweetness and fiber. Vanilla extract enhances flavor without extra calories. Ground cinnamon adds taste and can help regulate blood sugar. A pinch of salt brings out all the flavors.
Possible Substitutions
If you want to switch things up, try peanut butter or cashew butter instead of almond butter. You can use agave nectar as a sweetener in place of honey. For nuts, sunflower seeds work well if you need a nut-free option. Instead of dark chocolate chips, try white chocolate or leave them out entirely. You can swap dried fruit for seeds or even fresh fruit if you plan to eat the bars right away.
Step-by-Step Instructions
Detailed Preparation Steps
To start, gather your ingredients. You will need rolled oats, nut butter, honey, nuts, and more. In a large bowl, mix the rolled oats, chopped nuts, chocolate chips, dried fruit, cinnamon, and salt. Stir them well until everything is evenly spread.
In a small bowl, blend the almond butter, honey, and vanilla extract. Mix these until they are smooth and creamy. Then, pour this wet mixture into the dry ingredients. Use a spatula to combine them. Keep stirring until the mixture feels sticky and well mixed.
Next, line an 8×8 or 9×5-inch baking dish with parchment paper. Leave some paper hanging over the edges. This will help when you take the bars out later. Transfer the sticky granola mix to the lined dish.
Tips for Mixing and Pressing the Mixture
When pressing the mixture, use your hands or the spatula’s back. Make sure to press down firmly. This helps the bars hold their shape when cut. Aim for an even layer. If it feels loose, keep pressing until it feels compact.
To make sure it sticks well, you can dampen your hands slightly before pressing. This will help the mixture not to stick to your hands.
Cooling and Cutting Instructions
Now, place the dish in the fridge. Let it chill for 1-2 hours. This will help the bars firm up nicely. After the chilling time, lift the bars out of the dish using the parchment paper.
Cut the granola slab into bars or squares based on your preferred size. Enjoy your healthy no-bake granola bars as a tasty snack!
Tips & Tricks
How to Make Them Stick Together
To get your granola bars to hold together, you need a good sticky mix. The almond butter and honey work as glue. When you mix the wet and dry items, make sure to blend them well. Use a spatula to press the mixture into your pan. Press it down hard to pack it together. This helps the bars stick when you cut them.
Storing Your Granola Bars
Store your granola bars in an airtight container. They will stay fresh for about one week at room temperature. If you want them to last longer, keep them in the fridge. For even longer storage, you can freeze them. Wrap each bar in parchment paper and place them in a freezer bag. They can last up to three months this way.
Serving Suggestions
These granola bars make a great snack anytime. You can enjoy them as is or pair them with yogurt. Slice them into smaller pieces for kids or share at a picnic. You can even crumble them over oatmeal for breakfast. They are tasty and fun to eat!You can find it above.
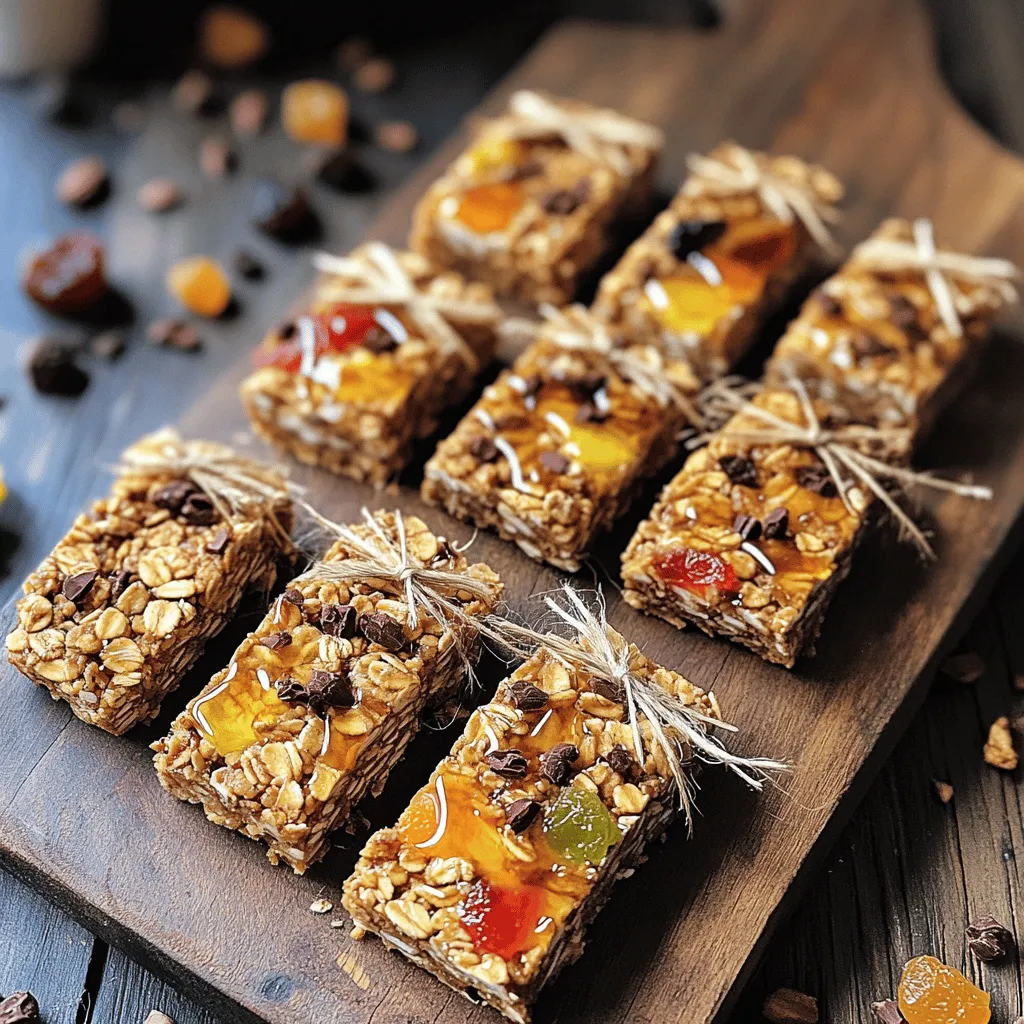
Variations
Different Nut Butter Options
You can change the nut butter for different tastes. Almond butter is creamy and nutty. Peanut butter brings a classic flavor. Cashew butter offers a smooth and mild taste. Sunflower seed butter is great for nut-free diets. Each option changes the flavor and texture of your bars.
Adding Superfoods or Protein
Superfoods boost nutrition in your granola bars. Try adding chia seeds for fiber and omega-3s. Flaxseeds add extra fiber and protein too. Protein powder can also give your bars a healthy kick. Just mix in a scoop with your dry ingredients for a protein boost.
Flavor Enhancements
Flavor is key for tasty granola bars. You can add spices like nutmeg or ginger for warmth. Try using fruit purees for extra sweetness and moisture. Coconut flakes add a tropical touch. Don’t forget to experiment with extracts! Almond or coconut extracts can make your bars even more delicious.Enjoy making your own tasty snacks!
Storage Info
Best Practices for Keeping Granola Bars Fresh
To keep your granola bars fresh, store them in an airtight container. This helps protect them from air and moisture. You can also wrap each bar in plastic wrap for added freshness. Keep the container in a cool, dry place, like your pantry. Avoid direct sunlight, as this can make them go stale fast. Storing them correctly helps maintain their taste and texture.
Freezing Instructions
You can freeze granola bars for long-term storage. To do this, wrap each bar in plastic wrap. Then, place them in a freezer-safe bag or container. Label the bag with the date. You can freeze them for up to three months. When you’re ready to eat one, take it out and let it thaw at room temperature. You can also microwave it for a few seconds to enjoy it warm.
Shelf Life
When stored properly, your healthy no bake granola bars last about one week at room temperature. In the fridge, they can last up to two weeks. If you freeze them, they stay good for three months. Always check for any signs of spoilage, like an off smell or change in texture. Trust your senses to decide if they are still good to eat.
FAQs
Can I make these granola bars vegan?
Yes, you can easily make these bars vegan. Just replace honey with maple syrup. Use any nut butter that fits your taste. This way, your snack stays plant-based and delicious.
How do I know when the bars are properly set?
You can tell the bars are set when they feel firm to the touch. After chilling for 1-2 hours, they should hold their shape. If they are still soft, give them more time in the fridge.
What can I add to customize my granola bars?
You can mix in many fun ingredients! Try adding seeds like chia or flax. You can also use different dried fruits like apricots or figs. For a crunch, add more nuts or coconut flakes.
Why are these granola bars healthy?
These granola bars are healthy because they use whole ingredients. Rolled oats provide fiber, which helps with digestion. Nut butter adds protein and healthy fats. Dried fruits give natural sweetness and vitamins.It’s simple and quick, and you’ll love the taste!
You learned about crafting healthy no-bake granola bars from start to finish. We discussed the key ingredients and their benefits, along with handy tips for making and storing them. You can experiment with variations like different nut butters and superfoods. Remember, these bars are easy to customize and fun to make. They can fit into many diets and are great for snacking. Try these ideas, and enjoy your tasty and nutritious treat!

. - Preheat to 350°F (175°C). - Prepare muffin tin by lining with muffin liners or greasing it lightly. - In a medium bowl, combine: - 1 cup rolled oats - 1 cup whole wheat flour - 1 teaspoon baking powder - 1/2 teaspoon baking soda - 1/2 teaspoon salt - Whisk these until they mix well. Set the bowl aside for now. - In a large bowl, add: - 2 ripe bananas, mashed until smooth - 1/2 cup honey or maple syrup - 1/4 cup unsweetened applesauce - 2 large eggs - 1 teaspoon pure vanilla extract - Use a whisk to blend these ingredients. Make sure it is smooth and creamy. - Gradually add the dry mix to the wet mix. - Stir gently until just combined. It’s okay if a few lumps remain. - Carefully fold in: - 1 cup fresh or frozen cherries, pitted and chopped - Optional: 1/2 cup chopped walnuts or pecans - Ensure they are spread out in the batter without overmixing. - Spoon the batter into the muffin cups. Fill each about two-thirds full. - Place the muffin tin in the oven and bake for 18-20 minutes. - Check for doneness with a toothpick. It should come out clean. - Once done, let them cool for about 5 minutes in the tin. - After that, move them to a cooling rack. For the full recipe, refer to the main section. Enjoy your tasty Cherry Banana Oat Muffins! To get the best texture in your muffins, avoid overmixing. When you combine wet and dry ingredients, stir gently. You want some lumps in the batter. Overmixing can lead to tough muffins. Using ripe bananas is important too. The sweeter and softer they are, the better your muffins will taste. Look for bananas with brown spots; those are perfect for baking. To test for doneness, use a toothpick. Insert it into the center of a muffin. If it comes out clean, the muffins are ready. If it has batter on it, bake for a few more minutes. If you live at a high altitude, you may need to adjust the bake time. Muffins may bake faster, so keep an eye on them. Serve your muffins warm for the best flavor. A light dusting of powdered sugar makes them look nice. You can also add fresh mint leaves for a pop of color. These muffins pair well with your favorite tea or coffee. Enjoy them as a snack or breakfast treat! For the full recipe, check out the details above. {{image_4}} You can easily change the flavor of these muffins. Adding spices like cinnamon or nutmeg gives them a warm touch. Just sprinkle in about a teaspoon of cinnamon for a cozy flavor. Nutmeg is great too, but use less, about 1/4 teaspoon. You can also try different fruits. Swap cherries for blueberries or apples. Each fruit gives a new taste and keeps things fun. If you want a vegan option, you can replace the eggs. Use flax eggs instead. Mix 1 tablespoon of ground flaxseed with 2.5 tablespoons of water. Let it sit for 5 minutes. For a low-sugar option, cut the honey or maple syrup in half. You can also use a sugar substitute like stevia. This way, you still enjoy the muffins without too much sugar. You can change the size of your muffins. Make mini muffins by using a mini muffin tin. Fill each cup halfway and bake for about 10-12 minutes. If you prefer standard-sized muffins, stick to the original recipe. Just remember, baking time changes with size. Keep an eye on them to avoid overbaking. For the full recipe, check out the details above. To keep your Cherry Banana Oat Muffins fresh, store them in an airtight container. This way, they stay moist and tasty. You can keep them at room temperature for up to three days. If you live in a warm area, use the fridge. Muffins can last about a week in the refrigerator. Just be aware that cold storage may change their texture slightly. If you want to save muffins for later, freezing is the best option. To freeze, allow the muffins to cool completely. Then, wrap each one in plastic wrap. Place them in a freezer-safe bag or container. They can stay frozen for up to three months. When you want to eat them, take a muffin out and thaw it in the fridge overnight. For the best texture, you can also microwave the muffin for about 20 seconds after thawing. To enjoy your muffins warm, use the oven or microwave. For the oven, preheat to 350°F (175°C). Place the muffin on a baking sheet and heat for about 5 to 10 minutes. This warms them through and helps regain moisture. If you use the microwave, heat for about 10 to 15 seconds. Just be careful not to overheat, as this can make them dry. Warm muffins taste best and are a perfect treat! Yes, you can use frozen cherries. They will soften during baking. This may change the texture a bit. The flavor will still be great. Just make sure to chop them before adding to the mix. If you use frozen cherries, you do not need to thaw them first. To ripen bananas fast, place them in a paper bag. This traps the ethylene gas they emit. You can also add an apple to the bag for even faster results. If you are in a hurry, you can bake bananas at 300°F (150°C) for about 15-20 minutes. This will soften them quickly. If you want to swap honey, maple syrup is a great choice. Agave nectar or brown sugar also works well. Each option will give a different taste, but they will all be sweet. Use the same amount as honey in the recipe. Each muffin has about 140 calories. This can change based on your ingredients. If you use nuts or different sweeteners, check those values. These muffins are a tasty, healthy treat you can enjoy without guilt. When stored well, these muffins last about 3 days at room temperature. Keep them in an airtight container to maintain freshness. You can store them in the fridge for up to a week. For longer storage, freeze them for up to 3 months. Just thaw them before enjoying! You now have a simple yet tasty recipe for cherry banana oat muffins. You learned about ingredients, from oats to cherries, and how to mix them. We covered important tips for getting the right texture and bake time. You also have ideas for variations and storage. These muffins are a great snack or breakfast option. Enjoy making them your way!](https://dishtreats.com/wp-content/uploads/2025/07/f958d702-06c5-46b3-af8d-5861eadc8c12-768x768.webp)
![- 1 cup rolled oats - 1/2 cup canned pumpkin puree - 1/4 cup almond butter (or your choice of nut butter) - 1/4 cup honey or maple syrup - 1/2 teaspoon vanilla extract - 1 teaspoon pumpkin pie spice - Pinch of salt - 1/4 cup chopped nuts (walnuts or pecans) - 1/4 cup mini chocolate chips or raisins - Calories per serving: About 100 - Protein content: 2 grams - Fiber content: 3 grams When you gather these ingredients, you set the stage for a tasty treat. Rolled oats serve as the base, giving each bite a hearty texture. Canned pumpkin puree brings moisture and a rich flavor that screams fall. Almond butter adds creaminess and healthy fats, while honey or maple syrup sweetens the mix. The vanilla extract rounds out the flavors, and pumpkin pie spice makes everything feel festive. Optional ingredients like chopped nuts and chocolate chips offer extra crunch and sweetness. You can mix and match to fit your taste. In terms of nutrition, these bites pack a punch. Each serving gives you about 100 calories, 2 grams of protein, and 3 grams of fiber. This makes them a great snack for energy and fullness. For the complete recipe, you can check out the Full Recipe section. - In a large mixing bowl, combine: - 1 cup rolled oats - 1/2 cup canned pumpkin puree - 1/4 cup almond butter (or your choice of nut butter) - 1/4 cup honey or maple syrup - 1/2 teaspoon vanilla extract - 1 teaspoon pumpkin pie spice - Pinch of salt Mix these ingredients well. Use a spatula to ensure everything blends together. You want a sticky dough. This sticky texture helps the bites hold their shape later. If you like, fold in some extras: - 1/4 cup chopped nuts (like walnuts or pecans) - 1/4 cup mini chocolate chips or raisins Make sure to distribute these evenly. This adds crunch and sweetness. The more you mix, the better the flavors combine. Now, it’s time to shape the bites. - Scoop small portions of the mixture. - Roll each portion into 1-inch balls. Place the balls on a plate or parchment paper. Leave space between them. After shaping, refrigerate the bites for at least 30 minutes. This helps them firm up. Enjoy these tasty bites chilled or at room temperature as a quick snack! For the full recipe, check out the details above. To make great energy bites, size matters. Aim for about 1 inch for each bite. This helps them cook evenly. Use a light touch when mixing the dough. Overworking it can make them tough. Gently blend the ingredients until they come together. Want more flavor? Try making your own pumpkin pie spice. Combine cinnamon, nutmeg, and ginger to find your perfect mix. You can also adjust sweetness. Use honey or maple syrup to make them sweeter or less sweet. Taste as you go! When it's time to serve, make it pretty! Arrange your energy bites on a decorative plate. This makes them look special. Add a sprinkle of pumpkin pie spice on top for a nice touch. It looks great and adds extra flavor. For the full recipe, check out [Full Recipe]. {{image_4}} You can make your pumpkin pie energy bites even more fun with flavor twists. Try adding toasted coconut for a tropical vibe. The sweet and crunchy texture makes each bite delightful. You can also switch your nut butter. Use peanut or cashew butter instead of almond butter. Each nut brings its own taste, making the bites unique. If you need a gluten-free snack, use gluten-free oats in your mix. This small change keeps the bites delicious and safe for those with gluten sensitivities. For a vegan option, swap honey with agave nectar. This keeps your bites sweet while fitting a plant-based diet. You can tailor these bites to fit the seasons. For fall, mix in some spiced apple or cider. This adds a warm, cozy flavor that feels like autumn. For summer, a hint of citrus zest can brighten the bites. It gives them a fresh burst that’s perfect for hot days. For the full recipe, check the details above and make your own tasty energy bites! Store your pumpkin pie energy bites in an airtight container in the refrigerator. This keeps them fresh and tasty. If you plan to eat them soon, you can keep them at room temperature for short durations. Just remember, they may not last as long outside the fridge. These energy bites can last up to one week in the fridge. If you want to keep them longer, freeze them. They can stay fresh for up to three months in the freezer. Just make sure to label the container with the date you froze them. You can enjoy these bites chilled or at room temperature. They make a great snack either way! For a delightful treat, pair them with a cup of tea or coffee. The warm drink complements the tasty flavors of the bites perfectly. If you want to try a fun twist, serve them at a party on a festive plate. You can find the full recipe to make these delicious bites. To make pumpkin pie energy bites, follow these steps: 1. In a large bowl, mix rolled oats, canned pumpkin puree, almond butter, and honey. 2. Add vanilla extract, pumpkin pie spice, and a pinch of salt. 3. Stir until the mixture becomes a sticky dough. 4. Fold in chopped nuts and chocolate chips or raisins. 5. Scoop out small portions and roll them into balls, about 1 inch wide. 6. Place the bites on a plate with space between them. 7. Refrigerate for at least 30 minutes to firm up. Enjoy your tasty and healthy snack! For more details, check the Full Recipe. Yes, you can freeze these energy bites. To do this, place the bites on a baking sheet. Freeze them for about an hour until solid. Then, transfer them to a freezer bag or an airtight container. Label the bag with the date. These bites can last up to three months in the freezer. When you’re ready to eat them, just let them thaw in the fridge. Pumpkin pie energy bites have many health benefits. They are rich in fiber from the oats and pumpkin. Fiber helps with digestion and keeps you full. Almond butter provides healthy fats and protein. Honey or maple syrup adds natural sweetness without refined sugar. Pumpkin is packed with vitamins A and C, which support your immune system. Overall, these bites are a nutritious snack option. Yes, these energy bites are safe and nutritious for kids. They contain wholesome ingredients that provide energy without added sugar. Kids love the sweet taste and chewy texture. You can also let your children help make them. This way, they learn about healthy snacks. Just remember to check for any nut allergies before serving. These pumpkin pie energy bites are easy to make and fun to eat. You mix simple main ingredients like oats, pumpkin, and nut butter. Add some nuts or chocolate chips for a tasty twist. Remember to store them well to enjoy later. Whether for a snack, dessert, or lunchbox treat, these bites pack nutrition in every bite. Get creative with flavors and enjoy the flexible recipes. Healthy eating can be delicious and effortless. Make these energy bites today and see for yourself!](https://dishtreats.com/wp-content/uploads/2025/07/b18c9eee-ac7a-43cf-8a14-33dd9ccff863-768x768.webp)