
Cucumber Ginger Lemonade Refreshing Summer Drink Recipe
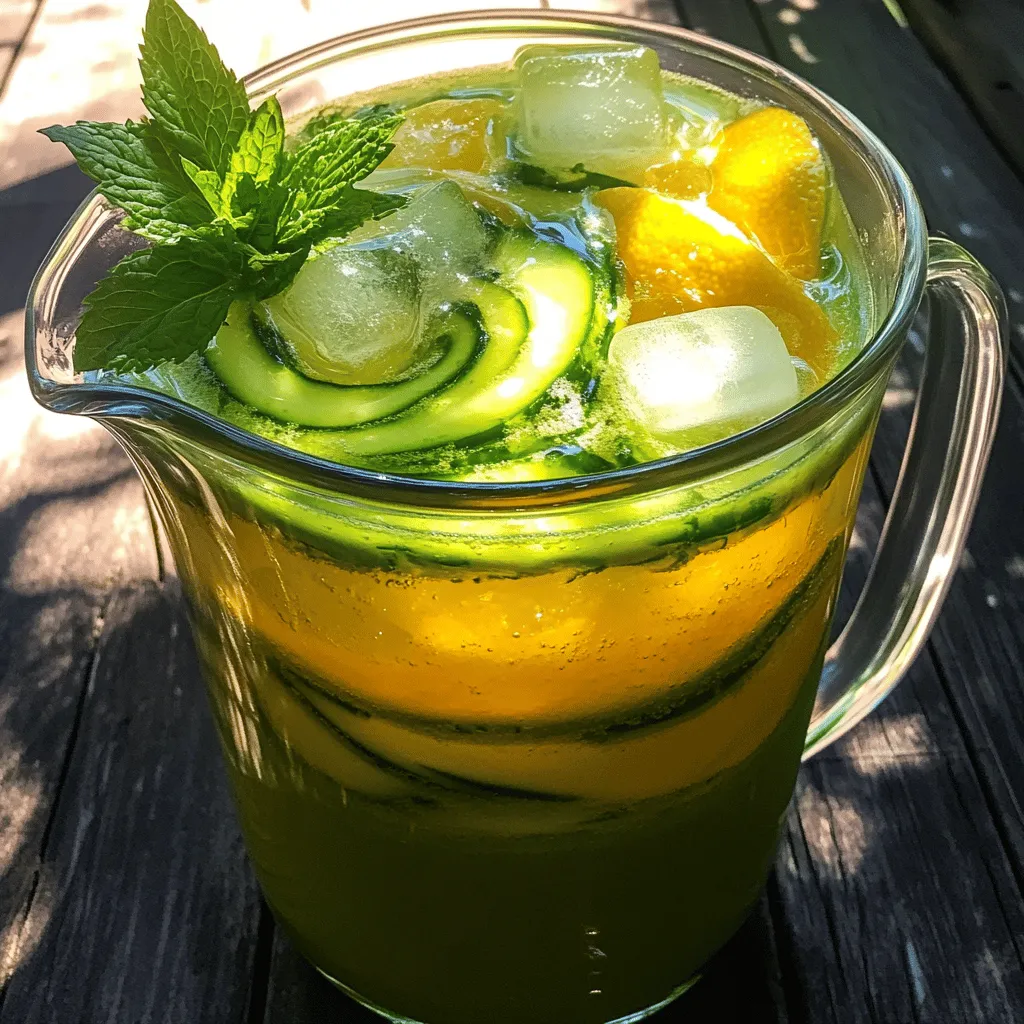
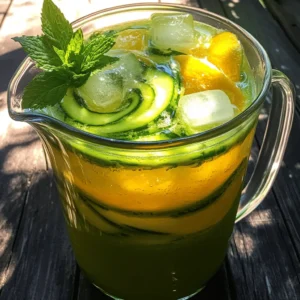
Looking for a cool, tasty drink to beat the summer heat? Try my Cucumber Ginger Lemonade! This refreshing blend of crisp cucumbers, zesty ginger, and tangy lemon will quench your thirst in no time. Not only is it easy to make, but it’s also packed with health benefits. Grab your blender, and let’s get started on this delicious drink that will impress your friends and family!
Ingredients
Main Ingredients for Cucumber Ginger Lemonade
- 2 medium cucumbers, peeled and roughly chopped
- 1 tablespoon fresh ginger, finely grated
- 2-3 large lemons, juiced (about ½ cup of lemon juice)
- 1/4 cup honey (or agave syrup for a vegan option)
- 4 cups cold water
- A pinch of salt
- Fresh mint leaves for garnish
- Ice cubes
Equipment Needed
- Blender
- Fine-Mesh Sieve
- Large Pitcher
- Measuring Cups
To make cucumber ginger lemonade, you need fresh ingredients. Choose firm cucumbers with a vibrant green color. Select juicy lemons that feel heavy for their size. Fresh ginger adds a spicy kick, so pick a root that is smooth and firm. For sweetness, honey or agave syrup works well.
You also need basic kitchen tools. A blender helps puree the cucumbers. A fine-mesh sieve strains the mixture, ensuring a smooth drink. A large pitcher holds your lemonade as it chills. Measuring cups ensure you use the right amounts of each ingredient.
These ingredients and tools are essential for making this refreshing summer drink. They create a balance of flavors that will quench your thirst on hot days.
Step-by-Step Instructions
Preparing the Cucumbers
- Peeling and Chopping
Start by peeling the cucumbers. Use a vegetable peeler to remove the skin. Then, chop the cucumbers into large chunks. This makes them easier to blend.
- Blending to Puree
Place the chopped cucumbers into a blender. Blend at high speed until the mixture is smooth and liquid-like. This will create a fresh cucumber puree for your lemonade.
Straining the Mixture
- Using a Fine-Mesh Sieve
Next, take a fine-mesh sieve and set it over a large pitcher. Pour the cucumber puree into the sieve. This helps to separate the juice from the pulp.
- Extracting Maximum Juice
Use a spatula or the back of a spoon to press down on the mixture. This action extracts every drop of juice. Discard the leftover pulp, as you won’t need it for the lemonade.
Combining Ingredients
- Adding Ginger, Lemon Juice, and Sweetener
In the pitcher with cucumber juice, add the freshly grated ginger. Then, squeeze the juice from the lemons. Pour in the honey or agave syrup, and add a pinch of salt.
- Mixing and Adjusting Sweetness
Stir the mixture well. Make sure the honey dissolves fully. Taste it, and if you want it sweeter, add more honey until it’s just right.
Chilling the Lemonade
- Refrigeration Time and Tips for Flavor Enhancement
Cover the pitcher and place it in the fridge. Let it chill for about 30 minutes. This time allows the flavors to blend beautifully, giving you a refreshing drink.
Serving Suggestions
- Pouring Over Ice
When you’re ready to serve, fill glasses with ice cubes. Then pour the chilled cucumber ginger lemonade over the ice.
- Garnishing with Mint
Finally, garnish each glass with fresh mint leaves. This adds a nice color and a lovely aroma to your drink. Enjoy your refreshing summer drink!
Tips & Tricks
Perfecting the Flavor
To make your cucumber ginger lemonade just right, you can adjust its sweetness and acidity. If you find it too sour, add more honey or agave syrup. Start with a small amount and mix well. Taste it again until you reach your ideal balance. For a zesty kick, try adding a bit of lime juice. This adds a fun twist to the flavor.
Infusing flavor is also key. After mixing the ingredients, let the drink chill in the fridge for 30 minutes. This allows the flavors to blend well. You can even add sliced cucumbers or ginger into the pitcher. This gives a fresh look and extra taste to your drink.
Presentation Ideas
Serving your cucumber ginger lemonade can be a fun part of the process. Use tall, clear glasses to show off the bright green color. For a fancy touch, try using mason jars or colorful glassware. Add a sprig of mint on top for a pop of color. It also adds a nice scent when you sip.
You can also create a lemonade bar. Set out ice, fresh fruits, and herbs. Let guests customize their own drinks. This adds a fun and interactive element to your gathering.
Making Ahead
Making this lemonade in advance can save you time. You can prepare the base a day before serving.Avoid adding ice until you are ready to serve. This keeps the drink from getting watery.
For best storage, use a pitcher with a lid. This keeps the lemonade fresh and prevents it from absorbing other fridge smells. If you have leftovers, store them in an airtight container. They will last for up to three days.

Variations
Cucumber ginger lemonade is a great base for fun twists. You can mix it up to suit your taste or mood.
Adding Flavors
- Mint Variation: Adding fresh mint gives this drink a cool flavor. Just toss in a handful of mint leaves when blending the cucumbers. This makes your drink even more refreshing.
- Citrus Variations: Want more zing? Try adding lime or orange juice. These fruits blend well with the lemon and add a bright, tangy kick. Just use the same amount of juice as you do for lemons.
Sweetener Alternatives
- Using Different Natural Sweeteners: Honey is common, but you can swap it for agave syrup or maple syrup. Each sweetener brings its own flavor profile. Try them out to see what you like best.
- Sugar-Free Options: If you want a sugar-free drink, use a sugar substitute like stevia or erythritol. Just remember to adjust the amount to avoid making it too sweet.
Additional Ingredients
- Adding Herbal Elements: You can also add herbs like basil or rosemary. These add a unique flavor. Just crush the leaves before adding to release their oils.
- Using Sparkling Water for a Fizzy Twist: For a bubbly drink, use sparkling water instead of still water. This adds a fun fizz and makes it feel more like a celebration. Just mix it in right before serving to keep the bubbles.
These variations make cucumber ginger lemonade fun. You can always find new ways to enjoy it!
Storage Info
How to Store Leftover Lemonade
To keep your cucumber ginger lemonade fresh, use a clean glass pitcher. Glass does not hold odors or flavors like plastic. You can also use a mason jar with a tight lid. This helps keep the lemonade flavorful and cool. Make sure to seal it well.
Shelf Life
In the refrigerator, your lemonade lasts about three days. After this, the flavors may fade. If you notice separation, just give it a quick stir. Always check for any off smells or changes in color.
Freezing Options
You can freeze your lemonade for later use. Pour it into ice cube trays for easy storage. This way, you can add a cube to any drink for a refreshing twist. Just pop the cubes out when you’re ready. Enjoy the cool taste anytime in the future!
FAQs
What are the health benefits of cucumber ginger lemonade?
Cucumber ginger lemonade offers great health benefits.
- Hydration and Cooling Effects: This drink helps keep you hydrated. Cucumber has high water content, making it refreshing. Ginger adds a nice kick and can help cool your body.
- Nutritional Benefits of Cucumbers and Ginger: Cucumbers are low in calories and rich in vitamins. They contain vitamin K and antioxidants. Ginger can help with digestion and reduce inflammation. This drink is a tasty way to get these nutrients.
Can I adjust the ingredients to my taste?
Yes, you can easily change the recipe to fit your taste.
- Customizing Sweetness and Flavor Profiles: If you want it sweeter, add more honey or agave syrup. For more zing, squeeze in more lemon juice. You can also add more ginger for a stronger flavor. Try different amounts until it tastes just right for you.
Is Cucumber Ginger Lemonade suitable for detox diets?
Absolutely! This drink is great for detox diets.
- Discussing Detox Properties and Usage: Cucumber and ginger help flush out toxins. They work together to cleanse your system. The lemon adds vitamin C, which supports your immune system. This makes it a perfect drink for a detox.
How can I make this recipe vegan-friendly?
Making this lemonade vegan is simple and easy.
- Sweetener Alternatives and Other Vegan Tips: Instead of honey, use agave syrup or maple syrup. Both options work well and keep the drink vegan. Also, check any garnishes you use to ensure they are plant-based.
Cucumber ginger lemonade is refreshing and simple to make. We covered the key ingredients, like cucumbers, ginger, and lemons, and the equipment needed. Following clear steps helps create the best flavor. You can also experiment with different sweeteners and variations for a unique twist. Store leftovers properly to enjoy later.
Creating your drink offers hydration and a fun way to enjoy summer. Now, you can impress others with your homemade lemonade!
![- 1 cup frozen mixed berries (e.g., strawberries, blueberries, raspberries) - 1 ripe banana, peeled and sliced - 1/2 cup unsweetened almond milk (or preferred milk alternative) - 1 tablespoon chia seeds - Honey or maple syrup (to adjust sweetness) - Sliced fresh fruits (kiwi, strawberries) - Granola - Shredded coconut - Edible flowers for garnish For this berry smoothie bowl, I love using these main ingredients. The frozen mixed berries give a great flavor and color. The banana adds natural sweetness and creaminess. The almond milk brings it all together. If you want to boost nutrition, I suggest adding chia seeds. They are small but packed with nutrients. You can also add honey or maple syrup to sweeten your bowl. I often skip this step, as the fruits are sweet enough for me. Toppings are where you can really get creative. Fresh sliced fruits like kiwi or strawberries make it pop. Granola adds a nice crunch, while shredded coconut gives a fun texture. For a fancy touch, edible flowers look beautiful on top. Using this [Full Recipe], you can easily whip up a berry smoothie bowl that is both tasty and healthy. - Step 1: Combine ingredients in a blender. Add 1 cup of frozen mixed berries, 1 ripe banana, 1/2 cup of almond milk, and 1 tablespoon of chia seeds. This mix brings great taste and nutrition. - Step 2: Blend until smooth and creamy. Start on a low speed and then increase to high. Stop occasionally to scrape the sides. You want a thick, creamy blend. - Step 3: Adjust thickness with almond milk if needed. If it's too thick, add more almond milk slowly. Blend again until you reach your perfect texture. - Step 4: Pour smoothie into a bowl. Use a spoon to spread it evenly across the base. This makes a nice canvas for your toppings. - Step 5: Arrange toppings artistically. Layer your sliced fruits, sprinkle granola, and add shredded coconut. Be creative! Place a few edible flowers for a pop of color. - Step 6: Drizzle with honey or syrup if desired. This adds a lovely touch of sweetness. Enjoy every spoonful of your berry bliss smoothie bowl, a treat that's both refreshing and nutritious. For the full recipe, check out the Berry Bliss Smoothie Bowl. To make your smoothie bowl creamy, blend the ingredients well. Start with frozen mixed berries. They give a nice thick base. Add your ripe banana for extra creaminess. Blend on high speed. Stop to scrape down the sides with a spatula as needed. If the mix is too thick, slowly add almond milk. This helps you find your perfect texture. How you present your smoothie bowl matters. Use a wide, shallow bowl for a lovely look. Pour in your smoothie and spread it evenly. Get creative with toppings! You can layer sliced fruits in a fun pattern. Add granola for a nice crunch, and sprinkle shredded coconut on top. Edible flowers can make it pop. You can also serve it in a glass for a different vibe. Berries are packed with vitamins and antioxidants. They help keep your heart healthy and improve your skin. Chia seeds are tiny but mighty! They add fiber and omega-3 fatty acids. This helps with digestion and keeps you full. Both ingredients make your smoothie bowl tasty and good for you. Check out the Full Recipe for more delicious details. {{image_4}} You can switch up the berries for a fun twist. Try adding pineapple and mango for a tropical vibe. This mix adds sweetness and a bright flavor. You can also include spinach or kale. These greens boost the nutrition and keep the color vibrant. If you want a creamier texture, substitute almond milk with coconut milk. This adds a rich flavor and silkiness. Another great option is oat milk. It gives a smooth feel and works well with fruity flavors. For an extra layer of taste, add a splash of vanilla extract. This small change can make your bowl feel gourmet. You can also enhance it with nut butter. Almond or peanut butter gives a nutty taste and adds protein. Feel free to explore these variations to make your berry smoothie bowl your own. For the complete recipe, check out the full recipe. After enjoying your berry smoothie bowl, you might have leftovers. Store them in an airtight container in the fridge. Make sure to cover the bowl well. This keeps the smoothie fresh for up to 24 hours. To prevent browning, squeeze a little lemon juice on top. The acid helps keep the colors bright. You can freeze smoothie bowls for longer storage. Pour your extra smoothie into ice cube trays. Once frozen, transfer the cubes to a freezer bag. When you want to enjoy it again, just take out a few cubes. Let them thaw in the fridge overnight or blend them with a splash of milk for a quick treat. Preparing your smoothie ingredients ahead saves time. You can make smoothie packs by placing all the fruit in bags. Just add almond milk and blend when you’re ready. For batch-making, mix your berries and banana in a large bowl. Divide into smaller containers for easy access. This way, you can enjoy your berry bliss smoothie bowl anytime! For the full recipe, check out the Berry Bliss Smoothie Bowl section. To thicken your smoothie bowl, use frozen fruits. Frozen berries or bananas work best. You can also add less liquid. If you want more creaminess, add a scoop of Greek yogurt. Another trick is to use a small amount of oats or chia seeds. They absorb liquid and add thickness. Yes, you can use fresh fruits, but the texture changes. Fresh fruits make the smoothie thinner. Frozen fruits give a nice, thick texture. Plus, frozen fruits are often picked at peak ripeness. This means they can be sweeter and more flavorful. If you use fresh fruits, add ice to help thicken. For protein-rich toppings, try Greek yogurt or nut butter. You can also sprinkle on hemp seeds or chia seeds. Other great options include sliced almonds or granola with protein. These toppings not only add protein but also give extra flavor and crunch. To make your smoothie bowl vegan, swap dairy milk for almond milk or coconut milk. Use maple syrup instead of honey for sweetness. You can also add silken tofu for extra creaminess and protein. These swaps keep your smoothie bowl delicious and plant-based. Cleaning your blender is simple! Fill it halfway with warm water. Add a drop of dish soap. Blend for 30 seconds, then rinse. If there are tough spots, use a sponge to scrub them. Always unplug it before cleaning for safety. Regular cleaning keeps your blender fresh for every use. By blending frozen berries, banana, and almond milk, you craft a delicious smoothie bowl. Optional chia seeds add health benefits, while a mix of fresh toppings makes it visually appealing. Remember to adjust your blend for perfect creaminess and arrange your toppings artfully. In the end, a smoothie bowl offers both flavor and nutrition. Whether you add unique fruits or non-dairy milk, there are endless ways to make it your own. Enjoy the process and your tasty creation!](https://dishtreats.com/wp-content/uploads/2025/06/ca3318a7-4b20-4fec-bf86-7164735c42c6-768x768.webp)


![To make a tasty and moist chocolate zucchini bread, gather these simple ingredients: - 1 medium zucchini, finely grated - 1 cup whole wheat flour - 1/2 cup unsweetened cocoa powder - 1/2 teaspoon baking soda - 1/2 teaspoon baking powder - 1/4 teaspoon salt - 1/2 cup pure maple syrup or honey - 1/4 cup unsweetened applesauce - 2 large eggs - 1 tablespoon vanilla extract - 1/2 cup dark chocolate chips (optional) - 1/4 cup chopped walnuts or pecans (optional) These ingredients help create a rich flavor and moist texture. The grated zucchini adds moisture without a strong taste. Whole wheat flour makes the bread hearty and healthy. Cocoa powder gives it that delicious chocolate flavor. Sweeteners like maple syrup or honey ensure the bread stays moist and sweet. Applesauce also adds moisture while cutting down on fat. The eggs help bind everything together. Optional items like dark chocolate chips can add extra richness. Walnuts or pecans bring a nice crunch. You can adjust the recipe to suit your taste. For the full recipe, refer to [Full Recipe]. 1. Preheat your oven to 350°F (175°C). Prepare a 9x5-inch loaf pan. You can grease it lightly or line it with parchment paper. This will help with easy removal once it’s baked. 2. In a large mixing bowl, combine the finely grated zucchini, maple syrup (or honey), unsweetened applesauce, eggs, and vanilla extract. Whisk them together until blended. 3. In a separate bowl, gently whisk the whole wheat flour, cocoa powder, baking soda, baking powder, and salt. Make sure they mix well to avoid clumps. 1. Gradually add the dry ingredients into the wet mixture. Stir just until combined. Avoid over mixing to keep the bread light and fluffy. 2. If you like, gently fold in dark chocolate chips and chopped walnuts or pecans. These add a nice crunch and rich flavor. 3. Carefully pour the batter into the prepared loaf pan. Use a spatula to smooth the top for an even bake. 1. Bake in the preheated oven for 45-50 minutes. Test doneness by inserting a toothpick into the center. It should come out clean or with a few moist crumbs. 2. Once baked, remove the bread from the oven. Let it cool in the pan for about 10 minutes. Then, transfer it to a wire rack to cool completely. For the full recipe, check out the details provided earlier. Enjoy your baking! To make your chocolate zucchini bread perfect, mix well but don’t overdo it. Overmixing can lead to a tough loaf. Stir the batter until just combined. This keeps the bread soft and moist. Accurate measurements matter too. Use a kitchen scale for the best results if you have one. If not, make sure to level off your measuring cups. If you want to switch up the flour, try using almond flour. It gives a nice flavor and works well in this recipe. For sweeteners, you can use agave syrup or coconut sugar. Both options keep the bread tasty and healthy. Just use the same amount as maple syrup or honey. Serve your zucchini bread warm for the best taste. Slice it and dust with powdered sugar for a pretty look. You can also spread nut butter on top for a yummy twist. Pair it with a glass of milk or a cup of tea. These drinks enhance the rich flavors of the bread. For the full recipe, check out the earlier section. {{image_4}} For those with dietary needs, you can easily adapt this recipe. - Gluten-free options: Use a gluten-free flour blend. It works well in this recipe. Just make sure it has a good mix of starch and protein. - Vegan alternatives: Replace the eggs with flax eggs. Mix one tablespoon of ground flaxseed with three tablespoons of water. Let it sit for five minutes until it thickens. You can also switch the honey with agave syrup or another plant-based sweetener. These changes keep the bread tasty while meeting different needs. You can enhance the flavor of your chocolate zucchini bread. - Adding spices like cinnamon or nutmeg: A teaspoon of cinnamon or nutmeg brings warmth. These spices pair well with chocolate and add depth to the flavor. - Incorporating other mix-ins like dried fruit: Try adding dried cherries, cranberries, or even raisins. They add sweetness and chewiness. Mix in about half a cup for the best results. These variations make your bread unique and fun! For the full recipe, check out the details above. To keep your chocolate zucchini bread fresh, store it correctly. Wrap the cooled bread tightly in plastic wrap or aluminum foil. This keeps moisture in and prevents it from drying out. Place it in an airtight container for extra protection. You can store it at room temperature for about three days. If you want to keep it longer, freezing works great. To freeze chocolate zucchini bread, slice it first. Wrap each slice in plastic wrap. Then, place the wrapped slices in a freezer-safe bag. This way, you can grab a slice whenever you want a treat. It can stay fresh in the freezer for up to three months. When you’re ready to enjoy your chocolate zucchini bread, warming it up adds to the taste. The best way to heat it is in the microwave. Place a slice on a microwave-safe plate, cover it with a paper towel, and heat for 15-20 seconds. This keeps the bread moist. You can also reheat it in the oven. Preheat the oven to 350°F (175°C). Wrap the bread in foil to prevent it from getting dry. Heat for about 10-15 minutes. This method helps keep the texture soft and warm. For the best taste, enjoy your chocolate zucchini bread within three days if stored at room temperature. If frozen, try to eat it within three months for the best flavor. To keep zucchini bread moist, use fresh zucchini. Grate it finely to release its juice. Adding unsweetened applesauce or pure maple syrup also helps boost moisture. - Bake at the right temperature. Too high can dry it out. - Don’t overmix the batter. This keeps the bread tender. - Cover the bread with foil if it browns too fast. Yes, you can use frozen zucchini. Just let it thaw and drain excess water first. Frozen zucchini works well but may change the texture slightly. - Fresh zucchini offers the best flavor and moisture. - If you have frozen, make sure to squeeze out the water. - Using frozen is a great way to reduce waste. Check for doneness with a toothpick. Insert it into the center of the bread. If it comes out clean or with a few moist crumbs, it’s done. - The edges will pull away from the pan slightly. - The top should look set and spring back when you touch it. - Baking time is usually 45-50 minutes, but ovens vary. For the complete method to make this treat, check out the Full Recipe! You’ve learned how to make delicious chocolate zucchini bread. We covered the main ingredients, step-by-step instructions, and helpful tips. Remember, precise measurements and mixing are key to success. You can also explore variations to match your tastes and dietary needs. Store your bread properly for long-lasting freshness. With these insights, you’ll enjoy baking and sharing this treat. Dive in and enjoy the process!](https://dishtreats.com/wp-content/uploads/2025/06/124341aa-b5ba-4a17-ada7-3bb78900324d-768x768.webp)