
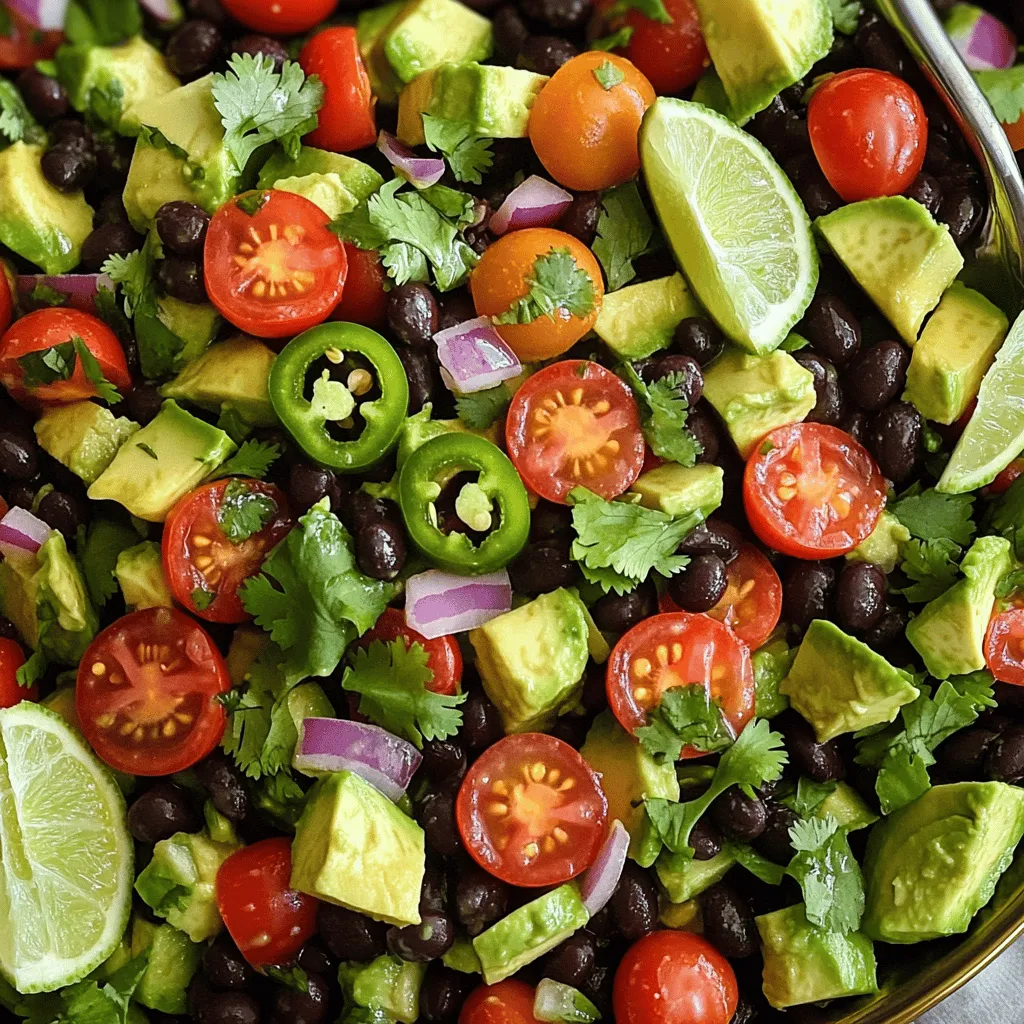
Flavorful Avocado Black Bean Salad Quick and Easy Recipe
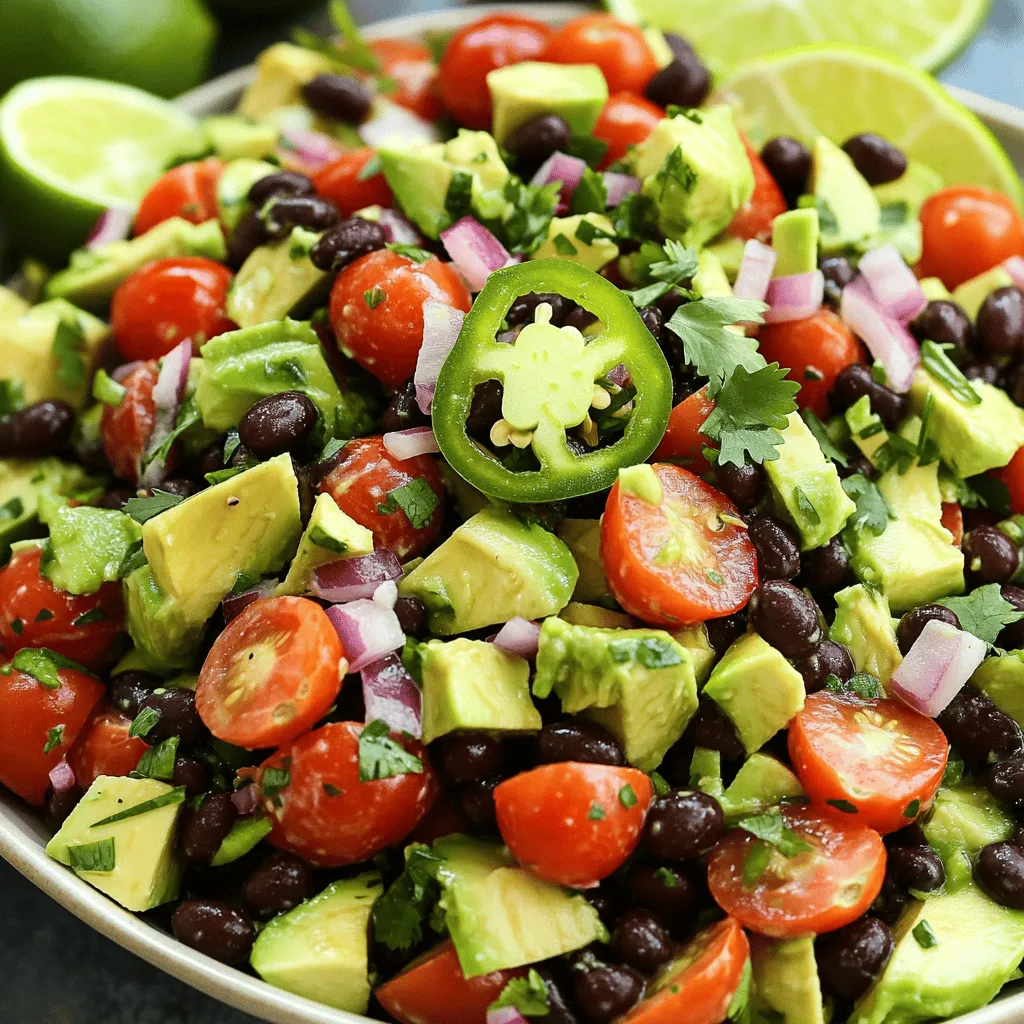
Looking for a dish that’s fresh, tasty, and super easy to make? This Flavorful Avocado Black Bean Salad hits the mark! With vibrant ingredients like ripe avocados, crunchy bell peppers, and zesty lime juice, this salad bursts with flavor in every bite. Whether you’re a meal prep pro or just want a quick side, I’ve got you covered. Let’s dive into this simple recipe that’ll brighten up your plate!
Ingredients
List of Ingredients
- Ripe avocados
- Canned black beans
- Cherry tomatoes
- Red onion
- Red bell pepper
- Jalapeño pepper
- Fresh cilantro
- Lime juice
- Extra virgin olive oil
- Ground cumin
- Salt and pepper
For the Avocado Black Bean Salad, each ingredient plays a key role in the taste and texture. Ripe avocados bring creaminess, while canned black beans add protein. Cherry tomatoes offer a burst of sweetness. The red onion lends a zesty crunch, and the red bell pepper adds color and freshness. If you like some heat, the jalapeño pepper is perfect. Fresh cilantro gives a bright herbal note. Lime juice adds a tangy kick, and extra virgin olive oil provides richness. Ground cumin gives an earthy flavor, while salt and pepper enhance all the tastes.
Nutritional Information
- Calories per serving: About 220
- Macronutrient breakdown:
- Carbs: 30g
- Fats: 10g
- Proteins: 7g
- Fiber content: 8g
This salad is not just tasty; it is also good for you. Each serving has around 220 calories, making it a healthy choice. It has a good mix of carbs, fats, and proteins. The fiber content is high, which helps with digestion. This dish is perfect as a light meal or side.
Step-by-Step Instructions
Combine Ingredients
In a large bowl, start by adding the diced avocados, rinsed black beans, halved cherry tomatoes, finely chopped red onion, diced red bell pepper, and jalapeño if you want some heat. Use a soft spatula to mix everything gently. Be careful to keep the avocados whole. This gentle mixing helps the flavors blend without mashing the creamy avocados.
Prepare the Dressing
In a small bowl, whisk together the lime juice, olive oil, ground cumin, salt, and pepper. Whisk until the dressing is well mixed and slightly thickened. This emulsifying helps the dressing coat the salad evenly.
Dress the Salad
Now, slowly drizzle the dressing over the salad mix. With a gentle touch, toss the salad so every piece is coated. Be cautious not to mash the avocados, as they should stay chunky and fresh.
Add Freshness
Next, sprinkle the chopped cilantro on top. Give the salad another light toss to ensure the cilantro is spread throughout. The cilantro adds a burst of freshness that brightens the whole dish.
Taste and Adjust
Take a moment to taste the salad. If it needs more flavor, add a splash of lime juice or a pinch of salt. This step is key, as it makes sure your salad is just right for your palate.
Rest Before Serving
Let the salad rest at room temperature for 10-15 minutes. This waiting time helps all the ingredients mix together, enhancing the overall flavors. When you serve it, you’ll enjoy a salad that tastes even better!
Tips & Tricks
Selecting the Perfect Avocado
- Ripeness indicators: Look for avocados that feel slightly soft when you press them gently. If they are hard, they need more time to ripen. Dark green or black skin usually means they are ripe.
- Best practices for cutting avocados: Cut the avocado in half lengthwise. Twist the two halves apart. Use a spoon to scoop out the seed. Then, slice or dice the flesh while it’s still in the skin. This keeps the pieces neat.
Substitutions
- Alternative beans: You can use kidney or pinto beans instead of black beans. Each type brings a different taste and texture.
- Replacing lime juice with other citrus: If you don’t have limes, try lemon or orange juice. They will add a different but tasty zing to your salad.
Customization Suggestions
- Adding feta cheese or corn: Crumbled feta adds creaminess. Sweet corn gives a nice crunch. Both enhance the flavor and texture.
- Enhancing spiciness with additional jalapeños: If you like heat, add more jalapeños. You can also try a dash of hot sauce for an extra kick.
These tips help you make the best Avocado Black Bean Salad. Enjoy the process of creating your tasty dish!
Variations
Southwest Avocado Black Bean Salad
You can easily switch up the flavors in your salad. Try adding corn and lime vinaigrette. This adds sweetness and a nice tang. If you want a fun crunch, toss in some corn chips. They add a great texture that makes each bite exciting.
Tropical Twist
For a fresh spin, include mango or pineapple. This makes your salad taste bright and fruity. You might want to adjust the seasoning to make it sweeter. A bit of honey or extra lime juice can enhance that tropical vibe.
Protein-Packed Version
If you want to make it heartier, add grilled chicken or shrimp. This boosts the protein while keeping it tasty. You can also mix in quinoa for extra nutrition. Quinoa adds a nice nutty flavor and makes the salad more filling.
Storage Info
Best Practices for Storing
To keep your avocado black bean salad fresh, use an airtight container. This helps keep air out. Store it in the refrigerator right after making it. The salad stays fresh for about 1 to 2 days. After this, the avocados may brown and lose their taste.
Tips for Preventing Browning
Lime juice is a great way to stop browning. It helps keep avocados green and fresh. Make sure to mix lime juice in well. You can also cover the salad with plastic wrap. Press the wrap down to touch the salad. This limits air exposure and helps keep it fresh longer.
Reheating Instructions
You do not need to heat this salad. It tastes best cold. If you have leftovers, enjoy them straight from the fridge. You can serve the salad with tortilla chips or on a bed of greens. This keeps each bite crunchy and refreshing.
FAQs
Can I make Avocado Black Bean Salad ahead of time?
Yes, you can make this salad ahead. To keep it fresh, prepare the base first. Mix the avocados, beans, and veggies. Store them in an airtight container. Add the dressing right before serving. This way, the avocados stay bright and tasty.
What can I serve with Avocado Black Bean Salad?
You can serve this salad with many dishes. Here are some great pairings:
- Grilled chicken for protein
- Tacos for a fun meal
- Rice for a filling option
- Tortilla chips for crunch
These pairings enhance the salad’s flavors and create a balanced meal.
How do I know when the avocados are ripe?
When choosing avocados, look for these signs:
- The skin should be dark green or almost black.
- It should feel soft when you press it gently.
- Avoid avocados that have large dark spots.
These tips help you pick perfect avocados for your salad.
Is this recipe vegan and gluten-free?
Yes, this recipe is both vegan and gluten-free. It contains no animal products. The black beans and avocados provide all the protein you need. This makes the salad perfect for many diets.
How long does Avocado Black Bean Salad last in the fridge?
When stored properly, this salad lasts about 1 to 2 days in the fridge. Keep it in an airtight container. To keep it fresh longer, avoid mixing in the dressing. This helps prevent browning and keeps flavors fresh.
In this blog post, I shared a simple and tasty recipe for Avocado Black Bean Salad. We covered ingredient selections, step-by-step instructions, and helpful tips. The salad is full of flavor and nutrition, making it a perfect addition to any meal. Don’t forget to mix gently and let it rest for the best taste. Remember, you can easily customize this dish to fit your preferences. Enjoy creating your own version of this healthy treat!

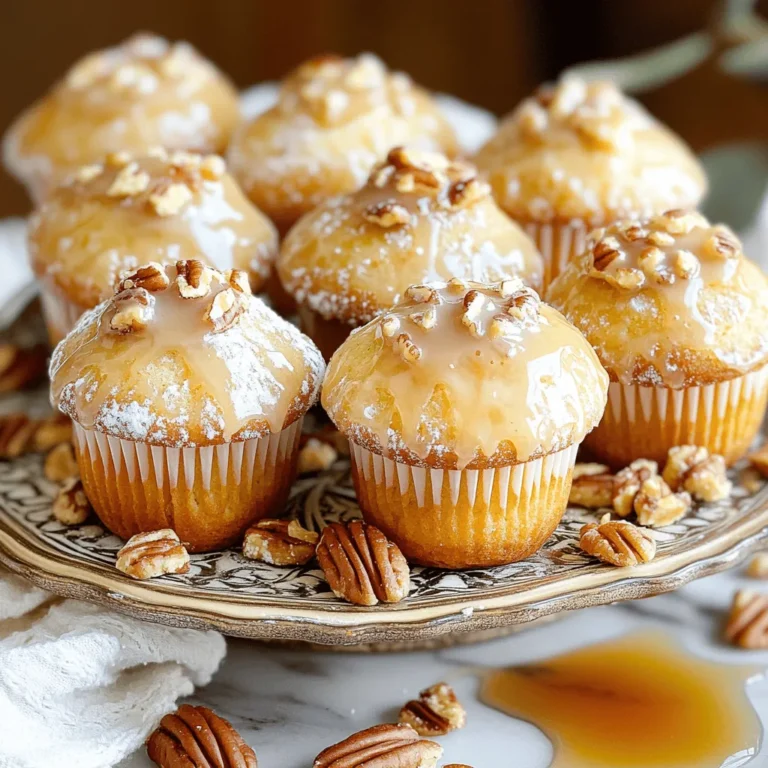
![When making peach streusel muffins, the right ingredients make all the difference. Here’s what you need: - 1 ½ cups all-purpose flour - 1 tsp baking powder - ½ tsp baking soda - ¼ tsp salt - ½ cup granulated sugar - ¼ cup packed brown sugar - ⅓ cup unsalted butter, melted - 1 large egg - 1 tsp vanilla extract - ½ cup buttermilk - 1 ½ cups fresh peaches, peeled and diced - ⅓ cup rolled oats - 1 tsp ground cinnamon These ingredients create a lovely balance of flavors. The fresh peaches add sweetness and moisture. The streusel topping gives a nice crunch. This recipe is simple and uses common items. I love how easy it is to find these ingredients at any store. For the full recipe, check out [Full Recipe]. It's a delightful way to enjoy seasonal peaches in a warm muffin. First, preheat your oven to 375°F (190°C). This step warms the oven, helping the muffins bake evenly. Next, prepare your muffin tin. You can line it with muffin liners or grease it lightly with some non-stick spray or butter. This will keep the muffins from sticking. In a medium bowl, whisk together the dry ingredients. Combine 1 ½ cups of all-purpose flour, 1 teaspoon of baking powder, ½ teaspoon of baking soda, and ¼ teaspoon of salt. Mix well until everything is blended. Set this bowl aside for now. In a large mixing bowl, combine the sugars and melted butter. Use ½ cup of granulated sugar and ¼ cup of brown sugar. Mix them well until they blend together. Then, add 1 large egg and 1 teaspoon of vanilla extract. Beat the mixture until it looks fluffy. Next, pour in ½ cup of buttermilk and stir gently. Now, it’s time to add the dry ingredients. Gradually fold the flour mixture into the wet ingredients. Be gentle and avoid overmixing. It’s okay if the batter has a few lumps. Finally, fold in 1 ½ cups of diced peaches. Make sure they are evenly spread throughout the batter. In a small bowl, mix together ⅓ cup of rolled oats, 1 teaspoon of ground cinnamon, and a pinch of sugar for the streusel topping. This mix will add a crunchy texture to your muffins. Using a scooper or a spoon, fill each muffin liner with the batter. Aim to fill them about two-thirds full. This gives your muffins room to rise. Once filled, sprinkle a generous amount of the streusel topping over each muffin. This adds that crispy layer on top. Place the muffin tin in your preheated oven. Bake for 18 to 20 minutes. Check for doneness by inserting a toothpick into the center of a muffin. If it comes out clean, your muffins are ready. After baking, let the muffins cool in the pan for about 5 minutes. Then, transfer them to a wire rack to cool completely. For a complete recipe and detailed instructions, check out the Full Recipe. To make great muffins, avoid overmixing the batter. When you mix too much, muffins can turn tough and dry. Gently fold the dry ingredients into the wet. Leave some lumps; they are okay! The batter should feel thick but not dry. Aim for a smooth mix with small bits of flour still visible. This keeps the muffins soft and fluffy. To keep your muffins fresh, store them in an airtight container at room temperature. They will stay good for up to three days. If you want to keep them longer, freeze them. Wrap each muffin in plastic wrap, then put them in a freezer bag. When ready to eat, thaw them in the fridge overnight or microwave them for about 20 seconds. This keeps them soft and tasty. These peach streusel muffins pair well with coffee or tea. They also taste great with a glass of milk. For a nice touch, dust the muffins with powdered sugar before serving. You can also add a slice of fresh peach on the side. This extra step makes your muffins look fancy and adds more peach flavor. Enjoy the delightful mix of tastes! {{image_4}} You can switch the peaches for other fruits. Blueberries and raspberries work great! They add a nice burst of flavor. You can even mix fruits, like peaches and blueberries, for a fun twist. Remember to adjust the amount of fruit based on what you use. Keep it around 1 ½ cups to fill the muffins well. Need a gluten-free option? Use a gluten-free flour blend instead of all-purpose flour. For a dairy-free version, replace buttermilk with almond milk or coconut milk. You can also use a flax egg instead of a regular egg. Just mix 1 tablespoon of flaxseed meal with 2.5 tablespoons of water. Let it sit for a few minutes to thicken. This will keep your muffins tasty and friendly for different diets. Want to kick up the flavor? Try adding nuts like walnuts or pecans to the batter. They give a nice crunch. You can also sprinkle some cinnamon or nutmeg in the batter for warmth. For a little zing, add a splash of lemon juice or zest. These small changes can make your muffins more exciting and tasty. For the full recipe, look for the Peach Streusel Muffins instructions above! You can store Peach Streusel Muffins at room temperature. Place them in an airtight container. This helps keep them fresh and soft. They will stay tasty for up to three days. If you want to keep them longer, consider freezing. Freezing is a great way to save these muffins for later. Wrap each muffin in plastic wrap. Then, place them in a freezer bag or container. This keeps them from getting freezer burn. You can freeze them for up to three months. To enjoy them later, thaw your muffins. Take them out of the freezer and let them sit at room temperature. This usually takes about an hour. You can also warm them in the oven at low heat for a fresh-baked taste. For the best experience, try the Full Recipe to make these delightful muffins again! Yes, you can use canned peaches. Look for peaches packed in juice or water. Drain them well and pat them dry to remove excess moisture. This step helps avoid soggy muffins. Cut the peaches into small pieces, similar to fresh ones. Canned peaches can be sweeter, so reduce the sugar in the recipe by a tablespoon. This keeps your muffins balanced. If your batter is thick, add a splash of milk or buttermilk. Mix well until you reach a smooth texture. Thick batter can lead to dry muffins. You want a batter that can easily drop from a spoon but is not runny. Another tip is to gently fold in a bit more diced peaches. This adds moisture and flavor. Check for doneness by inserting a toothpick into the center of a muffin. If it comes out clean or with a few crumbs, your muffins are ready. Look for a golden-brown top and a slight spring when you touch the surface. If the muffins still look wet or jiggly, bake them a few more minutes. Yes, you can prepare the batter ahead. Store it in the fridge for up to 2 hours. Mix the wet and dry ingredients separately. Combine them just before baking. This helps keep the muffins light and fluffy. If you plan to store longer, consider freezing the batter in muffin tins. This way, you can bake fresh muffins anytime. For the full recipe, check above. These peach muffins are easy to make and full of flavor. We covered the ingredients, step-by-step instructions, and tips to improve texture and taste. From using fresh peaches to adding oats, each detail counts. You can experiment with flavors and storage methods. Enjoy these muffins fresh or store them for later. Happy baking!](https://dishtreats.com/wp-content/uploads/2025/07/b62cebd8-d26b-48c0-b1ab-fab18f37a599-768x768.webp)


 link for all details! Asian Chicken Lettuce Wraps are fun, tasty, and easy to make. We covered key ingredients, step-by-step cooking, and helpful tips. You can mix things up with different proteins and veggies. Storing leftovers is simple, too. This dish is perfect for quick meals or impressing guests. Use the recipe and ideas to create your own version. Enjoy every bite, and share your creations!](https://dishtreats.com/wp-content/uploads/2025/07/cde1ffe3-32d5-41af-a230-f4c5c520fc8a-768x768.webp)