Vegan Lentil Soup Heartwarming and Nourishing Dish
![- 1 cup green or brown lentils - 1 tablespoon olive oil - 1 medium onion, finely chopped - 2 cloves garlic, minced - 2 medium carrots, diced into bite-size pieces - 2 stalks celery, diced - 1 red bell pepper, diced - Ground cumin - Smoked paprika - Turmeric - Salt - Black pepper - 6 cups vegetable broth (preferably low-sodium) - 1 (14-ounce) can diced tomatoes, including their juices - 2 tablespoons fresh lemon juice In this vegan lentil soup, I love using green or brown lentils. They add a hearty feel. The olive oil helps to sauté the veggies, making them soft and full of flavor. The mix of vegetables is key. You need an onion for sweetness. Garlic adds a nice kick. Carrots and celery give texture. The red bell pepper adds color and sweetness. For spices, I use ground cumin and smoked paprika. They bring warmth and depth. A bit of turmeric adds a lovely golden hue. Salt and black pepper round out the flavors. Liquid ingredients are vital too. I use vegetable broth for a rich base. Diced tomatoes add acidity and sweetness. Lastly, fresh lemon juice brightens the dish. You can find the full recipe above for all the details! - Rinse the lentils and chop the vegetables. - Heat olive oil and sauté onion and garlic. Start by rinsing one cup of green or brown lentils under cold water. This helps remove any dirt or debris. While the lentils drain, chop your vegetables. You will need one medium onion, two cloves of garlic, two medium carrots, two stalks of celery, and one red bell pepper. Next, in a large pot, heat one tablespoon of olive oil over medium heat. Add the chopped onion and cook for about five minutes. Stir until it becomes soft and clear. Then, add the minced garlic. Cook for one more minute to release its wonderful aroma. - Incorporate remaining vegetables and spices. - Add lentils, broth, and tomatoes, bring to a boil. Now, add the diced carrots, celery, and red bell pepper to the pot. Cook for another five to seven minutes. Stir often until the vegetables become tender. To build flavor, sprinkle in one teaspoon of ground cumin, one teaspoon of smoked paprika, and half a teaspoon of turmeric. Mix well and cook for one more minute. After the spices bloom, add the rinsed lentils, six cups of vegetable broth, and one can of diced tomatoes with their juices. Increase the heat and bring this mixture to a boil. Once it boils, reduce the heat and cover the pot. Let it simmer for 25 to 30 minutes, or until the lentils are soft but not mushy. - Simmer and add kale. - Season and serve. Once the lentils are cooked, stir in two cups of chopped kale. Let it simmer for an additional five to seven minutes. The kale should turn bright green and wilted. Now, season your soup with salt, freshly ground black pepper, and two tablespoons of fresh lemon juice. The lemon juice adds a nice zing. Taste it and adjust the seasoning as needed. Serve the soup hot, garnished with fresh parsley for a hint of color and flavor. For a full recipe, please see the [Full Recipe]. Enjoy your warm and nourishing vegan lentil soup! To boost the taste of your vegan lentil soup, consider these tips: - Add spices: Try bay leaf for depth or chili flakes for heat. - Sauté longer: Cook your vegetables a bit more. This gives a richer, deeper flavor. This soup shines when paired with the right sides. Here are my favorite ways: - Bread: Serve it with homemade bread for a warm, cozy meal. - Garnishes: Top it with nutritional yeast for a cheesy flavor or creamy avocado for richness. Lentils are packed with nutrients. Here’s why they are great: - Nutritional benefits: They provide protein, fiber, and iron, making them a healthy choice. - Leafy greens: Adding kale boosts vitamins and minerals. It also adds color and texture. For the full experience, check out the Full Recipe. These tips will help you create a dish that's not just tasty but also nourishing! {{image_4}} You can switch lentils for other beans or pulses. Black beans or chickpeas work well. Each bean adds a unique taste and texture to the soup. You can also use seasonal vegetables. Try zucchini in summer or butternut squash in fall. These swaps keep your soup fresh and exciting. To make your soup creamier, add coconut milk. It gives a rich texture and a hint of sweetness. You can also use fresh herbs like basil or cilantro. They add bright flavors and an herbal kick. A sprinkle of fresh herbs before serving makes a big difference. If you want a faster option, try an Instant Pot. Cook the soup on high pressure for about 15 minutes. You can also use a slow cooker. Simply set it on low for 6-8 hours. For a creamy version, use a blender. Blend half the soup and mix it back in. This makes the soup thick and smooth. Explore the [Full Recipe] for more ideas on making this soup your own! After enjoying your vegan lentil soup, you can store leftovers easily. Let the soup cool down first. Then, transfer it to airtight containers. Glass or plastic containers work well for this. Store it in the fridge for up to five days. For longer storage, freeze the soup. Use freezer-safe containers or bags to prevent freezer burn. The soup can last up to three months in the freezer. When it’s time to enjoy the soup again, reheat it gently. You can use a pot on the stove or a microwave. If using a pot, heat it over medium-low until warm. Stir occasionally to prevent sticking. In the microwave, use a microwave-safe bowl. Heat in short bursts, stirring in between. This helps heat evenly. Avoid overcooking, as the lentils may become mushy. Preparing for future meals is smart and easy with this soup. Chop your vegetables ahead of time, like onion, garlic, and carrots. Store them in the fridge for quick use. You can also rinse your lentils in advance and keep them in a container. Making larger batches is a great idea too. This way, you always have a warm, nourishing meal ready. Just follow the full recipe and freeze extra portions for busy days. Green and brown lentils are great for soup. They hold their shape well. Green lentils have a slightly peppery taste. Brown lentils are milder and cook faster. Both work well in this vegan lentil soup. Yes, you can adapt this recipe. If you prefer meat, try adding cooked chicken or sausage. For dairy, a splash of cream or some cheese can add richness. Just remember, this makes it less vegan. To thicken your soup, you have a few options. You can mash some lentils against the pot. Adding a spoonful of tomato paste also helps. If you want a creamier feel, blend a portion of the soup. These techniques will help you achieve the perfect consistency. For more details, check the full recipe. This blog post covers the key aspects of making a hearty lentil soup. We discussed the essential ingredients, including lentils, vegetables, and spices. I shared step-by-step instructions for preparing and cooking the soup. We explored tips for enhancing flavors and serving suggestions. You can create variations with different ingredients and learn best practices for storing and reheating leftovers. Lentil soup is a healthy, versatile meal that is easy to make. Enjoy experimenting with your own flavors and keep discovering new ways to make it.](https://dishtreats.com/wp-content/uploads/2025/06/c46bc7f1-46e5-4579-b786-1848127316df.webp)
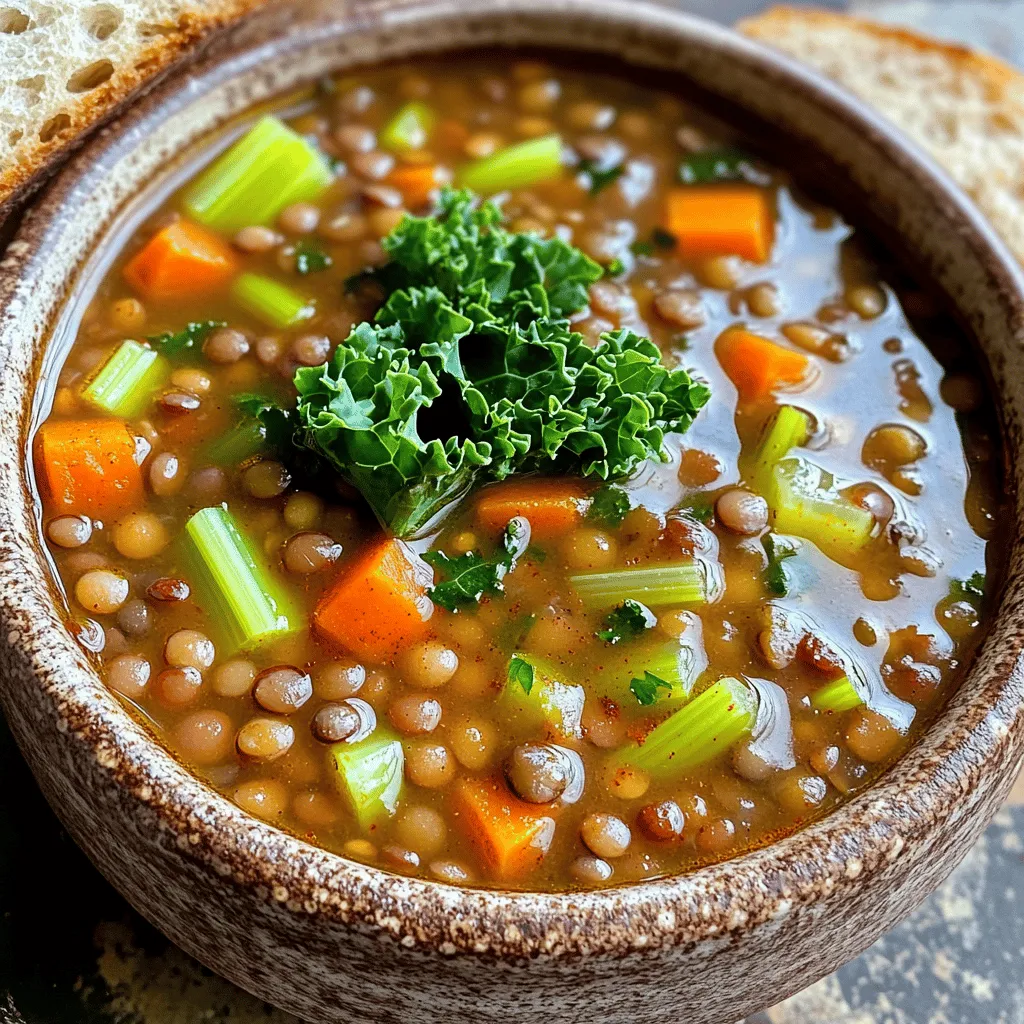
If you’re craving a warm, hearty dish, vegan lentil soup is your answer! This easy recipe packs in flavors and nutrients that hit the spot. With simple ingredients like green or brown lentils, fresh veggies, and spices, you’ll enjoy every spoonful. Plus, it’s customizable to your taste! Join me as we explore this nourishing soup that warms your heart and fills your belly. Let’s get cooking!
Ingredients
Main Ingredients
- 1 cup green or brown lentils
- 1 tablespoon olive oil
Vegetables and Seasonings
- 1 medium onion, finely chopped
- 2 cloves garlic, minced
- 2 medium carrots, diced into bite-size pieces
- 2 stalks celery, diced
- 1 red bell pepper, diced
- Ground cumin
- Smoked paprika
- Turmeric
- Salt
- Black pepper
Liquid Ingredients
- 6 cups vegetable broth (preferably low-sodium)
- 1 (14-ounce) can diced tomatoes, including their juices
- 2 tablespoons fresh lemon juice
In this vegan lentil soup, I love using green or brown lentils. They add a hearty feel. The olive oil helps to sauté the veggies, making them soft and full of flavor.
The mix of vegetables is key. You need an onion for sweetness. Garlic adds a nice kick. Carrots and celery give texture. The red bell pepper adds color and sweetness.
For spices, I use ground cumin and smoked paprika. They bring warmth and depth. A bit of turmeric adds a lovely golden hue. Salt and black pepper round out the flavors.
Liquid ingredients are vital too. I use vegetable broth for a rich base. Diced tomatoes add acidity and sweetness. Lastly, fresh lemon juice brightens the dish.
Step-by-Step Instructions
Preparation Steps
- Rinse the lentils and chop the vegetables.
- Heat olive oil and sauté onion and garlic.
Start by rinsing one cup of green or brown lentils under cold water. This helps remove any dirt or debris. While the lentils drain, chop your vegetables. You will need one medium onion, two cloves of garlic, two medium carrots, two stalks of celery, and one red bell pepper.
Next, in a large pot, heat one tablespoon of olive oil over medium heat. Add the chopped onion and cook for about five minutes. Stir until it becomes soft and clear. Then, add the minced garlic. Cook for one more minute to release its wonderful aroma.
Cooking Process
- Incorporate remaining vegetables and spices.
- Add lentils, broth, and tomatoes, bring to a boil.
Now, add the diced carrots, celery, and red bell pepper to the pot. Cook for another five to seven minutes. Stir often until the vegetables become tender. To build flavor, sprinkle in one teaspoon of ground cumin, one teaspoon of smoked paprika, and half a teaspoon of turmeric. Mix well and cook for one more minute.
After the spices bloom, add the rinsed lentils, six cups of vegetable broth, and one can of diced tomatoes with their juices. Increase the heat and bring this mixture to a boil. Once it boils, reduce the heat and cover the pot. Let it simmer for 25 to 30 minutes, or until the lentils are soft but not mushy.
Final Steps
- Simmer and add kale.
- Season and serve.
Once the lentils are cooked, stir in two cups of chopped kale. Let it simmer for an additional five to seven minutes. The kale should turn bright green and wilted.
Now, season your soup with salt, freshly ground black pepper, and two tablespoons of fresh lemon juice. The lemon juice adds a nice zing. Taste it and adjust the seasoning as needed. Serve the soup hot, garnished with fresh parsley for a hint of color and flavor.Enjoy your warm and nourishing vegan lentil soup!
Tips & Tricks
Flavor Enhancements
To boost the taste of your vegan lentil soup, consider these tips:
- Add spices: Try bay leaf for depth or chili flakes for heat.
- Sauté longer: Cook your vegetables a bit more. This gives a richer, deeper flavor.
Serving Suggestions
This soup shines when paired with the right sides. Here are my favorite ways:
- Bread: Serve it with homemade bread for a warm, cozy meal.
- Garnishes: Top it with nutritional yeast for a cheesy flavor or creamy avocado for richness.
Health Tips
Lentils are packed with nutrients. Here’s why they are great:
- Nutritional benefits: They provide protein, fiber, and iron, making them a healthy choice.
- Leafy greens: Adding kale boosts vitamins and minerals. It also adds color and texture.These tips will help you create a dish that’s not just tasty but also nourishing!
Variations
Ingredient Swaps
You can switch lentils for other beans or pulses. Black beans or chickpeas work well. Each bean adds a unique taste and texture to the soup. You can also use seasonal vegetables. Try zucchini in summer or butternut squash in fall. These swaps keep your soup fresh and exciting.
Flavor Adjustments
To make your soup creamier, add coconut milk. It gives a rich texture and a hint of sweetness. You can also use fresh herbs like basil or cilantro. They add bright flavors and an herbal kick. A sprinkle of fresh herbs before serving makes a big difference.
Cooking Method Alternatives
If you want a faster option, try an Instant Pot. Cook the soup on high pressure for about 15 minutes. You can also use a slow cooker. Simply set it on low for 6-8 hours. For a creamy version, use a blender. Blend half the soup and mix it back in. This makes the soup thick and smooth.
Storage Info
Storing Leftovers
After enjoying your vegan lentil soup, you can store leftovers easily. Let the soup cool down first. Then, transfer it to airtight containers. Glass or plastic containers work well for this. Store it in the fridge for up to five days. For longer storage, freeze the soup. Use freezer-safe containers or bags to prevent freezer burn. The soup can last up to three months in the freezer.
Reheating Instructions
When it’s time to enjoy the soup again, reheat it gently. You can use a pot on the stove or a microwave. If using a pot, heat it over medium-low until warm. Stir occasionally to prevent sticking. In the microwave, use a microwave-safe bowl. Heat in short bursts, stirring in between. This helps heat evenly. Avoid overcooking, as the lentils may become mushy.
Meal Prep Ideas
Preparing for future meals is smart and easy with this soup. Chop your vegetables ahead of time, like onion, garlic, and carrots. Store them in the fridge for quick use. You can also rinse your lentils in advance and keep them in a container. Making larger batches is a great idea too. This way, you always have a warm, nourishing meal ready.
FAQs
What type of lentils are best for soup?
Green and brown lentils are great for soup. They hold their shape well. Green lentils have a slightly peppery taste. Brown lentils are milder and cook faster. Both work well in this vegan lentil soup.
Can I add meat or dairy to this recipe?
Yes, you can adapt this recipe. If you prefer meat, try adding cooked chicken or sausage. For dairy, a splash of cream or some cheese can add richness. Just remember, this makes it less vegan.
How do I make vegan lentil soup thicker?
To thicken your soup, you have a few options. You can mash some lentils against the pot. Adding a spoonful of tomato paste also helps. If you want a creamier feel, blend a portion of the soup. These techniques will help you achieve the perfect consistency.
This blog post covers the key aspects of making a hearty lentil soup. We discussed the essential ingredients, including lentils, vegetables, and spices. I shared step-by-step instructions for preparing and cooking the soup. We explored tips for enhancing flavors and serving suggestions. You can create variations with different ingredients and learn best practices for storing and reheating leftovers.
Lentil soup is a healthy, versatile meal that is easy to make. Enjoy experimenting with your own flavors and keep discovering new ways to make it.
![- 1 cup green or brown lentils - 1 tablespoon olive oil - 1 medium onion, finely chopped - 2 cloves garlic, minced - 2 medium carrots, diced into bite-size pieces - 2 stalks celery, diced - 1 red bell pepper, diced - Ground cumin - Smoked paprika - Turmeric - Salt - Black pepper - 6 cups vegetable broth (preferably low-sodium) - 1 (14-ounce) can diced tomatoes, including their juices - 2 tablespoons fresh lemon juice In this vegan lentil soup, I love using green or brown lentils. They add a hearty feel. The olive oil helps to sauté the veggies, making them soft and full of flavor. The mix of vegetables is key. You need an onion for sweetness. Garlic adds a nice kick. Carrots and celery give texture. The red bell pepper adds color and sweetness. For spices, I use ground cumin and smoked paprika. They bring warmth and depth. A bit of turmeric adds a lovely golden hue. Salt and black pepper round out the flavors. Liquid ingredients are vital too. I use vegetable broth for a rich base. Diced tomatoes add acidity and sweetness. Lastly, fresh lemon juice brightens the dish. You can find the full recipe above for all the details! - Rinse the lentils and chop the vegetables. - Heat olive oil and sauté onion and garlic. Start by rinsing one cup of green or brown lentils under cold water. This helps remove any dirt or debris. While the lentils drain, chop your vegetables. You will need one medium onion, two cloves of garlic, two medium carrots, two stalks of celery, and one red bell pepper. Next, in a large pot, heat one tablespoon of olive oil over medium heat. Add the chopped onion and cook for about five minutes. Stir until it becomes soft and clear. Then, add the minced garlic. Cook for one more minute to release its wonderful aroma. - Incorporate remaining vegetables and spices. - Add lentils, broth, and tomatoes, bring to a boil. Now, add the diced carrots, celery, and red bell pepper to the pot. Cook for another five to seven minutes. Stir often until the vegetables become tender. To build flavor, sprinkle in one teaspoon of ground cumin, one teaspoon of smoked paprika, and half a teaspoon of turmeric. Mix well and cook for one more minute. After the spices bloom, add the rinsed lentils, six cups of vegetable broth, and one can of diced tomatoes with their juices. Increase the heat and bring this mixture to a boil. Once it boils, reduce the heat and cover the pot. Let it simmer for 25 to 30 minutes, or until the lentils are soft but not mushy. - Simmer and add kale. - Season and serve. Once the lentils are cooked, stir in two cups of chopped kale. Let it simmer for an additional five to seven minutes. The kale should turn bright green and wilted. Now, season your soup with salt, freshly ground black pepper, and two tablespoons of fresh lemon juice. The lemon juice adds a nice zing. Taste it and adjust the seasoning as needed. Serve the soup hot, garnished with fresh parsley for a hint of color and flavor. For a full recipe, please see the [Full Recipe]. Enjoy your warm and nourishing vegan lentil soup! To boost the taste of your vegan lentil soup, consider these tips: - Add spices: Try bay leaf for depth or chili flakes for heat. - Sauté longer: Cook your vegetables a bit more. This gives a richer, deeper flavor. This soup shines when paired with the right sides. Here are my favorite ways: - Bread: Serve it with homemade bread for a warm, cozy meal. - Garnishes: Top it with nutritional yeast for a cheesy flavor or creamy avocado for richness. Lentils are packed with nutrients. Here’s why they are great: - Nutritional benefits: They provide protein, fiber, and iron, making them a healthy choice. - Leafy greens: Adding kale boosts vitamins and minerals. It also adds color and texture. For the full experience, check out the Full Recipe. These tips will help you create a dish that's not just tasty but also nourishing! {{image_4}} You can switch lentils for other beans or pulses. Black beans or chickpeas work well. Each bean adds a unique taste and texture to the soup. You can also use seasonal vegetables. Try zucchini in summer or butternut squash in fall. These swaps keep your soup fresh and exciting. To make your soup creamier, add coconut milk. It gives a rich texture and a hint of sweetness. You can also use fresh herbs like basil or cilantro. They add bright flavors and an herbal kick. A sprinkle of fresh herbs before serving makes a big difference. If you want a faster option, try an Instant Pot. Cook the soup on high pressure for about 15 minutes. You can also use a slow cooker. Simply set it on low for 6-8 hours. For a creamy version, use a blender. Blend half the soup and mix it back in. This makes the soup thick and smooth. Explore the [Full Recipe] for more ideas on making this soup your own! After enjoying your vegan lentil soup, you can store leftovers easily. Let the soup cool down first. Then, transfer it to airtight containers. Glass or plastic containers work well for this. Store it in the fridge for up to five days. For longer storage, freeze the soup. Use freezer-safe containers or bags to prevent freezer burn. The soup can last up to three months in the freezer. When it’s time to enjoy the soup again, reheat it gently. You can use a pot on the stove or a microwave. If using a pot, heat it over medium-low until warm. Stir occasionally to prevent sticking. In the microwave, use a microwave-safe bowl. Heat in short bursts, stirring in between. This helps heat evenly. Avoid overcooking, as the lentils may become mushy. Preparing for future meals is smart and easy with this soup. Chop your vegetables ahead of time, like onion, garlic, and carrots. Store them in the fridge for quick use. You can also rinse your lentils in advance and keep them in a container. Making larger batches is a great idea too. This way, you always have a warm, nourishing meal ready. Just follow the full recipe and freeze extra portions for busy days. Green and brown lentils are great for soup. They hold their shape well. Green lentils have a slightly peppery taste. Brown lentils are milder and cook faster. Both work well in this vegan lentil soup. Yes, you can adapt this recipe. If you prefer meat, try adding cooked chicken or sausage. For dairy, a splash of cream or some cheese can add richness. Just remember, this makes it less vegan. To thicken your soup, you have a few options. You can mash some lentils against the pot. Adding a spoonful of tomato paste also helps. If you want a creamier feel, blend a portion of the soup. These techniques will help you achieve the perfect consistency. For more details, check the full recipe. This blog post covers the key aspects of making a hearty lentil soup. We discussed the essential ingredients, including lentils, vegetables, and spices. I shared step-by-step instructions for preparing and cooking the soup. We explored tips for enhancing flavors and serving suggestions. You can create variations with different ingredients and learn best practices for storing and reheating leftovers. Lentil soup is a healthy, versatile meal that is easy to make. Enjoy experimenting with your own flavors and keep discovering new ways to make it.](https://dishtreats.com/wp-content/uploads/2025/06/c46bc7f1-46e5-4579-b786-1848127316df-300x300.webp)


![To make Classic Chicken Marsala, you will need: - 4 boneless, skinless chicken breasts - Sea salt and freshly cracked black pepper, to taste - 1/2 cup all-purpose flour, for dredging - 4 tablespoons extra virgin olive oil - 2 tablespoons unsalted butter - 8 ounces cremini mushrooms, thinly sliced - 1 cup low-sodium chicken broth - 2 tablespoons freshly squeezed lemon juice - 1/4 cup fresh parsley, finely chopped, for garnish Using fresh ingredients makes all the difference in your dish. Fresh chicken tastes better and has better texture. Fresh mushrooms add depth and flavor. Fresh herbs, like parsley, bring vibrant notes to your plate. Fresh ingredients enhance the overall taste and make your meal more enjoyable. They can transform a simple dish into something special. If you can't find certain items, don't worry! Here are some easy swaps: - Chicken breasts: You can use chicken thighs for a richer flavor. - Cremini mushrooms: Use button mushrooms if cremini are not available. - Olive oil: Use canola or vegetable oil if you're out of olive oil. - Chicken broth: Vegetable broth works well for a lighter taste. - Lemon juice: You can use vinegar as a tangy alternative if you lack lemons. These substitutes will keep your Chicken Marsala flavorful and delicious, even with changes. 1. First, season the chicken breasts with salt and pepper. 2. Dredge each breast in flour. Shake off any extra flour. 3. Heat 2 tablespoons of olive oil in a skillet over medium heat. 4. Place the chicken in the skillet. Cook for 5-6 minutes on each side. 5. Remove the chicken from the skillet and keep it warm on a plate. 6. Add the remaining olive oil and butter to the same skillet. 7. Once the butter melts, add the sliced mushrooms. Sauté for 5 minutes. 8. Pour in the chicken broth and lemon juice. Scrape the skillet's bottom. 9. Simmer the sauce for 5 minutes until it thickens. 10. Return the chicken to the skillet. Spoon sauce over the top. 11. Simmer everything together for 2-3 minutes. 12. Finish with parsley before serving. To get the best Chicken Marsala, focus on these techniques: - Dredging: Flour helps create a crust. It locks in moisture and adds flavor. - Searing: Cooking the chicken on medium heat gives a golden crust. - Deglazing: Scraping the skillet adds depth to the sauce. - Simmering: Letting the sauce thicken enhances the flavor. Here are some tips to avoid issues while cooking: - Skipping seasoning: Always season the chicken well. It makes a big difference. - Overcrowding the skillet: Cook in batches if needed. This keeps the heat high. - Not checking doneness: Use a meat thermometer. Chicken should reach 165°F. - Rushing the sauce: Let it simmer. This builds the best flavor. For the complete cooking process, check the Full Recipe. Serve Chicken Marsala on a large plate. Spoon the rich mushroom sauce over the chicken. Pair it with creamy mashed potatoes or steamed vegetables. These sides add color and balance to the dish. I love adding a bright green salad too. It makes the meal complete and fresh. To boost flavor, season the chicken well with sea salt and pepper. Dredging it in flour gives it a nice crust. Be sure to use fresh mushrooms for the best taste. Cremini mushrooms add a deep, earthy flavor. Deglazing the skillet with chicken broth is key. It helps pick up all the tasty bits left behind. A splash of lemon juice brightens the dish. It cuts through the richness and makes every bite pop. When it comes to drinks, I suggest a dry white wine. A good Sauvignon Blanc or Chardonnay works well. These wines complement the chicken and sauce without overpowering them. If you prefer something non-alcoholic, try sparkling water with lemon. It refreshes your palate between bites. Enjoy your meal with a suitable drink for a perfect dining experience. Check out the Full Recipe for more details. {{image_4}} You can add herbs and spices to give Chicken Marsala a fun twist. Try adding fresh thyme or rosemary for a fragrant touch. Paprika can add a bit of heat and color. You can also use garlic powder or onion powder to deepen the flavor. Mix these into the flour before dredging the chicken. This small change can make a big difference in taste. If you want a vegetarian or vegan version, replace the chicken with hearty mushrooms or eggplant. Both options soak up the sauce well. Use vegetable broth instead of chicken broth for a rich flavor. You may also try tofu for a protein boost. Dredge the tofu in flour like the chicken for a satisfying crunch. You can play with the sauce to change the flavor profile. For a creamier version, add heavy cream to the broth. This will give you a rich, luscious sauce that coats the chicken well. You can also use Marsala wine for a sweeter touch. If you want a tangy flavor, use balsamic vinegar instead of lemon juice. Each of these swaps can help you create a unique dish. For the full recipe, check the [Full Recipe]. To store your Classic Chicken Marsala, let it cool first. Place the chicken and sauce in an airtight container. Make sure to separate the sauce from the chicken if you can. This helps keep the chicken moist. Place the container in the fridge. It’s best to use the leftovers within three days for the best taste. When reheating Classic Chicken Marsala, use a skillet for the best results. Warm it over medium heat. Add a splash of chicken broth or water to keep it moist. Stir gently until heated through. You can also microwave it, but be careful not to overheat. This can dry out the chicken. Classic Chicken Marsala lasts about three days in the fridge. If you want to keep it longer, freeze it. In the freezer, it will last up to three months. Just remember to store it in a freezer-safe container. To enjoy it later, thaw it in the fridge overnight before reheating. For more details on making this dish, check out the Full Recipe. Chicken Marsala is made of simple, tasty ingredients. You need chicken breasts, mushrooms, and Marsala wine. The sauce gets its flavor from chicken broth and lemon juice. You also use flour to coat the chicken. Olive oil and butter add richness. Fresh parsley gives a nice touch at the end. Yes, you can prepare Chicken Marsala ahead of time. Cook the chicken and store it in the fridge. Keep the sauce separate to avoid sogginess. When you are ready to serve, just reheat both. This keeps the chicken juicy and the sauce fresh. The best wine for Chicken Marsala is a dry Marsala wine. This wine adds depth and sweetness to the dish. If you can't find Marsala, you can use dry sherry or white wine. These alternatives work well but may change the flavor slightly. Always choose a wine you enjoy drinking! In this article, we covered the crucial ingredients for Chicken Marsala and why freshness matters. I shared step-by-step instructions to help you cook it perfectly. We explored tips for serving and pairing drinks, as well as variations for every taste. Finally, I explained how to store leftovers safely. Cooking Chicken Marsala can be easy and fun. With the right tips and knowledge, you can enjoy a delicious meal every time.](https://dishtreats.com/wp-content/uploads/2025/06/e9aedbd7-71f4-4133-b36d-4fb1a0e8152d-768x768.webp)