Air Fryer Parmesan Zucchini Fries Crispy and Tasty
![To make these Air Fryer Parmesan Zucchini Fries, you need just a few simple items. Gather these ingredients: - 2 medium zucchinis, sliced into thin fries - 1 cup breadcrumbs (recommended: panko) - 1/2 cup grated Parmesan cheese - 1 teaspoon garlic powder - 1 teaspoon Italian seasoning - 1/2 teaspoon salt - 1/4 teaspoon black pepper - 2 large eggs, beaten - Olive oil spray Each ingredient plays a key role. The zucchinis provide a fresh base. Panko breadcrumbs add great crunch. Parmesan cheese gives a rich, cheesy flavor. Garlic powder and Italian seasoning make your fries tasty. Salt and pepper enhance all the flavors. Eggs act as glue for the coating. The olive oil spray keeps everything crisp. When selecting zucchinis, choose firm ones with smooth skin. They should feel heavy for their size. This tells you they are fresh. The breadcrumbs should be light and airy, perfect for frying. If you're feeling adventurous, try different herbs or cheeses! For the full recipe, check out this [Full Recipe]. 1. Preheat your air fryer to 400°F (200°C). This step is key for a crispy finish. 2. Wash and dry the zucchinis. Clean veggies are a must for great taste. 3. Cut the zucchinis into 1/4 inch thick fries. Make sure they are even for uniform cooking. 1. In a medium bowl, combine breadcrumbs, Parmesan cheese, garlic powder, Italian seasoning, salt, and black pepper. This mix gives the fries a tasty crust. 2. In a separate bowl, beat the eggs until smooth. This egg wash will help the coating stick well. 1. Dip each zucchini fry in the beaten eggs. Let any extra egg drip back into the bowl. 2. Roll the zucchini in the breadcrumb mixture. Press gently to coat all sides evenly. This ensures every bite is full of flavor. 1. Lightly spray the air fryer basket with olive oil. This helps prevent sticking. 2. Arrange the coated zucchini fries in a single layer in the basket. Avoid crowding to keep them crispy. 3. Mist the tops of the fries with olive oil spray. This adds a lovely golden color. 4. Cook for 10-12 minutes, flipping halfway. This makes sure each side cooks evenly. Once you follow these steps, you will have crispy and tasty Air Fryer Parmesan Zucchini Fries. For the complete recipe, refer to the section above. Enjoy! To keep your zucchini fries crispy, avoid overcrowding the air fryer basket. When fries sit too close, they steam instead of crisp. It’s best to cook in batches if needed. Also, mist the tops of fries lightly with olive oil. This simple step helps them brown nicely. Want to spice things up? Consider adding cayenne pepper for heat. A little goes a long way! You can also play around with different herbs or seasonings. Try adding smoked paprika or fresh thyme for a unique twist. Each option can add depth to the flavor. Pair your zucchini fries with great dipping sauces. I love zesty marinara or creamy ranch. They add a fun taste contrast. For serving, arrange the fries in a single layer on a platter. Garnish with fresh herbs or a sprinkle of more Parmesan cheese for a lovely touch. Add a small bowl of sauce in the center for a delightful display. For the complete recipe, check out the Full Recipe section. {{image_4}} You can switch up the coating for your zucchini fries. Using gluten-free breadcrumbs works great if you need a gluten-free option. They still get nice and crispy. You can also try different cheeses like mozzarella or cheddar. Each cheese brings a unique flavor that can enhance your fries. Don't stop at zucchini! You can add other veggies like eggplant or carrots. Cut them into fries, just like the zucchini. This makes your dish colorful and fun. You might also mix in spices like paprika or cumin. These spices bring extra warmth and flavor to your fries. You can cook zucchini fries in different ways. The air fryer gives you crispy results in less time. Baking in the oven is another option. It takes longer but still tastes great. Stovetop frying is also a choice. You’ll need more oil, but the flavor is rich and satisfying. Each method has its perks, so feel free to experiment! To store Air Fryer Parmesan Zucchini Fries in the fridge, let them cool first. Place the fries in an airtight container. This keeps them fresh for up to three days. I recommend using glass containers, as they seal well and prevent moisture. If you want to save your fries for longer, freeze them. Lay the cooked fries on a baking sheet in a single layer. Freeze for about an hour. Once frozen, transfer them to a freezer bag. This method stops them from sticking together. They can last in the freezer for about two months. To reheat, place the frozen fries in the air fryer. Set it to 400°F (200°C) and cook for about 8-10 minutes. This will help keep them crispy. You can also reheat them in an oven for a similar effect. Air Fryer Parmesan Zucchini Fries stay fresh in the fridge for about 3 to 4 days. To store, place them in an airtight container. For longer storage, freeze them. They can last up to 2 months in the freezer. To freeze, lay them flat on a baking sheet first, then transfer them to a freezer bag. This helps keep them from sticking together. Yes, you can prepare these fries ahead of time. Slice the zucchinis and coat them in the breadcrumb mixture. Keep them in the fridge for up to 24 hours. When you're ready, air fry them directly from the fridge. If you freeze them, let them thaw in the fridge overnight before cooking. This helps them cook evenly and stay crispy. These zucchini fries taste great with many dishes. Serve them with a tangy marinara sauce or creamy ranch dressing for dipping. They also pair well with grilled chicken or fish. For a fun twist, try serving them alongside a fresh salad or as a side to tacos. Their crunch adds a nice texture contrast to softer dishes. Absolutely! You can use yellow squash instead of green zucchini. They have a similar taste and texture. If you have gifted zucchinis from friends or family, feel free to use those too. Just make sure they are firm and fresh for the best results. This recipe is very flexible and lets you enjoy various types of squash. In this post, I shared a simple recipe for Air Fryer Parmesan Zucchini Fries. You learned the ingredients, step-by-step instructions, and useful tips for crispiness. Experiment with flavors or make different versions to keep it fresh. Remember to store leftovers properly for later enjoyment. This dish is easy to make and pairs well with various dips. Enjoy your healthy snack, and have fun trying out new ideas!](https://dishtreats.com/wp-content/uploads/2025/06/3cf59b94-4108-4e4b-8eff-d7b1557676e8.webp)
Looking for a tasty snack that’s also healthy? Air Fryer Parmesan Zucchini Fries are the answer! This simple yet delicious recipe brings a crispy crunch to your kitchen without the guilt. With just a few ingredients, you can whip up a batch that’s perfect for movie night or a quick side. Join me as we explore easy steps and tips to make these fries your new favorite!
Ingredients
To make these Air Fryer Parmesan Zucchini Fries, you need just a few simple items. Gather these ingredients:
- 2 medium zucchinis, sliced into thin fries
- 1 cup breadcrumbs (recommended: panko)
- 1/2 cup grated Parmesan cheese
- 1 teaspoon garlic powder
- 1 teaspoon Italian seasoning
- 1/2 teaspoon salt
- 1/4 teaspoon black pepper
- 2 large eggs, beaten
- Olive oil spray
Each ingredient plays a key role. The zucchinis provide a fresh base. Panko breadcrumbs add great crunch. Parmesan cheese gives a rich, cheesy flavor. Garlic powder and Italian seasoning make your fries tasty. Salt and pepper enhance all the flavors. Eggs act as glue for the coating. The olive oil spray keeps everything crisp.
When selecting zucchinis, choose firm ones with smooth skin. They should feel heavy for their size. This tells you they are fresh. The breadcrumbs should be light and airy, perfect for frying. If you’re feeling adventurous, try different herbs or cheeses!
Step-by-Step Instructions
Preparing the Zucchini
1. Preheat your air fryer to 400°F (200°C). This step is key for a crispy finish.
2. Wash and dry the zucchinis. Clean veggies are a must for great taste.
3. Cut the zucchinis into 1/4 inch thick fries. Make sure they are even for uniform cooking.
Setting Up the Breading Station
1. In a medium bowl, combine breadcrumbs, Parmesan cheese, garlic powder, Italian seasoning, salt, and black pepper. This mix gives the fries a tasty crust.
2. In a separate bowl, beat the eggs until smooth. This egg wash will help the coating stick well.
Coating the Zucchini
1. Dip each zucchini fry in the beaten eggs. Let any extra egg drip back into the bowl.
2. Roll the zucchini in the breadcrumb mixture. Press gently to coat all sides evenly. This ensures every bite is full of flavor.
Air Frying the Fries
1. Lightly spray the air fryer basket with olive oil. This helps prevent sticking.
2. Arrange the coated zucchini fries in a single layer in the basket. Avoid crowding to keep them crispy.
3. Mist the tops of the fries with olive oil spray. This adds a lovely golden color.
4. Cook for 10-12 minutes, flipping halfway. This makes sure each side cooks evenly.
Once you follow these steps, you will have crispy and tasty Air Fryer Parmesan Zucchini Fries. For the complete recipe, refer to the section above. Enjoy!
Tips & Tricks
Ensuring Crispiness
To keep your zucchini fries crispy, avoid overcrowding the air fryer basket. When fries sit too close, they steam instead of crisp. It’s best to cook in batches if needed. Also, mist the tops of fries lightly with olive oil. This simple step helps them brown nicely.
Flavor Enhancements
Want to spice things up? Consider adding cayenne pepper for heat. A little goes a long way! You can also play around with different herbs or seasonings. Try adding smoked paprika or fresh thyme for a unique twist. Each option can add depth to the flavor.
Serving Suggestions
Pair your zucchini fries with great dipping sauces. I love zesty marinara or creamy ranch. They add a fun taste contrast. For serving, arrange the fries in a single layer on a platter. Garnish with fresh herbs or a sprinkle of more Parmesan cheese for a lovely touch. Add a small bowl of sauce in the center for a delightful display.

Variations
Alternative Coatings
You can switch up the coating for your zucchini fries. Using gluten-free breadcrumbs works great if you need a gluten-free option. They still get nice and crispy. You can also try different cheeses like mozzarella or cheddar. Each cheese brings a unique flavor that can enhance your fries.
Veggie Additions
Don’t stop at zucchini! You can add other veggies like eggplant or carrots. Cut them into fries, just like the zucchini. This makes your dish colorful and fun. You might also mix in spices like paprika or cumin. These spices bring extra warmth and flavor to your fries.
Cooking Methods
You can cook zucchini fries in different ways. The air fryer gives you crispy results in less time. Baking in the oven is another option. It takes longer but still tastes great. Stovetop frying is also a choice. You’ll need more oil, but the flavor is rich and satisfying. Each method has its perks, so feel free to experiment!
Storage Info
Short-term Storage
To store Air Fryer Parmesan Zucchini Fries in the fridge, let them cool first. Place the fries in an airtight container. This keeps them fresh for up to three days. I recommend using glass containers, as they seal well and prevent moisture.
Freezing Instructions
If you want to save your fries for longer, freeze them. Lay the cooked fries on a baking sheet in a single layer. Freeze for about an hour. Once frozen, transfer them to a freezer bag. This method stops them from sticking together. They can last in the freezer for about two months.
To reheat, place the frozen fries in the air fryer. Set it to 400°F (200°C) and cook for about 8-10 minutes. This will help keep them crispy. You can also reheat them in an oven for a similar effect.
FAQs
How long do Air Fryer Parmesan Zucchini Fries last?
Air Fryer Parmesan Zucchini Fries stay fresh in the fridge for about 3 to 4 days. To store, place them in an airtight container. For longer storage, freeze them. They can last up to 2 months in the freezer. To freeze, lay them flat on a baking sheet first, then transfer them to a freezer bag. This helps keep them from sticking together.
Can I make these zucchini fries ahead of time?
Yes, you can prepare these fries ahead of time. Slice the zucchinis and coat them in the breadcrumb mixture. Keep them in the fridge for up to 24 hours. When you’re ready, air fry them directly from the fridge. If you freeze them, let them thaw in the fridge overnight before cooking. This helps them cook evenly and stay crispy.
What can I serve with Air Fryer Zucchini Fries?
These zucchini fries taste great with many dishes. Serve them with a tangy marinara sauce or creamy ranch dressing for dipping. They also pair well with grilled chicken or fish. For a fun twist, try serving them alongside a fresh salad or as a side to tacos. Their crunch adds a nice texture contrast to softer dishes.
Can I use different types of zucchini?
Absolutely! You can use yellow squash instead of green zucchini. They have a similar taste and texture. If you have gifted zucchinis from friends or family, feel free to use those too. Just make sure they are firm and fresh for the best results. This recipe is very flexible and lets you enjoy various types of squash.
In this post, I shared a simple recipe for Air Fryer Parmesan Zucchini Fries. You learned the ingredients, step-by-step instructions, and useful tips for crispiness. Experiment with flavors or make different versions to keep it fresh. Remember to store leftovers properly for later enjoyment. This dish is easy to make and pairs well with various dips. Enjoy your healthy snack, and have fun trying out new ideas!
![To make these Air Fryer Parmesan Zucchini Fries, you need just a few simple items. Gather these ingredients: - 2 medium zucchinis, sliced into thin fries - 1 cup breadcrumbs (recommended: panko) - 1/2 cup grated Parmesan cheese - 1 teaspoon garlic powder - 1 teaspoon Italian seasoning - 1/2 teaspoon salt - 1/4 teaspoon black pepper - 2 large eggs, beaten - Olive oil spray Each ingredient plays a key role. The zucchinis provide a fresh base. Panko breadcrumbs add great crunch. Parmesan cheese gives a rich, cheesy flavor. Garlic powder and Italian seasoning make your fries tasty. Salt and pepper enhance all the flavors. Eggs act as glue for the coating. The olive oil spray keeps everything crisp. When selecting zucchinis, choose firm ones with smooth skin. They should feel heavy for their size. This tells you they are fresh. The breadcrumbs should be light and airy, perfect for frying. If you're feeling adventurous, try different herbs or cheeses! For the full recipe, check out this [Full Recipe]. 1. Preheat your air fryer to 400°F (200°C). This step is key for a crispy finish. 2. Wash and dry the zucchinis. Clean veggies are a must for great taste. 3. Cut the zucchinis into 1/4 inch thick fries. Make sure they are even for uniform cooking. 1. In a medium bowl, combine breadcrumbs, Parmesan cheese, garlic powder, Italian seasoning, salt, and black pepper. This mix gives the fries a tasty crust. 2. In a separate bowl, beat the eggs until smooth. This egg wash will help the coating stick well. 1. Dip each zucchini fry in the beaten eggs. Let any extra egg drip back into the bowl. 2. Roll the zucchini in the breadcrumb mixture. Press gently to coat all sides evenly. This ensures every bite is full of flavor. 1. Lightly spray the air fryer basket with olive oil. This helps prevent sticking. 2. Arrange the coated zucchini fries in a single layer in the basket. Avoid crowding to keep them crispy. 3. Mist the tops of the fries with olive oil spray. This adds a lovely golden color. 4. Cook for 10-12 minutes, flipping halfway. This makes sure each side cooks evenly. Once you follow these steps, you will have crispy and tasty Air Fryer Parmesan Zucchini Fries. For the complete recipe, refer to the section above. Enjoy! To keep your zucchini fries crispy, avoid overcrowding the air fryer basket. When fries sit too close, they steam instead of crisp. It’s best to cook in batches if needed. Also, mist the tops of fries lightly with olive oil. This simple step helps them brown nicely. Want to spice things up? Consider adding cayenne pepper for heat. A little goes a long way! You can also play around with different herbs or seasonings. Try adding smoked paprika or fresh thyme for a unique twist. Each option can add depth to the flavor. Pair your zucchini fries with great dipping sauces. I love zesty marinara or creamy ranch. They add a fun taste contrast. For serving, arrange the fries in a single layer on a platter. Garnish with fresh herbs or a sprinkle of more Parmesan cheese for a lovely touch. Add a small bowl of sauce in the center for a delightful display. For the complete recipe, check out the Full Recipe section. {{image_4}} You can switch up the coating for your zucchini fries. Using gluten-free breadcrumbs works great if you need a gluten-free option. They still get nice and crispy. You can also try different cheeses like mozzarella or cheddar. Each cheese brings a unique flavor that can enhance your fries. Don't stop at zucchini! You can add other veggies like eggplant or carrots. Cut them into fries, just like the zucchini. This makes your dish colorful and fun. You might also mix in spices like paprika or cumin. These spices bring extra warmth and flavor to your fries. You can cook zucchini fries in different ways. The air fryer gives you crispy results in less time. Baking in the oven is another option. It takes longer but still tastes great. Stovetop frying is also a choice. You’ll need more oil, but the flavor is rich and satisfying. Each method has its perks, so feel free to experiment! To store Air Fryer Parmesan Zucchini Fries in the fridge, let them cool first. Place the fries in an airtight container. This keeps them fresh for up to three days. I recommend using glass containers, as they seal well and prevent moisture. If you want to save your fries for longer, freeze them. Lay the cooked fries on a baking sheet in a single layer. Freeze for about an hour. Once frozen, transfer them to a freezer bag. This method stops them from sticking together. They can last in the freezer for about two months. To reheat, place the frozen fries in the air fryer. Set it to 400°F (200°C) and cook for about 8-10 minutes. This will help keep them crispy. You can also reheat them in an oven for a similar effect. Air Fryer Parmesan Zucchini Fries stay fresh in the fridge for about 3 to 4 days. To store, place them in an airtight container. For longer storage, freeze them. They can last up to 2 months in the freezer. To freeze, lay them flat on a baking sheet first, then transfer them to a freezer bag. This helps keep them from sticking together. Yes, you can prepare these fries ahead of time. Slice the zucchinis and coat them in the breadcrumb mixture. Keep them in the fridge for up to 24 hours. When you're ready, air fry them directly from the fridge. If you freeze them, let them thaw in the fridge overnight before cooking. This helps them cook evenly and stay crispy. These zucchini fries taste great with many dishes. Serve them with a tangy marinara sauce or creamy ranch dressing for dipping. They also pair well with grilled chicken or fish. For a fun twist, try serving them alongside a fresh salad or as a side to tacos. Their crunch adds a nice texture contrast to softer dishes. Absolutely! You can use yellow squash instead of green zucchini. They have a similar taste and texture. If you have gifted zucchinis from friends or family, feel free to use those too. Just make sure they are firm and fresh for the best results. This recipe is very flexible and lets you enjoy various types of squash. In this post, I shared a simple recipe for Air Fryer Parmesan Zucchini Fries. You learned the ingredients, step-by-step instructions, and useful tips for crispiness. Experiment with flavors or make different versions to keep it fresh. Remember to store leftovers properly for later enjoyment. This dish is easy to make and pairs well with various dips. Enjoy your healthy snack, and have fun trying out new ideas!](https://dishtreats.com/wp-content/uploads/2025/06/3cf59b94-4108-4e4b-8eff-d7b1557676e8-300x300.webp)
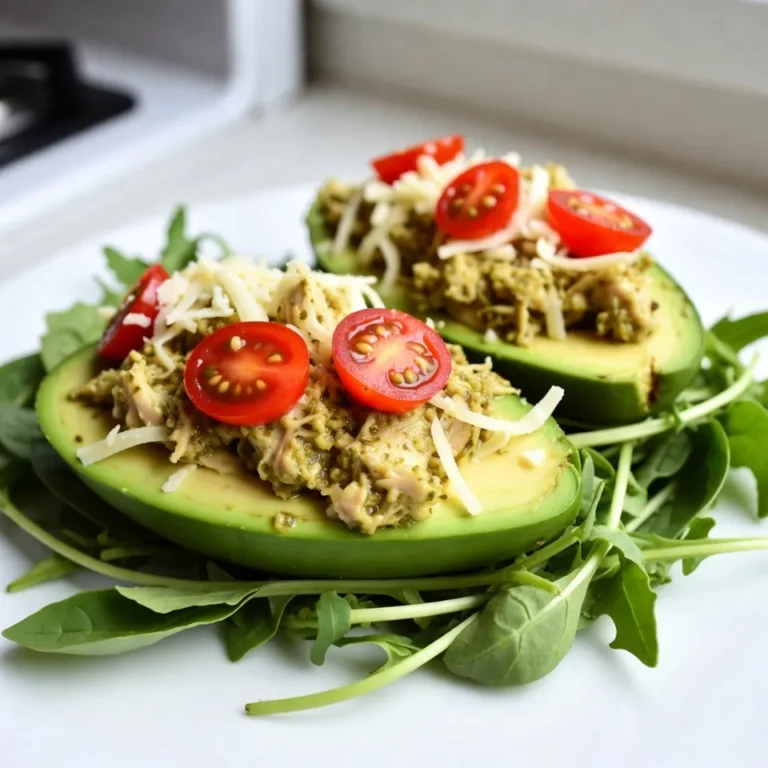
![To make creamy avocado toast, you need these fresh ingredients: - 4 ripe avocados - 8 slices of whole grain bread - 1 tablespoon fresh lemon juice - ½ teaspoon garlic powder - ½ teaspoon smoked paprika - Salt and black pepper, to taste - 1 cup cherry tomatoes, halved - Fresh basil leaves for garnish These ingredients come together to create a bright and tasty dish. The avocados provide creaminess, while the lemon juice adds a zing. Garlic powder and smoked paprika give the avocado spread a delicious depth. You can customize your toast with these optional toppings: - Crumbled feta cheese - Red chili flakes - A drizzle of balsamic glaze These extras let you explore different flavors. Feta adds a salty kick, while red chili flakes bring heat. Balsamic glaze offers a sweet contrast. Feel free to mix and match to suit your taste! Avocados are not just tasty; they also pack a punch in nutrition. They are rich in healthy fats, which can help lower bad cholesterol. They also contain fiber, which aids digestion. Plus, avocados are high in vitamins C, E, and K, supporting your immune system and skin health. Eating avocados promotes heart health and keeps you feeling full longer. This creamy avocado toast is not only a simple delight but a smart choice for your meals. For the full recipe, check out the detailed instructions! To make creamy avocado toast, start by toasting your bread. Use a toaster or a skillet. Aim for a golden brown color. This creates a firm base for your toppings. While the bread toasts, cut the ripe avocados in half. Remove the pits carefully. Use a spoon to scoop the soft flesh into a bowl. Next, add fresh lemon juice, garlic powder, smoked paprika, salt, and black pepper. Mix these into the avocado. Use a fork to mash it until creamy. It should still have some small chunks for texture. Taste it and adjust the seasoning if needed. Once the bread is ready, spread the avocado mix generously over each slice. Make sure to cover the bread completely. For the best toast, choose whole grain bread. It adds flavor and nutrition. Toasting in a skillet gives a nice crispness. Preheat the skillet over medium heat. Add a bit of olive oil for extra flavor. If using a toaster, toast twice for extra crunch. Keep an eye on the bread to avoid burning. Perfect toast should be firm and golden. To achieve the best creaminess, use ripe avocados. They should yield slightly when pressed. Start mashing with a fork in a bowl. Press down firmly to break it up. Mix in your other ingredients as you mash. This helps blend the flavors well. You want a creamy texture, but some chunks are great for bite. Don’t over-mash; keep it fun and textured. For the full recipe, you can check out the [Full Recipe]. When choosing avocados, look for ones that feel slightly soft when you gently squeeze them. A ripe avocado should give a little but not feel mushy. Check the skin color too; darker skin often means it's ripe. If you find hard avocados, leave them at room temperature for a few days to ripen. You can speed this up by placing them in a paper bag with a banana. If you have leftover avocado mixture, store it in an airtight container. To keep it fresh, add a layer of plastic wrap on top, pressing it directly against the surface. This prevents air from causing browning. You can also add a little extra lemon juice for added protection. Serve your creamy avocado toast with fresh toppings for added flavor and fun. Consider adding sliced radishes for crunch, or a poached egg for protein. You can also try smoked salmon or a sprinkle of nuts for extra texture. Customize each slice to create a unique bite every time. For the full recipe, check out the detailed steps and enjoy this simple dish! {{image_4}} Let’s get creative with your creamy avocado toast! You can mix and match toppings to make each bite special. Here are some ideas: - Crumbled feta cheese: This adds a salty kick. - Red chili flakes: For a spicy touch, sprinkle these on top. - Balsamic glaze: Drizzle it for a sweet and tangy flavor. - Radish slices: These add crunch and a peppery note. - Sliced boiled eggs: They provide extra protein and creaminess. You can change the whole vibe of your toast with different flavors. Here are some tasty combos: - Spicy: Mash in jalapeños or add hot sauce for heat. - Mediterranean: Mix in olives, sun-dried tomatoes, and a bit of oregano. - Mexican: Top with black beans, corn, and a squeeze of lime. - Asian: Add sesame seeds, soy sauce, and sliced green onions. Avocado toast is great for everyone! Here are some easy swaps: - Vegan bread: Choose gluten-free bread to keep it vegan and gluten-free. - Nutritional yeast: Use this instead of cheese for a cheesy flavor. - Chickpeas: Mash these into the avocado for added protein and flavor. - Hummus: Spread a layer of hummus under the avocado for extra creaminess. Feel free to explore these variations and make this dish your own. For the full recipe, check the recipe section above. If you have leftover toast, store it in an airtight container. This keeps it from getting soggy. You can also wrap it in foil or plastic wrap. Toast is best eaten fresh, but you can enjoy it later. Just reheat it in a toaster or oven to bring back its crunch. To keep avocados fresh, sprinkle lemon juice on the cut side. The acid slows browning. Cover the avocado tightly with plastic wrap. You can also store it in an airtight container. Place the pit back in the unused half to help it stay fresh longer. If you prepare avocado toast but can't eat it right away, store it carefully. Place the toast in a container with a lid. Avoid stacking to prevent sogginess. When ready to eat, reheat it for a few minutes in an oven. This brings back the crispy texture. For the best taste, enjoy it fresh if you can. Check out the Full Recipe for more tips! To make creamy avocado toast, you need ripe avocados, whole grain bread, and a few spices. Start by toasting the slices of bread until golden brown. Next, cut the avocados in half, remove the pits, and scoop the flesh into a bowl. Add lemon juice, garlic powder, smoked paprika, salt, and pepper. Mash the mixture until creamy but slightly chunky. Spread it on the toast, top with cherry tomatoes, and finish with fresh basil. For full details, check out the Full Recipe. Avocados are packed with good fats. They are rich in fiber, which helps digestion. They also contain vitamins like C, E, K, and B6. These nutrients support heart health and skin. Eating avocados can also boost your mood and give you energy. Plus, they can help lower cholesterol! You can prepare the avocado mixture ahead of time. Store it in an airtight container with lemon juice to prevent browning. However, I advise against toasting the bread too early. Toasted bread tastes best fresh and crunchy. Assemble your avocado toast right before serving for the best flavor and texture. Whole grain bread is my go-to choice. It adds a nice nutty flavor and fiber. Sourdough is also excellent for a tangy twist. Gluten-free bread works well too. Choose a bread that you enjoy, as it will make your toast even better! Creamy avocado toast is simple and delicious. You learned the key ingredients, from ripe avocados to tasty toppings. Following the steps ensures the perfect texture and creaminess. Remember to choose ripe avocados and store them right. You can explore unique flavor combos for a fun twist. This dish offers great health benefits and endless variations. Enjoy making this tasty treat!](https://dishtreats.com/wp-content/uploads/2025/06/dc41bef5-23d5-41ad-b579-59fa0f16c9c9-768x768.webp)

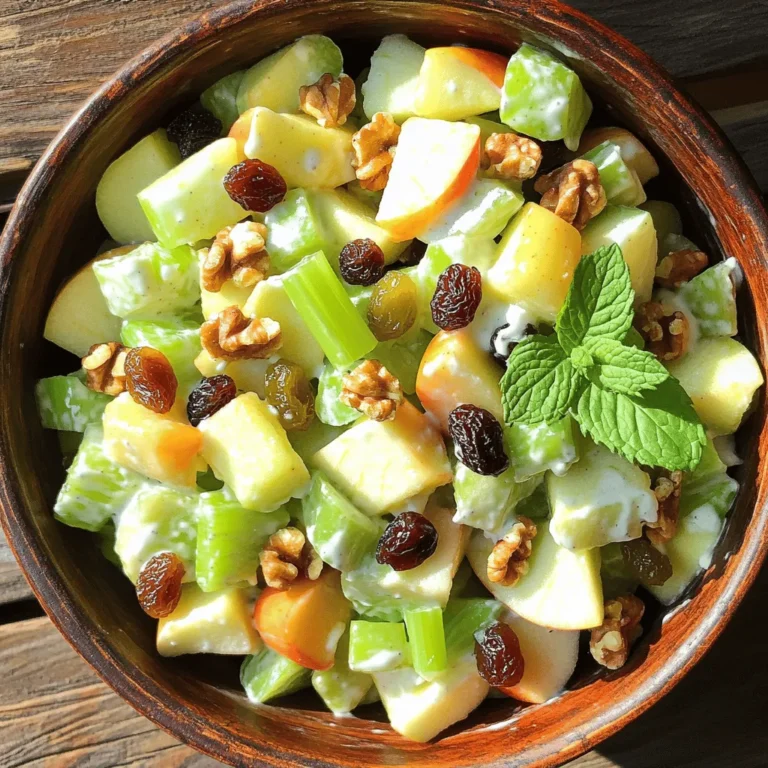
. - Preheat the oven to 425°F (220°C). - Slice the red bell peppers in half. Remove the seeds and membranes. Place them skin-side up on a lined baking sheet. - Roast the peppers for about 25 minutes until the skin is blistered. - Let the peppers cool. Once cool, peel off the skin and chop them into bite-sized pieces. - Rinse 1 cup of quinoa thoroughly under cold water. - In a saucepan, combine the rinsed quinoa with 2 cups of water. Bring it to a boil. - Reduce the heat to low, cover, and simmer for about 15 minutes until the water is absorbed. - Fluff the quinoa with a fork and let it cool. - In a large mixing bowl, combine the cooled quinoa with the roasted peppers, halved cherry tomatoes, finely diced red onion, and diced cucumber. - Mix gently to ensure even distribution of all ingredients. - In a small bowl, whisk together 3 tablespoons of olive oil, 2 tablespoons of balsamic vinegar, and 1 teaspoon of garlic powder. - Add a pinch of salt and freshly ground black pepper, to taste. - Drizzle the dressing over the salad mixture and toss gently to coat. - If you want, sprinkle 1/4 cup of crumbled feta cheese on top and mix lightly. - Finally, garnish with freshly chopped parsley for a colorful finish. For more details, refer to the Full Recipe. To get that perfect blistered skin on your red peppers, follow these steps: - Choose fresh peppers: Look for firm, shiny skin. - Cut them right: Slice each pepper in half lengthwise. This helps them roast evenly. - High heat is key: Roast at 425°F (220°C) for about 25 minutes. - Watch for bubbles: The skin should bubble and char slightly. This adds great flavor. For seasoning your peppers, try these ideas: - Simple salt and pepper: This lets the natural sweetness shine. - Add garlic powder: This gives a rich taste. - Sprinkle paprika: This adds a nice smoky flavor. To ensure your quinoa is fluffy and not mushy, use this method: - Rinse well: Rinse quinoa under cold water to remove bitterness. - Water ratio matters: Use 2 cups of water for every 1 cup of quinoa. - Don’t skip the simmer: Bring to a boil, then lower the heat and cover. Let it simmer for 15 minutes. You can also hydrate quinoa with broth instead of water. This adds extra flavor to your dish. To make your Roasted Red Pepper Quinoa Salad even tastier, consider these tips: - Add fresh herbs: Basil or cilantro can brighten the dish. - Spice it up: A pinch of red pepper flakes adds heat. - Mix textures: Add nuts for crunch or avocado for creaminess. These simple changes can elevate your salad and keep it exciting. For the full recipe, refer to the earlier section. {{image_4}} For a vegan twist, you can skip the feta cheese. Instead, use avocado or vegan cheese. These options add creaminess without dairy. You can also mix in other vegetables. Try adding spinach, roasted zucchini, or artichokes. They boost flavor and nutrition. Want to make your salad heartier? Add chickpeas or grilled chicken. Chickpeas add fiber and protein. They make the salad more filling. If you prefer meat, grilled chicken works great. You can also try other legumes like black beans or lentils. They offer different flavors and textures. You can change the salad with the seasons. In summer, use fresh corn, tomatoes, or cucumber. These veggies are sweet and crunchy. You might also swap roasted red peppers for grilled asparagus or eggplant. These changes keep the salad exciting and fresh all year. For the full recipe, check out the details above. To keep your roasted red pepper quinoa salad fresh, store it in the fridge. Use an airtight container to avoid moisture loss. Place a piece of parchment paper between the salad and the lid. This helps keep it crisp. This salad lasts about 3 to 5 days in the refrigerator. Look for signs of spoilage like an off smell or slimy texture. If the salad looks or smells bad, it’s best to toss it. You can freeze quinoa, but it's best not to freeze the whole salad. Freezing can change the texture of the veggies. To freeze quinoa, cook it and let it cool. Then, place it in a freezer-safe bag. Remove as much air as possible. This way, you can use it later for quick meals. Yes, you can make this salad ahead. Prepare it in advance for busy days. I suggest making it up to two days before serving. Store it in an airtight container in the fridge. The flavors will meld nicely. Just keep the dressing separate until you’re ready to eat. This keeps the salad fresh and crisp. If you want a change, try using brown rice, farro, or couscous. Each option gives a different taste and texture. You can even use lentils for a protein boost. Just make sure to cook them according to package directions. This keeps your salad hearty and filling. This salad has a mild flavor. The roasted peppers add sweetness, not heat. If you like spice, you can add jalapeños or red pepper flakes. For a milder taste, skip the spicy additions. You can also add more cucumber or feta to balance the heat. This salad works great as a side or main dish. Pair it with grilled chicken or fish for protein. It also complements roasted veggies or a light soup. For a vegetarian option, add chickpeas or serve with hummus. You can enjoy it as part of a larger meal or on its own. Check out the Full Recipe for more ideas! This Roasted Red Pepper Quinoa Salad is easy and tasty. We covered key ingredients, cooking steps, and helpful tips. You can customize it to fit your diet and likes. Always store leftovers properly to enjoy later. Remember, fresh flavors and textures make this salad shine. With these ideas, you can impress your friends or family at any meal. Enjoy making and sharing this healthy dish!](https://dishtreats.com/wp-content/uploads/2025/06/1f28db07-8093-4cb7-8796-796da85cb13a-768x768.webp)