Easy Chocolate Mug Cake Delight in Minutes

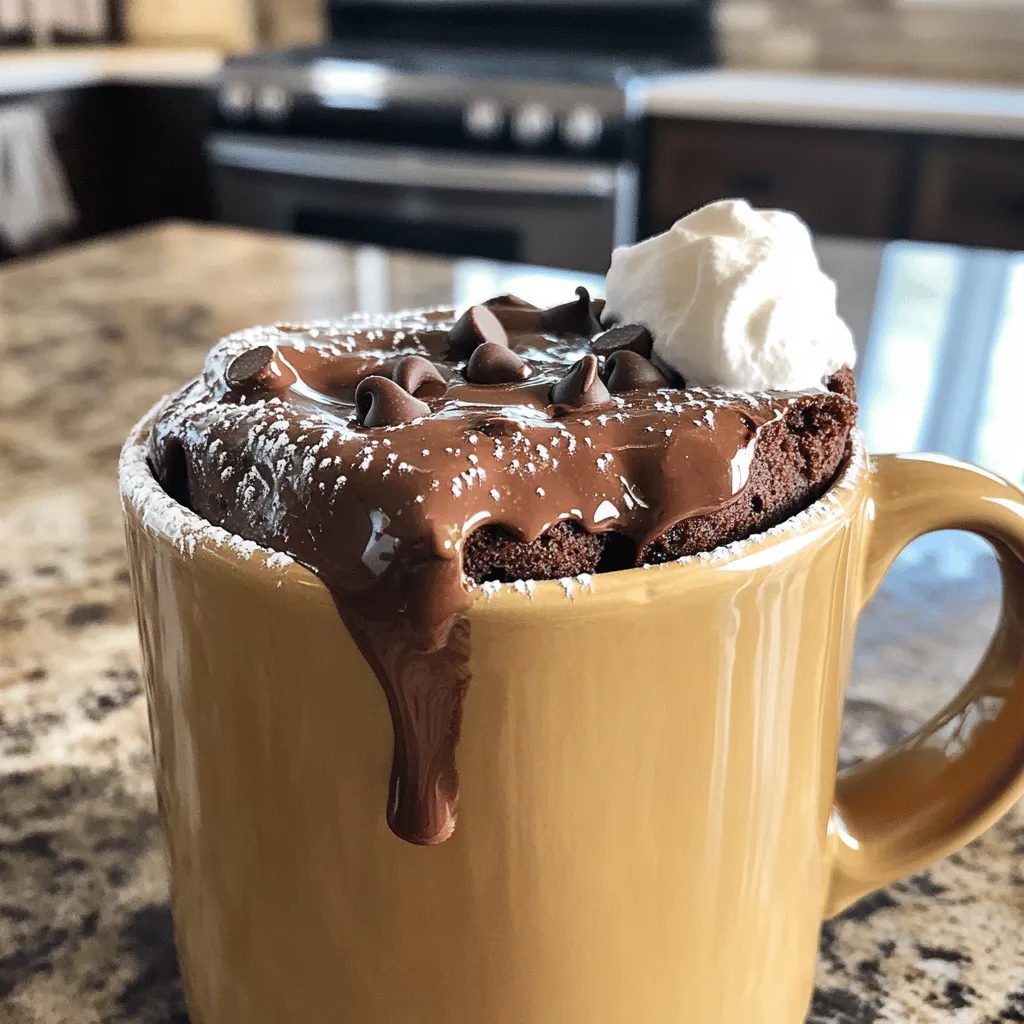
Craving something sweet and quick? You’re in the right place! My Easy Chocolate Mug Cake is the answer to your dessert dreams, ready in just minutes. With simple ingredients and easy steps, you’ll whip up a delicious treat that satisfies your chocolate cravings. Let’s dive into the magic of mug cakes, perfect for when you want a warm dessert without the fuss! Get ready to indulge!
Ingredients
To make your easy chocolate mug cake, you need a few simple items. Here’s the list:
- 4 tablespoons all-purpose flour
- 4 tablespoons granulated sugar
- 2 tablespoons unsweetened cocoa powder
- 1/8 teaspoon baking powder
- A pinch of salt
- 3 tablespoons milk
- 2 tablespoons vegetable oil
- 1/4 teaspoon vanilla extract
- 2 tablespoons chocolate chips (optional)
These ingredients come together to create a rich and tasty treat. All-purpose flour serves as the base, while sugar adds sweetness. Cocoa powder gives that deep chocolate flavor, and baking powder helps it rise. A pinch of salt brings out the flavors.
Milk and oil keep your mug cake moist. Vanilla extract adds a nice aroma. If you want more chocolate, add the optional chocolate chips. They melt and make each bite a delight!You’ll enjoy how quick and easy this dessert comes together.
Step-by-Step Instructions
Preparing the Mug and Mixing Dry Ingredients
Choose a microwave-safe mug that holds about 12 ounces. This helps prevent spills. In the mug, add the following dry ingredients:
- 4 tablespoons all-purpose flour
- 4 tablespoons granulated sugar
- 2 tablespoons unsweetened cocoa powder
- 1/8 teaspoon baking powder
- A pinch of salt
Mix these dry ingredients well with a whisk or fork. Make sure they blend evenly. This step is key for a smooth cake.
Adding Wet Ingredients to Form Batter
Now, it’s time for the wet ingredients. Add these to the dry mix in your mug:
- 3 tablespoons milk
- 2 tablespoons vegetable oil
- 1/4 teaspoon vanilla extract
Stir the mixture until you see a smooth batter. Make sure there are no lumps. If you want more chocolate, fold in 2 tablespoons of chocolate chips now. They will melt and enhance the flavor.
Cooking the Mug Cake in the Microwave
Place your filled mug in the microwave. Cook on high for 1 minute and 30 seconds. After that time, check the cake. Gently press the center. If it feels wet, cook it in 10-second bursts until it is done. Be careful not to overcook. This can make your cake rubbery.
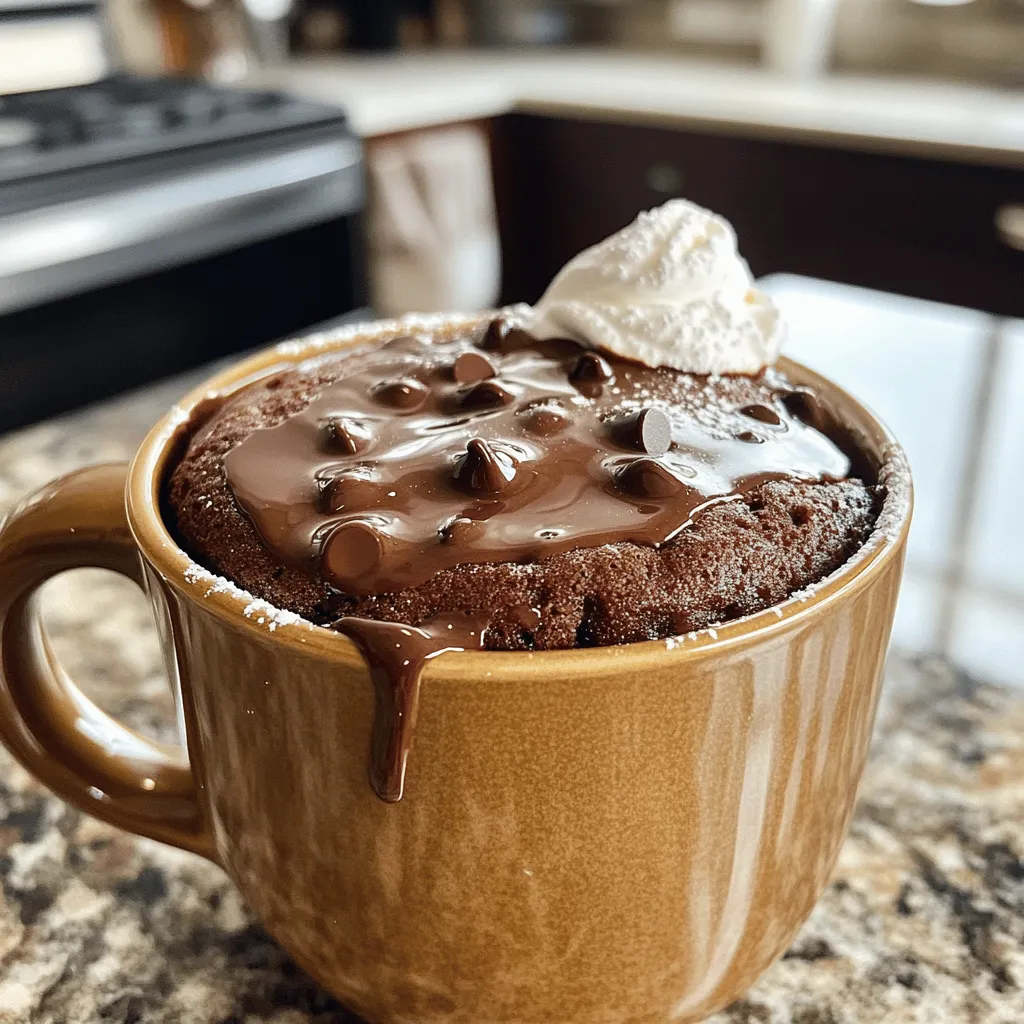
Let the mug cake cool for about 1 minute. This avoids burning your tongue. For a fun treat, top it with whipped cream, ice cream, or powdered sugar. Enjoy your Easy Chocolate Mug Cake Delight in Minutes!
Tips & Tricks
Best Practices for Perfecting Your Mug Cake
To make the best mug cake, use a large mug. A 12-ounce mug works well. This gives your cake room to rise. Mix the dry ingredients well. This helps the flavors blend. Use a whisk or fork for a smooth batter. Stir until there are no lumps. If you want more chocolate, add chocolate chips. They melt and add extra flavor.
Common Mistakes to Avoid
Don’t skip the baking powder. It helps your cake rise. If you add too much liquid, the cake will be soggy. Too little can make it dry. Always check cooking time. Microwaves vary, so start with 1 minute and 30 seconds. If it looks wet, cook for 10 more seconds. Overcooking makes it tough.
How to Ensure Even Cooking
Microwave in short bursts. This helps cook the cake evenly. Move the mug around halfway through cooking. This helps heat spread well. After cooking, let it sit. This allows the heat to distribute evenly. Enjoy your cake warm for the best taste.

Variations
Different Flavor Combinations
You can easily change the flavor of your mug cake. Try using different types of cocoa powder, like dark or milk chocolate. You can also swap in some matcha powder for a green tea twist. Want a nutty flavor? Add a spoonful of almond butter or peanut butter. You can even mix in a teaspoon of instant coffee for a mocha flavor. The options are endless!
Substitutions for Dietary Preferences
If you have dietary needs, you can still enjoy this mug cake. Use almond milk or oat milk instead of regular milk. For a gluten-free version, try using almond flour or a gluten-free flour blend. If you need it vegan, replace milk with a plant-based option and use a flax egg instead of regular eggs. These swaps will keep your cake tasty and enjoyable.
Toppings and Add-ins Suggestions
Toppings can make your mug cake even more special. Add whipped cream or ice cream for a rich treat. Fresh fruits like strawberries or bananas can add a nice touch. You can also sprinkle some nuts on top for crunch. Drizzle melted chocolate or caramel sauce for an extra sweet kick. Mix and match these ideas to create your perfect dessert!
Storage Info
How to Store Leftovers
To store leftovers, let the mug cake cool completely. Cover it with plastic wrap or place it in an airtight container. This keeps the cake fresh. You can store it in the fridge for up to two days. However, I recommend eating it fresh for the best taste.
Reheating Tips for Best Results
When you’re ready to enjoy your leftover mug cake, reheat it in the microwave. Place the cake in the microwave for about 10 to 15 seconds. This warms it up nicely without drying it out. Check the cake to ensure it’s heated through. If it needs more time, add a few more seconds.
Can You Freeze a Mug Cake?
Yes, you can freeze a mug cake! After it cools, wrap the mug cake tightly in plastic wrap. Place it in a freezer-safe bag or container. It can last for up to a month. To enjoy it later, thaw it in the fridge overnight. Then, reheat it as described above.
FAQs
How long does it take to cook a chocolate mug cake in the microwave?
You can cook a chocolate mug cake in just 1 minute and 30 seconds. After this time, check if it’s done by gently pressing the center. If it feels wet, microwave it in 10-second bursts until it is fully cooked. Be careful not to overcook, as this can make your cake rubbery.
Can I use gluten-free flour for this recipe?
Yes, you can use gluten-free flour in this recipe. Many types work well, such as almond flour or a gluten-free all-purpose blend. Just keep in mind that the texture may change a bit. You might need to adjust the liquid if using a different flour type.
Is it safe to eat a mug cake made in the microwave?
Yes, it is safe to eat a mug cake cooked in the microwave. The microwave cooks the cake quickly and evenly. Just ensure you follow the recipe closely to avoid undercooking. Always let it cool for a minute before eating to prevent burns. Enjoy your delicious treat!
In this post, we explored how to make a delicious mug cake. We covered essential ingredients and provided step-by-step instructions. You learned tips for the perfect bake and how to avoid common mistakes. We even discussed tasty variations and storage methods.
Now, you can enjoy this easy dessert at home. Remember, creativity is key. Mix flavors, try toppings, and make it your own. Enjoy your mug cake journey!


![To make your chocolate chip banana bread, you need these key ingredients: - 2 ripe bananas, thoroughly mashed - 1/3 cup coconut oil, melted - 1 teaspoon pure vanilla extract - 1/2 cup packed brown sugar - 1/4 cup granulated sugar - 2 large eggs at room temperature - 1 teaspoon baking soda - 1/4 teaspoon fine salt - 1 1/2 cups all-purpose flour - 1/2 cup semi-sweet or dark chocolate chips - 1/4 cup walnuts or pecans, chopped (optional) Each ingredient plays a vital role in crafting a moist and tasty loaf. Ripe bananas add sweetness and moisture. Coconut oil gives a rich flavor and a soft texture. The sugars create that perfect crust while the eggs help bind everything together. You can personalize your chocolate chip banana bread with fun add-ins. Here are some ideas: - Chopped nuts for crunch - Dried fruits like cranberries or raisins - A sprinkle of cinnamon for warmth - Peanut butter or nutella swirls for extra richness Feel free to mix and match! These add-ins can bring new flavors and textures to your bread. Using high-quality ingredients makes a big difference. Choose ripe bananas; they should be spotty and soft. Fresh eggs bring richness and flavor. Use pure vanilla extract for the best taste. For the oils, opt for organic coconut oil if possible. Quality flour helps create the right texture. Remember, great ingredients lead to great results! For the full recipe, check out the [Full Recipe]. Start by preheating your oven to 350°F (175°C). This step is crucial for even baking. Next, grab a 9x5 inch loaf pan. Lightly grease it with cooking spray or butter. You can also use parchment paper to line the pan. This makes removing the banana bread easier. In a large mixing bowl, take 2 ripe bananas and mash them well. You want them smooth with no lumps. Then, add 1/3 cup of melted coconut oil. Mix them together until they blend into a creamy base. This combination gives your bread moisture and flavor. Add 1 teaspoon of pure vanilla extract, 1/2 cup of packed brown sugar, and 1/4 cup of granulated sugar to the banana mix. Stir until it’s smooth. Now, crack in 2 large eggs. Mix well after each egg. Then, sprinkle 1 teaspoon of baking soda and 1/4 teaspoon of fine salt over the mix. Stir gently. Next, sift in 1 1/2 cups of all-purpose flour. Fold it in carefully. Don’t overmix; this keeps your loaf tender. Finally, gently fold in 1/2 cup of semi-sweet or dark chocolate chips. If you like, add 1/4 cup of chopped nuts too. Pour the batter into your prepared loaf pan. Smooth the top with a spatula. Place it in the oven and bake for 55-65 minutes. It’s done when a toothpick comes out clean or with a few crumbs. Let the bread cool in the pan for 10 minutes. Then, carefully move it to a wire rack to cool completely. This cooling step helps set the flavors. For the full recipe, refer to the section above. To get the best texture, use ripe bananas. The riper, the better! They must be soft and spotty. This way, you get a sweet and moist bread. Mash them well to avoid lumps. Mix ingredients gently after adding the flour. Over-mixing can make your bread tough. Aim for a light, fluffy loaf. Keep your banana bread fresh by wrapping it tightly. You can use plastic wrap or foil. Store it at room temperature for up to four days. If you want it to last longer, place it in the fridge for about a week. To keep it even longer, freeze it. Slice it before freezing for easy serving. Just make sure to wrap each slice well. Serve your chocolate chip banana bread warm. It tastes best right out of the oven! Add some butter on top for richness. You can also sprinkle powdered sugar for a sweet touch. For extra fun, top with fresh banana slices or more chocolate chips. This makes it look pretty and taste even better! For the complete recipe, check out the Full Recipe section in this article. {{image_4}} You can enjoy chocolate chip banana bread without gluten. Use a gluten-free flour blend. This blend works well as a one-to-one substitute. Make sure it has xanthan gum. This helps bind the ingredients. The flavor stays rich and delicious. Just follow the same steps as in the Full Recipe. You will love the texture and taste. For a vegan version, swap eggs for flax eggs. To make a flax egg, mix one tablespoon of flaxseed meal with three tablespoons of water. Let it sit for a few minutes to thicken. Use non-dairy milk and coconut oil as well. This keeps the bread moist and soft. You can still add chocolate chips, just choose dairy-free ones. You can add your favorite spices for extra flavor. Cinnamon and nutmeg pair well with bananas. A pinch of each can make a big difference. You can also try almond or coconut extract. These extracts add depth. Experiment to find your favorite combo. Each twist makes the bread unique and fun. To keep your chocolate chip banana bread fresh, store it at room temperature. Wrap it tightly in plastic wrap or foil. This helps keep moisture in. Place it in a cool, dry spot, away from direct sunlight. If you prefer, you can also use an airtight container. This will help maintain its soft texture and rich flavor. Freezing is a great option if you want to save some for later. First, let the banana bread cool completely. Then, wrap it tightly in plastic wrap, followed by aluminum foil. This extra layer prevents freezer burn. You can freeze it for up to three months. When you're ready to enjoy it, simply thaw it in the fridge overnight. Reheating banana bread can bring back its lovely warmth. You can use a toaster oven or a conventional oven. Preheat your oven to 350°F (175°C). Slice the bread and place it on a baking sheet. Heat for about 5-10 minutes. If you want a softer texture, cover it with foil. You can also pop a slice in the microwave for about 10-15 seconds. Enjoy it warm for a cozy treat! Your chocolate chip banana bread is done when a toothpick comes out clean. Insert it in the center. If it has a few crumbs, that is fine too. The bread usually bakes for 55-65 minutes. The top should look golden brown. Yes, you can substitute some ingredients. For example, use olive oil instead of coconut oil. You can also swap brown sugar for maple syrup. Make sure to adjust the amounts as needed for the best results. Chocolate chip banana bread lasts about 3-4 days at room temperature. Store it in an airtight container. For longer storage, keep it in the fridge for a week. You can also freeze it for up to 3 months. You can use applesauce or mashed bananas as egg substitutes. Use 1/4 cup of applesauce or 1/2 banana for each egg. Both options keep the bread moist and flavorful. This chocolate chip banana bread stands out because of its rich flavors. The combination of ripe bananas and chocolate chips creates a sweet treat. Using coconut oil adds a subtle depth to the taste. The option to add nuts gives extra texture. You can find the complete recipe in the Full Recipe section. This blog post covered how to make delicious chocolate chip banana bread. We discussed key ingredients, optional add-ins, and the importance of ingredient quality. I shared step-by-step instructions to guide you through the baking process. We explored tips for the perfect texture, storage methods, and fun variations like gluten-free and vegan options. With these insights, you can easily bake this treat and impress everyone. Enjoy your baking journey!](https://dishtreats.com/wp-content/uploads/2025/06/ff2d306f-7b8f-4bb2-a8a5-5e2882fba681-768x768.webp)


