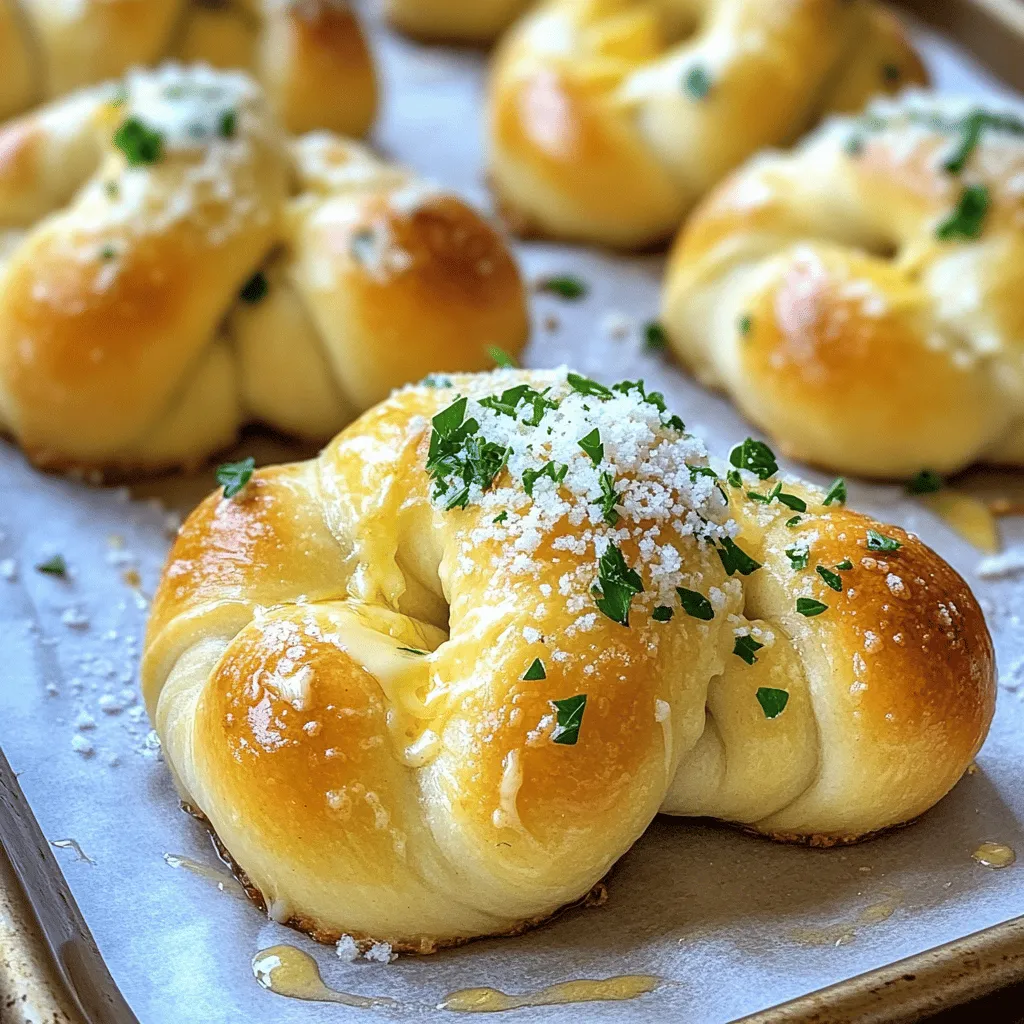
Easy Garlic Parmesan Knots Flavorful and Simple Recipe

Craving a delicious snack that’s quick and easy? You’re in the right spot! These Easy Garlic Parmesan Knots are bursting with flavor and perfect for any occasion. With just a few simple ingredients and steps, you’ll have golden, cheesy knots that everyone will love. Let’s dive into this simple recipe and transform your snack game. You won’t believe how easy it is!
Ingredients
List of Ingredients
- 1 package (16 oz) refrigerated pizza dough
- 4 tablespoons unsalted butter, melted
- 4 cloves garlic, minced
- ½ cup grated Parmesan cheese
- 2 tablespoons fresh parsley, finely chopped
- 1 teaspoon garlic powder
- ½ teaspoon salt
- ¼ teaspoon black pepper
When it comes to making Garlic Parmesan Knots, the ingredients are key. Each one plays a part in creating that delicious flavor.
Pizza dough is the base. Choose a good quality, refrigerated pizza dough. It saves time and makes the process easier.
Unsalted butter adds richness. You will melt this butter to mix with the garlic. It gives the knots a tasty coating.
Next is garlic. I use fresh garlic for its strong flavor. Mincing it helps release its oils, packing a punch.
Parmesan cheese brings a salty, nutty taste. Grate it finely so it melts well on the knots.
Fresh parsley adds color and a light taste. It brightens the dish and makes it look nice.
Garlic powder boosts the garlic flavor. It blends well with the melted butter.
Salt and black pepper round out the flavors. They ensure each bite is savory.
Tools Needed
- Baking sheet
- Parchment paper
- Mixing bowl
- Pastry brush
- Knife or pizza cutter
Having the right tools makes cooking easier. A baking sheet is essential for holding your knots. Parchment paper prevents sticking and makes cleanup simple.
A mixing bowl is needed for your garlic butter. Use a pastry brush to spread the butter on the knots.
Finally, a knife or pizza cutter helps you cut the dough into strips. These tools will help you create perfect knots every time.
Step-by-Step Instructions
Prepping the Oven and Dough
- Preheat the oven to 400°F (200°C).
- Prepare the baking sheet with parchment paper.
Before you start, get the oven hot. This step helps the knots bake evenly. Lining the baking sheet with parchment paper keeps the knots from sticking. It also makes cleaning easier.
Shaping the Knots
- Roll out the pizza dough and cut into strips.
- Tie each strip into a knot and place on the baking sheet.
Take your refrigerated pizza dough and roll it out on a floured surface. Aim for about ¼ inch thick. Then use a knife or pizza cutter to slice the dough into 1-inch wide strips. Each strip should be about 6 inches long. Now, tie each strip into a simple knot. Tuck the ends underneath to make them look neat. Place the knots on your baking sheet with some space between them. This allows them to rise while baking.
Making the Garlic Butter Mixture
- Combine melted butter, garlic, garlic powder, salt, and black pepper.
In a mixing bowl, mix together melted butter, minced garlic, garlic powder, salt, and black pepper. Stir well until all ingredients combine. This garlic butter will give your knots a rich flavor.
Baking the Knots
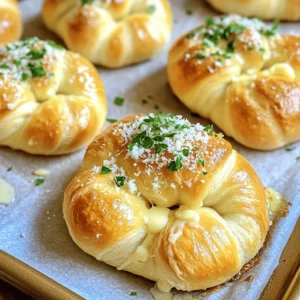
- Coat knots with garlic butter and sprinkle cheese and parsley.
- Bake for 12-15 minutes until golden brown.
Use a pastry brush or spoon to coat each knot with the garlic butter mixture. Be generous! After that, sprinkle grated Parmesan cheese and chopped parsley over the top. Then, place the baking sheet in the oven. Bake for 12 to 15 minutes. Keep an eye on them as they bake. Look for a golden brown color, which means they are ready.
Tips & Tricks
Perfecting the Garlic Flavor
To get the best garlic taste, use fresh garlic. Fresh garlic has a bright and strong flavor. You can also mix in garlic powder for an extra kick. Try adding a pinch of red pepper flakes for heat. It gives a nice twist to the flavor.
Ensuring the Right Texture
For soft yet chewy knots, don’t roll the dough too thin. Aim for about ¼ inch thick. This helps keep them fluffy. Watch the time closely while baking. If you overbake, they will turn hard. Bake until they are golden brown, then remove them right away.
Making Ahead
You can prepare these knots in advance. Shape them and place them on the baking sheet. Cover them and chill in the fridge for up to 24 hours. For longer storage, freeze the unbaked knots. When ready to bake, just pop them in the oven straight from the freezer. They take a little longer to cook, so add a few extra minutes.
Variations
Cheese Variations
You can switch up the cheese in your knots. Try using mozzarella or cheddar instead of Parmesan. Both will melt wonderfully and add a rich taste. For an even cheesier bite, place some cheese inside the knots before you tie them. This will give you a gooey, cheesy surprise with each bite.
Herb Infusions
Herbs can add a new dimension to your knots. Fresh rosemary or oregano gives a bright flavor. You can also create a garlic herb butter. Just mix your melted butter with chopped herbs. This will coat the knots in a fragrant layer of flavor.
Spicy Additions
If you love heat, add red pepper flakes to your garlic butter. This gives the knots a warm kick. For a fun twist, make taco-inspired garlic knots. Mix in taco seasoning and top with shredded cheese. These will be a hit at any gathering.
Storage Info
Proper Storage Techniques
To keep leftover Garlic Parmesan Knots fresh, store them in an airtight container. This keeps them soft and tasty. If you do not have a container, wrap them tightly in plastic wrap or foil. You can store them at room temperature for up to two days. For longer storage, place them in the fridge for up to a week.
Reheating Instructions
When you want to enjoy your Garlic Parmesan Knots again, you can reheat them quickly. Use the oven for best results. Preheat it to 350°F (175°C). Place the knots on a baking sheet and warm them for about 5 to 8 minutes. This will help keep them soft and crisp.
If you are short on time, you can use the microwave. Place the knots on a microwave-safe plate. Heat them in short bursts, about 10 to 15 seconds. Check after each burst to avoid sogginess. Enjoy them warm!
FAQs
Can I use homemade pizza dough instead?
Yes, you can use homemade pizza dough. Make sure it is soft and easy to handle. Roll it out to about ¼ inch thick. Cut it into 1-inch wide strips, then tie them into knots. Follow the same steps for coating with garlic butter and baking.
What can I serve with Garlic Parmesan Knots?
You can serve these knots with many tasty sides. Try marinara sauce for dipping. It adds a nice tomato flavor. You can also serve them with garlic aioli or ranch dressing. A side salad or soup pairs well too, enhancing your meal.
How do I know when the knots are done baking?
Your knots are done when they turn a golden brown. They should feel firm to the touch but still soft inside. Check the bottom; it should be lightly browned. If they look too dark, take them out right away to avoid burning.
In this post, we covered how to make Garlic Parmesan Knots. We started with the ingredients and tools needed, then I outlined each step—from prepping the oven to baking. I shared tips for great flavor, texture, and variations you can try.
These knots are simple to make and perfect for any meal. Enjoy them fresh or reheat leftovers easily. Dive into your kitchen and create these tasty treats today!

![- Medium head of cauliflower - Garlic cloves - Grated Parmesan cheese - Extra virgin olive oil - Garlic powder - Smoked paprika - Salt and pepper - Fresh parsley To convert cups to grams, remember that 1 cup of cauliflower is about 100 grams. For cheese, 1 cup of grated Parmesan is around 100 grams too. If you want more garlic flavor, you can add extra garlic cloves. Adjust the garlic powder to your taste. Using fresh ingredients makes a big difference. Fresh cauliflower offers better taste and texture. Fresh garlic gives a stronger flavor. For those with dietary needs, you can swap Parmesan cheese with a vegan version made from nuts or nutritional yeast. Always choose high-quality olive oil for a rich flavor. Quality ingredients lead to a better dish! First, break down the cauliflower. Remove the leaves and stem. Cut the head into bite-sized florets. Make sure they are all similar in size. This step helps them cook evenly. Next, take six cloves of garlic and finely mince them. You want the garlic to blend well with the cauliflower. Gather the other ingredients: olive oil, garlic powder, smoked paprika, salt, and pepper. Now, preheat your oven to 425°F (220°C). This temperature is perfect for roasting. While the oven heats, grab a large bowl. Add the cauliflower florets, minced garlic, olive oil, garlic powder, smoked paprika, salt, and pepper. Toss everything together with your hands or a spoon. Ensure each floret is well-coated. Line a large baking sheet with parchment paper for easy cleanup. Spread the cauliflower in a single layer on the sheet. Place the baking sheet in the preheated oven. Roast the cauliflower for about 20 to 25 minutes. Stir halfway through to achieve a nice golden brown. After roasting, take the baking sheet out of the oven. Sprinkle the grated Parmesan cheese over the hot cauliflower. The heat will melt the cheese beautifully. Return it to the oven for another five minutes. Wait until the cheese is bubbly and delicious. When it's done, let it cool for a few minutes. For a fresh touch, garnish with finely chopped parsley before serving. If you want to explore the full recipe, check it out here: [Full Recipe]. To ensure even roasting, spread the cauliflower in a single layer. This allows the hot air to circulate around each floret. Use a large baking sheet lined with parchment paper for easy cleanup. Keep an eye on your cauliflower as it roasts. Aim for a golden color and tender texture. Stir the florets halfway through the cooking time to promote uniform browning. You can boost the flavor with extra spices and herbs. Consider adding a pinch of cayenne for heat or thyme for an earthy touch. If you want deeper flavor, try marinating the cauliflower in olive oil and spices before roasting. This helps the flavors soak in, making each bite delicious. This roasted garlic Parmesan cauliflower pairs great with many main dishes. I love it with grilled chicken or fish. For best practices in garnishing, sprinkle fresh parsley on top before serving. This adds color and freshness to your dish. Serve it in a rustic bowl or a beautiful platter. A drizzle of olive oil enhances its appeal. Enjoy your flavorful roasted garlic Parmesan cauliflower as a delightful side dish! For the full recipe, check out the details. {{image_4}} You can easily change a few ingredients in this dish. If you're looking for a vegan option, use nutritional yeast instead of Parmesan. This swap gives you a cheesy flavor without dairy. For other veggies, try broccoli or Brussels sprouts. Both will roast nicely and absorb the garlic flavor. If you want a different taste, you can grill the cauliflower. Grilling brings a smoky flavor that pairs well with garlic. Another option is using an air fryer. It cooks faster and makes the cauliflower crispy. Both methods keep the dish delicious. You can adjust ingredients based on the season. In fall, add some pumpkin spice for warmth. In spring, include fresh herbs like dill or tarragon. For holiday meals, mix in some cranberries or nuts for a festive twist. These changes keep the recipe fresh and exciting. To store leftovers, place the cauliflower in an airtight container. This keeps it fresh and tasty. Use it within three days for the best flavor. Glass or BPA-free plastic containers work well for storage. They seal tightly and prevent moisture loss. For reheating, the oven is your best friend. Preheat it to 350°F (175°C). Spread the cauliflower on a baking sheet and bake for about 10 minutes. This method keeps it crispy. Microwaving works too, but it can make the cauliflower soggy. To avoid this, place a paper towel over the dish to absorb excess moisture. You can freeze the cauliflower before cooking. Just toss it with the oil and seasonings, then spread it in a single layer on a baking sheet. Freeze until solid, then transfer to a freezer bag. To cook from frozen, no need to thaw. Just roast it at 425°F (220°C) for 30-35 minutes, adding the cheese in the last five minutes. This method keeps the flavors locked in. How can I make this dish ahead of time? You can prepare the cauliflower ahead. Simply season it and spread it on a baking sheet. Cover the sheet tightly with plastic wrap. Store it in the fridge for up to a day. When ready, roast it as per the recipe. This saves time and keeps flavors fresh. What can I serve with roasted garlic Parmesan cauliflower? This dish pairs well with many meals. It complements grilled chicken or fish nicely. You can also serve it with a hearty salad. For a vegetarian option, try it with quinoa or rice. The flavors enhance any meal you create. Is this recipe gluten-free? Yes, this recipe is gluten-free. All the ingredients are safe for those on a gluten-free diet. Just ensure that the Parmesan cheese is labeled gluten-free. This makes it easy for everyone to enjoy. Can I make this dish low-carb? Absolutely! Cauliflower is a great low-carb choice. It’s naturally low in carbs and high in fiber. You can enjoy this dish without worry. It fits perfectly into a low-carb meal plan. What to do if it's too soggy? If your cauliflower is too soggy, it may need more roasting time. Make sure to spread the florets out on the baking sheet. This helps them roast evenly and stay crisp. You can also reduce the olive oil slightly for less moisture. Why isn’t the cheese melting properly? If the cheese isn’t melting, check the oven temperature. It should be hot enough at 425°F (220°C). Make sure to add the cheese right after roasting. This lets it melt smoothly over the hot cauliflower. If needed, give it a few extra minutes in the oven. This dish combines fresh ingredients and simple steps. You learned how to prepare, roast, and serve roasted garlic Parmesan cauliflower. I shared tips for enhancing flavor and ideas for swapping ingredients. Remember to store leftovers correctly to keep them fresh. Whether you want a quick snack or a tasty side, this recipe works well. You can easily adjust it to suit your tastes. Enjoy cooking and making this dish your own!](https://dishtreats.com/wp-content/uploads/2025/06/e2797ad0-ebfe-4fec-85bd-8200cd052b8d-768x768.webp)