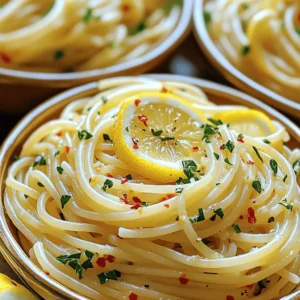
27. Spaghetti Aglio e Olio Simple and Satisfying Dish

If you’re craving a simple and satisfying meal, Spaghetti Aglio e Olio is the answer. This classic Italian dish stars just a handful of ingredients, making it quick and easy to whip up. With garlic, olive oil, and a hint of spice, it’s full of flavor. In this post, I’ll guide you through every step to make your own delicious batch. Let’s get cooking!
Ingredients
To make Spaghetti Aglio e Olio, you need simple ingredients. Each one adds unique flavor. Let’s look at what you need:
- 400g spaghetti
- 6 cloves garlic, thinly sliced
- 1/2 teaspoon red pepper flakes
- 1/2 cup extra virgin olive oil
- Zest of 1 lemon
- Juice of 1 lemon
- Salt, to taste
- Fresh parsley, finely chopped (for garnish)
- Grated Parmesan cheese, optional, for serving
These ingredients create a dish that is both simple and satisfying. Fresh garlic and olive oil give it a rich taste. The red pepper flakes add a nice kick. Lemon zest and juice brighten the flavors. Fresh parsley adds a pop of color and freshness when you serve.
When you gather these ingredients, choose high-quality items. Good olive oil makes a big difference. Fresh garlic will enhance the dish’s taste. You can find these ingredients at any grocery store.Happy cooking!
Step-by-Step Instructions
Cooking the Pasta
- Boil the Pasta: In a large pot, bring salted water to a boil. Add 400g of spaghetti. Cook it for about 9-11 minutes until it is al dente.
- Reserve Pasta Water: Before draining, save 1 cup of the pasta water. This water will help adjust the sauce later.
Preparing the Garlic Oil
- Heating the Olive Oil: While the pasta cooks, take a large skillet. Pour in 1/2 cup of extra virgin olive oil. Heat it on medium until it shimmers but does not smoke.
- Sautéing the Garlic: Add 6 cloves of thinly sliced garlic to the skillet. Stir it often for 2-3 minutes until the garlic turns golden brown. Watch closely to avoid burning.
Infusing and Combining
- Adding Red Pepper Flakes and Lemon Zest: Stir in 1/2 teaspoon of red pepper flakes and the zest of 1 lemon. Cook for another minute to let the flavors mix well.
- Tossing the Pasta with Garlic Oil: Add the drained spaghetti to the skillet. Toss it well to coat with the garlic oil. If it looks dry, add some reserved pasta water slowly until you like the sauce’s thickness.
Tips & Tricks
Perfecting Your Aglio e Olio
- Avoiding Burnt Garlic
Cooking garlic is key to this dish. Keep it on medium heat. Stir often. Look for a light golden color. If it turns dark, you must start over. Burnt garlic tastes bitter and ruins the dish.
- Adjusting Sauce Consistency
If your sauce is too dry, add reserved pasta water slowly. This adds flavor and moisture. Toss the spaghetti well after adding water. Aim for a light, silky sauce that coats each strand.
Serving Suggestions
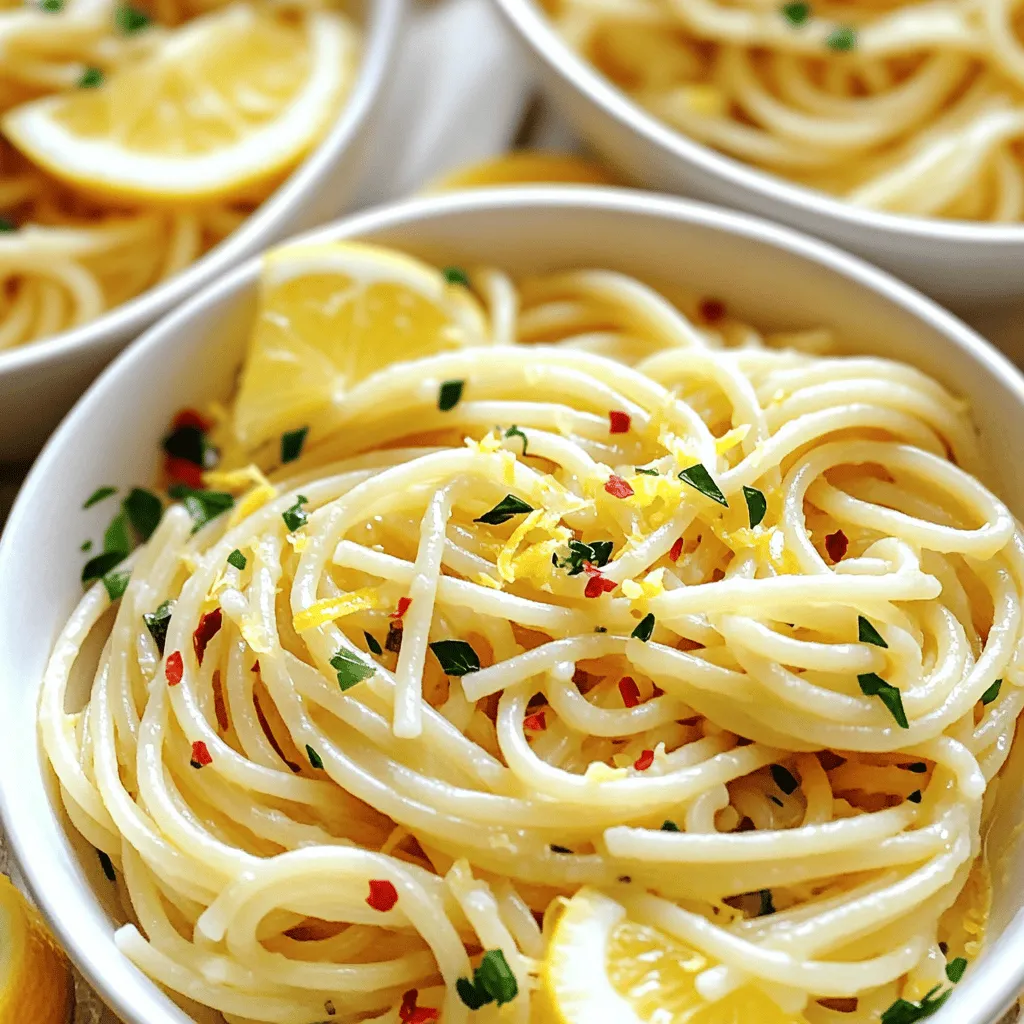
- Presentation Tips
To serve, use shallow bowls. This helps the dish look elegant. Drizzle a bit of extra olive oil on top. Garnish with lemon slices and parsley. It adds color and freshness to your plate.
- Adding Extra Flavor with Cheese
For more taste, sprinkle grated Parmesan cheese on top. The cheese melts slightly and adds richness. It pairs well with the garlic and lemon. Adjust the amount based on your taste preference.Enjoy your cooking!
Variations
Making It Spicy
You can make Spaghetti Aglio e Olio spicy by adding more red pepper flakes. Start with a pinch and taste. If you want more heat, add a bit more. You can also use fresh chili peppers. Slice them and sauté them with the garlic for a fresh kick. This adds a nice bite without being overwhelming.
Adding Protein
You can easily add protein to your spaghetti dish. Shrimp works great with garlic and lemon. Just sauté the shrimp in the garlic oil before adding the pasta. Cook them until they turn pink. You can also add cooked chicken for a heartier meal. For vegetarian options, try adding chickpeas or white beans. They give a nice texture and protein boost.
Experimenting with Herbs
Herbs can bring new flavors to Spaghetti Aglio e Olio. Fresh basil adds a sweet touch. Tear it up and mix it in before serving. Oregano also works well, giving an earthy flavor. Another idea is to add greens like spinach. Toss it in when you combine the pasta and garlic oil. The heat will wilt the spinach nicely, adding color and nutrients.
Storage Info
Refrigeration Tips
To store leftover Spaghetti Aglio e Olio, first let it cool to room temp. Then, place it in an airtight container. It will stay fresh in the fridge for about 3 days. If you want to keep it longer, consider freezing it instead. Just make sure to use a freezer-safe container.
Duration for Optimal Freshness
For the best taste, eat your leftovers within 3 days. After that, the flavors may fade. If frozen, consume within 3 months for best quality.
Reheating Guidelines
To reheat your spaghetti, use a skillet or a microwave. If using a skillet, add a splash of water or olive oil. Heat it gently over low heat. This helps keep the pasta from drying out. Stir often to ensure even heating.
Tips for Maintaining Flavor
When you reheat, taste and adjust seasoning as needed. You can also add a bit more lemon juice or fresh parsley for extra flavor. Enjoy your dish just as you did the first time!
FAQs
What is the origin of Spaghetti Aglio e Olio?
Spaghetti Aglio e Olio is a classic dish from Italy. It comes from Naples, a city known for its rich food culture. The dish dates back to the early 20th century, when it became popular among the working class. It uses simple, cheap ingredients, making it easy to prepare. Garlic, olive oil, and pasta are the main stars. This dish shows how Italian cooking values quality over quantity.
Can I make this dish gluten-free?
Yes, you can enjoy Spaghetti Aglio e Olio without gluten. Many brands offer gluten-free pasta made from rice or corn. These options cook similarly to regular pasta. Look for labels that say “gluten-free” for safety. Cook the gluten-free pasta just like you would regular spaghetti. The flavor and texture will still shine through.
How to enhance the flavor of Spaghetti Aglio e Olio?
You can try many easy tricks to boost flavor. Here are some tips:
- Add herbs: Fresh parsley or basil brings freshness.
- Use lemon: A squeeze of lemon juice brightens the dish.
- Top with cheese: Grated Parmesan adds a rich layer.
- Include veggies: Toss in spinach or cherry tomatoes for color and nutrition.
- Mix in protein: Shrimp or chicken can make it heartier.
These small changes can make your Spaghetti Aglio e Olio unique and delicious.
Spaghetti Aglio e Olio is simple yet delicious. We covered key ingredients, easy steps, and helpful tips. You can add protein or spice to suit your taste. Storing and reheating the dish properly keeps it fresh. Now you can enjoy this classic meal any time. Experiment with flavors to make it your own. Happy cooking!