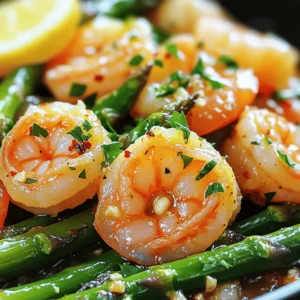
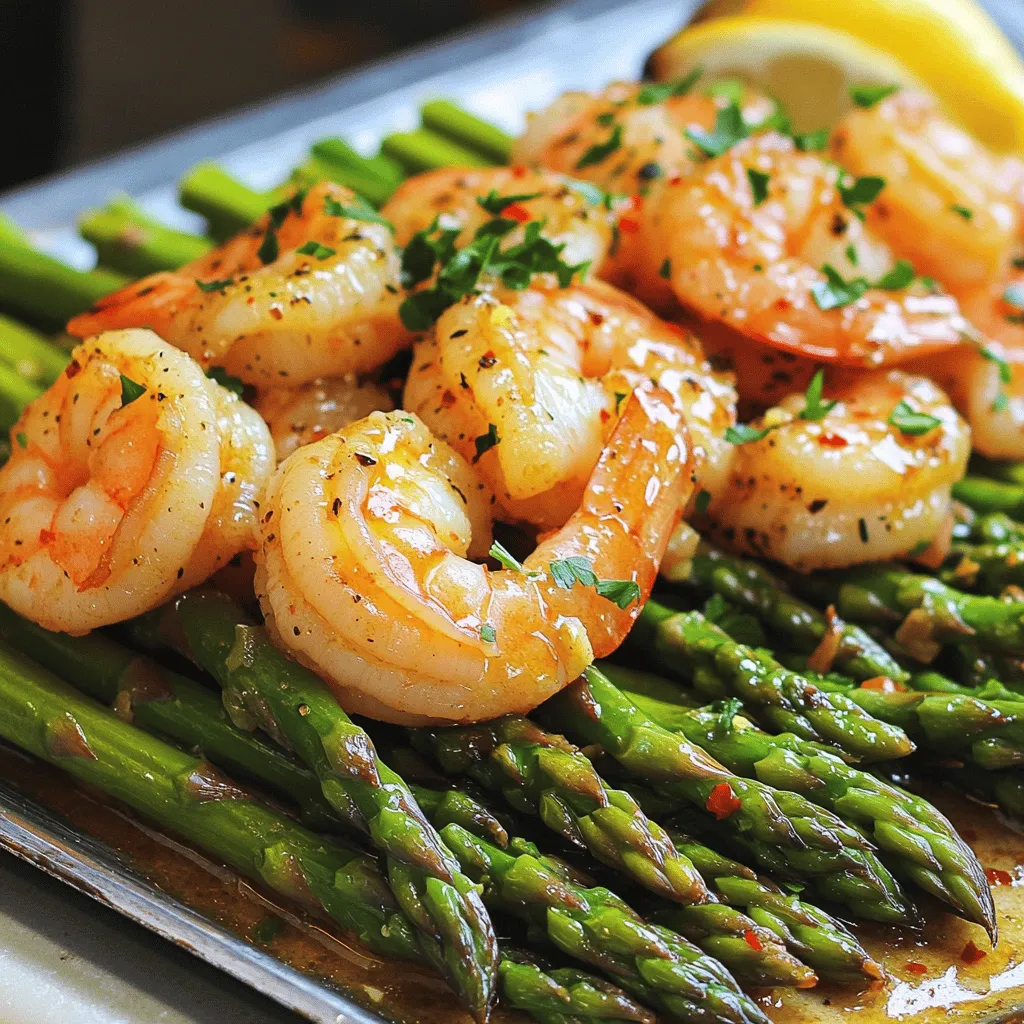
Garlic Butter Shrimp and Asparagus Tasty Dinner Dish

Are you ready to impress at dinner time? My Garlic Butter Shrimp and Asparagus recipe is a quick and tasty dish that packs flavor. With simple ingredients and easy steps, you’ll have a meal that delights your taste buds. Whether you’re cooking for family or entertaining friends, this dish is sure to please. Let’s dive in and make a delicious dinner together!
Ingredients
List of Ingredients
To make garlic butter shrimp and asparagus, you will need:
- 1 pound large shrimp, peeled and deveined
- 1 bunch asparagus, trimmed and cut into 2-inch pieces
- 4 tablespoons unsalted butter, divided
- 4 cloves garlic, minced
- 1 teaspoon lemon zest, freshly grated
- 2 tablespoons fresh lemon juice
- 1/2 teaspoon red pepper flakes (optional, for heat)
- Salt and freshly cracked black pepper, to taste
- Fresh parsley, finely chopped, for garnish
Alternate Ingredients
If you do not have shrimp, you can swap in chicken or scallops. For the asparagus, snap peas or green beans work well. Use olive oil instead of butter for a lighter dish. Fresh herbs, like cilantro or basil, can also add a nice touch.
Key Ingredient Substitutions
You can replace the unsalted butter with ghee or coconut oil. If you want a vegan option, try plant-based butter. For lemon zest, lime zest is a good alternative. Use garlic powder if you don’t have fresh garlic.
Step-by-Step Instructions
Preparation of Ingredients
To make garlic butter shrimp and asparagus, start with the shrimp.
- Pat 1 pound of large shrimp dry with a paper towel.
- Season the shrimp with salt and black pepper on both sides.
Next, prepare the asparagus.
- Trim the bunch of asparagus and cut it into 2-inch pieces.
Gather your garlic and lemon.
- Mince 4 cloves of garlic.
- Grate 1 teaspoon of lemon zest and get 2 tablespoons of lemon juice.
Cooking Process
Now, it’s time to cook.
- In a large skillet, melt 2 tablespoons of unsalted butter over medium-high heat.
- Once it bubbles, add the minced garlic and optional red pepper flakes.
- Stir for about 30 seconds until you smell the garlic. Don’t let it brown!
Next, add the shrimp.
- Place the shrimp in a single layer in the skillet.
- Cook for 2-3 minutes until they turn pink on one side.
- Flip them over and cook for another 1-2 minutes until opaque.
- Remove the shrimp and set them aside on a plate.
In the same skillet, cook the asparagus.
- Add the remaining 2 tablespoons of butter.
- Toss in the asparagus and sauté for about 4-5 minutes.
- Stir occasionally until the asparagus is tender but still bright green.
Final Steps for Serving
Now it’s time to combine everything.
- Return the shrimp to the skillet with the asparagus.
- Sprinkle in the lemon zest and pour the lemon juice over.
- Gently toss everything together to coat with the butter sauce.
- Cook for another minute to blend the flavors.
Taste the dish and adjust the seasoning if needed.
- Add more salt and pepper as you like.
Finally, serve it up!
- Transfer the shrimp and asparagus to a serving dish or keep it in the skillet.
- Garnish with freshly chopped parsley before serving.Enjoy your meal!
Tips & Tricks
Tips to Perfect the Dish
To make this garlic butter shrimp and asparagus shine, follow these tips:
- Use large, fresh shrimp for a better texture.
- Dry the shrimp well before cooking. This helps them sear nicely.
- Don’t overcook the shrimp; they should be pink and opaque.
- Keep the asparagus crisp by not cooking it too long.
- Taste as you go; adjust the seasoning for best results.
Common Mistakes to Avoid
Many cooks face these common pitfalls:
- Overcooking shrimp makes them tough. Watch them closely!
- Forgetting to season the shrimp can lead to blandness.
- Not using enough butter can result in a dry dish.
- Skipping the lemon juice or zest takes away freshness.
- Cooking shrimp and asparagus in the same skillet too long can lead to mushy veggies.
Ideas for Enhancing Flavor
Want to boost the taste? Try these ideas:
- Add fresh herbs like thyme or basil for extra aroma.
- Squeeze in more lemon juice for a zesty kick.
- Toss in a splash of white wine while cooking for depth.
- Include a dash of soy sauce for a savory twist.
- Serve with grated Parmesan for a rich finish.
Variations
Different Protein Options
You can switch out shrimp for other proteins. Chicken works well in this dish. Cut it into small pieces and cook it the same way. Salmon is another tasty choice. Just be sure to adjust the cooking time based on the protein. Tofu is great for a plant-based option. Press it to remove extra water, then cook until golden.
Seasonal Vegetable Additions
Asparagus shines in this recipe, but other veggies can add fun. Try using broccoli, snap peas, or bell peppers. In summer, zucchini or cherry tomatoes are wonderful choices. In fall, add butternut squash or brussels sprouts for a hearty twist. Each veggie brings its unique flavor and texture.
Flavor Profile Tweaks
You can adjust the flavors to suit your taste. Add fresh herbs like thyme or basil for a fragrant touch. If you enjoy spice, increase the red pepper flakes. For a zestier kick, add lime juice instead of lemon. A splash of soy sauce can give it an Asian flair. These tweaks can make your dish truly your own.
Storage Info
How to Store Leftovers
To store leftovers, first, let the dish cool down. Place the garlic butter shrimp and asparagus in an airtight container. Make sure to keep it in the fridge. It can stay fresh for up to three days.
Reheating Instructions
To reheat, you can use a skillet or microwave. If using a skillet, add a bit of butter over medium heat. Cook for about five minutes or until warm. For the microwave, heat in short bursts, stirring in between. This way, the shrimp will not overcook.
Freezing Guidelines
You can freeze garlic butter shrimp and asparagus, but it’s best to do it before cooking. Place the raw shrimp and asparagus in a freezer bag. Press out the air and seal it tightly. It will stay good for up to three months. When ready to use, thaw it in the fridge overnight before cooking. For the best flavor, use it fresh.
FAQs
How long does it take to cook garlic butter shrimp?
Cooking garlic butter shrimp takes about 10 minutes. First, you need to prep the shrimp and asparagus, which takes about 10 minutes. Then, cook everything together for about 5-7 minutes in the skillet. You want the shrimp to turn pink and opaque. The asparagus should stay bright green and crisp.
Can I use frozen shrimp for this recipe?
Yes, you can use frozen shrimp. Just make sure to thaw them first. Place them in a bowl of cold water for about 15-20 minutes. Once they are thawed, pat them dry before using. This helps get the right texture and flavor in the dish.
What should I serve with garlic butter shrimp and asparagus?
Garlic butter shrimp and asparagus go well with several sides. Here are some ideas:
- Fluffy rice to soak up the buttery sauce
- Crusty bread for dipping and savoring
- A fresh green salad for a light touch
- Quinoa for a healthy grain option
These sides will make your meal even more delicious and filling.
This blog post covers everything you need for garlic butter shrimp. We explored the ingredients, cooking steps, and storage tips. I shared ways to perfect the dish and avoid common mistakes. You can also try different proteins and vegetables for fun flavors.
Remember, the key is to enjoy the cooking process and share the meal. With these tips, you can impress anyone. Now, go ahead and create a delicious dish!