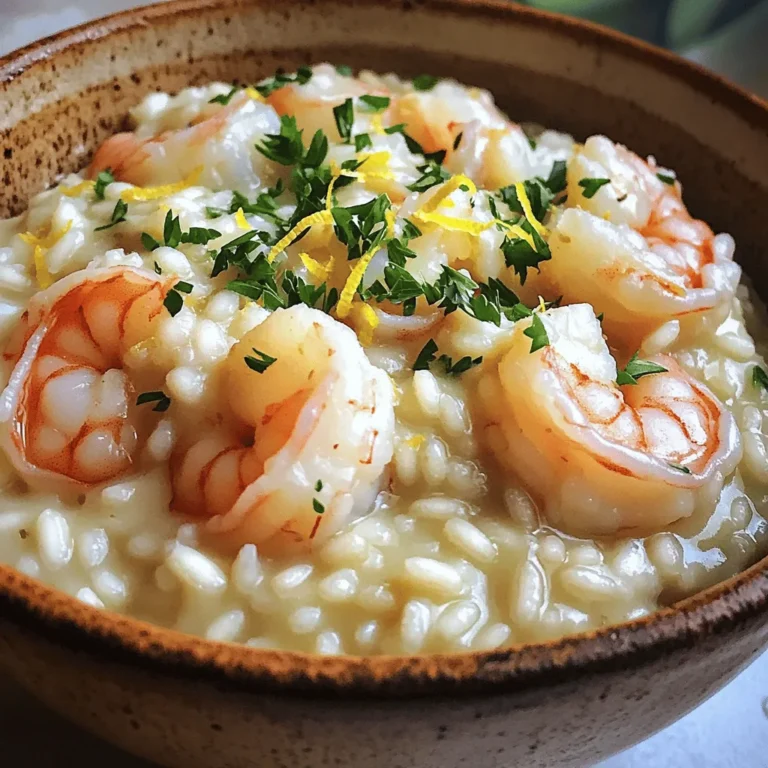
Lemon Herb Grilled Shrimp Easy and Flavorful Delight

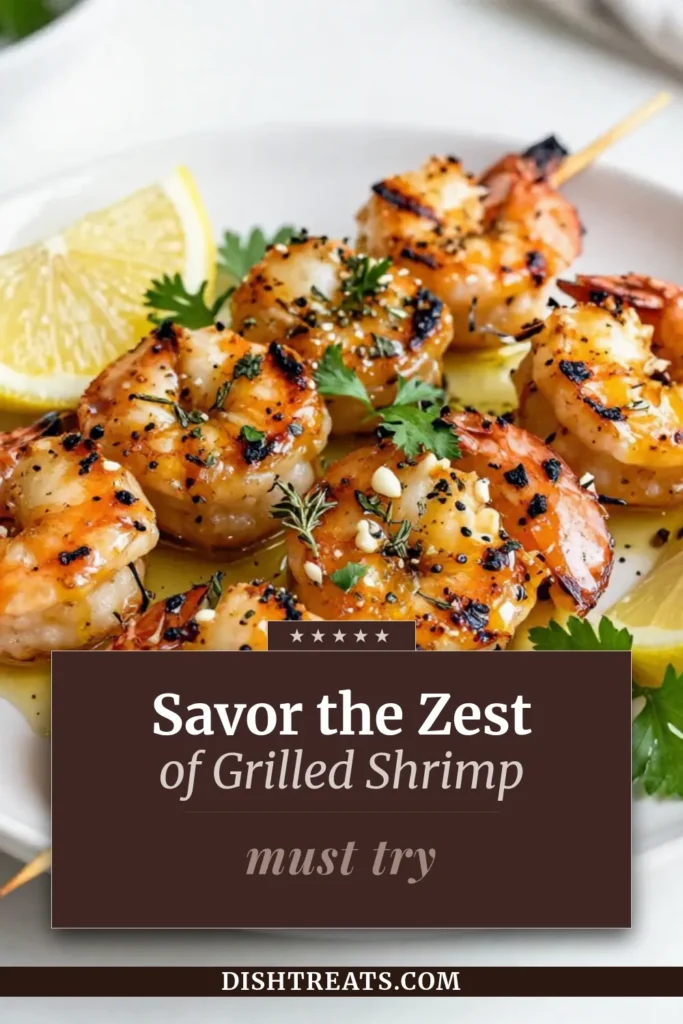
If you love fresh and zesty flavors, you’ll adore my Lemon Herb Grilled Shrimp recipe. This dish is not just easy to make; it bursts with bright flavor and is perfect for any meal. Whether you’re hosting a barbecue or just want a quick dinner, these shrimp will impress! Let’s dive into the simple ingredients and steps you need to create this delicious delight that everyone will enjoy.
Why I Love This Recipe
- Fresh and Zesty Flavor: The combination of lemon juice, zest, and fresh herbs creates a bright and refreshing taste that enhances the natural sweetness of the shrimp.
- Quick and Easy Preparation: This recipe is simple to follow and can be ready in under an hour, making it perfect for busy weeknights or last-minute gatherings.
- Grilling Perfection: Grilling the shrimp adds a smoky depth to the flavor, while also achieving that perfect char and tenderness that is truly irresistible.
- Versatile Serving Options: These shrimp can be served as an appetizer, tossed in a salad, or paired with your favorite sides for a complete meal that everyone will love.
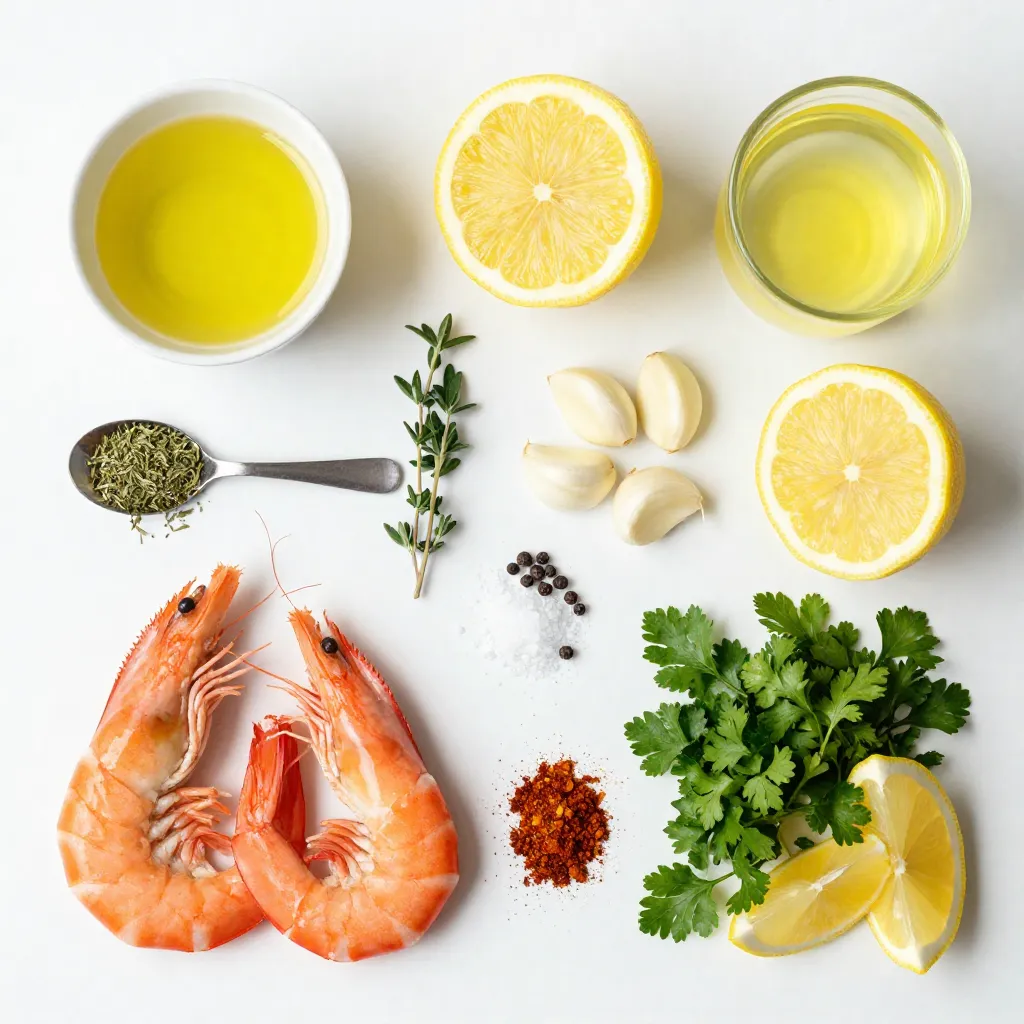
Ingredients
Complete List of Ingredients
To make Lemon Herb Grilled Shrimp, gather these items:
- 1 pound large shrimp, peeled and deveined
- 3 tablespoons extra virgin olive oil
- 2 tablespoons freshly squeezed lemon juice
- Zest of 1 large lemon
- 3 cloves garlic, finely minced
- 1 teaspoon dried oregano
- 1 teaspoon dried thyme
- 1 teaspoon smoked paprika
- Salt and freshly cracked black pepper to taste
- Fresh parsley, finely chopped (for garnish)
- Lemon wedges, for serving
Measurement Conversion Tips
When cooking, you may need to convert measurements. Here are some quick tips:
- 1 tablespoon equals 3 teaspoons.
- 1 ounce equals about 2 tablespoons.
- 1 cup equals 8 fluid ounces.
- Keep a conversion chart handy for easy reference.
Ingredient Substitutions
If you don’t have an ingredient, try these swaps:
- Use lime juice instead of lemon juice for a different flavor.
- If you lack fresh herbs, dried herbs work well too.
- For oil, you can use avocado oil or canola oil.
- Smoked paprika can be replaced with regular paprika or cayenne for heat.
These tips help you create a tasty dish with what you have at home. Enjoy your cooking!
Step-by-Step Instructions
Preparing the Marinade
To start, take a medium mixing bowl. Add 3 tablespoons of extra virgin olive oil. Squeeze 2 tablespoons of fresh lemon juice into the bowl. Next, add the zest of 1 large lemon for extra flavor. Then, finely mince 3 cloves of garlic, and toss them in. Now, sprinkle in 1 teaspoon each of dried oregano and dried thyme. Add 1 teaspoon of smoked paprika for a smoky touch. Finally, season with salt and freshly cracked black pepper to taste. Whisk everything together until it blends well. This marinade brings bright, fresh flavors to the shrimp.
Marinating the Shrimp
Now, it’s time to add the shrimp. Take 1 pound of large shrimp that are peeled and deveined. Place them in the bowl with the marinade. Make sure each shrimp is coated evenly. Cover the bowl with plastic wrap. Refrigerate the shrimp for at least 30 minutes. This allows the shrimp to soak up all the tasty flavors. Don’t rush this step; it makes a big difference in taste.
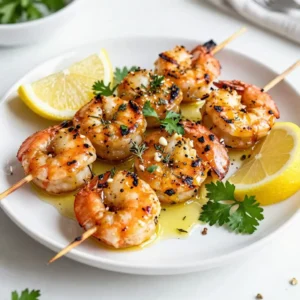
Grilling the Shrimp
While the shrimp marinates, preheat your grill to medium-high heat. If you use wooden skewers, soak them in water for 30 minutes. This will stop them from burning on the grill. After marinating, carefully thread the shrimp onto the skewers. Aim for about 4-5 shrimp per skewer. Discard any leftover marinade to keep things safe. When the grill is hot, place the skewers on it. Cook for about 2-3 minutes on each side. Watch closely as the shrimp turn pink and opaque. Don’t overcook them, or they will get rubbery. Once done, remove the skewers from the grill. Let them rest for a minute. Finally, sprinkle fresh parsley on top and serve with lemon wedges for a zesty finish!
Tips & Tricks
How to Achieve Perfectly Grilled Shrimp
To get great grilled shrimp, start with fresh shrimp. Large shrimp work best for this recipe. Make sure they are peeled and deveined. Marinate the shrimp for at least 30 minutes. This helps the flavors soak in. Use a medium-high heat on your grill. This gives a nice char and keeps the shrimp juicy. Watch the shrimp closely as they cook. They only need 2-3 minutes on each side. When they turn pink and opaque, they are done.
Common Mistakes to Avoid
One common mistake is overcooking the shrimp. They can turn tough and rubbery if cooked too long. Another mistake is skipping the marinade. The marinade adds flavor and helps tenderize the shrimp. Also, avoid using high heat right away. Shrimp cook quickly, and too much heat can burn them. Lastly, don’t crowd the grill. Give each shrimp space for even cooking.
Recommended Cooking Tools
For this recipe, you need a few simple tools:
- A mixing bowl for the marinade
- A whisk to blend the marinade well
- Wooden or metal skewers for grilling
- A grill or grill pan for cooking
If using wooden skewers, soak them in water first. This keeps them from burning. A good pair of tongs helps you flip the shrimp easily. A meat thermometer can ensure they are cooked just right. With these tools, grilling shrimp becomes easy and fun!
Pro Tips
- Marinating Time: Allowing the shrimp to marinate for at least 30 minutes helps to infuse them with flavor, but you can extend it to 2 hours for a more intense taste.
- Skewer Safety: If using wooden skewers, soak them in water for at least 30 minutes before grilling to prevent burning, ensuring your shrimp cook perfectly.
- Grilling Temperature: Preheat your grill to medium-high heat to achieve a nice sear on the shrimp. If it’s too hot, the shrimp may cook too quickly and become rubbery.
- Garnishing: Don’t skip the fresh parsley garnish! It adds a pop of color and a fresh flavor that complements the lemon and herbs beautifully.
Variations
Spicy Lemon Herb Grilled Shrimp
If you like heat, add some spice to your grilled shrimp. To create spicy lemon herb grilled shrimp, mix in some cayenne pepper or red pepper flakes. Start with 1/2 teaspoon and adjust to your taste. This kick enhances the lemon and herb mix. The result is a shrimp dish that sizzles with flavor and warmth. Pair it with a cooling dip, like yogurt sauce, to balance the heat.
Lemon Herb Shrimp Tacos
Make a fun twist by turning your grilled shrimp into tacos. Use small corn or flour tortillas. After grilling, place the shrimp in the tortillas. Top with fresh cabbage, diced tomatoes, and a squeeze of lime. You can also add avocado for creaminess. This makes a quick and tasty meal that’s perfect for sharing with friends or family.
Grilled Lemon Herb Shrimp Salad
A grilled lemon herb shrimp salad is light and fresh. Start with a bed of mixed greens, like arugula and spinach. Add your grilled shrimp on top. Toss in sliced cucumbers, cherry tomatoes, and red onion for crunch. Drizzle with olive oil and more lemon juice for dressing. This dish is healthy and packed with nutrients. It’s perfect for a summer day or a light dinner.
Storage Info
How to Store Leftover Grilled Shrimp
After you enjoy your Lemon Herb Grilled Shrimp, you might have some left. To keep it fresh, place the shrimp in an airtight container. Make sure it is cool before sealing. Store it in the fridge for up to three days. If you plan to keep it longer, consider freezing.
Reheating Tips
To reheat the shrimp, use the stovetop or oven. Avoid the microwave, as it can make shrimp rubbery. Heat a pan on low and add a splash of olive oil. Cook for a few minutes until warm. For the oven, set it to 350°F and bake for about 5-10 minutes. This keeps the shrimp tasty and moist.
Freezing Instructions
If you want to freeze your grilled shrimp, let it cool completely first. Place it in a freezer-safe bag or container. Remove as much air as possible to prevent freezer burn. You can freeze it for up to three months. When ready to eat, thaw in the fridge overnight before reheating. This method helps maintain the flavor and texture.
FAQs
Can I use frozen shrimp for this recipe?
Yes, you can use frozen shrimp. Just make sure to thaw them first. Place the shrimp in the fridge overnight or run them under cold water for a quick thaw. This way, you keep the texture nice. When thawed, follow the recipe steps like normal.
What other herbs can I use?
You can mix in other herbs like basil, dill, or cilantro. Each herb brings a different flavor. Feel free to experiment! Using fresh herbs can also add a bright taste. Just chop them finely for the best results.
How can I tell when the shrimp are done cooking?
Shrimp cook quickly and change color as they cook. Look for a pink hue and opaque texture. When they curl into a “C” shape, they are done. This usually takes 2-3 minutes per side on the grill. Avoid cooking too long, as shrimp can turn tough and chewy.
In this post, we covered the essential ingredients for grilled shrimp, from measurements to swaps. I shared step-by-step instructions for perfect marinating and grilling. We discussed tips to avoid common mistakes and recommended tools to make cooking easy. Variations, like spicy lemon herb options, add fun twists. Finally, we included storage tips to keep leftovers fresh.
Grilling shrimp can be simple and delicious. With practice, you’ll impress everyone at your next mea
Lemon Herb Grilled Shrimp Delight
Ingredients
- 1 pound large shrimp, peeled and deveined
- 3 tablespoons extra virgin olive oil
- 2 tablespoons freshly squeezed lemon juice
- 1 large lemon zest
- 3 cloves garlic, finely minced
- 1 teaspoon dried oregano
- 1 teaspoon dried thyme
- 1 teaspoon smoked paprika
- to taste salt and freshly cracked black pepper
- for garnish fresh parsley, finely chopped
- for serving lemon wedges
Instructions
- In a medium mixing bowl, combine the olive oil, freshly squeezed lemon juice, lemon zest, minced garlic, dried oregano, dried thyme, smoked paprika, salt, and freshly cracked black pepper. Whisk the mixture until well blended to create a flavorful marinade.
- Add the peeled and deveined shrimp to the marinade, ensuring each piece is thoroughly coated. Cover the bowl with plastic wrap and refrigerate for at least 30 minutes, allowing the shrimp to absorb the vibrant flavors.
- While the shrimp is marinating, preheat your grill to medium-high heat. If you’re using wooden skewers, submerged them in water for 30 minutes to prevent burning during grilling.
- After marinating, carefully thread the shrimp onto the skewers, placing about 4-5 shrimp per skewer. Be mindful to discard any leftover marinade as it has come into contact with raw seafood.
- Once your grill is hot, place the skewers on the grill and cook for approximately 2-3 minutes on each side. Watch closely as the shrimp transform to a lovely pink and opaque state, being careful not to overcook them as they can become rubbery.
- When cooked, remove the skewers from the grill and allow them to rest for a minute. Sprinkle with freshly chopped parsley for a burst of color and freshness. Serve immediately with lemon wedges on the side for an extra zest!

. To make One-Pan Garlic Herb Salmon, I start by gathering all my ingredients. This way, I avoid running around the kitchen. I always preheat my oven to 400°F (200°C). This ensures the salmon cooks evenly. I make sure to have a large baking dish or a lined baking sheet ready for the salmon. 1. First, I whisk together the olive oil, garlic, oregano, thyme, smoked paprika, salt, and pepper in a mixing bowl. This creates a tasty marinade. 2. Next, I place the salmon fillets skin-side down in the baking dish. I use a brush or spoon to coat each fillet with the marinade. I want to make sure each piece is well covered. 3. I then arrange lemon slices, halved cherry tomatoes, and zucchini around the salmon. I drizzle any leftover marinade over the veggies for extra flavor. 4. After that, I transfer the dish to the oven and bake for 12 to 15 minutes. The salmon should flake easily when done, and the veggies should look vibrant. 5. Once cooked, I take the dish out and let it rest for a few minutes. This helps the flavors blend better. 6. Just before serving, I sprinkle fresh parsley on top for a nice touch. To get the best salmon, I recommend using high-quality fillets. Fresh salmon tastes better than frozen. Keep an eye on the cooking time. Overcooking can dry out the fish. If you like crispy skin, place the salmon skin-side up under the broiler for the last minute. This gives it a nice crunch. If you're looking for the full recipe, check out the Full Recipe section. Enjoy your meal! To get crispy skin on your salmon, dry it well before cooking. Pat the skin with paper towels to remove moisture. This step helps the skin crisp up nicely. Use high-quality olive oil in your marinade. This oil helps the skin get golden and crunchy. Bake the salmon skin-side down, and avoid flipping it. This keeps the skin intact and crispy. For added flavor, try using fresh herbs instead of dried. Fresh parsley or dill adds a bright taste. Lemon zest is another great addition. It brings a fresh zing that pairs well with salmon. You can also add a splash of white wine to the baking dish. This adds depth to the sauce and enhances the overall flavor. One common mistake is overcrowding the pan. Make sure each salmon fillet has space around it. This helps the heat circulate and cook evenly. Another mistake is not checking for doneness. Salmon should flake easily with a fork. If you overcook it, it may become dry. Lastly, don’t skip the resting step after baking. Letting it rest helps the juices redistribute, leading to a juicier fillet. For the complete recipe, check out the Full Recipe section. {{image_4}} You can change up the veggies in this dish. Try using asparagus, bell peppers, or broccoli. These vegetables cook well and add color. They also provide different flavors. For a twist, add spinach or kale near the end of cooking. This keeps them bright and fresh. This recipe is naturally gluten-free and dairy-free. If you need to avoid gluten, ensure your ingredients are certified gluten-free. You can use coconut oil instead of olive oil for a different flavor. This keeps the dish healthy and tasty. You can cook this salmon in several ways. Besides baking, try grilling it for a smoky taste. To do this, preheat your grill and cook the salmon on medium heat. You can also pan-sear it on the stovetop. Just heat a non-stick pan and cook the salmon for about 4-5 minutes per side. Each method gives you a unique flavor and texture. For the full recipe, check out the One-Pan Garlic Herb Salmon Delight. After you enjoy your One-Pan Garlic Herb Salmon, store leftovers quickly. Place the salmon and veggies in an airtight container. This keeps them fresh and tasty. Make sure to cool them to room temperature before sealing. Store in the fridge for up to three days. If you want to keep it longer, freezing is a great option. When you're ready to eat leftovers, avoid the microwave if you can. It can dry out the salmon. Instead, preheat your oven to 350°F (175°C). Place the salmon and veggies on a baking sheet. Cover them with foil to keep moisture in. Heat for about 10 to 15 minutes, or until warm. You can also reheat in a skillet over low heat, adding a bit of olive oil to keep it moist. Freezing is a smart way to save your One-Pan Garlic Herb Salmon. To freeze, wrap each salmon fillet in plastic wrap, then place them in a freezer-safe bag. Remove as much air as possible before sealing. The veggies can go in the same bag or a separate one. This meal can last in the freezer for up to three months. When you're ready to eat, thaw it overnight in the fridge before reheating. Enjoy! You can tell salmon is cooked when it flakes easily with a fork. The fish should change from translucent to a light pink color. The internal temperature should reach 145°F (63°C). Always use a food thermometer for the best results. Yes, you can use frozen salmon! Just make sure to thaw it first. Place the salmon in the fridge overnight or use a quick method by sealing it in a bag and running it under cold water. This keeps the fish safe and helps it cook evenly. You can serve this dish with many sides. Try steamed rice, quinoa, or a fresh salad. Roasted vegetables pair well too. For a full meal, consider serving garlic bread or a light pasta. You can find the Full Recipe for One-Pan Garlic Herb Salmon here, which gives a complete picture of this delightful dish. In this blog post, we explored the best ingredients for making One-Pan Garlic Herb Salmon. I shared quality recommendations, possible substitutions, and step-by-step cooking instructions. You learned tips for achieving crispy skin and enhancing flavors. We discussed variations using different vegetables and cooking methods, along with storage and reheating tips. Remember, cooking salmon can be easy and fun. Stick to the tips and enjoy your meal! Check out the full recipe for detailed steps.](https://dishtreats.com/wp-content/uploads/2025/06/57d74547-3b02-425a-a5fa-1ca9189b97a5-768x768.webp)