Strawberry Banana Smoothie Bowl Fresh and Nourishing Treat
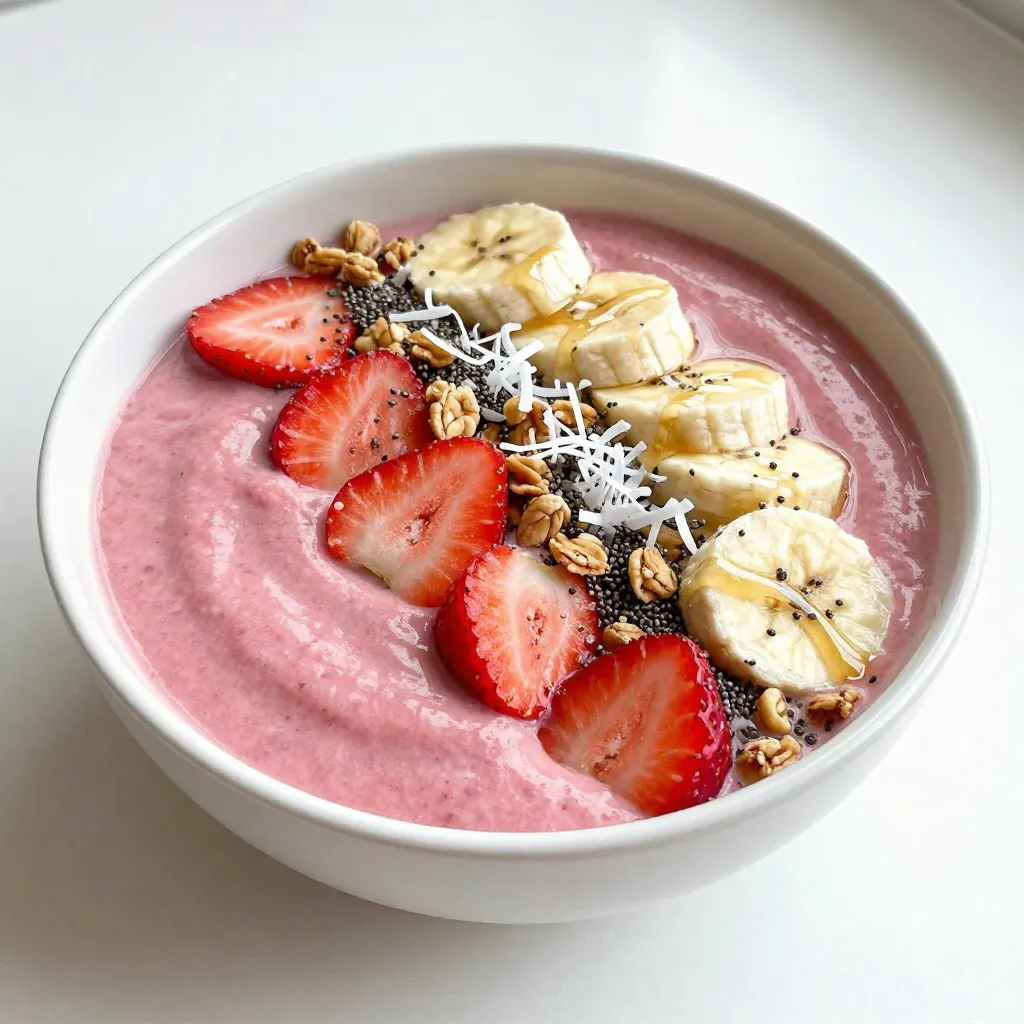
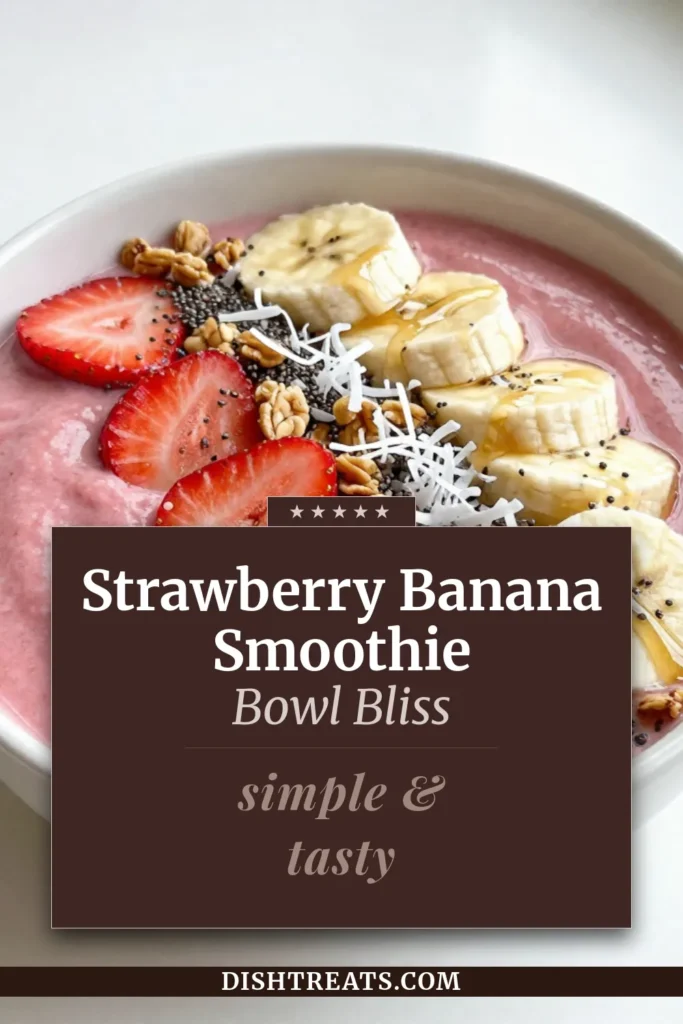
If you’re craving a tasty and healthy treat, a Strawberry Banana Smoothie Bowl is perfect for you! This bowl blends sweet strawberries and ripe bananas into a creamy delight. Loaded with nutrients, it’s a great way to start your day. In this post, I’ll guide you through simple ingredients and steps to create your own fresh and nourishing bowl. Let’s dive in and discover your new favorite breakfast!
Why I Love This Recipe
- Refreshing Flavor: The combination of strawberries and bananas creates a refreshing and naturally sweet flavor that is perfect for any time of the day.
- Easy to Make: With just a few ingredients and a blender, this smoothie bowl can be whipped up in under 10 minutes, making it a quick and healthy option.
- Customizable Toppings: You can personalize your smoothie bowl with a variety of toppings like granola, coconut, and fresh fruits, adding both nutrition and texture.
- Health Benefits: Packed with vitamins, protein, and fiber, this smoothie bowl is a nutritious breakfast or snack that fuels your body and satisfies your cravings.
Ingredients
Main Ingredients
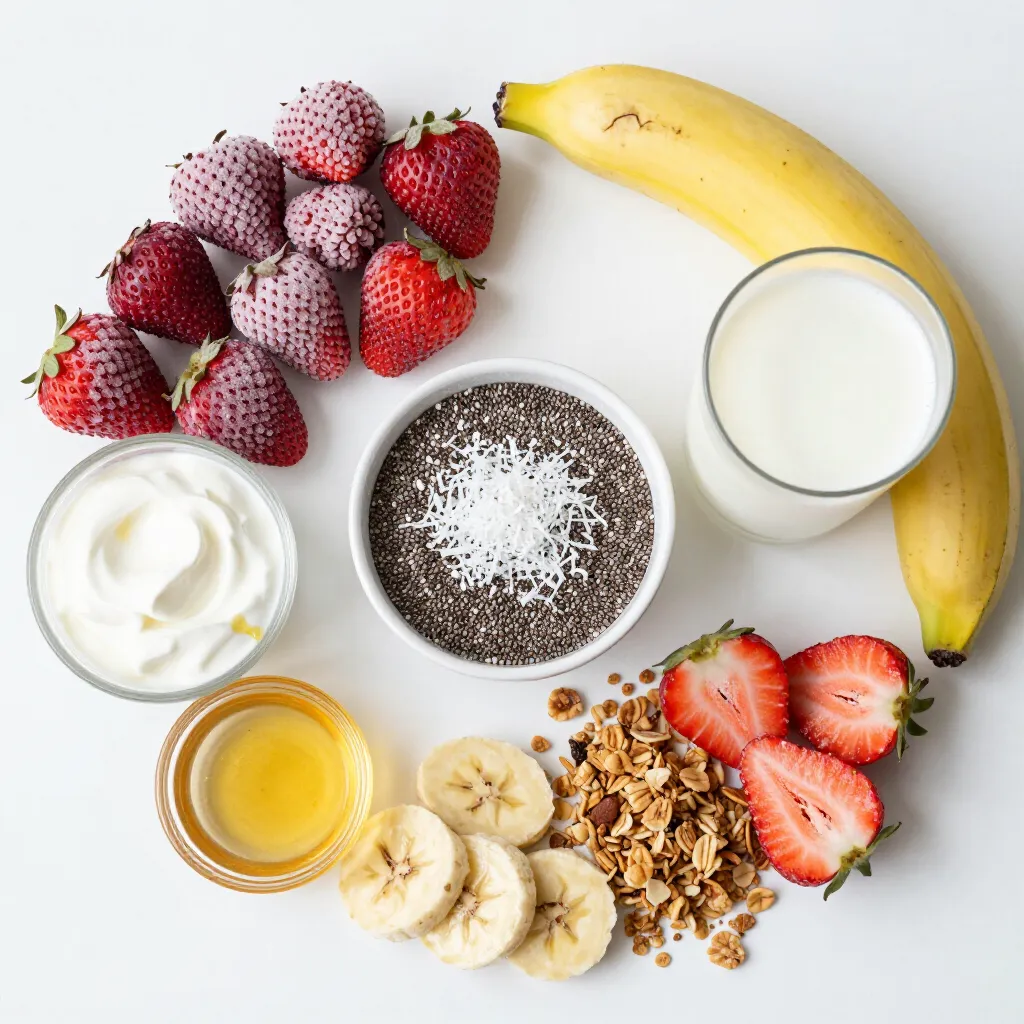
- 1 cup frozen strawberries
- 1 ripe banana, peeled and sliced
- 1/2 cup Greek yogurt (or non-dairy yogurt)
- 1/2 cup almond milk (or any milk of your choice)
To make the best Strawberry Banana Smoothie Bowl, start with fresh and frozen fruit. The frozen strawberries give your bowl a nice chill. The ripe banana adds natural sweetness and creaminess. Greek yogurt gives a rich texture and protein boost. Almond milk helps blend everything smoothly.
Optional Ingredients
- 1 tablespoon honey or maple syrup (for sweetness)
- 1 tablespoon chia seeds
You can add honey or maple syrup if you like it sweeter. Chia seeds are a great option for extra nutrition and a fun texture.
Toppings
- Sliced fresh strawberries
- Additional banana slices
- Crunchy granola
- Shredded coconut
- Drizzle of honey (optional for serving)
Toppings make your smoothie bowl special. Sliced fresh strawberries and bananas add color. Granola adds crunch and fiber. Shredded coconut gives a tropical touch. A drizzle of honey can finish it off nicely.
Step-by-Step Instructions
Blending the Base
- Combine all base ingredients in a blender.
- Add 1 cup frozen strawberries, 1 ripe banana, 1/2 cup Greek yogurt, and 1/2 cup almond milk.
- Blend until smooth and creamy.
Checking Consistency
- If the mixture is too thick, adjust thickness with almond milk.
- Add a splash at a time until you get your desired texture.
Taste Testing and Sweetening
- Sample the mixture to check the flavor.
- If you want it sweeter, add 1 tablespoon honey or maple syrup.
- Blend again for a few seconds to mix.
Assembling the Bowl
- Pour the smoothie mixture into a serving bowl.
- Make sure to leave some space for toppings.
Adding Nutritional Enhancements
- Sprinkle 1 tablespoon chia seeds over the smoothie.
- This adds texture and health benefits.
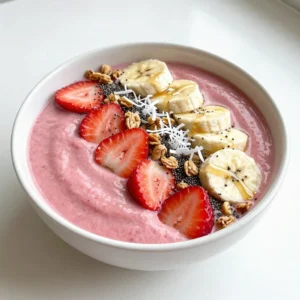
Finishing Touches
- Arrange sliced fresh strawberries and banana on top.
- Sprinkle crunchy granola for added crunch.
- Drizzle honey and sprinkle shredded coconut last.
This method gives you a tasty and vibrant bowl that looks great and is packed with nutrients! Enjoy every bite.
Tips & Tricks
Achieving the Perfect Consistency
To make a great smoothie bowl, thickness matters. A thicker smoothie holds toppings better. Start with less liquid. Blend your base first, then add more almond milk if needed. If it feels too thick, try adding just a splash of milk. For a creamier texture, use ripe bananas. They add natural creaminess that feels good in your mouth.
Presentation Tips
Use wide, shallow bowls for serving. These bowls showcase the bright colors of your smoothie and toppings. Arrange your fruit in fun patterns. Try to create a rainbow effect with your toppings. This makes your bowl pop and looks tempting. Fresh fruit like strawberries and bananas adds vibrance. Add crunchy granola for texture and color contrast.
Health Benefits of Key Ingredients
Strawberries and bananas pack a punch of nutrients. Strawberries are high in vitamin C and fiber. They help boost your immune system. Bananas give you energy with natural sugars and potassium. Greek yogurt is a great source of protein and probiotics. Chia seeds add omega-3 fatty acids, making your bowl even healthier. They help with digestion and keep you full longer.
Pro Tips
- Use Frozen Fruits for a Thicker Texture: Frozen strawberries not only enhance the chill factor but also give your smoothie bowl a creamy, thick consistency.
- Sweetness Adjustment: Always taste your smoothie base before serving. Adding honey or maple syrup can elevate the flavor, but a ripe banana usually adds enough natural sweetness.
- Experiment with Toppings: Feel free to mix and match toppings like nuts, seeds, or different fruits to create your personalized version of this smoothie bowl.
- Chill the Bowl: For an extra refreshing experience, chill your serving bowl in the freezer for a few minutes before assembling the smoothie bowl.
Variations
Fruit Variations
You can swap out strawberries and bananas for other fruits. Blueberries make a tasty option. They add a nice color and flavor. Mango works well too, giving a tropical twist. During summer, try using ripe peaches or nectarines. In winter, think about using frozen fruits like raspberries. Seasonal swaps help keep your smoothie bowl fresh and exciting.
Dairy-Free Options
If you want a dairy-free bowl, try using coconut yogurt. It adds a creamy texture and a hint of coconut flavor. Almond milk or oat milk can serve as your base. These alternatives keep the bowl rich while being kinder to the tummy.
Flavor Additions
Infuse your smoothie bowl with extra flavors. A splash of vanilla extract adds warmth and depth. Nut butter, like almond or peanut, gives a rich taste and healthy fats. You can even sprinkle some cinnamon for a hint of spice. These small changes can turn a simple dish into something special.
Storage Info
Short-term Storage
To keep your leftover smoothie mixture fresh, store it in an airtight container. Place it in the fridge for up to 24 hours. If the smoothie thickens, add a splash of almond milk before serving. This keeps it creamy and delicious.
Freezing for Later Use
You can freeze parts of the smoothie bowl for future use. Pour the leftover mixture into ice cube trays. Once frozen, transfer the cubes to a freezer bag. This method makes it easy to blend a quick smoothie later. Just blend a few cubes with some milk or yogurt when you want a treat.
Avoiding Oxidation
To keep your fruits fresh, store them in a cool place. Use lemon juice on cut fruits like bananas to prevent browning. When serving, add the fruits just before eating. This keeps your bowl looking colorful and appetizing.
FAQs
Can I make the smoothie bowl ahead of time?
Yes, you can make the smoothie bowl ahead of time. Blend all your ingredients and store the mix in an airtight container. Keep it in the fridge for up to 24 hours. When you are ready to eat, stir it well. It can thicken, so you may want to add a splash of milk to loosen it.
What can I substitute for Greek yogurt?
You can use non-dairy yogurt as a substitute for Greek yogurt. Coconut yogurt or almond milk yogurt works well. These options keep the bowl creamy and tasty. You can also try silken tofu for a protein boost.
How do I make my smoothie bowl vegan?
To make your smoothie bowl vegan, use non-dairy yogurt and plant-based milk, like almond or oat milk. Replace honey with maple syrup or agave nectar for sweetness. This way, you keep all the flavors without animal products.
What is the best way to sweeten my smoothie bowl?
The best way to sweeten your smoothie bowl is by using honey or maple syrup. You can also use ripe bananas for natural sweetness. If you prefer, try adding a date or two. Blend them in for a smooth texture.
How long can I store leftovers?
You can store leftovers in the fridge for one day. In an airtight container, it will stay fresh. However, the texture may change. It’s best to enjoy your smoothie bowl right after making it for the best taste.
You now know how to create a delicious smoothie bowl. You need simple ingredients, like strawberries and bananas, and a few easy steps. Adjust the thickness with almond milk and taste as you go. Feel free to get creative with toppings and variations. Whether you want a quick breakfast or a tasty treat, this recipe shines. Enjoy experimenting with flavors, and always make it your own! Eating healthy can be fun and yumm
Strawberry Banana Bliss Smoothie Bowl
Ingredients
- 1 cup frozen strawberries
- 1 ripe banana peeled and sliced
- 0.5 cup Greek yogurt (or non-dairy yogurt)
- 0.5 cup almond milk (or any milk of your choice)
- 1 tablespoon honey or maple syrup (optional, for sweetness)
- 1 tablespoon chia seeds
- to taste sliced fresh strawberries
- to taste additional banana slices
- to taste crunchy granola
- to taste shredded coconut
- to taste a drizzle of honey (optional for serving)
Instructions
- In a blender, add the frozen strawberries, sliced ripe banana, Greek yogurt, and almond milk.
- Blend on high speed until the mixture is completely smooth and creamy. If it’s too thick for your liking, add an extra splash of almond milk to adjust the consistency.
- Sample the smoothie base and, if desired, add honey or maple syrup for extra sweetness. Blend briefly to combine.
- Pour the luscious smoothie mixture into a serving bowl.
- Sprinkle chia seeds evenly over the surface for added health benefits.
- Artistically arrange the sliced fresh strawberries and banana on top of the smoothie for an appealing presentation.
- Sprinkle a generous handful of granola over the fruit for a delightful crunch.
- Drizzle a bit of honey over the bowl and finish with a light sprinkle of shredded coconut to enhance flavor and texture.

![- 4 chicken thighs (bone-in, skin-on) - 2 tablespoons jerk seasoning - 1 tablespoon olive oil - Salt and pepper to taste - 1 ripe pineapple, peeled and diced into small cubes - 1 red bell pepper, diced into small pieces - 1 small red onion, finely chopped - 1 jalapeño, deseeded and minced (adjust for spice preference) - Juice of 1 fresh lime - Fresh cilantro, chopped (for garnish) For this jerk chicken with pineapple salsa recipe, use chicken thighs for their rich flavor. The jerk seasoning adds a spicy and smoky kick. The pineapple and vegetables bring freshness and sweetness to the dish. - Adjust spice levels: If you want less heat, skip the jalapeño or use less jerk seasoning. - Additional garnishes: Lime wedges and extra cilantro make great toppings. You can also add avocado for creaminess. Feel free to customize these ingredients according to your taste. The key is to balance heat, sweetness, and freshness. For the full recipe, check out the [Full Recipe]. Start by mixing the chicken thighs with jerk seasoning, olive oil, salt, and pepper. Use your hands to coat each piece well. This step is key for flavor. Cover the bowl with plastic wrap and place it in the fridge. Marinate for at least 1 hour, but overnight gives the best taste. In a clean bowl, combine diced pineapple, red bell pepper, red onion, and jalapeño. Squeeze the juice of one lime over it and add a pinch of salt. Stir gently to mix. Let this salsa rest for at least 15 minutes. This resting time allows the flavors to blend nicely. Heat your grill or grill pan to medium-high. Take the chicken out of the marinade and let any extra drip off. Grill the chicken for about 6-8 minutes on each side. Use a meat thermometer to check that it reaches 165°F (75°C). This ensures it is fully cooked and safe to eat. Arrange the grilled jerk chicken on a platter. Spoon the bright pineapple salsa over the top. For a finishing touch, sprinkle fresh cilantro on the dish. You can also serve it on a rustic wooden board with lime wedges and extra pineapple chunks. This adds a fun, tropical vibe to your meal. For the full recipe, check out the [Full Recipe]. The key to great jerk chicken is marinating well. Many people rush this step, but a good marinating time is essential. Aim for at least one hour, or overnight if you can. This allows the chicken to soak up the flavors deeply. Common mistakes to avoid: - Skipping the marinade: This makes the chicken bland. - Using too much heat: Jerk seasoning has a kick. Balance it with other flavors. - Not resting the chicken: Skipping this step makes the meat dry. Flavor enhancements: - Add some lime zest to your marinade for extra tang. - Try a bit of honey for a hint of sweetness. - Use smoked paprika for a deeper, richer flavor. The salsa adds brightness to the dish. Choosing ripe pineapples is key to great flavor. Tips for selecting ripe pineapples: - Look for pineapples with a sweet smell at the base. - The skin should be golden and slightly firm. - Press gently; it should give just a little. Variations for additional flavor: - Add diced mango for extra sweetness. - Mix in some chopped mint for a fresh twist. - Try a dash of cumin for a warm, earthy note. These tips will help you create a jerk chicken dish that shines. Don't forget to check out the Full Recipe for more details! {{image_4}} You can swap chicken for other meats. Try pork or turkey. Both soak up jerk flavor well. If you prefer seafood, shrimp or fish works too. Just keep an eye on cooking times. Seafood cooks quickly, so grill it for just a few minutes. Feel free to play with the vegetables. You can use different peppers like green or yellow. Red onions are great, but sweet onions add a nice touch too. Want to mix it up? Add diced mango or avocado to the salsa. Fresh herbs like mint or basil can add fun flavors too. For gluten-free options, check your jerk seasoning. Make sure it has no gluten. You can enjoy jerk chicken without any worries. If you're looking for low-carb choices, skip the sugar in the salsa. You can also serve the chicken with a salad instead of rice. This keeps it fresh and light. To store leftovers, place the jerk chicken in an airtight container. Let it cool to room temperature before sealing. This helps keep it fresh longer. Jerk chicken can stay in the fridge for up to three days. When you are ready to eat, reheat it in the oven or on the grill. Heat it to 165°F (75°C) for safe eating. Avoid reheating in the microwave if you want crispy skin. Yes, you can freeze jerk chicken. Wrap it tightly in plastic wrap and then place it in a freezer-safe bag. It can last up to three months in the freezer. For thawing, move the chicken to the fridge overnight. If you need it fast, you can also use the microwave on the defrost setting. After thawing, make sure to heat it well before serving. This keeps it tasty and safe to eat. For the full recipe, visit the [Full Recipe]. I suggest marinating the chicken for at least one hour. For the best flavor, try to marinate overnight. This allows the jerk seasoning to soak in deeply, making the chicken tasty and juicy. Jerk chicken pairs well with a variety of sides. Some great options are: - Rice and peas - Grilled vegetables - Coleslaw - Fried plantains - Cornbread These sides balance the rich flavors of the chicken. Yes, you can make the salsa ahead of time. I recommend preparing it a few hours before serving. This gives the salsa time to rest. The flavors will mix better, making it even more delicious. Jerk seasoning has a unique and bold flavor. It combines heat from peppers, sweetness from spices, and a hint of smokiness. Common ingredients include allspice, thyme, and garlic. This mix creates a savory and vibrant taste. The spice level of jerk chicken can vary. It depends on the amount of jalapeño you use. If you want less heat, remove the seeds. For more spice, add extra jalapeño or a hotter pepper. Adjusting the seasoning lets you enjoy the dish at your preferred heat level. You learned about making jerk chicken with easy steps and key ingredients. Focus on marinating the chicken and crafting the pineapple salsa for the best flavor. Enjoy grilling techniques to get that perfect char. Remember to avoid common mistakes while cooking. You can also try different proteins and flavor swaps for variety. Store leftovers properly to enjoy later. Your jerk chicken can impress anyone at the table. Now, it’s time to put this knowledge to use and enjoy your delicious creation!](https://dishtreats.com/wp-content/uploads/2025/06/27cc5104-89a5-4e73-8f97-3d018bc709fa-768x768.webp)