Garlic Herb Buttered Noodles Quick and Flavorful Meal
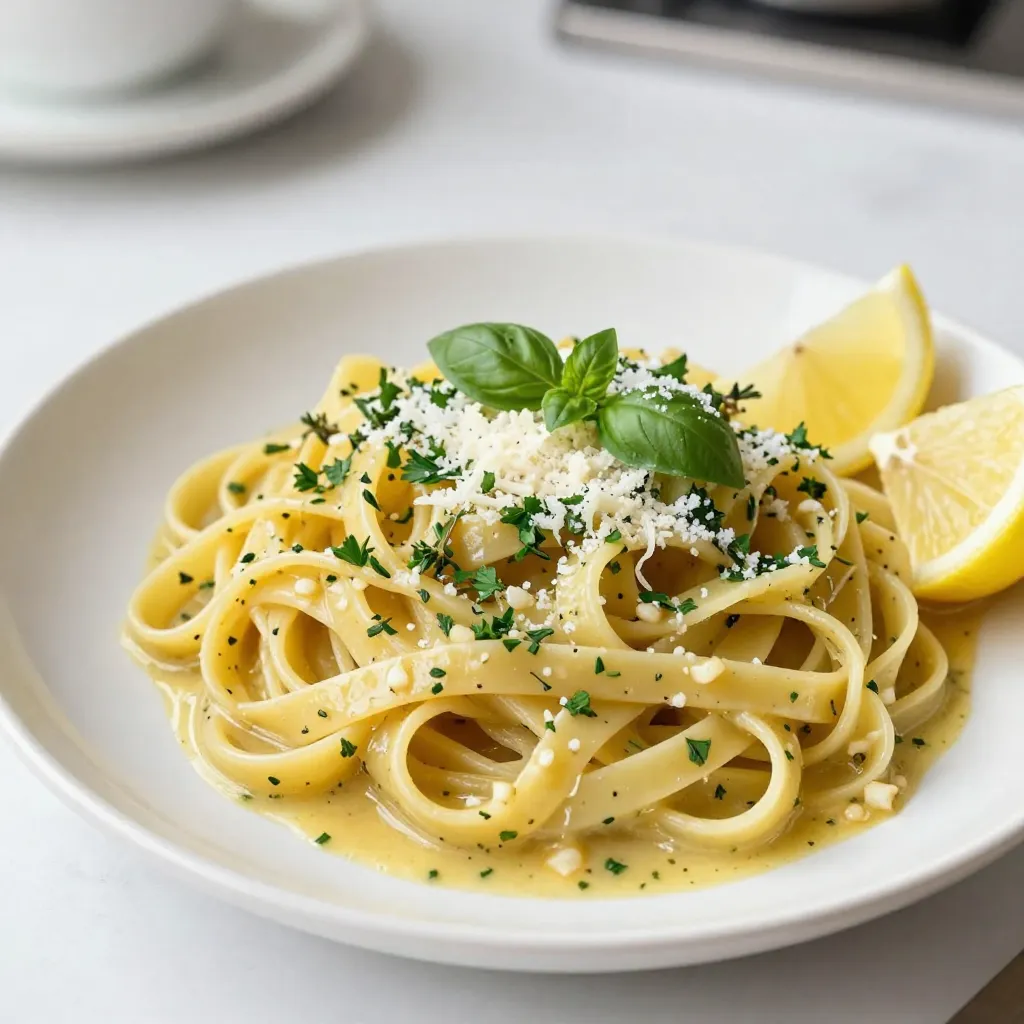
Looking for a quick, tasty meal? You’ve found it! Garlic Herb Buttered Noodles are easy to make and packed with flavor. In just a few steps, you can whip up this delightful dish using simple ingredients. Whether it’s a busy weeknight or a cozy weekend dinner, these noodles will impress everyone at your table. Let’s dive into the tasty details and get cooking!
Why I Love This Recipe
- Quick and Easy: This recipe comes together in just 20 minutes, making it perfect for busy weeknights or last-minute dinners.
- Flavorful Ingredients: The combination of garlic, fresh herbs, and butter creates a rich and aromatic dish that is sure to please anyone’s palate.
- Customizable: You can easily adjust the herbs and spices according to your taste preferences, or even add in vegetables or proteins for a heartier meal.
- Impressive Presentation: With a sprinkle of Parmesan cheese and a squeeze of lemon, these noodles look and taste gourmet, making them perfect for entertaining.
Ingredients
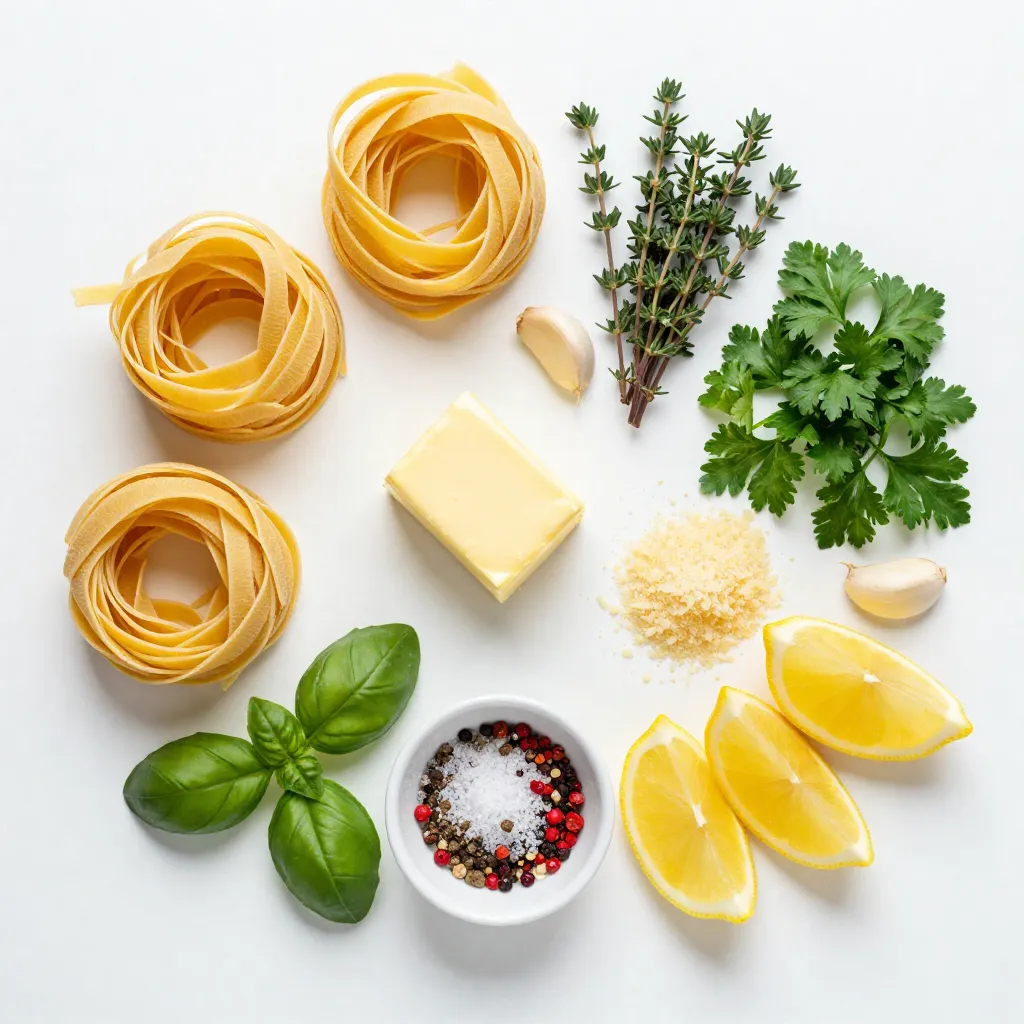
Essential Ingredients for Garlic Herb Buttered Noodles
You need just a few simple items to make Garlic Herb Buttered Noodles. Here’s what you should have:
- 8 oz fettuccine or spaghetti
- 4 tablespoons unsalted butter
- 4 cloves garlic, minced
- 1 teaspoon fresh thyme leaves
- 1 teaspoon fresh parsley, chopped
- 1 teaspoon fresh basil, chopped
- Salt and pepper to taste
These ingredients create a rich and flavorful base.
Optional Ingredients to Enhance Flavor
You can add some extra ingredients to boost the taste. Consider these options:
- 1/4 teaspoon red pepper flakes (for a spicy kick)
- Lemon wedges (for a bright finish)
These ingredients can add a nice twist to the dish.
Suggested Toppings and Garnishes
When serving, you can make your dish even better with toppings. Try these ideas:
- Grated Parmesan cheese
- Extra fresh herbs (like basil or parsley)
These garnishes not only look good but also enhance the overall flavor. Enjoy your meal!
Step-by-Step Instructions
Cooking the Noodles
To start, boil a large pot of salted water. Once it is bubbling, add 8 oz of fettuccine or spaghetti. Cook the pasta according to the package instructions until it is al dente. Al dente means the noodles should have a slight bite. Before you drain the noodles, save about 1/2 cup of the starchy pasta water. This water adds creaminess later. Drain the noodles in a colander and set them aside.
Preparing the Garlic Herb Butter
Next, grab a large skillet and heat 4 tablespoons of unsalted butter over medium heat. Once the butter melts, add 4 cloves of minced garlic. Sauté the garlic gently for 1-2 minutes until it smells fragrant. Stir carefully to prevent browning, which can taste bitter. After that, add 1 teaspoon each of fresh thyme leaves, chopped parsley, and chopped basil. If you like a bit of spice, toss in 1/4 teaspoon of red pepper flakes. Season with salt and pepper. Cook this mixture for 1 more minute to blend the flavors.
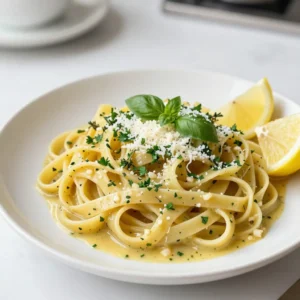
Combining Noodles with Garlic Herb Butter
Now it’s time to bring it all together. Add the drained noodles into the skillet with the garlic herb butter. Toss the noodles gently to coat them evenly. If the mixture looks dry, add small amounts of the reserved pasta water. This will help make it creamy. Taste the noodles and adjust the seasoning if needed. Once everything is mixed well, plate the noodles. Don’t forget to top with grated Parmesan cheese and serve with lemon wedges for a fresh kick!
Tips & Tricks
Best Practices for Cooking Pasta
To cook pasta well, start with a large pot. Use plenty of water, about 4-6 quarts. Add salt to the water before boiling. This step adds flavor. Bring the water to a rolling boil before adding your pasta. Stir the pasta right after adding it to prevent sticking. Cook it until it is al dente, which means firm to the bite. This usually takes 8-10 minutes for fettuccine or spaghetti. Save some pasta water before draining. This starchy water helps make your sauce creamy later.
How to Achieve Creamy Noodles
To create creamy noodles, the key is the pasta water. After draining, add the noodles to the skillet with garlic herb butter. Toss them gently to coat. If the noodles seem dry, add small amounts of the reserved pasta water. Stir until you reach the perfect creamy texture. The butter, along with the starchy water, combines to create a rich sauce. Remember, you can always add more water, but it’s hard to fix if you add too much.
Adjusting Flavors & Seasoning
Taste your dish as you cook. This helps you adjust the flavors. Start with salt and pepper, then add herbs like thyme, parsley, and basil. If you like a little heat, sprinkle in red pepper flakes. For a brighter taste, serve with lemon wedges. A squeeze of lemon enhances the noodles and adds freshness. Adjust the seasoning to your liking, and don’t be afraid to experiment. Cooking is about finding your favorite flavors!
Pro Tips
- Choose the Right Pasta: For this recipe, fettuccine or spaghetti works best as they hold the sauce well, allowing for a deliciously coated dish.
- Don’t Overcook the Garlic: When sautéing garlic, keep an eye on it to prevent burning. A fragrant, golden hue is what you want for optimal flavor.
- Use Starchy Pasta Water: The reserved pasta water helps to create a creamier sauce. Add it gradually until you reach your desired consistency.
- Fresh Herbs Make a Difference: Using fresh herbs instead of dried can elevate the flavor profile of the dish significantly, making it taste more vibrant and fresh.
Variations
Substitutions for Different Pasta Types
You can use any pasta you like for garlic herb buttered noodles. Fettuccine and spaghetti are great, but penne, linguine, or even whole wheat pasta work well too. Each pasta shape will hold the sauce differently, so choose one that you enjoy. If you prefer gluten-free options, look for rice or chickpea pasta. They add a unique flavor and texture.
Adding Protein or Vegetables
To make this dish heartier, add protein or vegetables. Cooked chicken, shrimp, or tofu blends nicely with the noodles. For veggies, consider adding spinach, peas, or cherry tomatoes. Sauté them in the skillet before adding the garlic and herbs. This adds color, nutrients, and flavor. You can also toss in cooked bacon or sausage for added richness.
Flavor Profile Adjustments
Adjust the flavors to your taste. For a zesty kick, add lemon zest or more red pepper flakes. If you love cheese, mix in cream cheese or ricotta for a creamy texture. Swap the herbs based on your preference. Oregano or dill can be nice alternatives. Don’t forget to taste as you go to find your perfect balance!
Storage Info
How to Store Leftovers
To keep your garlic herb buttered noodles fresh, let them cool first. Place the noodles in an airtight container. Make sure to cover them tightly. They will last in the fridge for 3 to 4 days. If you notice any signs of spoilage, such as a strange smell, it’s best to throw them out.
Reheating Tips for Garlic Herb Buttered Noodles
When you are ready to eat your leftovers, reheating is simple. You can use a skillet or microwave. If using a skillet, add a splash of water or broth. This helps steam the noodles and keeps them from drying out. Heat over low to medium heat, stirring gently. If you choose the microwave, cover the bowl with a damp paper towel. Heat in short bursts, stirring in between, until warm.
Freezing Guidelines
If you want to save garlic herb buttered noodles for later, freezing is a great option. First, cool the noodles completely. Then, portion them into freezer bags or containers. Be sure to remove as much air as possible before sealing. They can last in the freezer for up to 2 months. To use, thaw in the fridge overnight. Reheat using the tips above for best results.
FAQs
What is the best pasta to use for this recipe?
I recommend using fettuccine or spaghetti. Both types work well. Fettuccine has a flat shape that holds the sauce nicely. Spaghetti is classic and versatile, too. You can choose any pasta you prefer. Just make sure it has a good texture to grab that garlic herb butter.
Can I make this dish vegan?
Yes, you can make it vegan! Replace the butter with vegan butter or olive oil. Use nutritional yeast instead of Parmesan cheese for that cheesy flavor. Fresh herbs and garlic still shine in this dish. You won’t miss the dairy at all.
How can I make garlic herb butter ahead of time?
You can prepare garlic herb butter in advance. Simply melt the butter and mix in the minced garlic and herbs. Store this mix in an airtight container in the fridge. When you’re ready to use it, just warm it up before tossing with the noodles. This saves time and adds flavor fast!
Garlic herb buttered noodles are easy to make and delicious. We covered key ingredients and ways to add flavor. The step-by-step guide helps you cook perfectly every time. With tips for creamy noodles and serving ideas, you can customize this dish.
Store leftovers properly and learn to reheat them well. Enjoy these noodles your way, knowing you can make them ahead. Now you can create a tasty meal anytim
Garlic Herb Buttered Noodles
Ingredients
- 8 oz fettuccine or spaghetti
- 4 tablespoons unsalted butter
- 4 cloves garlic, minced
- 1 teaspoon fresh thyme leaves
- 1 teaspoon fresh parsley, chopped
- 1 teaspoon fresh basil, chopped
- 1/4 teaspoon red pepper flakes (optional)
- to taste salt and pepper
- to serve grated Parmesan cheese
- for garnish lemon wedges
Instructions
- Bring a large pot of salted water to a rolling boil. Add the fettuccine or spaghetti and cook as per the package instructions until al dente. Reserve about 1/2 cup of the starchy pasta water before draining. Drain the noodles and set aside.
- In a large skillet, heat the unsalted butter over medium heat. Once melted, add the minced garlic and sauté gently for about 1-2 minutes until fragrant, avoiding browning.
- Stir in the fresh thyme leaves, chopped parsley, and basil. Add red pepper flakes if desired. Season with salt and pepper, and cook for an additional minute.
- Gently add the drained noodles to the skillet and toss to coat in the garlic herb butter. If too dry, add reserved pasta water gradually until desired consistency is reached.
- Remove from heat, taste, and adjust seasoning as necessary. Plate the noodles in serving bowls.
- Sprinkle with freshly grated Parmesan cheese and serve immediately with lemon wedges on the side.

![To make honey garlic glazed carrots, gather these items: - 1 lb baby carrots (or 4-5 regular carrots, peeled and cut into sticks) - 3 tablespoons honey - 2 tablespoons unsalted butter - 2 cloves garlic, minced - 1 tablespoon fresh ginger, finely grated - Salt and freshly ground black pepper to taste - 2 tablespoons fresh parsley, finely chopped (for garnish) You can change up the flavor with these ingredients: - 1 teaspoon red pepper flakes for heat - 1 tablespoon soy sauce for depth - 1 tablespoon lemon juice for brightness - Chopped nuts like walnuts or pecans for crunch When selecting carrots, look for these signs: - Choose bright orange carrots without dark spots. - Check for firmness; soft carrots may be old. - Look for greens if buying whole carrots; they should be fresh and vibrant. - Avoid carrots with cracks or wrinkles, as they may be dry. These tips help ensure you use the best carrots for your dish. Fresh carrots enhance the taste and texture of your honey garlic glazed carrots. For the full recipe, don't forget to check the complete instructions! 1. Start by washing your carrots well. If you use regular carrots, peel them. Then, cut them into sticks. Baby carrots need less prep. Just wash them. 2. Take a large skillet and add the unsalted butter. Heat it on medium. Watch closely until it starts to foam. 3. Next, add the minced garlic and grated ginger. Stir them for 1-2 minutes. You want them to smell great but not brown. 4. Now, pour in the honey. Mix it well with the garlic and ginger. This makes a tasty glaze. 5. Carefully add your carrots into the skillet. Use tongs or a spoon to toss them in the glaze. Make sure they get covered well. 6. Season with salt and black pepper to taste. Lower the heat and cover the skillet. Cook for 10-15 minutes. Stir them a bit to cook evenly. They should be tender but not mushy. 7. When the carrots are done, remove the lid. Turn the heat back to medium. Sauté them uncovered for 2-3 minutes. This helps the glaze become sticky. 8. Finally, take the skillet off the heat. Move the glazed carrots to a serving dish. Garnish with fresh parsley for a bright touch. - Prep: Use a sharp knife for even cuts. This helps with cooking time. - Sautéing: Keep the heat steady. This prevents burning the garlic. - Glaze: Watch for a shiny, thick look. That means it's ready to serve. - Don’t burn the garlic. It can turn bitter fast. - Avoid overcrowding the pan. This can lead to uneven cooking. - Don’t skip the garnish. Fresh parsley adds flavor and color. By following these steps, you can create delicious honey garlic glazed carrots that everyone will love! For the full recipe, check out the [Full Recipe]. To get the best glaze, start with fresh ingredients. Use high-quality honey for more flavor. Heat the butter slowly to avoid burning. Once the garlic and ginger smell great, add the honey. Stir it well to mix the flavors. Cook the carrots in the glaze until they are tender but not mushy. This gives you that nice sticky texture. Don't forget to sauté them uncovered at the end. This helps the glaze thicken and shine. Serve your honey garlic glazed carrots in a shallow bowl. This way, the glossy glaze stands out. Add an extra sprinkle of parsley on top for color. These carrots pair well with roasted chicken or grilled fish. You can also serve them alongside rice or quinoa for a nice meal balance. They make a great side dish for any dinner. Want to spice things up? Try adding fresh herbs like thyme or rosemary. A pinch of chili flakes can give a nice kick. You can also use lemon zest for a bright taste. If you like a deeper flavor, add a splash of soy sauce. Just remember, keep it balanced. You want the sweet honey to shine, too. For even more fun, try mixing in some nuts for crunch. {{image_4}} You can make honey garlic glaze work with many veggies. Try adding green beans, broccoli, or bell peppers. Cut them to the same size as the carrots. This helps them cook evenly. Each vegetable brings its own texture and flavor. You can mix and match to keep it fun! To make this dish vegan, swap butter for olive oil or coconut oil. This keeps the flavor rich while making it plant-based. Also, use maple syrup instead of honey. It gives a sweet touch that works great with garlic. Your dish will still taste amazing while being vegan-friendly. In fall, try using roasted squash or sweet potatoes. These add a lovely flavor. For a winter twist, consider using parsnips or turnips. If you want to avoid honey, you can use agave syrup or date syrup. Both are sweet and work well with garlic. Each season offers unique veggies to explore. After enjoying your honey garlic glazed carrots, let them cool down. Place leftovers in an airtight container. Make sure to store them in the fridge. They can last up to 3 days. If you notice any excess moisture, use a paper towel to absorb it. You can freeze honey garlic glazed carrots, but they may lose some texture. Place cooled carrots in a freezer-safe bag. Try to remove as much air as possible. They can stay good for about 2 months. When you’re ready to use them, thaw them in the fridge overnight. To reheat, you have a few options. You can use the microwave for quick warming. Heat in intervals, stirring in between to ensure even heating. If you prefer, reheat them on the stove. Add a splash of water or broth in a pan. This helps keep them moist. Heat on low until warmed through, stirring gently. For a crispy finish, sauté them in a pan for a few minutes. Enjoy your sweet and savory dish again! Yes, you can! While I love baby carrots, you can use regular carrots too. Just peel and cut them into sticks. This helps them cook evenly. If you want a fun twist, try rainbow carrots. They add color and taste to your dish. These glazed carrots pair well with many dishes. Try them with roasted chicken or grilled fish. They also go great with rice or quinoa. For a hearty meal, serve them with beef or pork. You can even add them to a veggie bowl for a healthy lunch. To thicken the glaze, cook it longer. Let it simmer until it reduces and gets sticky. If you want a thinner glaze, add a bit of water or broth. Stir well to combine. Adjust it to your taste and enjoy! For the full recipe, check out the detailed steps above. Honey garlic glazed carrots are a simple side dish. They bring sweet and savory flavors to your meal. The honey adds a nice touch of sweetness. Garlic and ginger give it a warm, spicy zing. This dish is perfect for any dinner, big or small. - Prep Time: 10 min - Cook Time: 15 min - Total Time: 25 min - Servings: 4 This recipe is quick and easy. You can have it ready in just 25 minutes. Each serving of honey garlic glazed carrots is about: - Calories: 150 - Fat: 7g - Carbohydrates: 23g - Fiber: 3g - Sugar: 12g - Protein: 1g These carrots are good for you and taste great. They are a fun way to add veggies to any meal. For the full recipe, you can check out the details above. This blog post covered all you need for honey garlic glazed carrots. We talked about key ingredients, cooking steps, and variations. You learned how to avoid common mistakes and store leftovers. Remember, fresh carrots boost flavor, and adding spices can elevate your dish. Try different vegetables or keep it vegan for new tastes. With these tips, you can serve a delicious side meal every time. Happy cooking!](https://dishtreats.com/wp-content/uploads/2025/07/6848e6f0-ffb0-4855-be77-9b0adbe9293f-768x768.webp)