Blueberry Crumb Coffee Cake Simple and Delicious Recipe

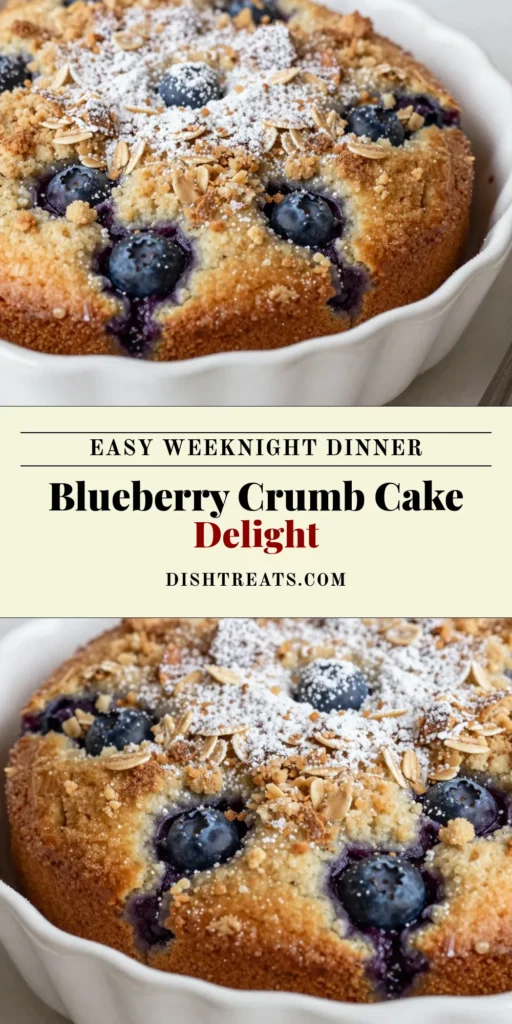
If you love blueberries and coffee cake, you’re in for a treat! This Blueberry Crumb Coffee Cake is simple to make and bursting with flavor. I’ll guide you step-by-step, from gathering ingredients to baking the perfect cake. You’ll discover tips for serving, storage, and even tasty variations. So grab your apron and let’s whip up a delicious delight that will impress family and friends!
Why I Love This Recipe
- Deliciously Moist: This coffee cake is incredibly moist thanks to the sour cream, making each bite a delightful experience.
- Blueberry Bliss: The fresh blueberries burst with flavor, adding a sweet and tangy contrast to the crumbly topping.
- Easy to Make: The straightforward steps make this recipe accessible for bakers of all skill levels.
- Perfect for Any Occasion: Whether it’s breakfast, brunch, or a snack, this coffee cake fits perfectly into any meal or gathering.
Ingredients
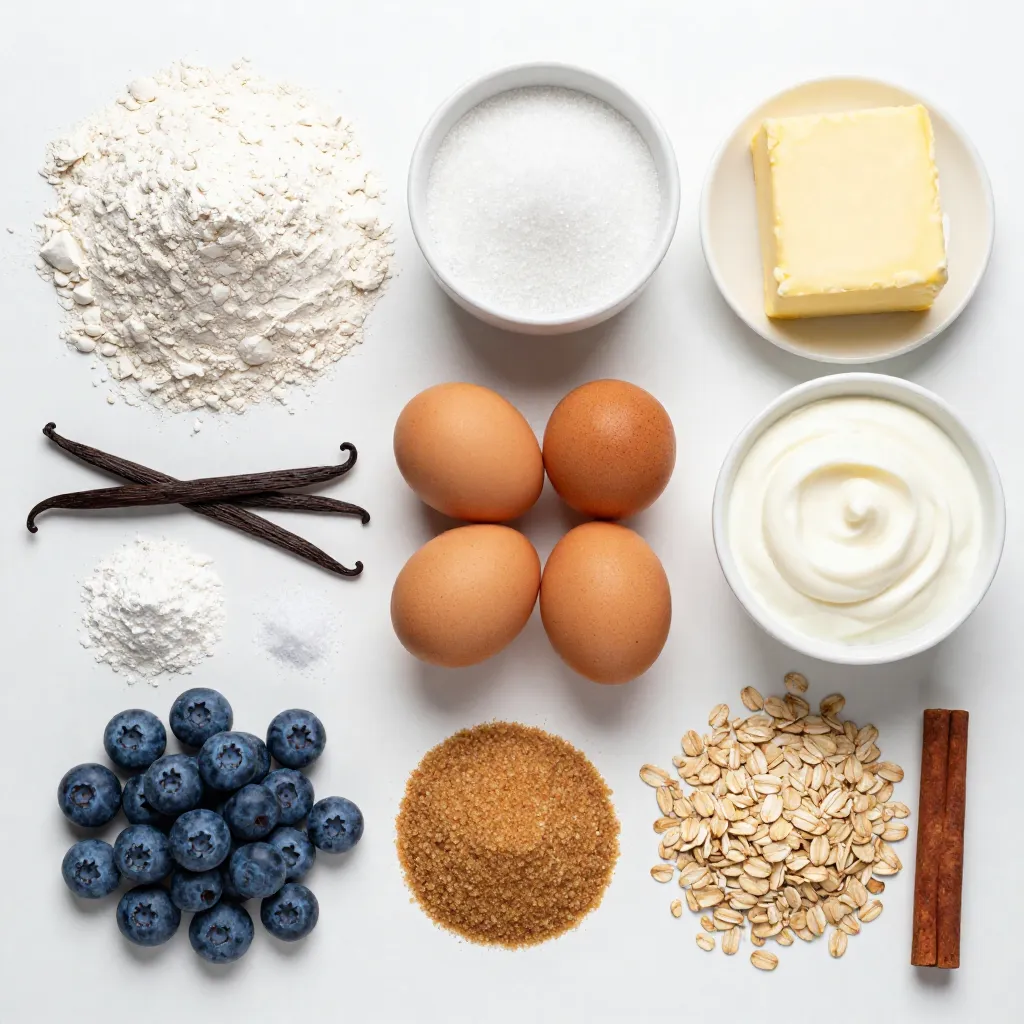
List of Ingredients
To make this blueberry crumb coffee cake, gather these simple ingredients:
- 2 cups all-purpose flour
- 1 cup granulated sugar
- 1/2 cup unsalted butter, softened
- 2 large eggs
- 1 cup sour cream
- 1 teaspoon vanilla extract
- 1 teaspoon baking powder
- 1 teaspoon baking soda
- 1/2 teaspoon salt
- 1 cup fresh blueberries, rinsed
- 1/2 cup brown sugar, packed
- 1/2 cup rolled oats
- 1 teaspoon ground cinnamon
Possible Substitutions for Key Ingredients
If you need to make changes, here are some great options:
- All-purpose flour: Use whole wheat flour for a healthier option.
- Sour cream: Greek yogurt works well and adds creaminess.
- Unsalted butter: Coconut oil can be a dairy-free choice.
- Fresh blueberries: Frozen blueberries can also work, but thaw them first.
- Granulated sugar: Brown sugar can add a deeper flavor.
These substitutions help you adjust the recipe without losing its delicious taste. Enjoy your baking!
Step-by-Step Instructions
Preparation Steps
1. Preheat your oven to 350°F (175°C).
2. Grease a 9×13 inch baking dish with butter. Dust it lightly with flour. This helps the cake not stick.
3. In a big bowl, mix the softened butter and granulated sugar. Beat it with an electric mixer for 3-4 minutes. The mix should be light and fluffy.
4. Add the eggs, one at a time. Make sure each egg mixes in well. Then, stir in the sour cream and vanilla extract until smooth.
5. In another bowl, whisk together flour, baking powder, baking soda, and salt. Mix until even.
6. Gradually add the dry mix to the wet mix. Stir gently. Don’t overmix. This keeps the cake tender.
Baking Process
1. Carefully fold in the fresh blueberries. Use a spatula for this. Make sure they spread throughout the batter without squishing.
2. Pour the batter into the prepared baking dish. Spread it out evenly.
3. For the crumb topping, mix brown sugar, rolled oats, cinnamon, and a little flour in a small bowl.
4. Drizzle a few tablespoons of melted butter into the mix. Use a fork to combine until it feels like wet sand.
5. Sprinkle the crumb topping over the batter. This gives it a tasty crunch.
6. Bake in the preheated oven for 40-45 minutes. Use a toothpick to check for doneness. It should come out clean.
7. Let the coffee cake cool in the pan for about 10 minutes. Slice it into squares and enjoy!
Tips & Tricks
Baking Tips
To make a moist coffee cake, use sour cream. It adds rich flavor and moisture. Don’t skip the butter either; it gives a nice texture. When mixing, beat your butter and sugar until fluffy. This step helps trap air, making the cake light.
Avoiding overmixing is key. When you combine wet and dry ingredients, stir gently. Stop mixing once you see no dry flour. Overmixing can make the cake tough, which we want to avoid.
Serving Suggestions
This coffee cake tastes great with coffee or tea. The warm flavors of blueberry pair well with a rich cup of coffee. You can also try it with a soothing herbal tea.
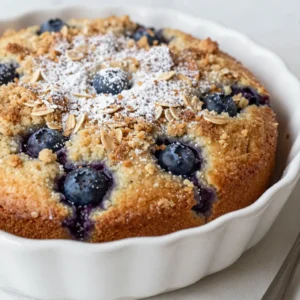
For a lovely presentation, serve the cake warm. Dust it lightly with powdered sugar. Add some fresh blueberries on top for color. This simple touch makes your coffee cake look special.
Pro Tips
- Fresh Blueberries: Always use fresh blueberries for the best flavor and texture. If using frozen, make sure to thaw and drain them to avoid excess moisture in the batter.
- Room Temperature Ingredients: Ensure your butter, eggs, and sour cream are at room temperature before mixing. This helps create a smoother batter and a lighter cake.
- Avoid Overmixing: Mix the batter just until combined to keep the cake tender. Overmixing can lead to a dense texture, so be gentle when folding in the dry ingredients.
- Cooling Time: Let the cake cool in the pan for about 10 minutes before slicing. This helps it set and makes it easier to cut without falling apart.
Variations
Different Berry Options
You can switch up the berries in this cake. Strawberries, raspberries, and blackberries all work well. Each berry brings its own flavor. Strawberries add sweetness, while raspberries give a nice tartness. Blackberries can add a juicy burst. Just be sure to rinse and dry them well before use.
Dietary Variations
If you need a gluten-free cake, use gluten-free flour. This works well in most recipes. It keeps the cake light and fluffy. For a vegan option, swap butter for coconut oil and use flax eggs. To make a flax egg, mix one tablespoon of ground flaxseed with three tablespoons of water. Let it sit for five minutes. This will help bind the cake.
Storage Info
Best Ways to Store
To keep leftover coffee cake fresh, wrap it tightly in plastic wrap. You can also place it in an airtight container. This keeps the cake moist and prevents it from drying out. Store it at room temperature for up to three days. If you want to keep it longer, refrigeration is a good choice. Just remember that it may lose some moisture in the fridge.
I recommend using glass or plastic containers that seal well. These containers help maintain the cake’s texture and flavor. Avoid using paper bags, as they do not keep moisture in.
Freezing Instructions
Freezing your coffee cake lets you enjoy it later. To freeze, cut the cake into squares. Wrap each piece in plastic wrap, then place them in a freezer bag. Make sure to remove any air from the bag to prevent freezer burn. You can freeze the cake for up to three months.
When you’re ready to eat it, take a piece out of the freezer. Let it thaw in the fridge overnight. If you want to eat it warm, you can reheat it in the oven at 350°F for about 10-15 minutes. This warms it up nicely and brings back its fresh taste.
FAQs
Common Questions
How to know when the coffee cake is done?
You can tell when the coffee cake is done by inserting a toothpick into the center. If it comes out clean, the cake is ready. The edges should be golden brown, and the center should feel set but springy.
Can I make this recipe ahead of time?
Yes, you can prepare the batter the night before. Just cover it and store it in the fridge. In the morning, pour it into your baking dish and add the crumb topping. Bake as usual, and enjoy fresh coffee cake!
Baking Related Queries
Why is my coffee cake dense?
A dense coffee cake can happen if you overmix the batter. Mix until just combined to keep it light. Also, check if your baking powder and baking soda are fresh, as old leavening agents can affect the rise.
Can I add nuts to the crumb topping?
Absolutely! Chopped nuts like walnuts or pecans work great in the crumb topping. They add a nice crunch and flavor. Just mix them in with the other crumb topping ingredients before sprinkling it on the cake.
This blog post covered how to make a delicious coffee cake. I shared the ingredients, detailed steps, and helpful tips to ensure great results. You learned about storage options and how to adapt the recipe for various diets.
Baking is fun and rewarding. With the right ingredients and techniques, you can create a tasty treat. Enjoy your coffee cake with friends and family, and don’t hesitate to experiment with different flavors. Happy bakin
Blueberry Bliss Crumb Coffee Cake
Ingredients
- 2 cups all-purpose flour
- 1 cup granulated sugar
- 0.5 cup unsalted butter, softened to room temperature
- 2 large eggs
- 1 cup sour cream
- 1 teaspoon vanilla extract
- 1 teaspoon baking powder
- 1 teaspoon baking soda
- 0.5 teaspoon salt
- 1 cup fresh blueberries, rinsed and drained
- 0.5 cup brown sugar, packed
- 0.5 cup rolled oats
- 1 teaspoon ground cinnamon
Instructions
- Begin by preheating your oven to 350°F (175°C). Prepare a 9x13 inch baking dish by greasing it with butter and lightly dusting it with flour to prevent the cake from sticking.
- In a large mixing bowl, combine the softened butter and granulated sugar. Beat the mixture with an electric mixer on medium speed for about 3-4 minutes until it becomes light and fluffy.
- Introduce the eggs into the mixture one at a time, ensuring each egg is fully incorporated before adding the next. After the eggs, stir in the sour cream and vanilla extract until the mixture is smooth and well blended.
- In a separate mixing bowl, whisk together the flour, baking powder, baking soda, and salt until evenly mixed. Slowly add this dry mixture to the wet ingredients, stirring gently just until combined—avoiding overmixing to keep the cake tender.
- Carefully fold in the fresh blueberries using a spatula, ensuring they are well-distributed throughout the batter without crushing them.
- Pour the batter into the prepared baking dish, spreading it evenly to ensure consistent baking.
- To make the crumb topping, in a small bowl, combine the brown sugar, rolled oats, cinnamon, and a handful of flour. Drizzle in a few tablespoons of melted butter and mix with a fork until the topping achieves a texture similar to wet sand.
- Evenly sprinkle the crumb topping over the batter in the baking dish for that delicious crunch.
- Bake in the preheated oven for 40-45 minutes, or until a toothpick inserted into the center comes out clean, indicating that the cake is done.
- After baking, allow the coffee cake to cool in the pan for about 10 minutes before slicing it into squares for serving.
. It will guide you through each step with details and tips. Enjoy cooking! In summary, we explored how to make delicious Roasted Garlic Parmesan Brussels Sprouts. I shared a full list of ingredients and options for substitutions. Fresh ingredients elevate taste and nutrition. You learned step-by-step instructions for perfect roasting, along with tips for flavor and presentation. Variations and storage tips help you customize and save leftovers. Remember to check FAQs for any lingering questions. Enjoy this simple yet tasty dish at your next meal!](https://dishtreats.com/wp-content/uploads/2025/08/f224f6d0-5adb-4fa1-b176-de066c43a5f2-3-768x768.webp)
![To make this tasty dip, you need a few key items: - 1 medium head of cauliflower, broken into bite-sized florets - 1 cup plain Greek yogurt (preferably full-fat for creaminess) - 1/2 cup shredded sharp cheddar cheese - 1/4 cup cream cheese, softened at room temperature - 1/4 cup buffalo sauce (adjust based on your heat preference) - 2 cloves garlic, finely minced - 1/2 teaspoon onion powder - 1/2 teaspoon smoked paprika for extra depth - Salt and freshly ground black pepper to taste These ingredients blend together to create a creamy, spicy dip that you will love. While the dip is great on its own, you can add some fun toppings. Here are some ideas: - Chopped green onions (scallions) for a fresh pop of color - Celery sticks for a crunchy contrast - Crispy tortilla chips for dipping These add-ons enhance both the look and taste of your dish. This dip is not just delicious; it's also packed with nutrients. Here’s a quick look at what you get: - Cauliflower: Low in calories, high in fiber - Greek yogurt: Good source of protein and probiotics - Cheese: Adds calcium and flavor Each serving is a great choice for a snack or appetizer. You can enjoy this dish without guilt! First, preheat your oven to 375°F (190°C). This step helps the dip cook well. Take a medium head of cauliflower and break it into bite-sized florets. Next, fill a large pot halfway with water and bring it to a boil. Once boiling, place a steamer basket inside the pot and add the cauliflower florets. Steam them for 8 to 10 minutes. You want them tender enough to pierce easily with a fork. After steaming, remove the florets from heat and let them cool for a few minutes. In a food processor, add the steamed cauliflower, 1 cup of plain Greek yogurt, 1/4 cup of softened cream cheese, and 1/4 cup of buffalo sauce. You can adjust the buffalo sauce to control the heat. Also, include 2 cloves of minced garlic, 1/2 teaspoon of onion powder, 1/2 teaspoon of smoked paprika, salt, and black pepper to taste. Blend until smooth and creamy. Scrape down the sides as needed. Then, gently fold in 1/2 cup of shredded sharp cheddar cheese. This adds great flavor and texture to the dip. Now, transfer the cauliflower mixture to your greased baking dish. Spread it out evenly using a spatula. Place it in the oven and bake for 20 to 25 minutes. You want the dip to be hot and the top to turn a light golden-brown color. When done, carefully take the dish out of the oven and let it cool for about 5 minutes. This rest time allows the flavors to blend. Don’t forget to garnish with chopped green onions before serving! Enjoy your warm dip with crunchy celery sticks and crispy tortilla chips. For the Full Recipe, you can refer back to the ingredients and instructions. To get the best flavor and texture from your dip, use fresh cauliflower. Steam it until it's tender but not mushy. This keeps the dip thick and creamy. Use full-fat Greek yogurt and cream cheese for added richness. They blend well and give a nice mouthfeel. Don't skip the garlic; it adds a punch of flavor. For spice lovers, adjust the buffalo sauce to your taste. You can easily modify this dip for different diets. For a vegan option, swap Greek yogurt and cream cheese for cashew cream or coconut yogurt. Use nutritional yeast for that cheesy flavor without dairy. If you want a low-carb option, serve it with sliced veggies instead of chips. This way, everyone can enjoy it without feeling left out. This dip works for many occasions. For game days, serve it warm with crispy tortilla chips. At parties, set it out with celery sticks and carrot sticks for a colorful platter. If you're hosting a casual dinner, pair it with toasted bread or pita chips. This dip can fit into any setting, making it a versatile choice. You can find the full recipe to make it just right! {{image_4}} To make a vegan version, swap Greek yogurt for cashew cream or vegan yogurt. Use vegan cream cheese instead of regular cream cheese. You can also choose nutritional yeast for a cheesy taste without dairy. Adjust the buffalo sauce based on your heat level. This version keeps the flavor while being plant-based. If you love heat, add extra buffalo sauce or some diced jalapeños. For a cheesier dip, mix in more shredded vegan cheese or cheddar. You can even top it with cheese before baking for a bubbly, golden finish. This variation will delight cheese lovers and spice fans alike. While celery sticks and tortilla chips are classic, try using sliced bell peppers or cucumber sticks. Pita chips or even crispy veggies add a nice crunch. For a fun twist, serve with mini pretzels for a salty kick. These options keep it fresh and exciting! For the full recipe, visit the [Full Recipe] page. To store leftover dip, let it cool first. Place it in an airtight container. This keeps the dip fresh for up to three days. You can also cover it tightly with plastic wrap. Make sure no air gets in, as this can spoil the dip. When you're ready to enjoy it again, scoop out what you need. Reheat in the oven for best results. Preheat your oven to 350°F (175°C). Place the dip in an oven-safe dish and cover it with foil. Heat for about 15-20 minutes, or until it's warm. You can also use the microwave. Heat in short bursts, about 30 seconds, stirring in between until hot. You can freeze Cauliflower Buffalo Dip for up to three months. Use a freezer-safe container. Leave some space at the top, as the dip may expand. To thaw, move it to the fridge overnight. Reheat it as mentioned above. The texture may change slightly, but the taste remains delicious. Enjoy this tasty dip anytime! Yes, you can use various cheeses. Creamy cheeses like goat cheese or ricotta work well. You could also try mozzarella for a milder taste. Each cheese changes the dip's flavor and texture. Mixing cheeses can create a unique taste. Just keep the total amount the same as the recipe calls for. You have many fun options for serving this dip. Here are a few ideas: - Crispy tortilla chips - Fresh celery sticks - Carrot sticks - Pita bread or chips - Crackers These choices add crunch and flavor. You can even make a veggie platter for a colorful spread. The dip's spice level depends on the buffalo sauce you use. Some sauces are very hot, while others are mild. If you like less heat, use less buffalo sauce. You can taste and adjust as you mix. This way, you control the spice to suit your taste. In this blog post, I covered how to make tasty Cauliflower Buffalo Dip. You learned about the key ingredients, how to prepare, and bake the dip. I shared tips for the best flavor and texture, plus easy variations to try. Storage tips ensure your leftovers stay fresh. Cauliflower Buffalo Dip is great for any party. Enjoy experimenting with flavors and tweaks. I hope you make this dish and share it with others. It’s sure to be a hit!](https://dishtreats.com/wp-content/uploads/2025/07/091f7212-5f30-4b51-84f4-e8795fa9d64a-768x768.webp)