
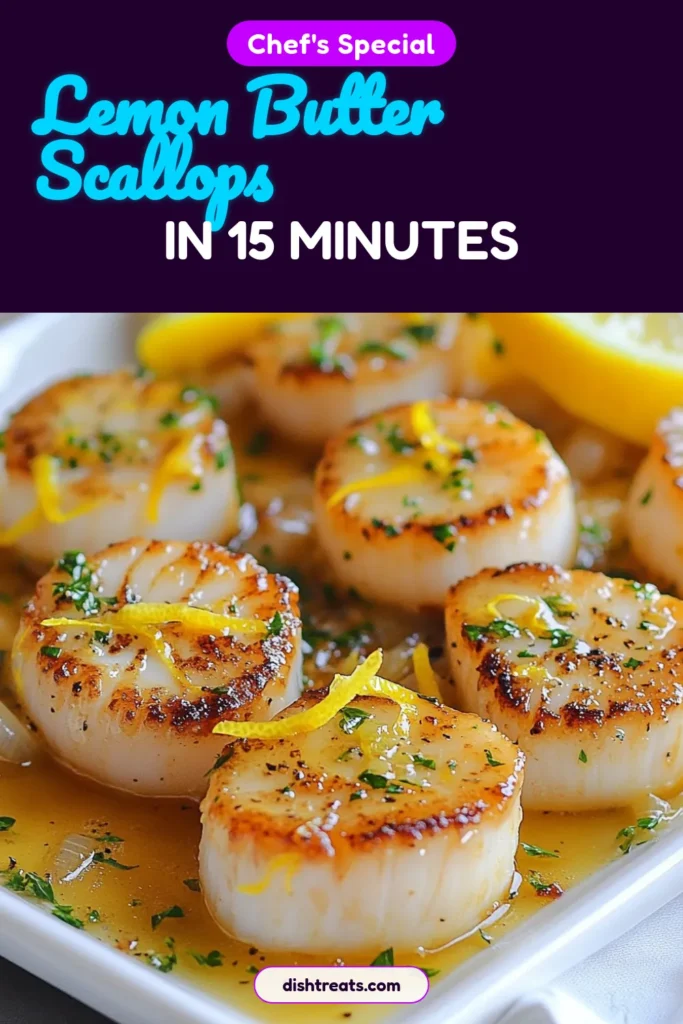
Lemon Butter Scallops Savory and Easy Delight
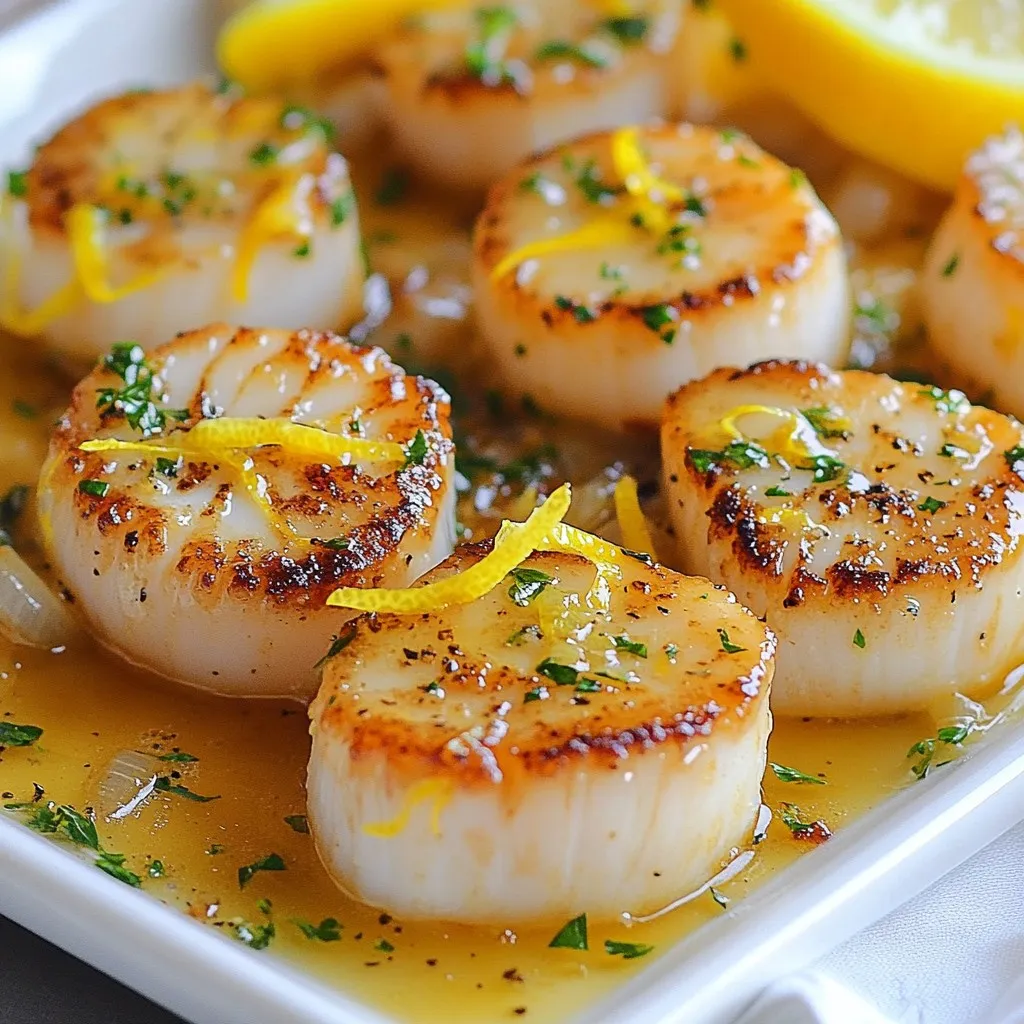
If you’re craving a meal that’s both rich and simple, try Lemon Butter Scallops. This dish is a game-changer for dinner parties or a cozy night in. You’ll learn how to cook tender scallops with a zesty lemon butter sauce that makes your taste buds sing. Follow my easy steps and tips, and you’ll impress everyone at your table. Let’s dive into this savory delight!
Why I Love This Recipe
- Quick to Prepare: This recipe comes together in just 15 minutes, making it perfect for a weeknight dinner or last-minute entertaining.
- Flavor Explosion: The combination of garlic, lemon, and butter creates a rich, zesty sauce that elevates the delicate flavor of the scallops.
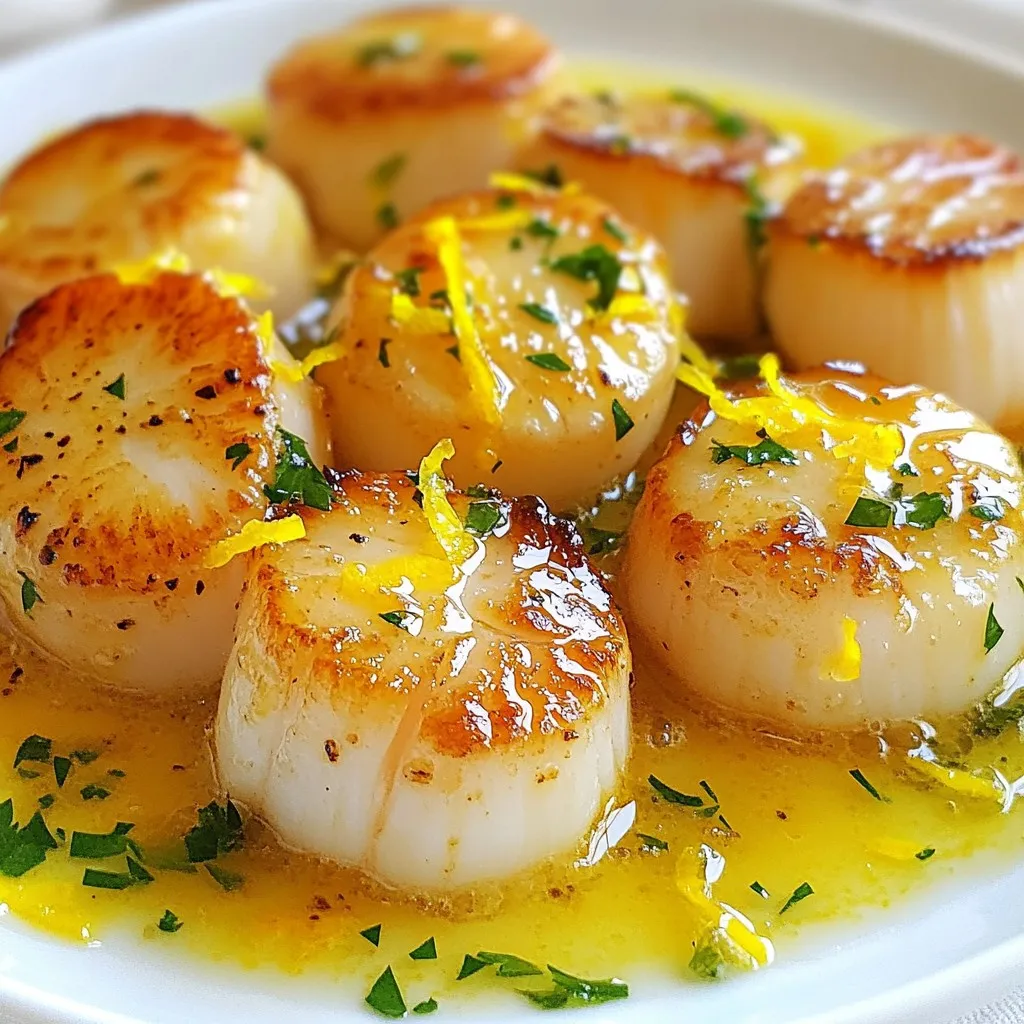
- Impressive Presentation: Beautifully seared scallops, drizzled with a vibrant lemon garlic sauce, make for an elegant dish that impresses guests.
- Healthy and Delicious: Packed with protein and healthy fats, this dish is both nourishing and indulgent, satisfying both your taste buds and dietary goals.
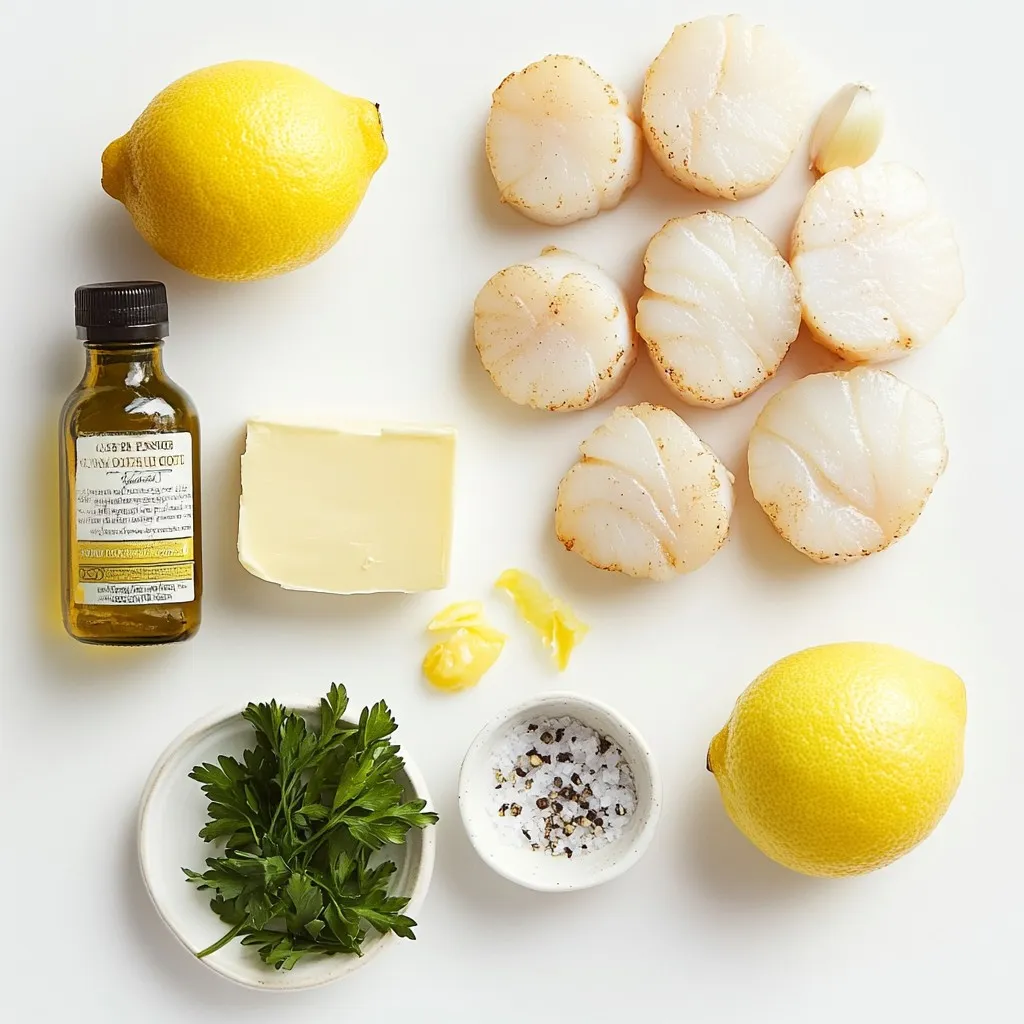
Ingredients
Fresh Sea Scallops
You need 1 pound of fresh sea scallops for this dish. Make sure they are cleaned and patted dry. Dry scallops sear better and will have a nice crust.
Butter and Olive Oil
Use 4 tablespoons of unsalted butter. This adds rich flavor. Combine it with 2 tablespoons of extra virgin olive oil. The oil raises the smoke point, helping you sear the scallops without burning.
Garlic and Lemon Components
For a tasty boost, you will need 2 cloves of finely minced garlic. The garlic adds depth. Also, zest one medium lemon and squeeze 2 tablespoons of fresh lemon juice. The zest gives a bright aroma while the juice adds a tangy finish.
Seasoning and Garnish
Add salt and pepper to taste. These simple seasonings enhance the scallops’ natural flavor. Finally, finely chop some fresh parsley for garnish. It adds a pop of color and freshness to your dish.
Step-by-Step Instructions
Preparing the Scallops
Start with fresh sea scallops. Make sure they are clean and dry. Pat them down with paper towels. This helps to get a nice sear. If you skip this step, they won’t brown well.
Heating the Pan for Searing
Grab a heavy skillet. Add 2 tablespoons of unsalted butter and 2 tablespoons of olive oil. Heat it over medium-high heat. Wait until the mixture shines but does not smoke. This makes the perfect setting for searing.
Searing the Scallops
Carefully place the scallops in the hot skillet. Do not crowd them. Leave some space between each scallop. Sear them on one side for 2-3 minutes. Look for a golden crust to form. This shows they are ready to flip.
Adding Garlic and Finishing Touches
Gently flip each scallop. Add minced garlic and the rest of the butter. Cook for another 2-3 minutes. The scallops should turn opaque. Be careful not to overcook them, or they will get tough.
Serving Suggestions
Remove the pan from heat. Drizzle fresh lemon juice over the scallops right away. This helps all the flavors combine. Serve the scallops on a platter. Pour the buttery garlic sauce over them. Lastly, sprinkle chopped parsley for color and taste.
Tips & Tricks
Achieving the Perfect Sear
To get that nice golden crust, start with dry scallops. After cleaning, pat them with paper towels. A dry surface helps in searing. Use a hot pan with a mix of butter and olive oil. The heat should shimmer but not smoke. When you add scallops, avoid crowding the pan. This allows each scallop to sear evenly. Cook for 2-3 minutes without moving them. Look for a beautiful golden color before flipping.
How to Avoid Overcooking
Scallops cook fast, so watch them closely. After flipping, they only need another 2-3 minutes. They should turn opaque when done. If they feel hard, you’ve cooked them too long. Use a timer if needed. Remember, it’s better to undercook than overcook. You can always give them a little more time.
Enhancing Flavor with Additional Ingredients
To make your scallops even tastier, try adding herbs. Fresh parsley is a great garnish. You can also use thyme or basil for extra flavor. A splash of white wine can brighten the dish. If you like some heat, add red pepper flakes. For a richer taste, try using garlic butter. These little touches can make a big difference!
Pro Tips
- Pat Dry for Perfection: Ensure the scallops are thoroughly dried before cooking to achieve a beautiful sear and prevent steaming.
- Don’t Overcrowd the Pan: Cook the scallops in batches if necessary, as overcrowding can lead to uneven cooking and prevent a good sear.
- Watch the Cooking Time: Keep a close eye on the scallops, as they cook quickly; overcooking can result in a rubbery texture.
- Enhance with Fresh Herbs: Garnish with fresh parsley or even dill for an aromatic finish that elevates the dish’s flavors.
Variations
Herb-Infused Lemon Butter Scallops
To add a fresh twist, try herb-infused lemon butter scallops. You can use herbs like thyme or basil. Chop them finely and add them into the butter while it melts. This adds a great depth of flavor. The herbs will mix with the butter and make your dish shine. You’ll enjoy a delightful aroma and taste with every bite.
Scallops with a Spicy Twist
If you like heat, scallops with a spicy twist are for you. Add red pepper flakes to the butter while it heats. This will give your scallops a warm kick. You can also toss in some diced jalapeños for extra spice. Just be careful not to overdo it! This spicy variation makes the dish exciting and perfect for spice lovers.
Serving Ideas for Different Occasions
Serving lemon butter scallops can fit any event. For a fancy dinner, arrange them on a plate with lemon slices and fresh herbs. For a casual night, serve them in a bowl with crusty bread. You can pair scallops with rice or pasta for a hearty meal. They also go well with a crisp salad. Choose your side based on the mood and occasion!
Storage Info
How to Store Leftover Scallops
To store leftover scallops, place them in an airtight container. Cover them with plastic wrap to keep moisture in. Make sure the scallops cool down to room temperature first. Store them in the fridge for up to two days. Use a marker to label the container with the date. This helps to track freshness.
Reheating Tips for Best Results
When reheating scallops, use a skillet for the best results. Heat the skillet over low to medium heat. Add a small amount of butter or oil to the pan. Place the scallops in the skillet and warm them slowly. This keeps them from getting tough. Cook for about two to three minutes on each side. Check the temperature with a food thermometer. They should reach 145°F to be safe to eat.
Freezing Scallops for Later Use
You can freeze scallops if you want to save them for later. First, make sure they are clean and dry. Place them in a single layer on a baking sheet. Freeze them for about one hour. Once frozen, transfer the scallops to a freezer bag. Be sure to remove as much air as you can. Label the bag with the date. Frozen scallops can last for up to three months. To use them, thaw in the fridge overnight before cooking.
FAQs
What’s the best way to clean scallops?
To clean scallops, start by rinsing them under cold water. Next, remove the side muscle, which looks like a small rectangle. This muscle can be tough. After that, pat them dry with paper towels. Dry scallops sear better and taste great.
Can I use frozen scallops for this recipe?
Yes, you can use frozen scallops. Thaw them in the fridge overnight for best results. If you’re in a hurry, put them in cold water for 30 minutes. Make sure to dry them well before cooking. This helps keep them tender and juicy.
What to serve with Lemon Butter Scallops?
Lemon Butter Scallops pair well with many sides. Consider serving them with:
- Garlic bread
- Steamed asparagus
- Creamy risotto
- Fresh salad
- Mashed potatoes
These sides balance the rich flavors of the scallops.
How can I make this dish dairy-free?
To make this dish dairy-free, use olive oil instead of butter. You can also try vegan butter for a similar taste. Use the same amount as in the recipe. This keeps the dish rich and flavorful while meeting your dietary needs.
Cooking fresh sea scallops is simple and rewarding. We covered key ingredients, from scallops to garlic and lemon. The steps to prepare, sear, and serve scallops ensure a tasty dish. Tips and tricks help you avoid overcooking and enhance flavor. With variations, you can get creative for any occasion. Finally, proper storage and reheating keep leftovers fresh. Enjoy making scallops a regular part of your meal

Lemon Butter Scallops
Ingredients
- 1 lb fresh sea scallops, cleaned and thoroughly patted dry
- 4 tablespoons unsalted butter, divided
- 2 tablespoons extra virgin olive oil
- 2 cloves garlic, finely minced
- 1 medium lemon, zest
- 2 tablespoons freshly squeezed lemon juice
- to taste salt and pepper
- for garnish fresh parsley, finely chopped
Instructions
- Prepare the Scallops: Begin by ensuring that the scallops are completely dry; use paper towels to pat them down thoroughly. This step is crucial to achieving a beautifully seared exterior.
- Heat the Pan: In a large, heavy-bottomed skillet, combine 2 tablespoons of unsalted butter and 2 tablespoons of olive oil. Heat over medium-high heat until the mixture is shimmering but not smoking, creating the perfect environment for searing.
- Sear the Scallops: Carefully add the scallops to the skillet, making sure not to overcrowd the pan—this allows for even cooking. Sear the scallops for approximately 2-3 minutes on one side without moving them, watching for a lovely golden crust to form.
- Flip and Add Flavors: Gently flip each scallop and add the minced garlic and the remaining 2 tablespoons of unsalted butter to the pan. Continue cooking for an additional 2-3 minutes until the scallops turn opaque and are just cooked through, being cautious not to overcook them.
- Finish with Lemon Juice: Once cooked, carefully remove the skillet from heat and immediately drizzle the fresh lemon juice over the scallops while they are still in the pan, allowing the flavors to meld.
- Serve: Arrange the scallops elegantly on a serving platter, spooning the aromatic buttery garlic sauce from the pan over them. Top with a sprinkle of finely chopped parsley for a pop of color and freshness.
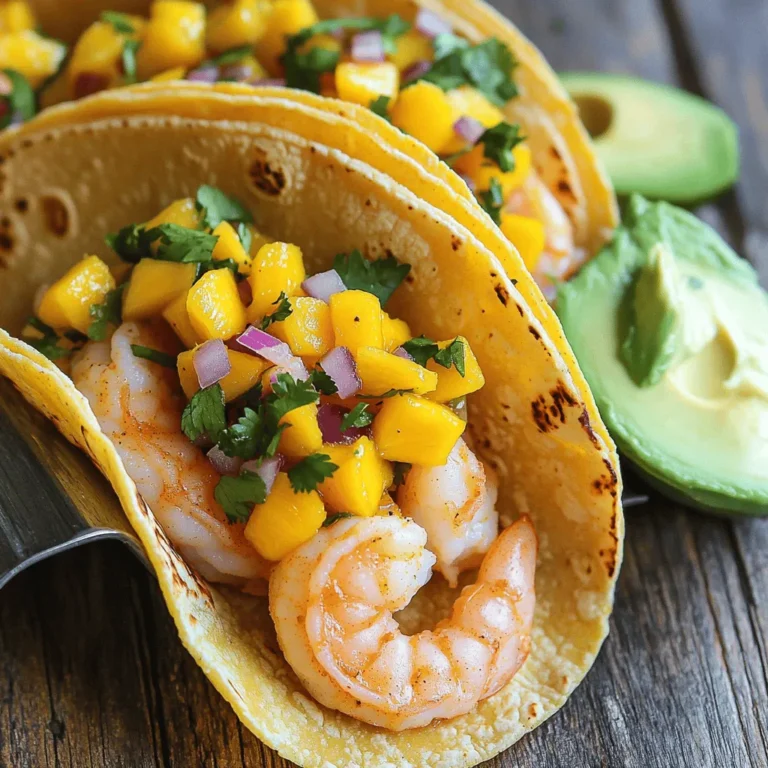
![To make tasty chicken gyros, you need fresh and simple ingredients. Here’s what you will need: - 500g chicken breast, thinly sliced - 2 tablespoons olive oil - 1 tablespoon dried oregano - 1 teaspoon garlic powder - 1 teaspoon onion powder - 1 teaspoon smoked paprika - Salt and freshly ground black pepper, to taste - 4 pita breads - 1 cup Greek yogurt - 1 tablespoon fresh lemon juice - 1 cucumber, finely diced - 1 ripe tomato, finely diced - 1 small red onion, thinly sliced - Fresh parsley, chopped, for garnish These ingredients work together to create a rich flavor for your gyros. The chicken pairs well with the spices. The tzatziki adds a creamy texture that balances the dish. Feel free to add more flavors to your gyros. Here are some optional ingredients: - Feta cheese, crumbled - Bell peppers, thinly sliced - Hot sauce or chili flakes for spice These extras can personalize your gyros. They can boost the taste and make your meal even more exciting. Garnishes make your gyros look pretty and add flavor. Here are some great ideas: - Extra tzatziki sauce on the side - Sliced olives for a briny kick - Fresh mint or dill for added freshness Serve your gyros with a side of simple salad or roasted potatoes. This adds to the fun and makes a complete meal. For the full recipe, check the earlier section! To start, you need to make the chicken marinade. In a big bowl, mix the chicken breast with olive oil, dried oregano, garlic powder, onion powder, smoked paprika, salt, and pepper. Ensure every piece is coated well. Cover the bowl with plastic wrap or a lid. Let it sit in the fridge for at least 30 minutes. You can even marinate it for up to 2 hours. This step helps the chicken soak up all the flavors. Next, heat your grill or skillet over medium-high heat. When it's hot, add the marinated chicken slices. Cook them for about 6 to 8 minutes. Make sure to turn them occasionally. You want them golden brown and fully cooked. Use a meat thermometer to check the chicken's internal temperature. It should reach 75°C (165°F) to be safe to eat. While the chicken cooks, prepare the tzatziki sauce. In a medium bowl, mix Greek yogurt, fresh lemon juice, finely diced cucumber, salt, and pepper. Stir it well and set it aside. Letting it sit helps the flavors blend together nicely. This sauce adds a cool taste to your gyros. It's a perfect match for the warm chicken. For the full recipe including all ingredients and steps, see [Full Recipe]. When making chicken gyros, many people make simple errors. Here are some to watch for: - Not marinating long enough: Marinate your chicken for at least 30 minutes. Longer gives better flavor. - Overcrowding the grill: Give each piece space. This helps the chicken cook evenly. - Skipping the meat thermometer: Always check if chicken is at 75°C (165°F). This keeps it safe to eat. You can easily change the recipe to fit your needs. Here are some ideas: - Gluten-free: Use gluten-free pita or lettuce wraps instead of pita bread. - Dairy-free: Swap Greek yogurt with a non-dairy yogurt for the tzatziki sauce. - Low-carb: Serve the chicken on a salad instead of using pita bread. Grilling chicken gyros can be easy with a few tips: - Heat control: Make sure your grill is hot before adding chicken. This gives nice grill marks. - Avoid pressing down: Don’t press the chicken with a spatula. This releases juices and dries it out. - Let it rest: Always let the chicken rest after cooking. This keeps it juicy when you slice it. Using these tips will help you craft great homemade chicken gyros. For the complete recipe, check out the Full Recipe section. {{image_4}} You can swap chicken with other meats. Try beef, lamb, or pork. Each protein brings its own taste. Marinate them the same way as chicken. This gives you tasty options for your gyros. For example, beef adds a rich flavor. Lamb has a unique zest. Pork is juicy and tender. All these variations keep your meals exciting. If you prefer plant-based meals, there are great choices. Use marinated mushrooms or eggplant as your base. Grilled zucchini or bell peppers work well too. For protein, try chickpeas or lentils. These options are filling and tasty. You can still make a delicious tzatziki sauce with vegan yogurt. This lets everyone join in on the fun. Want to change up the flavor? Add spices like cumin or coriander to the marinade. This gives your gyros a warm, earthy taste. You can also try different herbs, like mint or dill. They add a fresh twist. For a kick, include hot sauce or chili flakes. Each tweak can create a new flavor experience. Enjoy creating your own unique version of homemade chicken gyros. For the full recipe, check the earlier section. To keep your leftover gyros fresh, wrap them tightly. I recommend using plastic wrap or aluminum foil. This helps prevent air from getting in and keeps the flavors locked in. Place the wrapped gyros in an airtight container or a resealable bag. Store them in the fridge for up to three days. If you notice any extra moisture, you can add a paper towel inside to absorb it. Reheating gyros can be easy. To maintain their taste and texture, use a skillet or grill. Heat it over medium heat. Place the gyros in the skillet for about 3-4 minutes. Turn them halfway through so they warm evenly. If you prefer, you can also use a microwave. Just remember to wrap them in a damp paper towel. This keeps them from drying out. Heat for 30 seconds, then check. If they need more time, heat in 10-second bursts. If you want to save gyros for later, freezing is a great option. Start by letting the cooked chicken cool completely. Then, wrap the chicken in plastic wrap. Place it in a freezer-safe bag or container. You can freeze the chicken for up to three months. When you are ready to eat, thaw it in the fridge overnight. Reheat it as mentioned earlier. You can also freeze the tzatziki sauce separately. Just remember to stir it well after thawing. To make tzatziki sauce, mix Greek yogurt, fresh lemon juice, and diced cucumber. Add salt and pepper for taste. This sauce adds a cool, creamy touch to your gyros. It’s simple and fresh. Let it sit for a few minutes to blend the flavors. Yes, you can use store-bought pita bread. It saves time and works well. Just warm the pita on the grill or in a skillet. This makes it soft and ready to hold your tasty filling. Homemade pita is great, but store-bought is quick and easy. Serve chicken gyros with a side of Greek salad or roasted veggies. You can also add extra tzatziki for dipping. For drinks, try a refreshing lemonade or some iced tea. These sides enhance your meal and bring more flavor to the table. For the full recipe, check out the complete guide on making Homemade Chicken Gyros. Homemade chicken gyros are easy and fun to make. We covered key ingredients, cooking steps, and tips to avoid mistakes. You can add your own twist by using different proteins or flavors. Storing leftovers or prepping meals ahead keeps dinner simple. With all this info, you can create a tasty meal your whole family will love. Enjoy making gyros that bring great joy to your table!](https://dishtreats.com/wp-content/uploads/2025/06/a33d49ac-ff2d-4809-8657-a37e258bd1fd-768x768.webp)