
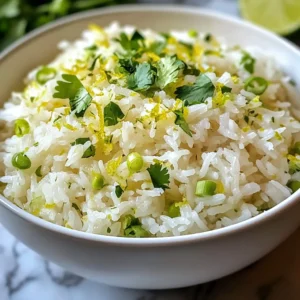
Coconut Lime Rice Fresh Flavors in Every Bite
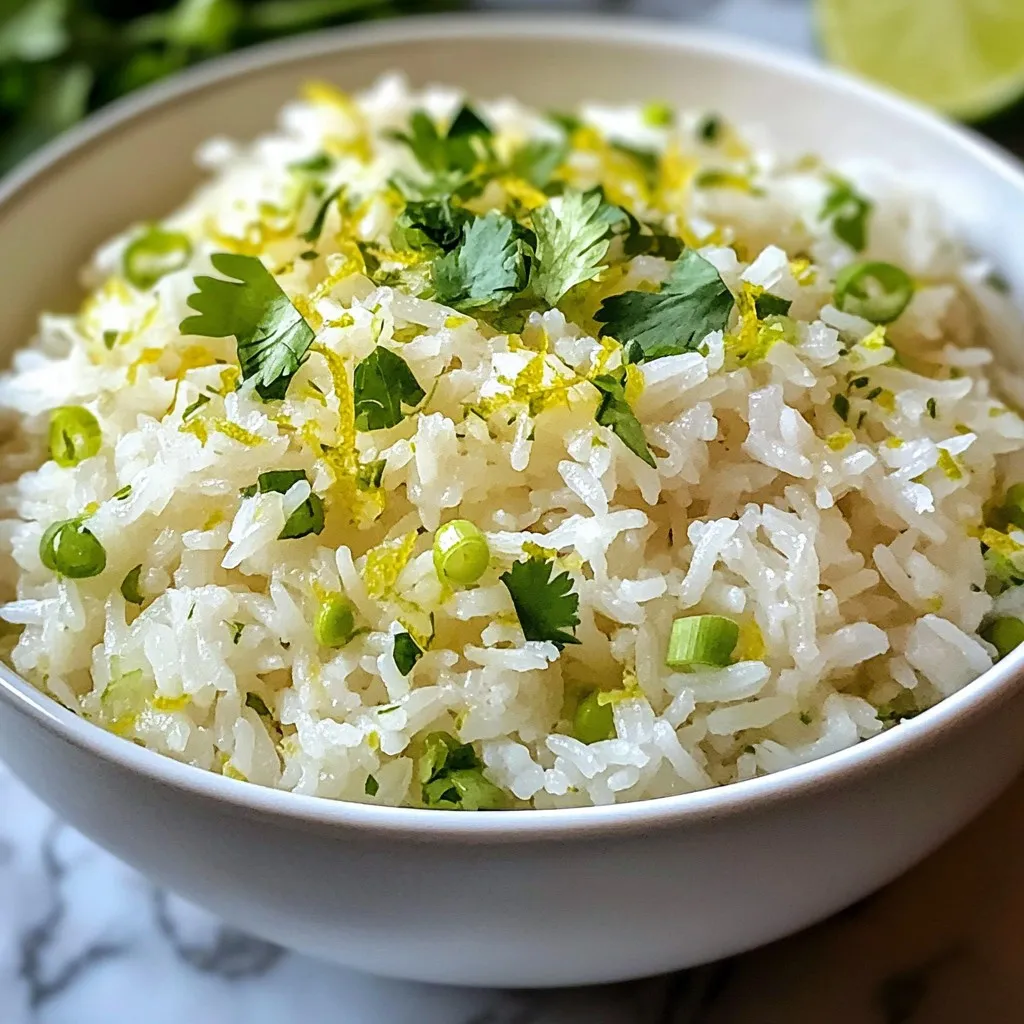
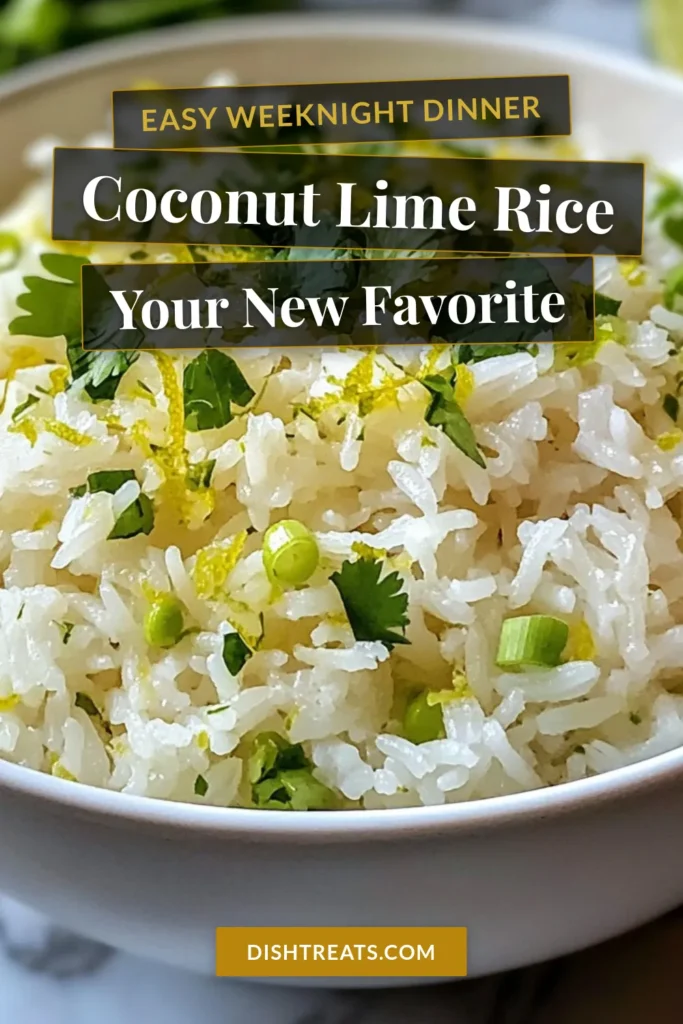
Coconut Lime Rice brings a burst of flavor to any meal. You’ll love how the creamy coconut and zesty lime blend perfectly in every bite. This dish is not just tasty; it’s easy to make! In this post, we’ll explore the best ingredients, share step-by-step instructions, and give you tips to get it just right. Let’s dive into this fresh favorite and make your next meal unforgettable!
Why I Love This Recipe
- Refreshing Flavor: The combination of coconut and lime creates a light and zesty flavor that is perfect for any occasion.
- Easy to Make: This recipe requires minimal ingredients and straightforward steps, making it accessible for cooks of all levels.
- Versatile Side Dish: Coconut lime rice pairs beautifully with a variety of dishes, from grilled meats to vegetarian options.
- Beautiful Presentation: Garnished with fresh cilantro or green onions, this dish adds a vibrant touch to your table.
Ingredients
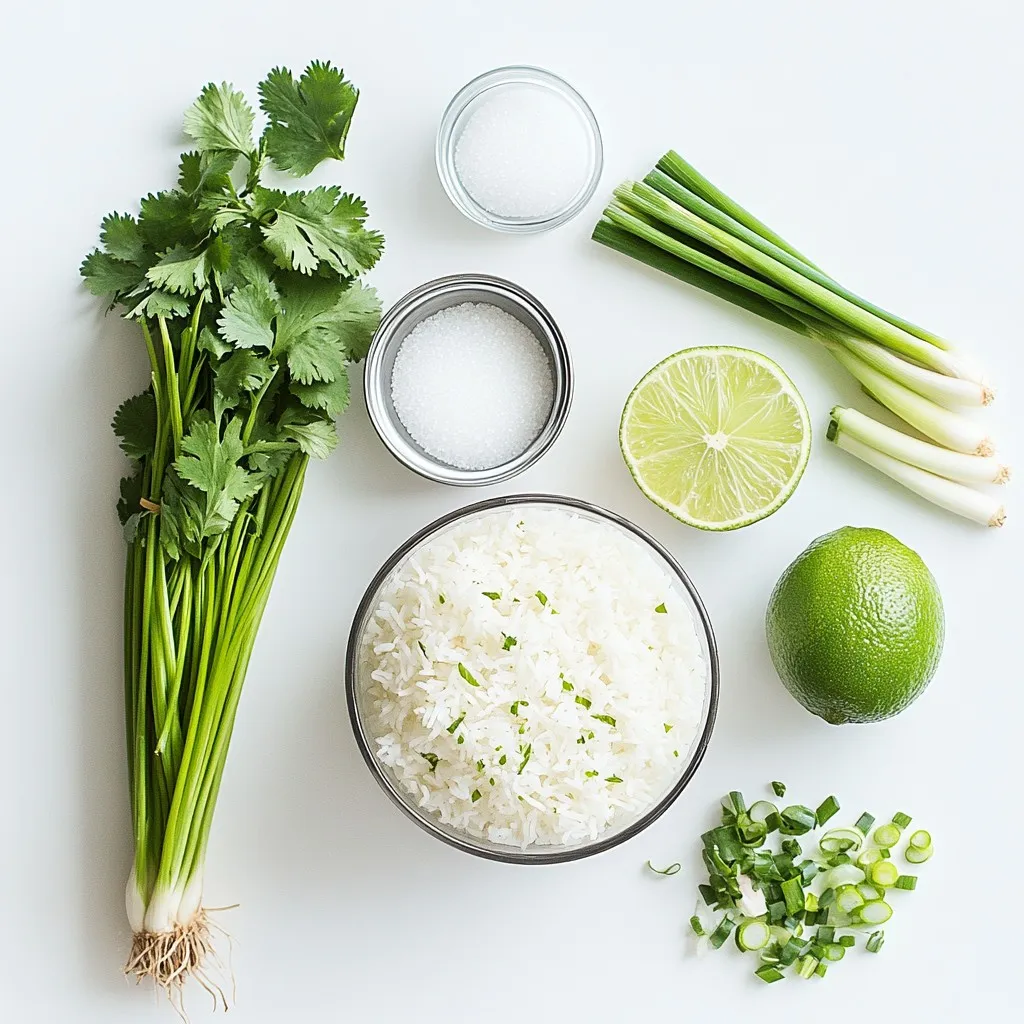
Essential Ingredients for Coconut Lime Rice
To make coconut lime rice, you need a few key ingredients:
- 1 cup jasmine rice
- 1 cup coconut milk
- 1/2 cup water
- Zest of 1 lime
- Juice of 1 lime
- 1/2 teaspoon salt
These ingredients create a creamy, fragrant rice dish. The jasmine rice gives it a nice texture. Coconut milk adds richness, while lime brings a fresh, zesty flavor.
Optional Ingredients & Flavor Enhancers
You can enhance the dish with these optional ingredients:
- 1 tablespoon sugar (adjust to taste)
- Fresh cilantro, chopped, or green onions, sliced, for garnish
Adding sugar can balance the lime’s tartness. The cilantro or green onions make the dish look pretty and add a burst of flavor.
Substitutions and Alternatives
If you don’t have jasmine rice, you can use basmati rice. It will still taste great. For dairy-free options, use coconut cream instead of coconut milk. If you want a spicier kick, add a pinch of chili flakes. Always feel free to adjust the ingredients to make it your own!
Step-by-Step Instructions
Preparing the Rice
First, rinse the jasmine rice under cold water. This step is key. Rinsing removes excess starch. This helps the rice stay fluffy and not sticky. Keep rinsing until the water runs clear. It usually takes a few minutes.
Mixing Ingredients Together
In a medium saucepan, mix the rinsed rice with the coconut milk and water. Add the lime zest and juice. If you like, add sugar and salt too. Stir gently to combine everything well. This blend gives the rice its fresh taste.
Cooking and Resting the Rice
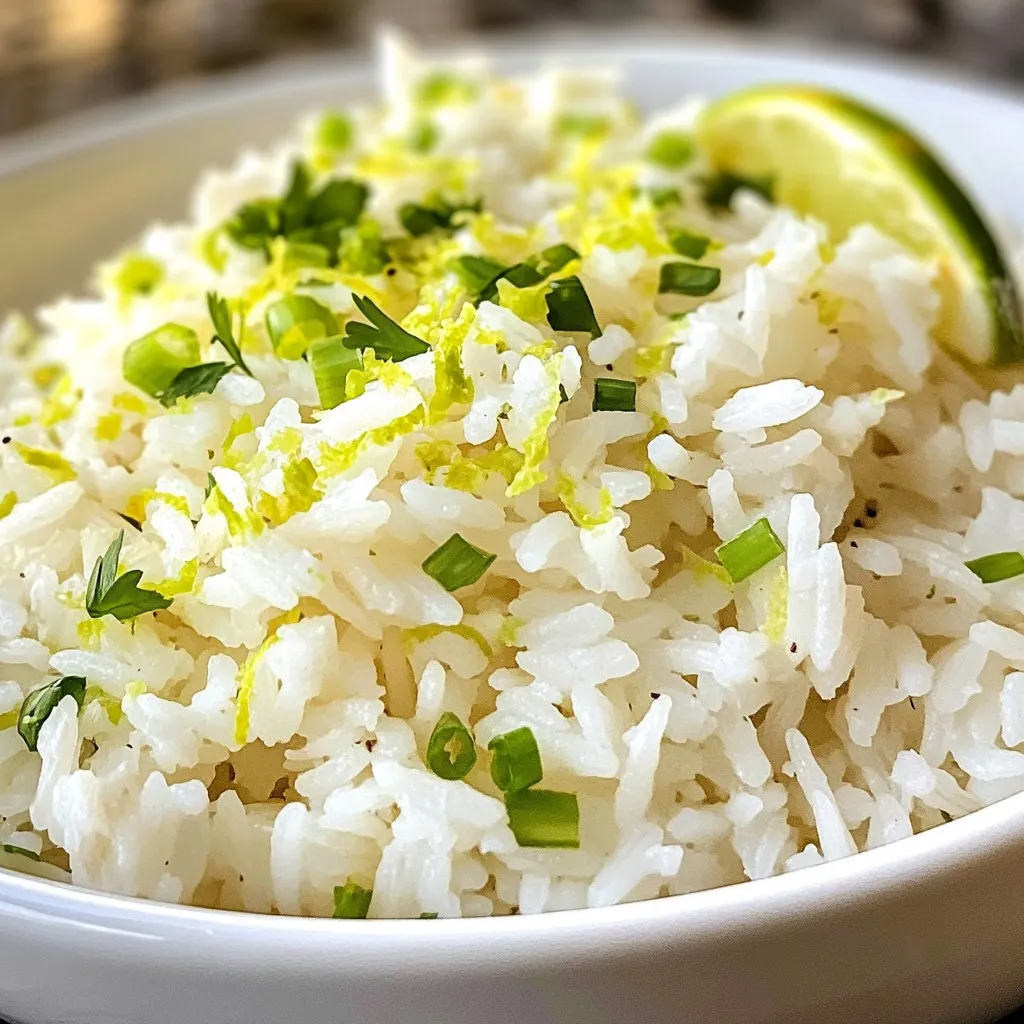
Place the saucepan over medium heat. Watch as the mixture comes to a gentle boil. This takes just a few minutes. Once it starts boiling, reduce the heat to low. Cover the saucepan tightly and let it simmer for 15 to 20 minutes. The rice will absorb all the liquid and get tender. After cooking, remove the saucepan from heat but keep it covered. Let it rest for 5 minutes. This resting time helps steam the rice. Finally, use a fork to fluff the rice gently. Taste it! Adjust the sweetness or salt to your liking. Serve the rice warm and garnish with fresh cilantro or green onions for added flavor.
Tips & Tricks
Achieving Perfectly Fluffy Rice
To get fluffy rice, start with rinsing the jasmine rice. Rinse it under cold water until the water runs clear. This step removes extra starch, which helps the rice cook evenly. After rinsing, mix the rice with coconut milk and water in a saucepan. Bring it to a gentle boil, then lower the heat and cover it tight. Let it simmer for 15 to 20 minutes. Once done, let it rest for 5 minutes before fluffing with a fork. This resting time is key to fluffy rice.
Flavor Variations for Coconut Lime Rice
You can play with flavors in coconut lime rice. Try adding a pinch of ginger or garlic for warmth. Fresh herbs like mint or basil can also add a nice twist. For a touch of heat, add chopped jalapeño or red pepper flakes. If you want a tropical vibe, mix in some pineapple chunks or mango pieces. Each variation brings a new taste to this delicious dish.
Common Mistakes to Avoid
Avoid using too much water, as it makes rice mushy. Stick to the recipe’s liquid amounts for best results. Don’t skip rinsing the rice; this step is very important. Also, don’t rush the cooking process. Let the rice simmer slowly and rest afterward to reach its full potential. Lastly, adjust flavors only after cooking, so you can taste and see what it needs.
Pro Tips
- Rinse Thoroughly: Make sure to rinse the jasmine rice until the water runs clear to achieve the perfect texture and avoid gumminess.
- Adjusting Sweetness: The sugar is optional, so taste and adjust to your preference. You can also substitute with honey or agave for a different flavor.
- Perfect Lime Flavor: Use fresh lime juice and zest for a brighter flavor. Avoid bottled lime juice, which can be less vibrant.
- Resting Time: Don’t skip the resting time after cooking; it helps the rice become fluffier and allows the flavors to meld.
Variations
Vegan Coconut Lime Rice
You can easily make coconut lime rice vegan. Simply use coconut milk and water as is. This version keeps the creamy texture and bright taste. Many love it for its tropical flavor. If you want extra sweetness, add a bit of maple syrup. This gives a nice twist without dairy. You can also leave out the sugar for a more natural taste.
Coconut Lime Rice with Vegetables
Adding veggies is a great way to boost nutrition. Consider using peas, bell peppers, or carrots. Chop them finely and mix them in while cooking. This method allows the veggies to absorb the coconut flavor. They stay bright and crisp, adding color to your dish. You can also sauté the veggies first for a deeper taste. Enjoy a hearty meal that’s still light and refreshing.
Spicy Coconut Lime Rice
If you like heat, try adding some spice! You can mix in fresh chili peppers or red pepper flakes. This adds a kick that complements the coconut and lime. Adjust the spice level to fit your taste. Start with a small amount and add more as needed. You can also serve it with a spicy sauce on the side for extra flavor. This version excites your taste buds and pairs well with many main dishes.
Storage Info
How to Store Leftover Coconut Lime Rice
To keep your leftover coconut lime rice fresh, let it cool first. Transfer it to an airtight container. Store it in the fridge for up to four days. This method helps the rice stay moist and tasty.
Reheating Instructions for Best Results
When you are ready to eat the rice, take it out of the fridge. Place the rice in a saucepan. Add a splash of water or coconut milk to help it steam. Heat it on low heat, stirring often. This will keep the rice from drying out. You can also use a microwave. Just cover it with a damp paper towel to keep moisture in.
Freezing Coconut Lime Rice for Future Use
If you want to save coconut lime rice for later, freezing is a great option. Allow the rice to cool completely. Transfer it to a freezer-safe bag or container. Make sure to remove as much air as possible before sealing. You can freeze it for up to three months. When you’re ready to eat, thaw it in the fridge overnight. Reheat it as mentioned above for the best taste.
FAQs
What type of rice is best for Coconut Lime Rice?
I recommend using jasmine rice for Coconut Lime Rice. Jasmine rice is fragrant and fluffy. It absorbs the coconut milk well, giving a rich flavor. Other rice types may not have the same aroma or texture.
Can I make Coconut Lime Rice ahead of time?
Yes, you can prepare Coconut Lime Rice ahead of time. Cook it, then let it cool. Store it in an airtight container in the fridge. This way, you can enjoy it whenever you want. Just reheat it gently before serving.
How do I adjust the sweetness in Coconut Lime Rice?
You can adjust the sweetness by adding or reducing sugar. If you like it sweeter, add more sugar. Start with a small amount and taste as you go. Lime juice also balances sweetness, so use it wisely.
Can Coconut Lime Rice be served cold?
Coconut Lime Rice can be served cold, but it’s best warm. Cold rice works well in salads or as a side dish. If you enjoy a chilled dish, try adding fresh veggies or a light dressing.
Coconut lime rice is simple to make and full of flavor. You learned about key ingredients, cooking steps, and ways to avoid mistakes. The variations give you many options to try. Remember, you can store leftovers easily for later meals. Enjoy this dish as a side or main course. I hope you feel confident to make coconut lime rice at home. It’s a tasty treat that everyone will lov
Coconut Lime Rice Delight
Ingredients
- 1 cup jasmine rice
- 1 cup coconut milk
- 1 2 water
- 1 lime zest of
- 1 lime juice of
- 1 tablespoon sugar (optional, adjust to taste)
- 1 2 salt
- to taste Fresh cilantro, chopped, or green onions, sliced, for garnish
Instructions
- Rinse the jasmine rice under cold running water until the water becomes clear.
- In a medium saucepan, mix the rinsed rice with coconut milk, water, lime zest, lime juice, sugar (if using), and salt. Stir gently to combine.
- Place the saucepan on medium heat and bring the mixture to a gentle boil.
- Once boiling, decrease the heat to low, cover the saucepan tightly, and let it simmer for about 15-20 minutes.
- After cooking, remove the saucepan from heat and let it sit covered for an additional 5 minutes.
- Use a fork to fluff the rice gently and taste to adjust sweetness or salt levels.
- Serve warm, garnished with freshly chopped cilantro or sliced green onions.

![To make this dish, you need some key items. Gather the following ingredients: - 3 cups cooked rotini pasta - 2 cups cooked chicken, shredded - 1 cup fresh mushrooms, sliced (white or cremini) - 2 cups heavy cream - 1 cup grated Parmesan cheese - 1 cup shredded mozzarella cheese - 2 cloves garlic, minced - 1 tablespoon olive oil - 1 teaspoon dried Italian herbs (such as oregano, basil, and thyme) - Salt and freshly ground black pepper, to taste - Fresh parsley, chopped (for garnish) These ingredients come together to create a creamy, rich dish that warms the soul. You can add more fun to your Chicken and Mushroom Alfredo Bake. Here are some optional items to consider: - Sun-dried tomatoes for a tangy twist - Spinach or kale for added greens - Cooked bacon for extra flavor - More cheese for a cheesier bake These add-ins make the dish your own and can enhance its taste and texture. Seasonings can elevate the dish. Here are some suggestions: - Fresh thyme or rosemary for bright flavor - Crushed red pepper flakes for heat - Extra Parmesan or mozzarella on top for a golden crust - A drizzle of truffle oil for a gourmet touch These toppings can take your Chicken and Mushroom Alfredo Bake to the next level. For the full recipe, follow the steps closely, and enjoy this creamy delight! Start by preheating your oven to 375°F (190°C). This step is key for even cooking. While the oven warms up, take a 9x13-inch baking dish. Grease it lightly with cooking spray or a bit of olive oil. This will help the pasta bake not stick to the dish. Next, grab a large skillet and heat 1 tablespoon of olive oil over medium heat. Once hot, add 2 cloves of minced garlic. Sauté this for about 1 minute. You want it fragrant but not brown. Now, toss in 1 cup of sliced mushrooms. Cook these for around 5 minutes, stirring often. They should become tender and release their juices. Add salt and black pepper to boost their flavor. In a big mixing bowl, combine 3 cups of cooked rotini pasta and 2 cups of shredded chicken. Next, add the sautéed mushrooms and 2 cups of heavy cream. Sprinkle in half of the 1 cup of grated Parmesan cheese and 1 teaspoon of dried Italian herbs. Mix everything well until it’s all coated in that creamy goodness. Pour the mixture into the greased baking dish. Spread it out evenly. Top it with the rest of the Parmesan and 1 cup of shredded mozzarella cheese for a cheesy finish. Now you are ready for the next steps in your Chicken and Mushroom Alfredo Bake journey! For the full recipe, make sure to check the details provided earlier. To get the best flavor, use fresh mushrooms. They add a rich taste to the dish. I recommend cremini or white mushrooms for this recipe. Make sure you shred the chicken finely. This helps mix it well with the pasta and sauce. For a truly creamy bake, let your pasta cool slightly before mixing it with the sauce. This prevents the cheese from clumping. Use heavy cream for the richest texture. It helps create a smooth, velvety sauce that coats the pasta perfectly. Stir the sauce gently to keep it creamy. If you want to lighten it up a bit, you can mix in some milk, but it may not be as thick. Adding a bit of reserved pasta water can also help if the sauce seems too thick. Baking at 375°F (190°C) is ideal for even cooking. Cover the dish with foil for the first part of baking. This ensures the pasta heats through without drying out. After 25 minutes, remove the foil for the last 15 minutes. This allows the cheese to brown nicely and become bubbly. Always let the dish sit for a few minutes before serving. This helps everything set and makes for easier serving. For the full recipe, check the earlier sections! {{image_4}} You can boost your Chicken and Mushroom Alfredo Bake by adding veggies. Try spinach, broccoli, or bell peppers. These veggies add color and nutrition. You can also use different proteins. Swap chicken for shrimp or cooked sausage for a new twist. Each protein brings its own flavor, making this dish more exciting. If you need gluten-free options, use gluten-free pasta. Many brands offer great choices that taste good. For a low-carb version, replace pasta with zucchini noodles or cauliflower rice. This change keeps the dish light and healthy while still being creamy and satisfying. To change the flavor, add herbs and spices to your bake. Fresh basil or parsley adds a nice touch. You can also try crushed red pepper for heat or smoked paprika for a deeper flavor. Experiment with these options to find your perfect taste. Each adjustment can make your Chicken and Mushroom Alfredo Bake feel new and fun. Check [Full Recipe] for more ideas. After enjoying your Chicken and Mushroom Alfredo Bake, store leftovers properly for the best taste. Let the dish cool down first. Then, transfer it to an airtight container. You can keep it in the fridge for up to three days. Be sure to label the container with the date. To reheat, place the leftovers in a baking dish. Cover it with foil to keep moisture in. Preheat your oven to 350°F (175°C) and bake for about 20 minutes. Stir halfway through to heat evenly. You can also microwave individual portions for a quick meal. Just add a splash of cream or milk to keep it creamy. If you want to freeze your Chicken and Mushroom Alfredo Bake, it’s easy! Use a freezer-safe container or wrap it tightly in plastic wrap and foil. You can freeze it for up to three months. When you’re ready to eat, thaw it in the fridge overnight. Bake it at 350°F (175°C) until heated through, about 30 minutes. Enjoy every creamy bite from the Full Recipe! You can prepare Chicken and Mushroom Alfredo Bake ahead of time by following these steps. First, make the dish up to the point of baking. Once you mix the pasta, chicken, and sauce, place it in your greased baking dish. Cover it tightly with plastic wrap or aluminum foil. Store it in the fridge for up to 24 hours. When ready to bake, preheat your oven to 375°F (190°C). Remove the covering and bake as directed in the Full Recipe. You may need to add a few extra minutes to the baking time. Yes, you can use different cheese in your Chicken and Mushroom Alfredo Bake. If you want a sharper flavor, try using aged cheddar or gouda. For a creamier texture, consider using cream cheese or ricotta. Blend different cheeses for a unique taste. Just ensure that the total amount of cheese stays the same for best results. Your bake will still come out tasty and creamy. You can serve many tasty sides with Chicken and Mushroom Alfredo Bake. Garlic bread is a classic choice and adds a nice crunch. A fresh green salad with a light vinaigrette pairs well too. You can add steamed vegetables like broccoli or green beans for a healthy touch. These sides balance the richness of the bake and round out your meal nicely. This blog post covered how to make a delicious Chicken and Mushroom Alfredo Bake. You learned about the main ingredients, steps to prepare, and tips for the best results. I shared ways to adapt the recipe to your liking and how to store leftovers. With these tools, you can make a creamy dish that satisfies every time. Cooking can be fun and easy when you follow simple steps. Enjoy experimenting and making this recipe your own!](https://dishtreats.com/wp-content/uploads/2025/06/8d8b4d23-05f5-46f0-9917-116c769775c3-768x768.webp)
![- 12 oz (340g) penne pasta - 1 lb (450g) smoked sausage, sliced into rounds - 1 bell pepper, diced (choose your favorite color) - 1 medium onion, finely chopped - 3 cloves garlic, minced - 1 tablespoon Cajun seasoning - 1 teaspoon smoked paprika - 1/2 teaspoon cayenne pepper (adjust to your spice preference) - 2 cups low-sodium chicken broth - 1 cup heavy cream - Fresh parsley, chopped (for garnish) - Salt and freshly ground black pepper to taste When I make One Pot Cajun Sausage Pasta, I love how simple the ingredients are. You start with penne pasta, which cooks beautifully in the same pot. The smoked sausage gives it a rich flavor. Fresh veggies like bell pepper, onion, and garlic add color and crunch. For spices, Cajun seasoning gives that classic kick. A little smoked paprika adds depth, and cayenne pepper lets you control the heat. You can adjust it based on your taste. The chicken broth is key; it helps cook the pasta and keeps everything moist. When you add heavy cream, it makes the dish creamy and rich. Don’t forget the fresh parsley for a pop of color. A sprinkle of salt and pepper enhances all the flavors. You can find the full recipe with exact measurements and cooking steps. Enjoy making this easy and flavorful dish! 1. Heating the oil: Start by pouring two tablespoons of olive oil into a large pot. Heat it over medium heat until it shimmers. This takes about a minute. 2. Sautéing the sausage: Next, add one pound of sliced smoked sausage to the pot. Cook the sausage for about 4-5 minutes. Stir it until it turns brown and crispy. This adds great flavor. Then, remove the sausage from the pot and set it aside for later. 1. Cooking the bell pepper and onion: In the same pot, toss in one diced bell pepper and one finely chopped medium onion. Sauté these for about 3-4 minutes. You want them to soften and turn slightly translucent. 2. Adding garlic and spices: Now, add three minced garlic cloves. Cook for one more minute until it smells amazing. Then, stir in one tablespoon of Cajun seasoning, one teaspoon of smoked paprika, and half a teaspoon of cayenne pepper. Cook for another minute. This step brings out the flavors of the spices. 1. Combining ingredients in the pot: Carefully pour in two cups of low-sodium chicken broth. Use a wooden spoon to scrape any brown bits from the pot. Next, add 12 ounces of penne pasta and one can of undrained diced tomatoes. Mix everything well. 2. Simmering the mixture: Bring the mixture to a boil, then reduce the heat to low. Cover the pot and let it simmer for 12-15 minutes. Stir occasionally to keep the pasta from sticking. Cook until the pasta is tender and the liquid thickens. Now you can check the [Full Recipe] for additional details. To make sure your pasta does not stick, keep a close eye on the pot. Stir the pasta every few minutes while it cooks. This simple step prevents clumping and ensures even cooking. If you find your dish too thick, add a splash of chicken broth or water to loosen it up. For creaminess, adjust the amount of heavy cream to fit your taste. Start with one cup, then add more if you like it richer. Customizing the spice levels in your Cajun sausage pasta is easy. If you want more heat, add an extra pinch of cayenne pepper. You can also mix in some crushed red pepper flakes for a different kick. To add freshness, try throwing in herbs like thyme or oregano. These herbs bring depth to your dish and balance the spices well. Choosing the right pot is important for this dish. A large, deep pot works best since it holds all the ingredients and allows for easy stirring. I recommend using a heavy-bottomed pot to prevent burning. When sautéing, heat the oil until it shimmers, then add your sausage. This ensures a nice brown color and flavor. Always scrape the bottom of the pot to release any fond, which adds great taste to your sauce. {{image_4}} You can swap smoked sausage for different meats. Chicken or turkey sausage works well. They add less fat but keep great flavor. This dish still shines with these changes. For those with gluten issues, use gluten-free pasta. Options like brown rice pasta or chickpea pasta fit nicely. They change the texture but keep the taste. Want to change the spice? You can add more or less Cajun seasoning. If you like it mild, skip the cayenne pepper. For more heat, add a bit more. You can also add different vegetables. Spinach, zucchini, or mushrooms all mix well. They add color and nutrition, making the dish more exciting. Pair your pasta with sides for a well-rounded meal. A fresh salad adds crunch. Garlic bread brings warmth and comfort. For plating, serve in deep bowls. Garnish with fresh parsley for a pop of color. You can even sprinkle extra Cajun seasoning on top. This will enhance the flavors and make it look fancy. For the full recipe, check out One Pot Cajun Sausage Pasta. After you enjoy your One Pot Cajun Sausage Pasta, you may have leftovers. To store them, let the dish cool down first. Then, place it in an airtight container. This helps keep it fresh. You can keep it in the fridge for about 3 to 4 days. When you're ready to eat again, you can easily reheat it. Just place it in a pot over low heat, stirring often. You can also use the microwave. Heat it in short bursts, stirring in between, until it's warm. If you want to save the dish for longer, you can freeze it. First, let the pasta cool completely. Then, transfer it to a freezer-safe container. Make sure to leave some space at the top, as it may expand when frozen. You can freeze it for up to 3 months. To reheat from frozen, move it to the fridge overnight to thaw. Next, warm it in a pot or microwave until hot. You may need to add a splash of chicken broth or cream to keep it creamy. One Pot Cajun Sausage Pasta can last in the fridge for about 3 to 4 days. If you freeze it, aim to use it within 3 months for the best taste. Always check for signs of spoilage before eating. If you see any mold or if it smells off, it's best to throw it away. Remember, food safety is important for a delicious experience every time! Cajun seasoning is a blend of spices that gives dishes a bold flavor. It often includes paprika, garlic powder, onion powder, black pepper, cayenne pepper, and oregano. You can easily make it at home by mixing the following: - 1 tablespoon paprika - 1 teaspoon garlic powder - 1 teaspoon onion powder - 1 teaspoon black pepper - 1 teaspoon cayenne pepper - 1 teaspoon dried oregano - 1 teaspoon thyme Combine these in a bowl, and you have your own Cajun seasoning! This mix adds warmth and depth to your One Pot Cajun Sausage Pasta. Yes, you can easily make this dish vegetarian. Instead of sausage, you can use these options: - Plant-based sausage - Grilled mushrooms - Chopped tempeh These substitutes give a hearty texture. For protein, consider adding: - Chickpeas - Lentils - Tofu These choices keep the dish filling and nutritious while focusing on flavors. To amp up the heat in your pasta, you can adjust the spice levels. Here’s how: - Increase the cayenne pepper in the recipe. - Add crushed red pepper flakes while cooking. For more heat during cooking, try adding fresh chopped jalapeños or hot sauce. Just remember, start with a little and taste as you go! You want to enjoy the flavors without overwhelming your palate. This recipe is simple and delicious. We covered the best ingredients needed, such as penne pasta, smoked sausage, and fresh veggies. I shared tips for perfecting texture and flavor, plus ways to change things up. You can store leftovers easily and even freeze the dish for later. With this guide, cooking is quick and fun. So grab your ingredients and start creating a tasty meal today. Enjoy the process and make it your own!](https://dishtreats.com/wp-content/uploads/2025/06/1c4c8226-f553-4583-9158-57397e0bfaf8-768x768.webp)
. To make your soup even tastier, think about adding spices. A pinch of smoked paprika gives a nice depth. You can also try a dash of red pepper flakes for some heat. Fresh herbs like thyme or dill can brighten the flavors. To get the best creaminess, use full-fat coconut milk. It adds a rich texture. If you prefer cashew cream, blend soaked cashews with water until smooth. This makes a wonderful base too. If you want a thicker soup, let it simmer longer. This lets more water evaporate. You can also blend in some cooked potatoes for extra creaminess. To make it more nutritious, add veggies like carrots or spinach. Just chop them small and add them early in the cooking process. They will soften and blend well with the soup. You can also stir in cooked lentils for added protein and texture. {{image_4}} You can change the type of tomatoes you use. Fresh tomatoes add brightness. Canned tomatoes provide convenience and consistent flavor. Both work well in this soup. Choose what suits your taste and time best. For cream alternatives, coconut milk is my favorite. It gives a smooth and rich flavor. You can also use cashew cream or almond milk for a lighter option. Each choice offers a unique taste. Want to add protein? Beans or lentils are great options. They boost nutrition and make the soup heartier. Try adding white beans for a creamy texture or lentils for a bit of bite. You can mix and match until you find your favorite blend. Pair this soup with a side salad or sandwich. A fresh green salad balances the rich soup. A grilled cheese sandwich adds comfort and crunch. Both choices enhance your meal experience. For a fun twist, serve the soup in bread bowls. You can hollow out a crusty loaf and fill it. This adds a delicious element to your meal. Top the soup with fresh basil or a drizzle of olive oil for extra flair. These simple touches make the dish special. I encourage you to explore these ideas to create your own version of Vegan Creamy Tomato Soup. Check out the Full Recipe for all the details to get started! To keep your Vegan Creamy Tomato Soup fresh, store it in airtight containers. This helps prevent spoilage. Make sure the soup cools down before sealing the container. You can keep it in the fridge for up to five days. If you want to save it longer, consider freezing it. Pour the cooled soup into freezer-safe bags or containers. Leave some space at the top, as the soup will expand when frozen. This soup can last for up to three months in the freezer. When you want to enjoy your soup again, reheating it properly is key. The best method is to use the stovetop. Pour the soup into a pot and heat it over low to medium heat. Stir it often to keep it from sticking. This way, you keep the flavor and creaminess intact. If you prefer to use a microwave, pour the soup into a microwave-safe bowl. Heat it in short bursts, stirring in between, to ensure even warming. Be careful not to overheat, as this can change the texture. How to make Vegan Creamy Tomato Soup spicier? You can add red pepper flakes or a pinch of cayenne. Start with a small amount. Taste the soup after mixing. This way, you can control the heat. Another option is to add diced jalapeños. These will give your soup a nice kick! Can I substitute coconut milk with another plant-based milk? Yes, you can use almond milk, soy milk, or oat milk. Just ensure it is unsweetened. Coconut milk adds creaminess, but other milks work too. Each will change the flavor slightly, but they will still taste great. How long does the soup last in the fridge? The soup lasts about 3 to 5 days in the fridge. Store it in an airtight container. Always check for any changes in smell or color before eating. What is the best method to puree the soup? An immersion blender works best for pureeing. It keeps the soup in the pot, and it’s easy to use. If you don’t have one, use a regular blender. Just blend in small batches to avoid spills. Can I use fresh tomatoes instead of canned for this recipe? Yes, fresh tomatoes can be used! You will need about 2 pounds of ripe tomatoes. Blanch them first to remove the skins. This adds a fresh flavor to your soup. What garnishes pair well with Vegan Creamy Tomato Soup? Fresh basil leaves are a great choice. They add color and flavor. You can also drizzle some extra coconut milk on top. Croutons or a sprinkle of nutritional yeast also work well! This blog post covers how to make Vegan Creamy Tomato Soup. We broke down the needed ingredients, their nutritional value, and suggested substitutes. I provided step-by-step instructions for preparation and cooking. Tips for flavor, thickness adjustments, and variations helped enhance your soup. You'll find storage and reheating info to keep your leftovers fresh. With these insights, you can enjoy a delicious, creamy soup that's easy to make, healthy, and versatile. Get creative and have fun experimenting!](https://dishtreats.com/wp-content/uploads/2025/06/e1561612-3c52-470f-b0a5-4bd51ef2e908-768x768.webp)