Strawberry Lemon Crumble Fresh and Tasty Dessert

Are you ready to dive into a delightful dessert? Strawberry Lemon Crumble is fresh, tangy, and oh-so-tasty! It combines sweet strawberries and zesty lemons, topped with a crunchy crumble. This treat is perfect for any occasion. In this post, I’ll guide you through easy steps to create this delicious dish. Let’s gather our ingredients and make something amazing together!
Why I Love This Recipe
- Fresh Flavors: This crumble perfectly balances the sweetness of fresh strawberries with the zesty brightness of lemon, creating a refreshing dessert experience.
- Easy to Make: With simple ingredients and straightforward steps, this recipe is perfect for both novice and experienced bakers alike.
- Customizable: You can easily modify the recipe by adding other fruits or adjusting the sweetness, making it versatile for any occasion.
- Perfect Texture: The combination of a buttery crumble and juicy strawberries creates a delightful contrast that’s hard to resist.
Ingredients
Fresh Ingredients Needed
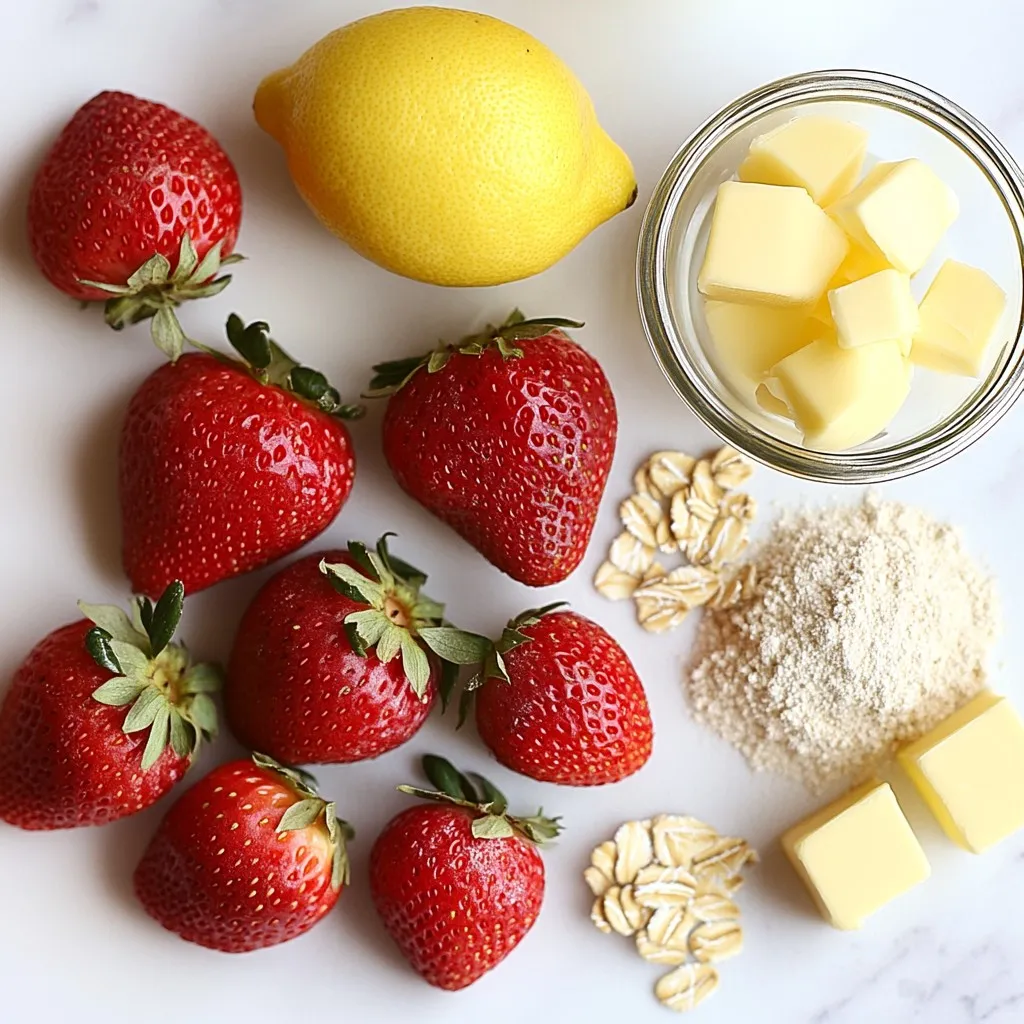
- 4 cups fresh strawberries, hulled and sliced
- Juice and zest of 1 lemon
- 2 tablespoons granulated sugar
Fresh strawberries are the star here. Their sweet and juicy nature pairs perfectly with lemon’s bright zing. The lemon juice and zest add a refreshing kick to the dish. The granulated sugar helps enhance the natural sweetness of the strawberries.
Dry Ingredients List
- 1 cup all-purpose flour
- 3/4 cup rolled oats
- 1/2 cup brown sugar, packed
- 1/2 teaspoon ground cinnamon
- 1/4 teaspoon salt
- 1/2 cup cold unsalted butter, cubed
The dry ingredients create a delightful crumble topping. All-purpose flour gives it structure. Rolled oats add a nice texture and chew. Brown sugar brings a rich, caramel-like flavor. Ground cinnamon adds warmth, while salt balances the sweetness. Cold butter is key for a crumbly topping, so don’t skip it!
Optional Serving Suggestions
- Vanilla ice cream
- Whipped cream
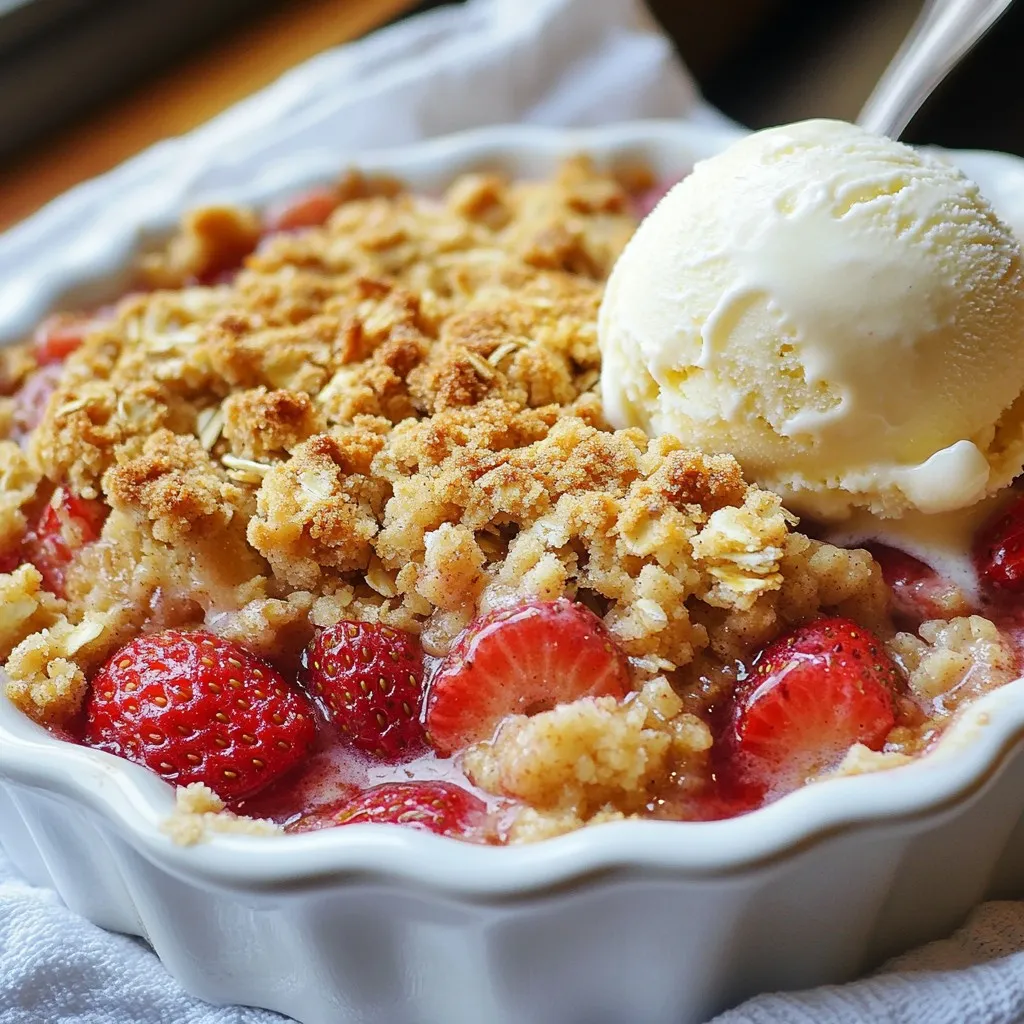
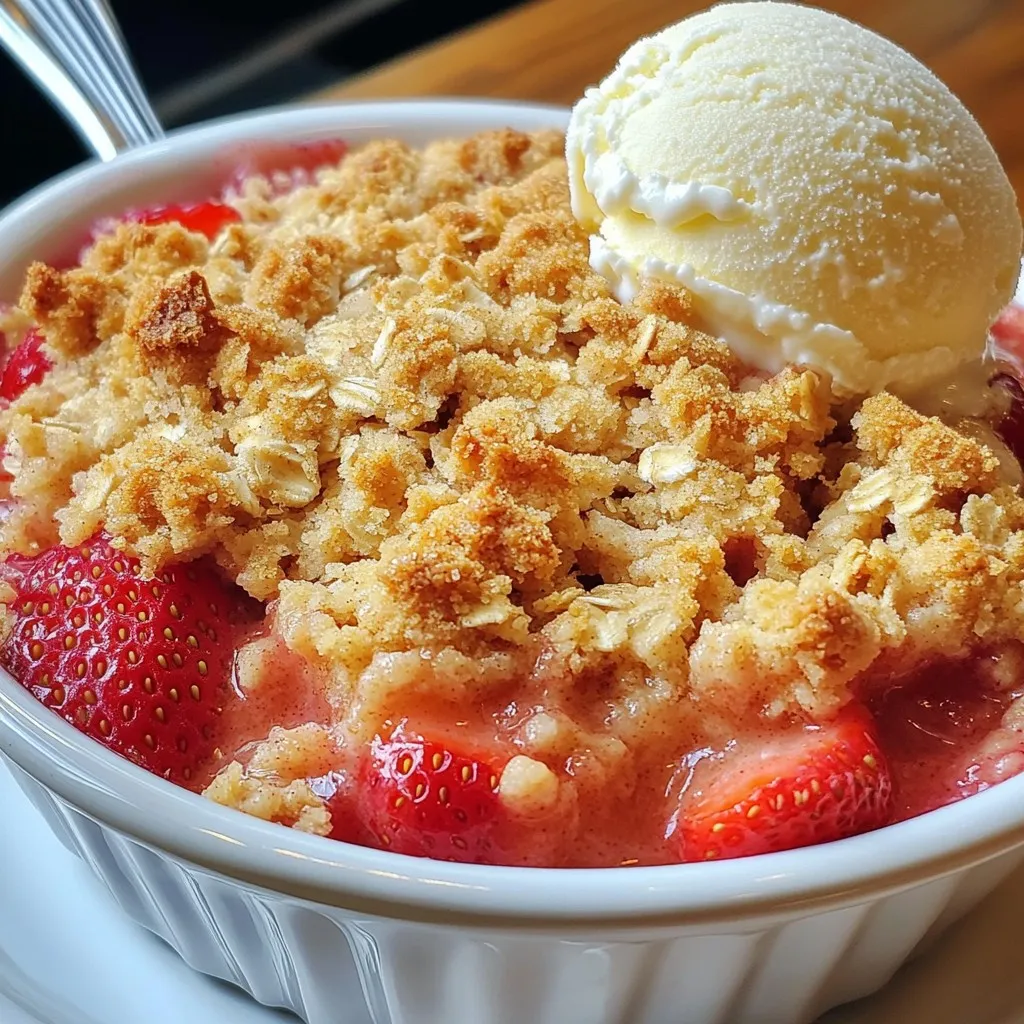
Serving this crumble warm is a must. A scoop of creamy vanilla ice cream or a dollop of whipped cream makes it even better. For a final touch, consider adding a sprig of mint or a sprinkle of lemon zest. It looks beautiful and tastes great!
Step-by-Step Instructions
Preparation and Preheating
Start by preheating your oven to 350°F (175°C). This step is key for even baking. Next, take a 9×9 inch baking dish. Grease it with a bit of butter or spray. This helps the crumble not stick.
Combining the Strawberry Mixture
In a medium bowl, combine 4 cups of sliced strawberries with 2 tablespoons of granulated sugar. Add the juice and zest of 1 lemon. Mix gently to coat the strawberries. Let this sit for about 10 minutes. This helps the strawberries release their sweet juices, making them juicy and flavorful.
Making the Crumble Topping
In another bowl, whisk together 1 cup of all-purpose flour, 3/4 cup of rolled oats, 1/2 cup of packed brown sugar, 1/2 teaspoon of ground cinnamon, and 1/4 teaspoon of salt. Make sure there are no lumps. Now, add 1/2 cup of cold, cubed unsalted butter. Use a pastry cutter, fork, or your hands to mix until the mixture looks like coarse crumbs. You want some pea-sized pieces of butter to stay. This will give your topping a nice texture.
Baking the Strawberry Lemon Crumble
Assembling the Dish
Start by preparing your baking dish. Use a 9×9 inch dish and grease it lightly. You can use butter or cooking spray. Next, mix the strawberries in a bowl with sugar, lemon juice, and lemon zest. Toss gently to coat the strawberries well. Let this sit for about 10 minutes. This step helps the strawberries release their sweet juices.
In another bowl, combine the dry ingredients. Whisk together flour, oats, brown sugar, cinnamon, and salt. Make sure there are no lumps. Now, add the cold butter cubes to the dry mix. Use a pastry cutter or your fingers to mix it in until you see coarse crumbs. These crumbs will form your lovely crumble topping.
Pour the marinated strawberries into the prepared dish. Spread them evenly across the bottom. Now, take the crumble mixture and sprinkle it generously on top. Make sure every strawberry is covered for the best flavor.
Baking Process
Preheat your oven to 350°F (175°C). Once ready, place the dish in the center of the oven. Bake for 30 to 35 minutes. You want the topping to turn a golden brown. You’ll also see the strawberries bubbling, which means they are cooked perfectly.
Cooling and Serving
After baking, remove the dish from the oven. Let it cool for about 10 minutes. This cooling time allows the juices to settle. Serve the warm crumble in individual bowls. For extra delight, top it with vanilla ice cream or whipped cream. A sprig of mint or a sprinkle of lemon zest adds a nice touch. Enjoy the blend of sweet and tart flavors!
Pro Tips
- Use Ripe Strawberries: Select ripe, sweet strawberries for the best flavor in your crumble. Overripe strawberries can become mushy, while underripe ones may be too tart.
- Chill the Butter: Keep the butter cold before mixing it into the dry ingredients. This will help achieve a flaky, crisp crumble topping.
- Let It Rest: Allow the crumble to cool for about 10 minutes after baking. This will help the juices settle and make it easier to serve.
- Add Nuts for Crunch: For an extra layer of texture, consider adding chopped nuts like almonds or pecans to the crumble topping.
Tips & Tricks
How to Choose the Best Strawberries
When you pick strawberries, look for bright red color. The berries should feel firm and plump. Avoid any with soft spots or white tips. Fresh strawberries taste sweet and juicy. Check for a pleasant smell, too. This shows they are ripe and ready to eat. If you can, buy them from a local farmer’s market. These berries are often fresher and tastier.
Secrets for the Perfect Crumble Texture
To get a great crumble, use cold butter. Cut it into small cubes before mixing. Work it into the dry mix until it looks like coarse crumbs. Keep some butter pieces the size of peas. This gives you a nice texture when baked. Don’t overmix; you want a crumbly topping, not a dough. A sprinkle of cinnamon adds warmth and flavor, too.
Serving Recommendations
Serve the crumble warm for the best taste. A scoop of vanilla ice cream on top is a must. The creaminess balances the tartness of the strawberries. You can also use whipped cream if you prefer. For a fun pop of color, add a sprig of mint or some lemon zest. This makes your dessert look even more appealing!
Variations
Alternative Fruit Combinations
You can mix up the fruits in your crumble. Instead of strawberries, try using blueberries, raspberries, or peaches. Each fruit brings its own flavor. For a tropical twist, mango and pineapple work well too. Just remember to adjust the sugar based on the fruit’s sweetness. This way, you keep everything balanced and delicious!
Gluten-Free Options
To make your crumble gluten-free, swap the all-purpose flour for a gluten-free blend. Look for a mix that includes rice flour or almond flour. These options give a nice texture without gluten. Ensure that your oats are certified gluten-free as well. This way, everyone can enjoy this tasty dessert!
Vegan Adaptations
You can easily adapt this recipe to be vegan. For the butter, use coconut oil or vegan butter. Instead of the sugar, try maple syrup or coconut sugar for sweetness. These swaps make the dessert plant-based, yet still creamy and tasty. Serve with vegan ice cream for a perfect finish!
FAQs
Can I use frozen strawberries for this recipe?
Yes, you can use frozen strawberries. Just remember to thaw them first. Drain any excess liquid before mixing. This helps keep the crumble from becoming soggy. I like to let them sit in a strainer while I prepare the rest of the dish. This way, you still get that fresh strawberry flavor.
How long can I store leftover crumble?
You can store leftover crumble for up to three days. Keep it in an airtight container in the fridge. When you are ready to eat, warm it in the oven. This brings back its crispy topping. You can also enjoy it cold if you like!
What can I use instead of brown sugar?
If you need a substitute for brown sugar, try using white sugar with molasses. Mix 1 cup of white sugar with 1 tablespoon of molasses. You can also use coconut sugar or honey. Each option will slightly change the flavor, but they all work well.
This blog post covers how to make a delicious strawberry lemon crumble. We discussed fresh and dry ingredients, plus fun serving ideas. The step-by-step guide shows you how to prepare, mix, and bake your dish. Tips help you choose the best strawberries and achieve the perfect crumble. Lastly, we explored variations for different tastes and answered common questions. Enjoy making this dish and sharing it with loved ones. You’ll find that cooking can be simple and fu

Strawberry Lemon Crumble
Ingredients
- 4 cups fresh strawberries, hulled and sliced
- 2 tablespoons granulated sugar
- 1 lemon Juice and zest of
- 1 cup all-purpose flour
- 3/4 cup rolled oats
- 1/2 cup brown sugar, packed
- 1/2 teaspoon ground cinnamon
- 1/2 cup cold unsalted butter, cubed
- 1/4 teaspoon salt
- to taste Vanilla ice cream or whipped cream for serving (optional)
Instructions
- Preheat your oven to 350°F (175°C). Grease a 9x9 inch baking dish with a little butter or cooking spray to prevent sticking.
- In a medium mixing bowl, combine the sliced strawberries with the granulated sugar, lemon juice, and lemon zest. Gently toss to coat the strawberries evenly and allow the mixture to sit for about 10 minutes.
- In a separate bowl, whisk together the all-purpose flour, rolled oats, brown sugar, ground cinnamon, and salt until fully combined.
- Add the cold cubed butter into the dry mixture. Using a pastry cutter, fork, or your fingertips, work the butter into the flour mixture until it resembles coarse crumbs.
- Carefully pour the marinated strawberries into the bottom of the prepared baking dish, spreading them evenly across the bottom.
- Generously sprinkle the crumble topping over the layered strawberries, making sure to distribute it evenly.
- Place the dish in the center rack of the preheated oven and bake for approximately 30-35 minutes, or until the topping turns golden brown and the strawberries begin to bubble.
- Once baked, remove the dish from the oven and allow it to cool slightly for about 10 minutes before serving.
![To make this delightful chilled peach soup, gather these main ingredients: - 4 ripe peaches, peeled and pitted - 1 cup plain Greek yogurt - 1 cup almond milk - 2 tablespoons honey (or maple syrup for a vegan option) - Juice of 1 lemon - 1 teaspoon vanilla extract - A pinch of salt These ingredients create a creamy and fruity flavor. The ripe peaches give sweetness and vibrancy. Greek yogurt adds creaminess and protein. Almond milk keeps it light and smooth. Honey or maple syrup sweetens it naturally. Lemon juice brightens the taste, while vanilla adds warmth. For an extra touch, consider these garnishes: - Fresh mint leaves for garnish - Crushed pistachios for topping (optional) Mint leaves add a fresh burst of flavor and color. Crushed pistachios give a nice crunch and a nutty taste. You can easily swap out some ingredients if needed: - Use coconut yogurt instead of Greek yogurt for a dairy-free version. - Substitute regular milk for almond milk if you prefer. - Adjust the sweetener; agave nectar works well too. - Try adding a splash of orange juice for a different citrus note. These substitutions help you customize the soup to your taste or dietary needs. You still get a refreshing and delicious chilled peach soup with any of these changes. For the full recipe, visit the [Full Recipe]. Start by washing the peaches well. Peeling them is next. Use a sharp knife to cut the peaches into small, even chunks. This helps them blend smoothly. Remove the pits and add the chopped peaches to your blender. Now, it’s time to mix everything. Add the Greek yogurt, almond milk, honey, lemon juice, vanilla extract, and a pinch of salt to the blender with the peaches. Each ingredient enhances the flavor and texture of the soup. Blend the mixture on high speed. You want it to be smooth and creamy. If you like a little texture, pulse the blender a few times instead of blending non-stop. This gives you control over the final consistency. Taste the soup. If it needs more sweetness or tang, add more honey or lemon juice. Once blended, pour the soup into a bowl or pitcher. Cover it tightly and place it in the fridge for at least two hours. This chilling time allows flavors to mix well. When ready to serve, stir the soup again. Pour it into bowls and garnish with fresh mint leaves and crushed pistachios. For a fancy touch, use chilled bowls. This chilled peach soup is perfect for a light dessert or starter. For the full recipe, check out the details above! To select the best peaches, look for ripe, fragrant fruit. They should have a slight give when you gently press them. Avoid peaches with bruises or soft spots. Choosing freestone peaches makes your prep easier. These peaches separate cleanly from the pit. You can tweak the flavor of your chilled peach soup. If you want it sweeter, add more honey or maple syrup. For more tartness, squeeze in more lemon juice. Always taste as you go. This way, you find the perfect balance for your palate. When blending, start on low speed, then increase. This helps break down the peaches evenly. If you like some texture, pulse the blender a few times instead of blending fully. For a creamier soup, blend longer. Always check the consistency before serving. You want it smooth but not too thin. For more detailed steps, check the Full Recipe. {{image_4}} You can easily make this soup vegan. Just swap Greek yogurt for coconut yogurt. It adds a nice creaminess. Use maple syrup instead of honey for sweetness. You can also try different plant-based milk. Almond, oat, or soy milk work well too. This way, everyone can enjoy a tasty bowl of chilled peach soup. Want to spice it up? Add a pinch of cinnamon or ginger for warmth. These spices can add depth to the sweet peaches. Fresh herbs can make it even better. Try basil or rosemary for a unique twist. Just a small amount can change the flavor profile completely. To change the texture, consider using different fruits. Add diced mango or berries for a fruity crunch. You can also mix in some chia seeds for a fun texture. Blending in some silken tofu can make the soup creamier. Each variation brings a new taste and feel to your chilled peach soup. For the full recipe, check out the details above. Store leftover chilled peach soup in an airtight container. This keeps the soup fresh. Make sure to cool it first before sealing. If you don’t have a container, you can use plastic wrap. Just cover the bowl tightly. Chilled peach soup lasts about 3 to 5 days in the fridge. After that, it may lose its flavor and freshness. Always check for signs of spoilage before eating. If it smells sour or changes color, it's best to toss it. You can freeze chilled peach soup for up to 3 months. Pour it into freezer-safe containers, leaving some space at the top. This allows for expansion when frozen. To enjoy later, thaw it in the fridge overnight. Stir well before serving to restore its smooth texture. For the full recipe, see the section above. Serve chilled peach soup in a bowl or a small glass. I love using chilled bowls for that extra touch. You can drizzle a bit of almond milk on top. A mint leaf adds a great pop of color. This soup works well as a light starter or a refreshing dessert. Yes, you can use frozen peaches. Just make sure they are thawed first. This keeps the soup smooth and creamy. Frozen peaches may change the taste slightly, but they still taste great. Chilled peach soup is quite healthy. It has ripe peaches, Greek yogurt, and almond milk. These ingredients offer vitamins, protein, and healthy fats. The honey adds natural sweetness, making it a tasty and nutritious choice. Enjoy it without guilt! You can mix in other fruits like berries or mangoes. Simply chop them up and blend them with peaches. Adjust the sweetness to match the fruit you choose. This gives you a unique flavor every time. Enjoy experimenting with seasonal fruits for variety! Chilled peach soup is a refreshing treat. We covered the main ingredients, like fresh peaches, and how to blend them for the best flavor. I shared tips on choosing, storing, and even varying the recipe for vegan options. Remember, this soup is easy to make and fun to try. Enjoy exploring different flavors or garnishes to suit your taste. Now, it’s time to make your own chilled peach soup and savor each bite!](https://dishtreats.com/wp-content/uploads/2025/07/cde2237f-ab80-4fd7-9ae6-23109d9f52c0-768x768.webp)