20. Garlic Butter Shrimp and Asparagus Flavor Boost

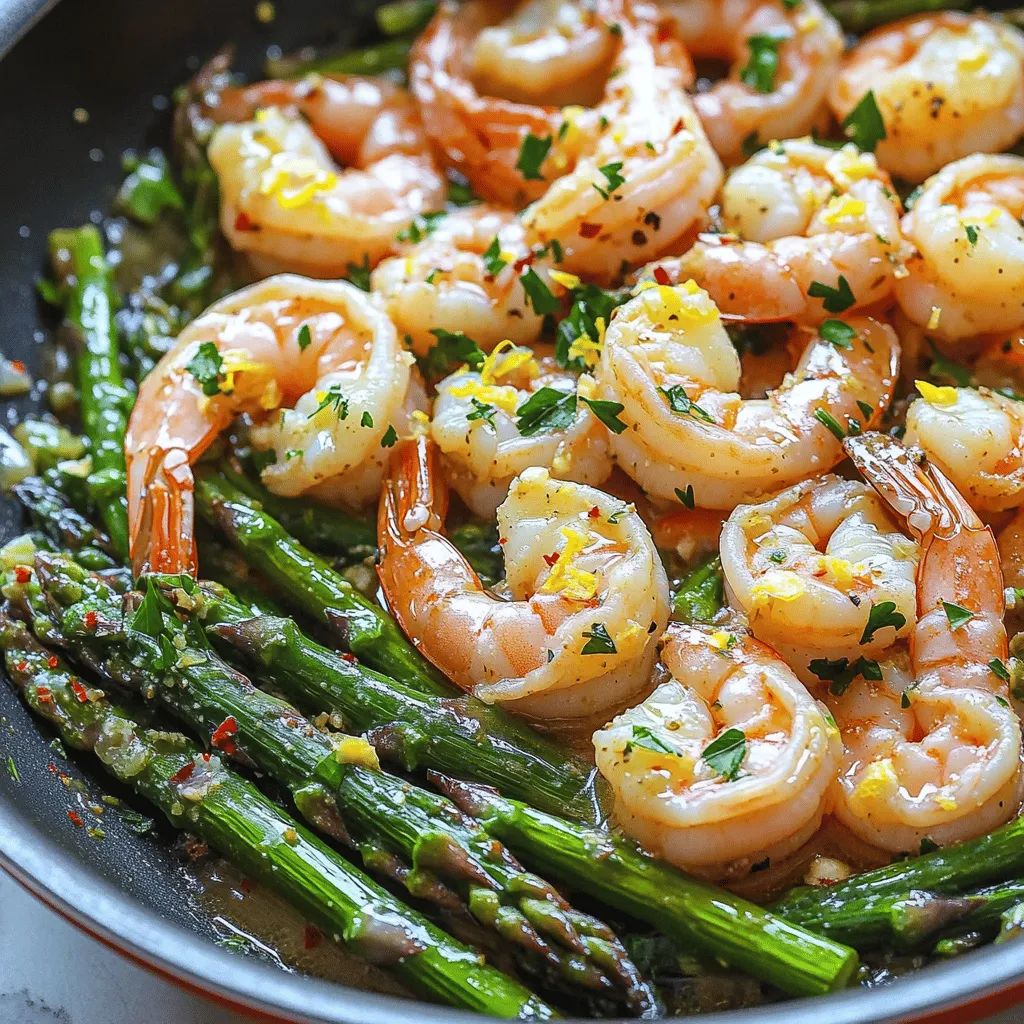
Are you ready to elevate your dinner game? Garlic Butter Shrimp and Asparagus is a match made in culinary heaven. With bright flavors and simple steps, you’ll impress your family or guests in no time. Whether you’re a seasoned chef or a kitchen newbie, this dish promises to deliver big on taste. Let’s dive into the ingredients and steps for a meal that’s quick and satisfying!
Ingredients
Main Ingredients for Garlic Butter Shrimp and Asparagus
For this dish, you need fresh and simple ingredients:
- 1 pound large shrimp, peeled and deveined
- 1 bunch asparagus, trimmed and cut into 2-inch pieces
- 4 tablespoons unsalted butter, divided
- 4 cloves garlic, finely minced
- 1 teaspoon red pepper flakes (optional, for a spicy kick)
- Zest of 1 lemon
- 2 tablespoons freshly squeezed lemon juice
- Salt and freshly cracked black pepper, to taste
- Fresh parsley, chopped (for garnish)
These main ingredients work together to create a savory, buttery sauce that coats the shrimp and asparagus perfectly.
Seasonings and Additional Flavorings
The key to a great flavor boost lies in the seasonings.
- Garlic is a must for that rich, aromatic taste.
- Lemon zest and juice add brightness and a fresh kick.
- Salt and pepper enhance the dish’s overall flavor.
- Red pepper flakes provide depth and spice, if you like heat.
These seasonings elevate the dish, making each bite delightful.
Optional Ingredients for Customization
Feel free to make this recipe your own. Here are some optional ingredients to consider:
- Cherry tomatoes for a sweet burst of flavor.
- Bell peppers or snap peas for extra crunch and color.
- Parmesan cheese to sprinkle on top for a rich finish.
These additions allow you to customize the dish to suit your taste.
Step-by-Step Instructions
Preparing the Skillet and Garlic
Start by heating your skillet on medium heat. Melt 2 tablespoons of butter in the skillet. Watch the butter closely as it melts. You want it to bubble but not burn. Once it starts bubbling, add the minced garlic. Sauté the garlic for about 1 minute. It should smell great and turn slightly golden. This step sets the stage for a rich flavor.
Cooking the Shrimp to Perfection
Now, it’s time for the shrimp. Place the large, peeled shrimp in a single layer in the skillet. Season them well with salt and black pepper. If you like heat, sprinkle in some red pepper flakes. Cook the shrimp for 2-3 minutes. Turn them halfway through to ensure even cooking. They should turn pink and opaque, signaling they’re ready.
Incorporating the Asparagus and Flavor Enhancements
With the shrimp nearly done, push them to one side of the skillet. On the empty side, add the asparagus pieces. Pour in the remaining 2 tablespoons of butter over the asparagus. This allows the spears to soak up that delicious garlic butter flavor. Stir the asparagus occasionally and cook for 4-5 minutes. You want them tender yet crisp, adding a nice bite to your dish.
Combining Ingredients
When the asparagus is ready, mix it together with the shrimp. Add the lemon zest and freshly squeezed lemon juice. This brightens the dish and enhances the flavor. Toss everything in the skillet for about one more minute. This helps combine all those tasty flavors into one mouthwatering dish.
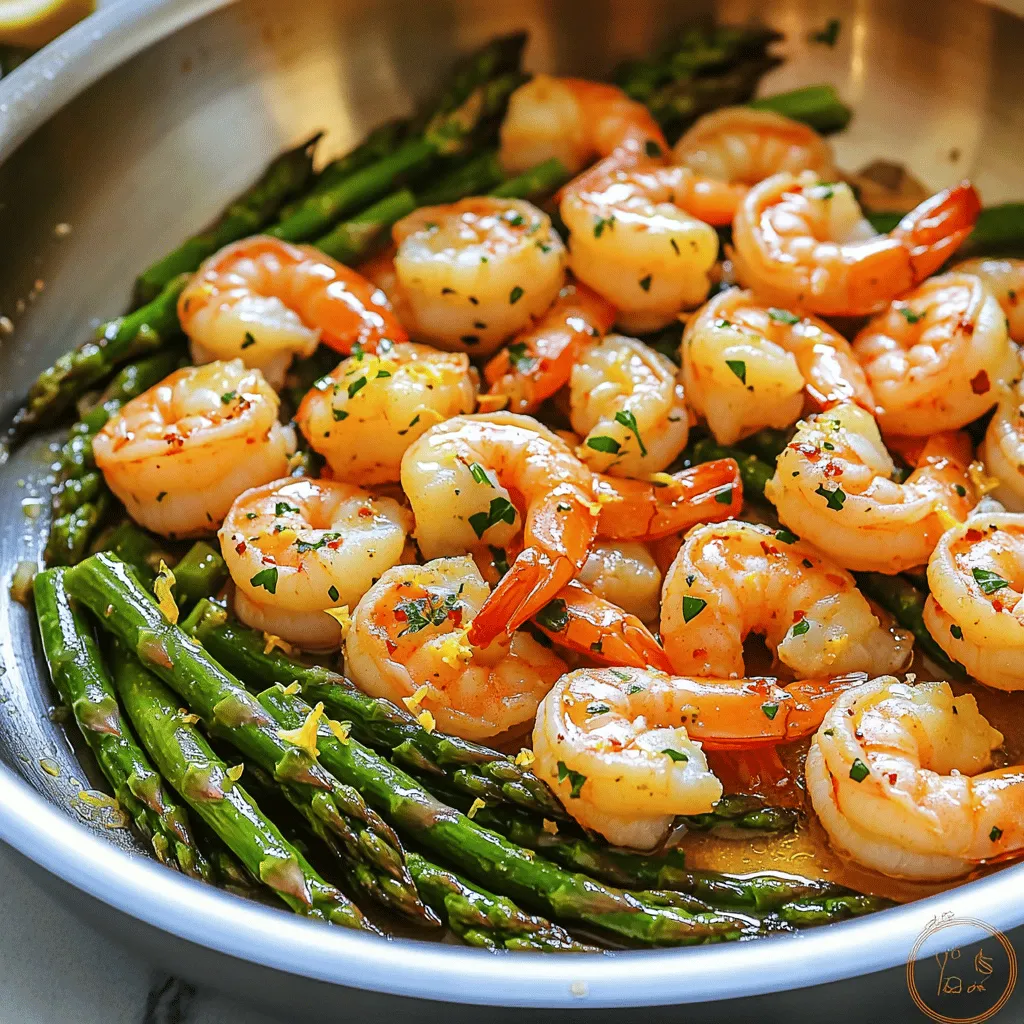
Serving Suggestions
Once everything is cooked, remove the skillet from the heat. Garnish your dish with freshly chopped parsley for a pop of color. Serve it warm over fluffy rice or with crusty bread. This way, you can enjoy every bit of that rich garlic butter sauce. Adding a bright side salad makes this meal even better.
Tips & Tricks
Achieving the Perfect Shrimp Texture
To make shrimp tender, start with fresh or properly thawed shrimp. Avoid overcooking them. Cook shrimp for only 2-3 minutes. They should turn pink and firm. If they curl too tightly, they are overdone. Rinse shrimp under cold water before cooking. This keeps them fresh and helps them cook evenly.
Selecting Fresh Asparagus
When picking asparagus, look for bright green stalks. Stalks should be firm, not limp. The tips should be tightly closed and not wilted. To check freshness, snap a stalk. If it breaks easily, it’s fresh. Store asparagus upright in water in the fridge. This keeps them crisp until you are ready to use them.
Garlic Butter Variations and Adjustments
You can change the garlic butter to fit your taste. For a spicy kick, add more red pepper flakes. If you love herbs, mix in fresh thyme or basil. You can also try adding a splash of soy sauce for depth. For a creamier sauce, stir in some heavy cream at the end. Adjust flavors by tasting as you go. This way, you create a dish you will love.

Variations
Spicy Garlic Butter Shrimp with Asparagus
Want a kick? Add red pepper flakes to the garlic butter. Start with one teaspoon. You can add more if you like it hotter. When you cook the shrimp, it will soak up the heat. This gives each bite a nice, spicy lift.
Garlic Butter Shrimp and Asparagus with Pasta
Love pasta? Serve the shrimp and asparagus over your favorite noodles. Cook spaghetti or fettuccine separately. Toss the pasta with the garlic butter sauce from the shrimp. This adds a rich flavor. It creates a complete meal that feels fancy.
Adding Other Vegetables for More Flavor
Mix in other veggies for more taste. Try bell peppers, cherry tomatoes, or snap peas. These add color and nutrition. Just add them to the skillet with the asparagus. Cook until they are bright and tender. This way, you get a bright and tasty dish every time.
Storage Info
How to Properly Store Leftovers
After enjoying Garlic Butter Shrimp and Asparagus, you might have some leftovers. To store them well, place the shrimp and asparagus in an airtight container. Make sure to cool the dish before sealing the container. This helps keep the food fresh and safe to eat later. Store it in the fridge, where it will last for up to three days.
Reheating Instructions
When you’re ready to eat your leftovers, reheating is simple. You can use a skillet or microwave. If using a skillet, place the dish over medium heat. Add a splash of water or broth to keep it moist. Heat for about five minutes, stirring often. If using the microwave, cover the dish and heat in short bursts. Check every 30 seconds until it’s warm. Be careful not to overheat, as it may make the shrimp tough.
Freezing Garlic Butter Shrimp and Asparagus
If you want to save your dish for longer, freezing is a good option. First, let the garlic butter shrimp and asparagus cool completely. Then, transfer them to a freezer-safe bag or container. Squeeze out as much air as possible to prevent freezer burn. This dish can stay in the freezer for up to three months. When you’re ready to eat it, thaw it in the fridge overnight. Reheat it as mentioned above for the best taste.
FAQs
What type of shrimp is best for this recipe?
I recommend using large shrimp, about 16-20 per pound. They cook well and have great flavor. You can use either wild-caught or farmed shrimp. Wild-caught often tastes better, but both work nicely.
Can I use frozen shrimp?
Yes, you can use frozen shrimp. Just make sure to thaw them first. Place them in cold water for about 15-20 minutes. Pat them dry before cooking to avoid excess water in the pan.
How do I know when the shrimp are fully cooked?
Cooked shrimp turn a vibrant pink color. They also curl into a C shape. If they are gray or form an O shape, they are overcooked. Aim for 2-3 minutes of cooking time per side.
What can I serve with Garlic Butter Shrimp and Asparagus?
You can serve this dish with rice, pasta, or crusty bread. A fresh salad also pairs well. The bright flavors of lemon and garlic shine next to something light and crisp.You’ll find all the ingredients and instructions you need to make this delicious dish!
This blog post covered easy, tasty garlic butter shrimp and asparagus. I shared the best ingredients, step-by-step instructions, and helpful tips. You learned how to achieve perfect shrimp and customize flavors.
Remember, you can store extras and even make delicious variations. Enjoy your cooking adventure, and don’t be afraid to try new ideas! This dish can impress anyone at your table. Now, get cooking and enjoy every bite!


![For a great eggplant and chickpea curry, you need some key ingredients. Here’s what you’ll need: - 1 large eggplant, diced into bite-sized cubes - 1 (15 oz) can of chickpeas, thoroughly drained and rinsed - 1 medium onion, finely chopped - 2 cloves garlic, minced - 1-inch piece of fresh ginger, grated These ingredients bring out the best flavors. The eggplant adds a rich texture. Chickpeas give protein and heartiness. Onions, garlic, and ginger provide a wonderful base. Spices make this dish pop with flavor. Here are the key spices you should have: - 2 tablespoons curry powder - 1 teaspoon turmeric powder - Salt and freshly cracked pepper, to taste Curry powder gives the dish its main flavor. Turmeric adds a warm color and depth. Always adjust salt and pepper based on your taste. Every curry needs a creamy base to bring it all together. Use these liquids: - 1 (14 oz) can of coconut milk - 1 cup diced tomatoes (can be fresh or canned) Coconut milk creates a rich and creamy sauce. Diced tomatoes add freshness and balance the spices. Together, they make the dish comforting and enjoyable. For the complete preparation, check out the Full Recipe. Start by heating olive oil in a large skillet over medium heat. Add the chopped onion. Sauté it until it turns soft and clear, about five minutes. Stir occasionally to prevent it from burning. Next, add the minced garlic and grated ginger. Cook this mix for one minute. You want it to smell good. Now, sprinkle in the curry powder and turmeric. Stir this for about 30 seconds. This toasts the spices and brings out their flavors. Time to add the star of the dish! Toss in the diced eggplant. Stir well to coat it with the spices. Let it cook for about five to seven minutes. Stir occasionally until it starts to soften. Next, add the diced tomatoes and coconut milk to the skillet. Gently mix in the chickpeas. Season with salt and pepper to your taste. Bring the curry to a gentle simmer. Cover the skillet and let it cook for 15 to 20 minutes. Stir it occasionally. This helps the eggplant become tender and the flavors meld together. Before serving, taste the curry. Adjust the seasoning as needed. You may want to add more salt, pepper, or spices. Let it rest for a few minutes after cooking. This helps the flavors develop more. Enjoy your flavorful and simple eggplant and chickpea curry! For the full recipe, check out the details above. To make your eggplant and chickpea curry stand out, focus on toasting spices. Toasting spices brings out their oils and deepens their flavor. Heat the spices for just a short time in the oil before adding other ingredients. This step is easy and makes a big difference. Cooking eggplant to perfection is also key. Eggplant can absorb a lot of oil, so don’t add too much at first. Cook it until it's tender but not mushy. This keeps the texture nice and adds depth to your dish. Pair this curry with rice or naan. Both options soak up the rich sauce well. Basmati rice adds a fluffy texture that contrasts nicely with the creamy curry. Warm naan bread is perfect for scooping up the curry. Garnish your dish with fresh cilantro. It adds a burst of color and brightness. Just sprinkle some on top before serving. This small step can elevate your dish's look and taste. One common mistake is overcooking the eggplant. It can turn mushy, losing its shape and texture. Keep an eye on it while it cooks, stirring occasionally. Another mistake is ignoring seasoning adjustments. Always taste your curry before serving. You might need to add more salt, pepper, or spices to get the flavor just right. Each ingredient plays a role, so this step is vital. For the full recipe, check the section above. {{image_4}} You can easily change the recipe by swapping legumes. Instead of chickpeas, try lentils or black beans. They bring unique textures and flavors. You can also mix them for a hearty dish. For vegetables, feel free to use zucchini, bell peppers, or spinach. Each adds a different taste and nutrition. Remember to adjust cooking times for firmer veggies like carrots. To change the spice level, add chili powder or fresh chilies. If you want it spicy, use one or two chopped green chilies. For a mild version, skip the heat or add a touch of sugar. This balances the spices and keeps it tasty. This dish is naturally vegan. You can enjoy rich flavors without any animal products. If you want a creamier texture, try a vegan yogurt option on top. For gluten-free diets, ensure your curry powder is free of gluten. Always check labels to be safe. Pair it with gluten-free rice or bread for a complete meal. If you want more details, check the Full Recipe. To keep your eggplant and chickpea curry fresh, let it cool. Place it in an airtight container. Refrigerate it within two hours of cooking. It stays good for about three to four days. If you want to enjoy it later, be sure to label the container with the date. You can freeze this curry for longer storage. Use a freezer-safe container or a heavy-duty freezer bag. Leave some space at the top, as it will expand when frozen. It’s best to freeze it within a day or two of cooking. The curry can last for up to three months in the freezer. When ready to enjoy, thaw it overnight in the fridge. Reheat your curry using the stovetop or microwave. For the stovetop, pour the curry into a pot on medium heat. Stir it often to avoid sticking. Heat until it is hot throughout, about 5-10 minutes. If using a microwave, place it in a microwave-safe bowl. Cover it loosely and heat in 1-minute bursts, stirring in between, until hot. Enjoy your meal quickly after reheating for the best taste. For the full recipe, check out the detailed steps to make this delicious dish. Making eggplant and chickpea curry takes about 35 minutes. You will need 10 minutes to prep and 25 minutes to cook. This makes it a great dish for a quick weeknight meal. You can use frozen eggplant, but fresh is best. Frozen eggplant may lose some texture. If using frozen, thaw it first and drain any excess moisture. This helps maintain the dish's taste and consistency. Serve this curry with cooked basmati rice or warm naan bread. Both options soak up the sauce well. You can also add a side of yogurt or a simple salad for freshness. Yes, this recipe is healthy. Eggplant is low in calories and high in fiber. Chickpeas provide protein and essential nutrients. Coconut milk adds healthy fats, making this dish both nutritious and satisfying. Yes, you can make this curry in a slow cooker. Start by sautéing the onion, garlic, and ginger in a pan. Then add all the ingredients to the slow cooker. Cook on low for 6-8 hours or high for 3-4 hours. Enjoy the rich flavors that develop over time. For the [Full Recipe], check the earlier sections. This blog post shared a simple recipe for eggplant and chickpea curry. You learned about key ingredients like eggplant, chickpeas, and spices. We walked through easy steps to cook and finish the dish. I offered tips for best flavor and common mistakes to avoid. You also found variations, storage tips, and answers to frequently asked questions. Enjoy your curry adventure, and feel free to tweak the recipe. Happy cooking!](https://dishtreats.com/wp-content/uploads/2025/06/d76b4beb-90df-44b1-93b9-0610964378a0-768x768.webp)


![To make delicious zucchini chocolate chip muffins, gather these simple ingredients: - 1 medium zucchini, grated (approximately 1 cup) - 1 cup all-purpose flour - 1/2 cup whole wheat flour - 1/2 teaspoon baking soda - 1 teaspoon baking powder - 1/2 teaspoon salt - 1/2 teaspoon ground cinnamon - 2 large eggs - 1/2 cup granulated sugar - 1/4 cup packed brown sugar - 1/3 cup vegetable oil - 1 teaspoon vanilla extract - 1/2 cup semi-sweet chocolate chips - 1/4 cup walnuts or pecans, chopped (optional for extra crunch) These ingredients blend well and create a moist muffin. The grated zucchini adds moisture while keeping the muffins healthy. The mix of flours gives a great texture. The sugars balance the chocolatey goodness. You can add nuts for crunch, or leave them out if you want a smoother bite. If you want the full details on how to put this all together, check out the Full Recipe. Start by preheating your oven to 350°F (175°C). This step is key for even baking. Prepare a muffin tin by lining it with paper liners or lightly greasing each cup. In a medium mixing bowl, whisk together the following dry ingredients: - 1 cup all-purpose flour - 1/2 cup whole wheat flour - 1/2 teaspoon baking soda - 1 teaspoon baking powder - 1/2 teaspoon salt - 1/2 teaspoon ground cinnamon Mix well to ensure they are evenly combined. This helps the muffins rise properly. In a larger bowl, crack two large eggs and beat them lightly. Add: - 1/2 cup granulated sugar - 1/4 cup packed brown sugar Mix these until smooth and slightly frothy. This gives the muffins a nice texture. Slowly add in: - 1/3 cup vegetable oil - 1 teaspoon vanilla extract Stir until fully combined. Next, gently fold in 1 cup of grated zucchini. Make sure it’s evenly distributed for great flavor. Gradually add the dry mixture to the wet ingredients. Use a spatula to fold them together gently. It’s okay if there are a few lumps. Next, divide the batter evenly among the prepared muffin cups, filling each about two-thirds full. Place the muffin tin in the preheated oven and bake for 18 to 20 minutes. To check if they are done, insert a toothpick into the center. It should come out clean or with a few moist crumbs. Once done, let the muffins cool in the pan for about 5 minutes before transferring them to a wire rack. This makes them easier to remove without breaking. For the full recipe, refer to the earlier sections. To make great muffins, follow these tips closely: - Use Fresh Ingredients: Fresh baking powder and soda give the best rise. - Room Temperature Eggs: Bring your eggs to room temperature for better mixing. - Preheat the Oven: Always preheat your oven to 350°F (175°C) before baking. - Fill Muffin Cups Evenly: Fill each cup about two-thirds full for a nice dome shape. Overmixing can lead to tough muffins, which we want to avoid. Here’s how: - Mix Dry and Wet Separately: Always mix dry and wet ingredients in separate bowls first. - Fold Gently: When combining, use a spatula to fold the mixture. Stop mixing when you see a few lumps. - Don’t Worry About Lumps: A few lumps are okay; they will bake out in the oven. Presentation is important for making your muffins look as good as they taste. Try these ideas: - Serve Warm: Serve your muffins warm from the oven for a cozy feel. - Use a Basket: Place muffins in a basket lined with a cloth napkin for a rustic touch. - Garnish: Lightly dust with powdered sugar or drizzle melted chocolate on top for flair. For the full recipe of Zucchini Chocolate Chip Muffins, check the earlier section. {{image_4}} You can make these muffins gluten-free easily. Just swap the all-purpose flour with gluten-free flour blend. Make sure it has xanthan gum to help with texture. This change keeps the muffins soft and tasty. You can also mix in other fun ingredients. Dried fruits like raisins or cranberries add sweetness. Chopped nuts like walnuts or pecans give a nice crunch. You can even add seeds for more texture. Just be sure to adjust the amount of chocolate chips if you add more. If you want a lower sugar treat, you have options. Use less granulated sugar or brown sugar. You can try sugar substitutes like stevia or monk fruit sweetener. These options can help keep the muffins sweet without the extra calories. Just remember to check the package for measurements. Check out the [Full Recipe] for more details! To keep your zucchini chocolate chip muffins fresh, store them in an airtight container. You can place them on the counter. They will stay tasty for about three days. If you want to keep them longer, consider freezing. Freezing muffins is easy and smart. First, let the muffins cool completely. Then, wrap each muffin in plastic wrap or aluminum foil. Place them in a freezer-safe bag or container. These muffins can last up to three months in the freezer. When you want one, just take it out and reheat. Reheating is quick and simple. You can use a microwave or an oven. For the microwave, heat one muffin for 15 to 20 seconds. For the oven, preheat to 350°F (175°C). Place the muffin on a baking sheet and warm it for about 5 to 10 minutes. Enjoy your warm muffin with a cup of coffee or tea! To make zucchini chocolate chip muffins from scratch, follow this simple recipe. Start by preheating your oven to 350°F (175°C). Prepare your muffin tin with liners or grease it. In one bowl, mix all-purpose flour, whole wheat flour, baking soda, baking powder, salt, and cinnamon. In another bowl, beat two eggs, then add granulated and brown sugar. Mix in vegetable oil and vanilla extract. Fold in grated zucchini, then combine the wet and dry ingredients. Lastly, add chocolate chips and any nuts if you want. Fill the muffin cups and bake them for 18 to 20 minutes. For the full recipe, check the instructions above. Yes, you can use frozen zucchini in this recipe. Just make sure to thaw it first. Drain any excess water to avoid soggy muffins. Frozen zucchini works well because it retains most of its flavor. It also provides moisture, just like fresh zucchini does. This option is great if you have leftover zucchini from last season. Zucchini offers several health benefits. It is low in calories and high in fiber. This can help keep you feeling full longer. Zucchini is also packed with vitamins like A and C. These vitamins support your immune system and skin health. Plus, adding veggies to your muffins makes them more nutritious. It’s a great way to sneak in some extra greens. Zucchini muffins can last up to a week when stored properly. Keep them in an airtight container at room temperature. If you want them to last longer, you can freeze them. Just make sure they are completely cooled before freezing. They can stay fresh in the freezer for about three months. Yes, you can substitute other types of flour in this recipe. Almond flour, oat flour, or coconut flour are all good options. Each type of flour can change the texture slightly, so keep that in mind. If you use a gluten-free flour blend, make sure it has a binding agent, like xanthan gum, for the best results. You now have a clear guide for making delicious zucchini chocolate chip muffins. We covered the ingredients and step-by-step instructions needed to bake them perfectly. Plus, I shared tips on avoiding common baking mistakes and ways to store your muffins. You can also explore tasty variations to suit your taste. Remember, these muffins are not just yummy; they bring the added health benefits of zucchini. Happy baking, and enjoy these treats!](https://dishtreats.com/wp-content/uploads/2025/06/0cde25ea-110a-42a8-bcb8-b8faa9becc28-768x768.webp)